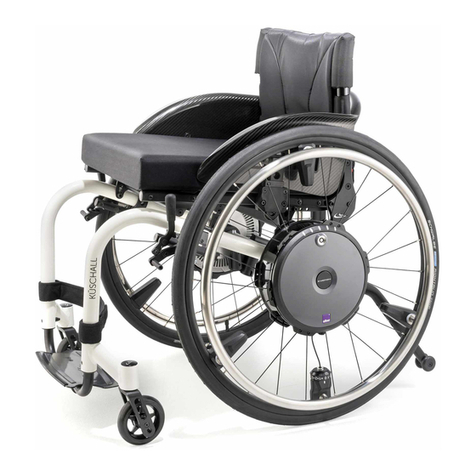
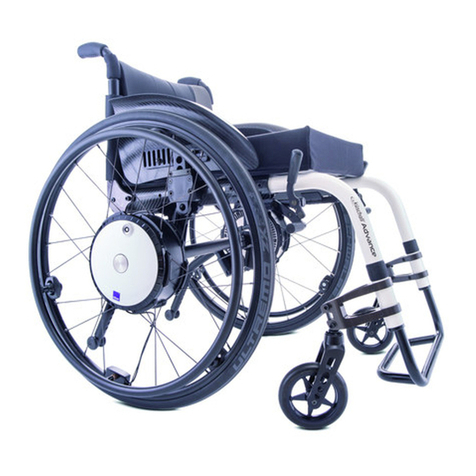
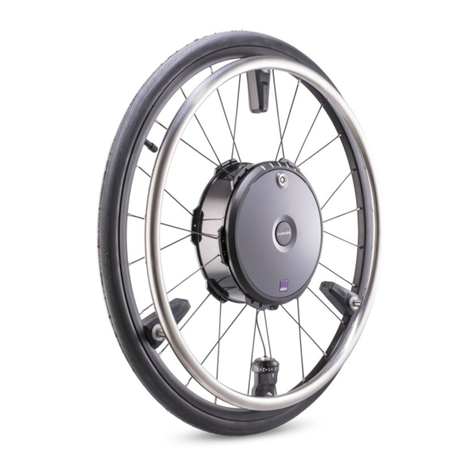
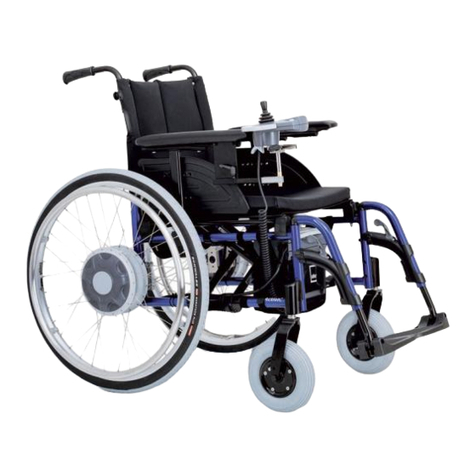
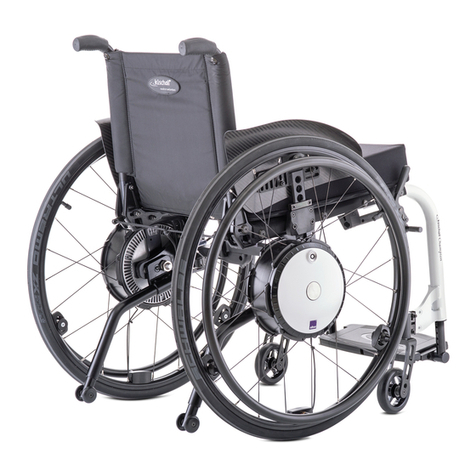
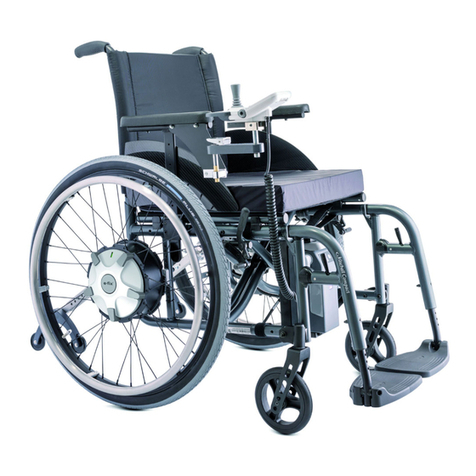
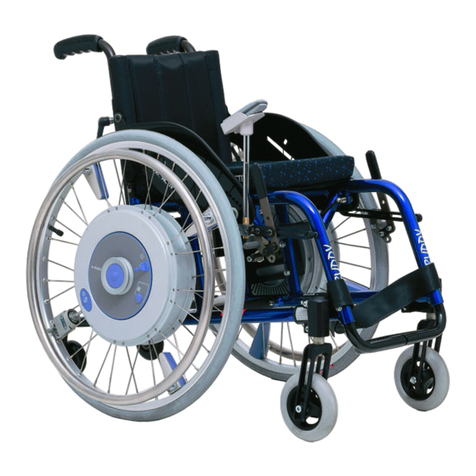
Alber e-motion DuoDrive User manual

Gebrauchsanweisung e-motion DuoDrive DE
Instructions for Use e-motion DuoDrive EN
Instructions d’utilisation e-motion DuoDrive FR
Gebruiksaanwijzing e-motion DuoDrive NL
Bruksanvisning e-motion DuoDrive NO

Bedieneinheit
Ein/Aus Taster 15
Geschwindigkeitswahlrad 16
Anzeige Bedieneinheit 17
Abdeckung USB-C Buchse 18
Ladebuchse USB-C 19
Pairing-Taste 20
Halteplatte 21
Arretierung 22

MF 81
44.0001.4.99.01
Version: 2021-04-14
The latest applicable version of this operating manual is available for download on our website
www.alber.de
. If you require a large-print version, please contact the Alber Service Centre.
Contents
1. Introduction 2
2. Attaching and removing the control unit 3
3. Setting the control unit 4
4. Switching on the system 5
5. Using the control unit (cruise mode) 6
6. Emergency stop in hazardous situations 8
7. Changing the assistance level 9
8. Using the optional ECS remote control
or the Mobility app 10
9. Switching off the control unit 10
10. Charging the control unit batteries 11
10.1 Information regarding chargers 11
10.2 Charging process 11
11. Additional operating status displays on the
e-motion wheel when travelling in cruise mode 12
12. Displays and error messages on the control unit 13
12.1 Battery charge status of the e-motion wheels 13
12.2 The charge status of the control unit battery 13
12.4. Error and warning messages on the control unit 13
13. Automatic shutdown 14
14. Pairing 14
14.1 General information 14
14.2 Pairing the e-motion wheels with the control unit 15
15. Technical data 16
16. Minimum requirements for the charger 16
17. Safety instructions and hazard information
when using the e-motion 17
18. Additional safety instructions for travelling in
cruise mode 17

2 83
1. Introduction
This operating manual provides information about the
e-motion M25 DuoDrive
, a control unit for use with the e-motion drive in
cruise mode, hereinafter referred to as “e-motion”. Important tips, information and warnings are identified in this operating manual as
follows:
Tips, information and special information.
Warning against possible hazards to your safety and health, and indication of potential risks of injury. Warning
against possible technical problems or damage.
•Observe the instructions and warnings at all times to avoid injury to people and damage to the product.
•When used in this operating manual, terms such as “in front of”, “behind”, “left”, right” etc. refer to the respective position from the
point of view of the wheelchair user.
•The symbols used on the labels and in some parts of this operating manual are explained in the e-motion M25 operating manual.
Alber GmbH excludes any liability for damage caused
•by use contrary to the intended purpose of the e-motion and its accessory parts;
•by use contrary to the intended purpose of the e-motion and its accessory parts by a person who has not been instructed;
•by use of the e-motion and its accessory parts contrary to the instructions and specifically the safety and hazard informa-
tion in this operating manual;
•or by exceeding the technical limits laid down in this operating manual on the part of the user or third parties.
Before using the e-motion, carefully read all the safety and hazard information contained in the individual
chapters of this operating manual and in the e-motion operating manual.
i
i

2 83
2. Attaching and removing the control unit
A retaining plate [21] for mounting the control unit to your wheelchair was attached by your specialist dealer.
You can insert the control unit into the retaining plate and remove it at any time.
Attaching the control unit
•Apply the parking brakes of your wheelchair.
•Switch off both e-motion wheels (see the e-motion M25 operating manual).
•If the control unit is switched on, switch it off as well (see Chapter 9).
•Then insert the control unit into the mount [21a] on the retaining plate [21] at a slight angle. In doing so,
hold the control unit by the handle at the bottom. Do not ever hold it by the speed dial [16] (see diagram).
•Tilt the control unit towards the retaining plate [21] until it audibly locks into place in the mount [21b].
•Check that the control unit is seated securely in the retaining plate [21].
When inserting the control unit into the retaining plate [21], do not ever hold it by the
speed dial [16]. Hold it only by the handle (see diagram opposite). This prevents you from
switching on the control unit unintentionally.
Removing the control unit
•Apply the parking brakes of your wheelchair.
•If you have not already done so, switch off both e-motion wheels (see the e-motion M25 operating manual).
•Switch off the control unit (see Chapter 9).
•Press the locking mechanism [22] on the lower end of theretaining plate [21].
•Remove the control unit from the retaining plate [21]. In doing so, hold the control unit by the handle.
Do not ever hold it by the speed dial [16].
•Put the control unit down in a safe place.
21
21
21a
21b 15
16
21
22

4 85
When removing the control unit from the retaining plate [21], do not ever hold it by the
speed dial [16]. Hold it only by the handle (see diagram opposite). This prevents you from
switching on the control unit unintentionally.
Information for left-handed persons
•Unless you specify otherwise when ordering the e-motion, the retaining plate [16] is mounted on the right-
hand side of the wheelchair as standard.
•The Mobility app allows the control unit to be switched to left-handed use at any time. Please consult the
operating manual for the e-motion Mobility app for further information in this regard.
3. Setting the control unit
If desired or necessary, the position of the display [23] can be adjusted.
•Switch off both e-motion wheels completely (see the e-motion M25 operating manual).
•Open the cover [18] of the control unit.
•Loosen the three screws [25] on the back of the control unit by not more than half a turn. To this end, use
an Allen key, size 2.5.
•Turn the ring [24] until the display [23] is in the desired position. Then carefully tighten the three
screws [25] until the ring [24] can no longer be turned.
•Close the cover [18] of the control unit.
25
25
23
24

4 85
4. Switching on the system
When using the control unit, the e-motion is switched over to cruise mode. Both e-motion wheels and the con-
trol unit need to be switched on for use to be possible. Carry out the following steps to this end:
•Switch off all Bluetooth devices in your immediate vicinity to prevent any interference when establishing
a connection between the drive unit and the control unit.
•Switch on both e-motion wheels (see the e-motion M25 operating manual). If they are in standby mode (the
middle white LED flashes briefly every 10 seconds), a connection to the control unit can be established.
•Switch on the control unit (this needs to be in the mount [21]) by pressing the button [15] on it for approx.
1 second.
•The LED [f] now indicates the capacity of the control unit battery in different colours (see Chapter 12.2).
If the LED [f] is flashing blue, this indicates an attempt to establish a connection to the drive unit via
Bluetooth.
•If no Bluetooth connection is established within 30 seconds, the LED [f] flashes red for 10 seconds. The con-
trol unit then switches off.
•If the Bluetooth connection is established between the drive unit and the control unit, the LED [f] on the
control unit continuously lights up green. See Chapter 12.2. for the meaning of the colour. The capacity of
the drive unit battery is also displayed.
If no Bluetooth connection is established after you have performed the steps listed above, this may be due to
the following reasons:
Both e-motion wheel batteries are empty
Provided the control unit still gets a connection to the wheels, either an orange warning LED (wheel batteries
low but not completely empty) or a red error LED (wheel batteries completely empty) appears depending on the
charge status, and the control unit switches off after 10 seconds. If a connection is not established, the error
LED also lights up red and the control unit switches off automatically after 10 seconds.
The control unit battery is empty
If the battery no longer has sufficient capacity, the LED [f] flashes brieflyin the display [23] when the control unit
is switched on. The system switches off completely thereafter. Charge the battery as described in Chapter 10.
23
15

6 87
Error in the system
In this regard, see the explanations in Chapter 12.4.
Fault due to Bluetooth devices
Check that all Bluetooth devices in your vicinity are switched off.
If this is the case and there is still no connection established between the drive unit and control unit despite
repeated attempts, please contact your specialist dealer.
5. Using the control unit (cruise mode)
If both e-motion wheels and the control unit are connected via Bluetooth, use of the e-motion can commence.
Note the following in this regard:
•In cruise mode, the e-motion can (from the user’s viewpoint) only move forwards; it cannot move backwards.
For this reason, always mount the e-motion wheels the right way round! They have already been provided
ex-works with stickers for left/right (direction of travel of the wheelchair). If the wheels are not fitted with
the correct orientation, there is a risk that the wheelchair will move backwards. There is a risk of injury.
•The control unit does not have any braking functions. The push rims [5] of the e-motion wheels control the
travel direction and braking of the wheelchair.
•Turning the speed dial [16] forwards sets the e-motion in motion. The further you move the speed dial in the
direction of travel, the faster your wheelchair will move.
•The speed dial [16] can be turned infinitely. However, once the maximum speed is reached, no further
increase in speed is possible.
•To reduce the speed, you need to turn the speed dial [16] against the direction of travel.
•To bring the wheelchair to a complete stop after switching off the drive, you need to brake it as usual using
the push rims.
•You can also activate cruise mode when the wheelchair has started to move. The current speed of the wheel-
chair is used as the starting speed for cruise mode, from which you can set the cruising speed to be faster or
slower by turning the speed dial [16] in or against the direction of travel.
16

6 87
The prerequisite for the e-motion's continuous drive assistance is an active Bluetooth connection between the control unit
and the e-motion wheels. If this Bluetooth connection is interrupted, the two e-motion wheels automatically switch to free-
wheeling mode. Power assistance using the push rims remains available. The wheelchair user can thus react to emergency
situations at any time by using the push rims to operate the system like a manual wheelchair.
If the Bluetooth connection was interrupted, it must be re-established manually (see Chapter 4).
The entirety of the technologies used ensures an appropriate Quality of Service (QoS) for the Bluetooth connection. The con-
nection to the app runs via the same Bluetooth module. The Bluetooth connection is highly secure due to the latest up-to-
date encryption and by taking SweynTooth vulnerabilities into account.
There can be various reasons for an interruption of the Bluetooth connection.
The e-motion has successfully passed the EMC test according to ISO 7176-21, including the active Bluetooth connection,
and the Wireless Coexistence test according to ANSI C63.27:2017. Therefore, interruptions at home or in an office environ-
ment are highly unlikely. However, every potential source of strong interference cannot be anticipated.
Nonetheless, it is very unlikely that the Bluetooth connection can be interrupted by other sources of interference such as
anti-theft alarm systems.
Malicious hacker attacks cannot be completely ruled out in the medical device market. An attacker can try to crash the
device, for example by triggering hard errors through the SweynTooth vulnerability, leading to a denial-of-service condition.
If your e-motion’s Bluetooth connection has been interrupted by an attack, the system stops the driving assistance to get
into the safe state of the system. In each case, the connection is interrupted; you can react at any time to avoid dangerous
situations by manoeuvring the system like a manual wheelchair to thus remove yourself from the danger zone.

8 89
Please note that you can reach significantly higher speeds than cruise mode allows if cruise
mode is deactivated and the e-motion is in freewheeling mode (e.g. when riding down-
hill). In this situation, if you activate cruise mode using the control unit, the speed will be
reduced very abruptly to the maximum cruising speed. There is an increased risk of falling
forwards out of the wheelchair.
The individual gradations of the speed dial can be set individually via the e-motion Mobility app. In
this regard, please read the relevant explanations in the e-motion Mobility app operating manual.
If the difference between the current travel speed and the maximum cruise mode speed is too high
(more than approx. 4 km/h), the cruise mode cannot be activated using the control unit.
6. Emergency stop in hazardous situations
Every wheelchair user is trained to bring their wheelchair to an immediate stop in hazardous situations by brak-
ing it using its push rims.
To bring your wheelchair to a quick and safe stop in hazardous situations when using cruise mode, there are two
options:
•Press the outer surface of the On/Off button [15]. This causes both e-motion wheels to switch to freewheel-
ing mode with power assistance. However, the control unit is not switched off; it remains switched on!
•Once you have done this, use the push rims to brake the wheelchair and bring it to a complete stop as
quickly as possible.
•Alternatively, in hazardous situations the wheelchair can be braked directly by using the push rims of the
two e-motion wheels. To do this, simultaneously move the push rims against the direction of travel. This
causes both e-motion wheels to switch to freewheeling mode with power assistance. The control unit is not
switched off; it remains switched on! It may be necessary to move the push rims against the direction of
travel for a longer period of time (approx. 1 second) in order to switch off cruise mode.
15 16

8 89
In the event of a collision with an obstacle, the e-motion wheels promptly switch off cruise mode.
By briefly pressing (less than 1 second) the On/Off button [15], neither the control unit nor the two e-motion wheels are
switched off – as indicated by the illuminated LEDs. This means that the e-motion wheels are immediately set in motion
again as soon as the speed dial [16] is turned (even unintentionally). In this respect, you should completely switch off
the two e-motion wheels in the event of an emergency stop (see Chapter 9) until it is safe for you to continue.
7. Changing the assistance level
If the control unit is switched on and there is a Bluetooth connection to the two e-motion wheels, it is possible to toggle between assist-
ance level 1 and 2 for support for the manual, residual power-assisted travel mode. To do this, briefly press the On/Off button [15] twice
(double-click).
When it is switched on, the e-motion is always in the assistance level that was activated before it was last switched off.
Depending on which assistance level is activated and set, the maximum possible cruising speed may vary, for example, a max-
imum of 4 km/h in assistance level 1, standard travel profile.
i

10 811
8. Using the optional ECS remote control or the Mobility app
Both the optional ECS remote control and the Mobility App can be used with the e-motion. However, for tech-
nical reasons, they cannot be used simultaneously with the control unit. Only one of these – either the control
unit, the ECS remote control or the Mobility app – can communicate with the two e-motion wheels at any one
time.
If you want to use the ECS remote control or the Mobility app, the control unit must be switched off beforehand
(see Chapter 9). The two e-motion wheels are then in standby mode and can be connected and activated using
the ECS remote control or the Mobility app with the ECS function enabled.
9. Switching off the control unit
The e-motion wheels go into standby mode if the control unit is switched off.
If the control unit is switched on, it can be used to switch off the two e-motion wheels or to set them to
standby mode.
•By briefly pressing the On/Off button [15], both e-motion wheels switch to freewheeling mode with
residual power assistance. Here, the control unit remains switched on.
•If the On/Off button [15] is pressed and held for longer than 2 seconds, both the control unit and the
two e-motion wheels are put into standby mode. All LEDs on the control unit go out. On both e-motion
wheels, the middle LED of the battery indicator briefly lights up every 10 seconds to signal standby mode.
•Depending on the time set in the wheels for automatic shutdown (see Chapter 13), the control unit
shuts down as well. It can then be switched on again by pressing the On/Off button [15]. The two
e-motion wheels are also automatically switched from standby mode to “ready for travel”.
When travelling, particularly when travelling by plane, the control unit and both e-motion
wheels must be shut down completely! For more information on air travel and flight mode,
see the M25 operating manual and the app.
23
15

10 811
10. Charging the control unit batteries
10.1 Information regarding chargers
Alber does not supply a separate charger for the control unit. To charge the control unit battery, you can use a
USB mains adapter that complies with the following technical parameters:
•Maximum +5 volts DC voltage
•Maximum 1.5 ampere current
•Connection for a USB type A charger cable
(the charger cable is included in the DuoDrive scope of delivery)
Alternatively, other USB mains adapters available from electrical retailers, which also comply with the USB 2.0
or USB 3.0 standard, may be used. However, the control unit may not necessarily charge if the charger used is
not compatible.
Chargers with a voltage of more than 5V may not be used under any circumstances!
Danger of destruction of the electronics due to overvoltage.
10.2 Charging process
•Open the cover [18] and insert the USB charger cable into the charger socket [19]. This automatically
interrupts the Bluetooth connection to the wheels. Travel with the e-motion is now only possible in
freewheeling mode (with power assistance).
•The charging process starts; the LED [f] of the control unit flashes green.
•The LED [f] lights up green continuously if the charging process is complete.
•Carry out the charging process in accordance with the charger operating manual.
•When the charging process is complete: remove the charger’s USB cable from the control unit.
•Switch on the control unit again (see Chapter 4) to reactivatecruise mode.
When charging, also follow the instructions in the operating manual of the charger used.
19
18

12 813
Before starting the charging process, switch off the system and secure the wheelchair using its parking brakes to pre-
vent it inadvertently rolling away.
Maintenance-free, rechargeable lithium-ion batteries are integrated in the control unit. For safety reasons, these can-
not be removed by the wheelchair user. If necessary, they must be removed by your authorised specialist dealer and be
replaced by new batteries. Read and observe the safety instructions and precautions prior to starting up and prior to
the charging process.
The control unit battery should always be fully charged so that you are able to make use of the maximum range during travel.
11. Additional operating status displays on the e-motion wheel when travelling in cruise mode
(For an overall layout, see the e-motion M25 operating manual)
Operating
status
Signalling
(to be recognised by)
Activate cruise mode by Power consumption of the batteries
Cruise mode
Control unit
Display for battery charge status
via LED display [1] on the drive
wheel and on the control unit.
Turning the speed dial [16] Range of up to 15 km (on level ground)
Actual power consumption depends on
cruising speed, user weight and terrain.
Cruise mode Display for the speed in cruise
mode (subject to a surcharge)
function of the e-motion
Mobility app
Single push; cruising speed is
logged in.
Range of up to 15 km (on level ground)
Actual power consumption depends on
cruising speed, user weight and terrain.
i

12 813
12. Displays and error messages on the control unit
12.1 Battery charge status of the e-motion wheels
If the control unit is connected to the drive wheels, the display [17] shows the charging status of the weaker
battery as follows:
LED [a] flashes: Battery charge status < 10%
LED [a] lights up: Battery charge status > 10%
LEDs [a] and [b] light up: Battery charge status > 20%
LEDs [a], [b] and [c] light up: Battery charge status > 40%
LEDs [a], [b], [c] and [d] light up: Battery charge status > 60%
LEDs [a], [b], [c], [d] and [e] light up: Battery charge status > 80%
12.2 The charge status of the control unit battery
The charging status of the control unit battery is only indicated in the display [17] by LED [f].
LED [f] lights up green continuously: Battery capacity > 20-100%
LED [f] lights up yellow continuously: Battery capacity > 10-20%
LED [f] lights up red continuously: Battery capacity > 2-10%
LED [f] flashes red continuously: Battery capacity < 2%, battery almost empty
12.3 Error and warning messages on the control unit
Error and warning messages are shown on the LED display [1] on the affected wheel(see e-motion M25 oper-
ating manual.
•The LED [f] flashes red if a serious error occurs that prevents further travel with the e-motion wheels.
Check the LED display [1] on the affected e-motion wheel for precise identification of the error. Altern-
atively, the wheel can be connected to the e-motion Mobility app for fault analysis.
•If a warning occurs that allows you to continue your journey, the LED [f] flashes yellow.
Check the LED display [1] on the affected e-motion wheel to identify the exact warning.
•If an error has occurred on the control unit, the LED [f] lights up red. The control unit then switches off
automatically after 10 seconds.
17

14 815
13. Automatic shutdown
To save power, the e-motion wheels will shut down automatically when not in use for a set period of time. The factory setting for this
automatic shutdown time is 60 minutes. Your specialist dealer can adjust this for you.
The control unit is also deactivated at the time of the automatic shutdown. As of this moment, there is no longer an active Bluetooth con-
nection between the control unit and the e-motion wheels. These are then shifted to standby mode.
To put the system back into operation, the e-motion wheels can be switched on again via the control unit within 48 hours. If the wheels
have been in standby mode for more than 48 hours, they must be switched on directly using their On/Off button [2].
14. Pairing
14.1 General information
If you have purchased the e-motion together with the control unit, it is already set up for the two wheels and can be put into operation
immediately. f the control unit was replaced during a repair, it must be reprogrammed on the e-motion wheels.
For reasons of cybersecurity, i.e. to protect against possible hacker attacks, a smartphone with the e-motion Mobility app is required to
pair the control unit. This app can be downloaded free of charge from the Apple App Store or from Google Play Store using the search term
“e-motion M25”.

14 815
14.2 Pairing the e-motion wheels with the control unit
•Start the e-motion Mobility app on your smartphone and connect to the e-motion wheels if you have not
already done so.
•Select the “Replace control unit” function in the Settings menu. The camera on your smartphone is started
automatically.
•Open the cover [18] on the back of the control unit and scan the QR code sticker [26].
•A new message appears in the app, which you must acknowledge with OK.
•All 5 segments of the LED battery display of both e-motion wheels then flash white.
You can now start pairing the control unit.
•Now switch on the control unit using the On/Off button (see Chapter 4).
•Immediately afterwards, press the pairing button [20] on the back of the control unit for at least three
seconds with a narrow but not pointed object (e.g. a ballpoint pen) until the LED [f] on the display [17]
flashes blue and the LEDs [b] and [d] flash white.
•As soon as both e-motion wheels have been detected by the control unit (this process can take several
seconds), the LED [f] lights up green. LEDs [a] through [e] show the battery status of the wheel with the
lowest capacity.
•The pairing process has been successfully completed and the control unit can now be used together with the
e-motion wheels.
The pairing process is only possible while the LED battery indicators of both e-motion wheels are
flashing. If the specified time is exceeded, please repeat the process. If you cannot find a QR code
on the e-motion wheels or the control unit or if they cannot be scanned, please contact your spe-
cialist dealer or the Alber Service Centre.
If you use the control unit on the left side of the wheelchair, a software setting by your specialist
dealer will be necessary.
20
26
17
i
i

16 817
15. Control unit technical data
Cell type: Lithium-ion 18650
Rated voltage: 3.6 VDC
Rated capacity: 2.5 Ah
Rated energy: 9 Wh
Charging temperature: 0° C to +45° C
Operating temperature: -25° C to +50° C
Protection rating: IPx4
Weight including battery: 0.25 kg
16. Minimum requirements for the charger (not included in the scope of delivery)
Output voltage: Maximum +5 volts
Nominal output current: Maximum 1.5 ampere current
Charger cable connection: USB type A
(the charger cable is included in the DuoDrive scope of delivery)

16 817
17. Safety instructions and hazard information when using the e-motion
Read and observe the safety instructions and hazard information from Chapter 3 onwards in the e-motion M25 operat-
ing manual.
18. Additional safety instructions for travelling in cruise mode (travel using the control unit or Mobility Plus app)
•Prior to use, check that the parking brakes of your wheelchair are working and are therefore able to prevent your wheelchair from rolling
away inadvertently. If this is not the case, please contact your specialist dealer.
•Always mount the e-motion wheels the right way round! They have already been provided ex-works with stickers for left/right (direction
of travel of the wheelchair). If the wheels are not fitted with the correct orientation, there is a risk that the wheelchair will move back-
wards. There is a risk of injury.
•If you have to replace a wheel or a control unit due to a defect, make sure when pairing again via the smartphone app that the wheels
are mounted onto the wheelchair with the correct sides according to the stickers. If necessary, use additional stickers or a permanent
marker to mark the new wheels.
•Always activate the parking brakes of your wheelchair before inserting the control unit into the bracket provided on the wheelchair.
•Do not switch on the control unit until you have attached it correctly.
•Before using cruise mode in public areas, you should first familiarise yourself with the travel characteristics in a safe and risk-free envir-
onment. Get a feel for the handling of the continuous drive, how to change direction during continuous drive, how to accelerate to an
increased continuous speed, how to slow down, and what to do in case of an emergency stop. You should test and practise these funda-
mental driving situations before travelling on public roads.
•It is not possible to travel backwards in cruise mode. To do so, switch to power-assisted travel mode.
•The wheelchair is steered by its push rims when travelling in cruise mode.
•When cruise mode is activated, your hand must always be positioned near the push rims so that you can react quickly to change direc-
tion and stop the wheelchair safely.
•While travelling in cruise mode, your hands must always be close to the push rims so that you can brake the wheelchair promptly with
your hands if cruise mode is switched off. If cruise mode is deactivated, the e-motion wheels are in freewheeling mode, but power
assistance is still available.
•When travelling on slopes, it is possible for cruise mode to be deactivated unintentionally if the Bluetooth connection to the smart-
phone is interrupted or if both push rim sensors receive a travel signal as a result of a vibration. If cruise mode is deactivated, the

18 8MF
e-motion wheels return to freewheeling mode and the speed of the wheelchair on slopes can increase. When travelling on slopes and
inclines, keep your hands close to the push rims and be prepared to brake.
•Cruise control may only be activated by the person sitting in the wheelchair. Unauthorised persons not familiar with the cruise mode
function are not permitted to activate or use the function.
Table of contents
Other Alber Wheelchair manuals

Alber
Alber e-fix User manual

Alber
Alber e-fix E35 User manual

Alber
Alber via GO V24 User manual

Alber
Alber e-fix E36 User manual

Alber
Alber Adventure A10 User manual

Alber
Alber viamobil User manual

Alber
Alber Twion Mobility Plus Paket User manual

Alber
Alber viamobil V15 User manual

Alber
Alber e-motion User manual

Alber
Alber E-MOTIONM12 User manual

Alber
Alber viamobil V15 User manual

Alber
Alber twion T24 User manual

Alber
Alber viamobil V25 User guide

Alber
Alber e-fix E35 User manual

Alber
Alber E-Motion M25 Operating instructions

Alber
Alber erivo R10 User manual

Alber
Alber twion User manual

Alber
Alber E-Motion M25 User manual

Alber
Alber e-fix E35 User manual

Alber
Alber twion User manual