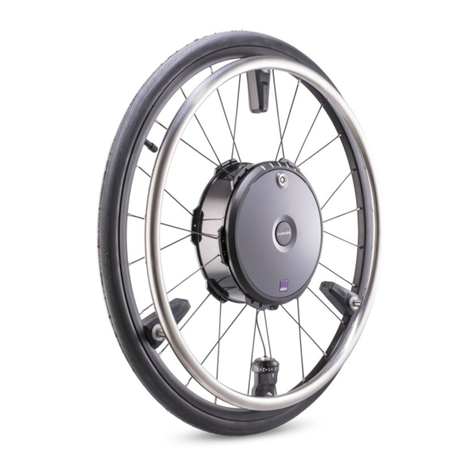
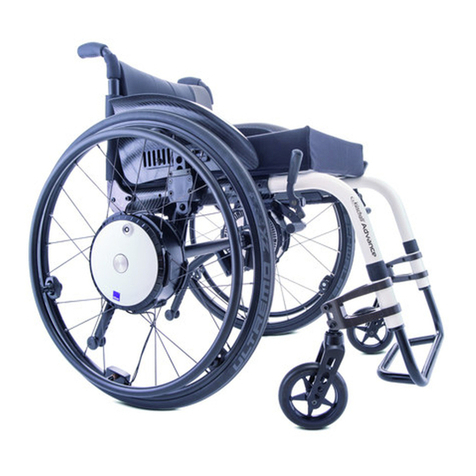
Alber Viaplus User manual

Brems- und Schiebehilfe
www.alber.de
Gebrauchsanweisung D
User manual GB/US
Instructions d’utilisation F
Instruktionsbok S
Damit Schieben
einfach wird
Umschlag.indd 5 26.05.2010 12:57:57

Gebrauchsanweisung D
User manual GB/US
Instructions d’utilisation F
Instruktionsbok S
Das viaplus ist klassifiziert
als Gerät Typ B.
Umschlag.indd 6 26.05.2010 12:57:58

1
23
4
5
6
7
8
9
10
12
13
14
16
17
15
18
19
20
18
21
11
25
22 23
24
Umschlag.indd 1 26.05.2010 12:57:54

81
Contents
1. Introduction 2
1.1 Important safety instructions – please observe carefully at all times 2
1.2 Purpose and intended use of viaplus 2
1.3 Permissible operating conditions / locations of operation 2
1.4 Standard scope of delivery 2
1.5 Technical data 3
1.6 The main elements at a glance 4
2. Start-up 5
2.1 Extending drive wheels 6
2.2 Selecting speed at the control unit 7
2.3 Forward travel 7
2.4 Reverse travel 7
2.5 Traversing obstacles 9
2.6 Switching off driving mode 10
2.7 Retracting drive wheels 10
2.8 Anti-tippers 10
3. Battery pack 11
3.1 Direct charging of battery pack 11
3.2 Charging battery pack through the viaplus 11
3.3 Changing fuse in battery pack 12
3.4 General battery information 12
4. Transport 13
4.1 Removing viaplus from wheelchair 13
4.2 Attaching viaplus to wheelchair 14
4.3 Transport instructions for viaplus and wheelchair 16
5. Storage 16
6. Fault signals 17
6.1 LED status indicator continuously on 17
6.2 LED status indicator flash codes 17
6.3 What should I do if ... 18
7. Safety and hazard information 19
7.1 Safety instructions 19
7.2 Obstacles 20
7.3 Danger areas and hazardous situations 20
8. Maintenance, care and disposal 20
8.1 Charging battery pack 20
8.2 Cleaning 21
8.3 Disposal 22
8.4 Re-use 22
8.5 Maintenance 22
9. Warranty and liability 23
9.1 Warranty for defects 23
9.2 Guarantee of durability 23
9.3 Liability 23
24.0001.4.99.01
As of: 03.05.2010
GA-V12_GB.indd 1 26.05.2010 13:04:00

2
1. Introduction
1.1 Important safety instructions – please observe carefully at all times
viaplus is a push and braking aid to be used exclusively by the person accompanying the wheelchair user. The viaplus must under no
circumstances be used as an electric drive system by the wheelchair user alone.
For safety reasons, the viaplus must only be operated by persons who
have been instructed in its handling and operation
are physically and mentally in a position to operate the device properly and according to the given operating conditions
and situations.
Instruction in the handling and operation of the device is included in the scope of delivery. Please contact your specialist dealer
or Alber representative to arrange for a training session. The instruction is free of charge.
If you feel a little unsure how to handle the viaplus, please contact your specialist dealer or Alber representative for advice.
For the operation of the viaplus, observe the specifications of the wheelchair manufacturer (e.g. maximum slope, air pressure of
tyres, etc.), and strictly adhere to the operating instructions of the wheelchair. Never exceed any of the specified limit values.
Before using a mobile phone or similar device, always secure the wheelchair on level ground and switch off the viaplus.
Avoid strong electromagnetic fields (for example near large electric motors), as they might interfere with the viaplus.
When in operation, the viaplus might under certain circumstances interfere with other electrical equipment such as anti-shoplifting
barriers in department stores.
!
Therefore do not start the viaplus before you have been properly instructed in its operation by an
authorised specialist dealer or Alber representative!
1.2 Purpose and intended use of viaplus
The viaplus is an add-on drive attached to a manually operated wheelchair to assist the attendant of a wheelchair user in pushing
the wheelchair. It thus enables people to take long drives without tiring as the effort for pushing and braking is greatly reduced.
The electric motor of the viaplus makes it easy to push the wheelchair up a slope. When travelling down a slope, the viaplus
reduces the speed to the set level, which makes operation of the wheelchair safer even on steep slopes.
Before using the viaplus, carefully read all safety instructions and hazard information in chapter 7.
1.3 Permissible operating conditions/locations of operation
Observe the permissible operating conditions of the wheelchair to which the viaplus is attached (see wheelchair manual).
Any limits regarding the operation of the wheelchair (e.g. maximum climbing capability, maximum permissible height of
obstacles, max. load, etc.) must be strictly adhered to.
Avoid using the wheelchair on soft ground (e.g. loose chipping, sand, mud, snow, ice or deep puddles).
Always observe the safety and hazard information in chapter 7.
1.4 Standard scope of delivery
Drive unit
Control unit
Battery charger
Battery pack
Operating instructions
Warranty information
•
•
•
•
•
•
•
•
•
•
•
GA-V12_GB.indd 2 26.05.2010 13:04:00
83
1.5 Technical data
Drive unit
Range: max. 16 km(*)
Speed: continuously adjustable to max. 6 km/h (forward travel) or max. 3 km/h (reverse travel)
Slope: max. 10 % (for user weight of 120 kg)
Motor power rating: 200 W
Battery pack
Batteries: 2 x 12 V, 12 Ah, approved by IATA and DOT for aircraft transport
Rated operating voltage: 24 V
Operating temperature: ambient temperature range (approx. - 25 °C to + 50 °C)
Weight of components
Battery pack: 6.0 kg
Drive unit: 10.7 kg
Control unit: 0.3 kg
Battery charger: 0.5 kg
Total weight: 20.5 kg
(*) The range depends on the terrain and the prevailing driving conditions. The specified maximum range is valid for optimum
travel conditions (level terrain, fully recharged batteries, ambient temperature around 20 °C, smooth travel, etc.).
The viaplus conforms to the requirements laid down in the European Medical Device Directive 93/42/EEC.
We reserve the right to modify the design and technology of our products to incorporate the latest developments.
Battery charger
For technical information and user instructions, please refer to the separate operating manual of the battery charger.
GA-V12_GB.indd 3 26.05.2010 13:04:01

4
1.6 The main elements at a glance
(please fold out overview drawing in document cover)
Drive unit
Plug 1
Socket for control unit plug 2
Charger socket at chassis 3
Bolt 4
Spacer ring 5
Pedal 6
Wheel 7
Mounting fork 8
Control unit
Control unit housing 9
Control button 10
LED status indicator 11
Driving lever 12
Plug 13
Battery pack
Plug contact 14
Fuse, 25 A 15
Hinged cover 16
Charger socket at battery pack 17
Battery pack housing 18
Battery charger
Charging plug 19
Charger housing 20
Charge indicator 21
Wheelchair
Bracket 22
Quickpin 23
Mounting fork 24
Cross strut of wheelchair 25
GA-V12_GB.indd 4 26.05.2010 13:04:01

85
18
22
2. Start-up
The viaplus is supplied to you ready for operation. This means that
a special bracket [22] to which the viaplus is attached has been mounted to
both sides of the wheelchair,
the viaplus has been fitted to the wheelchair,
the viaplus control unit has been mounted on the push handles of the wheelchair,
a battery pack [18] to power the viaplus has been attached below the wheelchair.
Your viaplus is thus ready for operation and can be started and operated by following
the instructions in the chapters below.
!
The installation of the bracket [22] and all necessary adjustments
to the viaplus must be carried out by Ulrich Alber GmbH, its repre-
sentative or your authorised specialist dealer.
!
Regularly check the bracket [22] to ensure that it is firmly secured
to the wheelchair. If a screw connection has become loose, contact
your specialist dealer or Alber representative to have it retightened.
It might be necessary to readjust the device.
!
Ulrich Alber GmbH provides brackets of various design (single-part
or multiple-part brackets). The bracket shown in figures in this
operating manual might therefore deviate from that attached to
your bracket.
!
Before starting the viaplus, carefully read the operating manual
and in particular chapter 7 (safety and hazard information).
•
•
•
•
GA-V12_GB.indd 5 26.05.2010 13:04:01

6
6
7
2.1 Extending drive wheels
When not in use, the drive wheels [7] of the viaplus are located approx. 2 cm above
the ground. This allows you to move the wheelchair without the viaplus.
To activate the electric push and braking aid, you must first lower the two wheels [7]
to the ground. To do this, proceed as follows:
Hold the wheelchair by its handles.
Using the tip of your foot, fold down the pedal [6] of the viaplus from its resting
position.
When the pedal [6] is in its centre position, push it down firmly with your foot
to extend the two retracted drive wheels [7].
When the wheels [7] are extended, swivel the pedal [6] back to its initial resting
position.
!
After each use, swivel the pedal [6] back to its resting position!
If the pedal [6] is not swivelled to its resting position, the
viaplus could malfunction and the braking behaviour of the
viaplus might be impaired!
•
•
•
•
GA-V12_GB.indd 6 26.05.2010 13:04:02

87
10 11
12
12
2.2 Selecting speed at the control unit
The scale positions on the button [10] are assigned as follows:
Position “0”: the viaplus is switched off; the LED status indicator [11] is off.
Positions “1” to “6”: preset speed (continuously adjustable from “1” = 1 km/h
to “6” = 6 km/h); the LED status indicator [11] is on.
Position “R”: the brake of the viaplus is disabled and the drive wheels are set
to idle rolling mode. The LED status indicator [11] is on.
To select the speed at which you wish to operate the wheelchair,
turn the button [10] to the respective position (1-6).
To switch off the viaplus, turn the button [10] to position “0”.
2.3 Forward travel
Hold the viaplus with both hands by the handles of the wheelchair.
Push the driving lever [12] slowly down to the stop, using your thumb.
As long as the driving lever [12] is pushed down, the viaplus drives the wheelchair
forward. When the driving lever [12] is released, it automatically returns to its initial
(centre) position. The viaplus is thus stopped and the brakes are applied.
2.4 Reverse travel
Hold the viaplus with both hands by the handles of the wheelchair.
Push the driving lever [12] slowly up to the stop.
As long as the driving lever [12] is pushed up, the viaplus drives the wheelchair
backwards. When the driving lever [12] is released, it automatically returns to its
initial (centre) position. The viaplus is thus stopped and the brakes are applied
with an audible click.
!
When starting the viaplus for the first time, operate it at minimum
speed (set speed select button to position „1“) and familiarise your-
self with the drive behaviour of the device. You can then gradually
increase the speed and operate the device in forward and reverse
mode. After a few minutes, you will have developed a feel for the safe
operation of the viaplus.
!
The viaplus is protected against inadvertent drive actuation.
It is therefore not possible to first actuate the driving lever [12]
and then switch on the viaplus.
If the driving lever is actuated before the viaplus is switched on,
the device is blocked and the LED status indicator [11] flashes
6 times (for fault codes, see chapter 6.2).
In this case, you must switch off the viaplus by turning the button
[10] to position „0“ and then switch it on again.
•
•
•
•
•
•
•
GA-V12_GB.indd 7 26.05.2010 13:04:03

8
!
While operating the add-on drive, keep an eye on the LED status
indicator [11] for possible fault signals (see also chapter 6.2).
If the indicator flashes at uniform intervals during driving, the
battery pack of the viaplus needs to be recharged. Terminate your
trip with the viaplus as soon as possible. If this is not possible,
switch off the viaplus as soon as this is possible (see chapter 2.6)
and retract the drive wheels (see chapter 2.7). You can then push
the wheelchair without the assistance of the add-on drive.
!
When driving along bends, turning the wheelchair or driving uphill
or downhill, the centre of gravity of the wheelchair might be shifted
so that there is a risk that the wheelchair might tip over to the side.
Therefore proceed with extreme care and reduce the speed of the add-
on drive!
!
For safety reasons, the brakes are automatically applied if the
wheelchair is moving too fast (pushed or rolling freely).
!
Never secure the driving lever [12] in a position using a strap or
similar object. Only operate the driving lever with your thumb.
!
Do not attach bags or similar objects to the handlebars of the
wheelchair or to the driving lever [12], as this could prevent
the lever from returning to its neutral position.
GA-V12_GB.indd 8 26.05.2010 13:04:03

89
10 11
2.5 Traversing obstacles
Obstacles higher than 3 cm (such as kerbs) must be traversed backwards with the
viaplus switched off.
Retract the drive wheels [7] (see chapter 2.7).
Turn the button [10] to position “R” to set the viaplus to idle rolling mode.
The brake of the viaplus is disabled and the drive wheels are set to idle rolling
mode. The LED status indicator [11] is constantly on.
Lift the wheelchair by its handles and pull it backwards over the obstacle.
After having traversed the obstacle:
Lower the drive wheels [7] again (see chapter 2.1).
Select the desired speed at the control unit [9] (see chapter 2.2) and continue
your trip.
!
Never switch to idle rolling mode when driving up or down a slope.
There is a risk that the wheelchair could be inadvertently set in
motion!
!
When climbing or descending across kerbs, observe the maximum
obstacle height specified by the wheelchair manufacturer.
•
•
•
•
•
GA-V12_GB.indd 9 26.05.2010 13:04:04

10
10 11
6
7
2.6 Switching off driving mode
To switch off the driving mode, turn the button [10] to position “0”.
The viaplus is now switched off and the LED status indicator [11] is off.
i
When not in use, switch off the viaplus to prevent unnecessary
discharge of the battery pack.
2.7 Retracting drive wheels
After switching off the viaplus, you must retract the drive wheels [7]. To do this,
proceed as follows:
Ensure that the viaplus is switched off (see chapter 2.6).
Using the tip of your foot, fold down the pedal [6] of the viaplus from its
resting position.
When the pedal [6] is in its centre position, push it down firmly with your foot
to retract the two lowered drive wheels [7].
After the wheels [7] are fully retracted, fold the pedal [6] up to its resting position.
!
After each use, swivel the pedal [6] back to its resting position!
If the pedal [6] is not switched to its resting position, the add-on
drive might not work properly and its braking function could be
impaired!
2.8 Anti-tippers
We strongly recommend equipping the wheelchair with anti-tippers, as they greatly
enhance safety when driving on level ground.
When climbing slopes of more than 8 %, the use of anti-tippers (installed in pairs)
is mandatory. Only attach the anti-tippers supplied by the wheelchair manufacturer.
•
•
•
•
GA-V12_GB.indd 10 26.05.2010 13:04:05

811
18
19
17
16
3
19
3. Battery pack
The viaplus is powered by a battery pack [18] attached to the wheelchair.
The battery pack is located in a battery pack bag (see diagram) or
in a metal battery box.
The battery pack should normally remain attached to your wheelchair. It can how-
ever be removed from the bag or box, if you need to lift or transport the wheelchair.
To charge the battery pack, follow the instructions below.
3.1 Direct charging of battery pack
Fold the hinged cover [16] of the battery pack down by 90 degrees.
Insert the plug [19] of the battery charger [20] into the charger socket [17]
of the battery pack.
Insert the mains plug of the battery charger into a mains socket. The battery pack
is now being charged, and the charge indicator [21] at the charger is lit in orange.
When the charge indicator [21] at the charger changes to green, the battery pack
is fully charged.
After charging:
Disconnect the mains plug of the battery charger [20] from the mains socket.
Disconnect the plug [19] of the battery charger from the charger socket [17]
of the battery pack.
Fold the hinged cover [16] up by 90 degrees and close it.
3.2 Charging battery pack through the viaplus
Remove the rubber cap of the charger socket [3].
Insert the plug [19] of the battery charger [20] into the charger socket [3].
Insert the mains plug of the battery charger into a mains socket. The battery pack
is now being charged, and the charge indicator [21] at the charger is lit in orange.
When the charge indicator [21] at the charger changes to green, the battery pack
is fully charged.
After charging:
Disconnect the mains plug of the battery charger [20] from the mains socket.
Disconnect the plug [19] of the battery charger from the charger socket [3]
of the viaplus.
Seal the charger socket [3] with the rubber cap.
!
For safety reasons, the viaplus cannot be started while it is being
charged. The viaplus can only be switched on after the plug [19]
has been disconnected.
!
For the charging of the battery pack, observe the instructions
in the operating manual of the charger.
•
•
•
•
•
•
•
•
•
•
•
•
•
•
GA-V12_GB.indd 11 26.05.2010 13:04:05

12
16
15
3.3 Changing fuse in battery pack
At the rear of the battery pack [18]:
Disconnect the plug [1] from the socket [14] (see chapter 4.1) so that there is
no electric connection between the battery pack and the viaplus.
At the front of the battery pack [18]:
Fold the hinged cover [16] of the battery pack down by 90 degrees.
Remove the defective fuse [15] from the battery pack.
Replace the defective fuse with a new 25 A blade-type fuse (available from your
electrical or medical equipment supplier).
Fold the hinged cover [16] up by 90 degrees.
At the rear of the battery pack [18]:
Reconnect the battery pack to the viaplus by inserting the plug [1] into the sock-
et [14] at the battery pack (see chapter 4.2).
!
If fuses must be replaced frequently, the viaplus might be defective.
Contact your authorised specialist dealer or Alber representative to
arrange for a technical inspection of your viaplus.
3.4 General battery information
The batteries of the viaplus require no maintenance and are rechargeable. Their serv-
ice life depends heavily on the depth of discharge. You can prolong the service life
of your batteries by recharging them regularly.
Avoid completely discharging the battery pack. Recharge the battery pack of the
viaplus after each partial discharge, i.e. after every use of the device.
Lead batteries are subject to what is known as self-discharge. If the battery pack
is not in use for a prolonged period of time (without charging), its capacity can
become reduced. Therefore regularly recharge the battery pack, if it is not in use
for some time. Normally, the full battery capacity is recovered after a number of
charging/discharging cycles.
If the battery pack is handled incorrectly, there is a risk of liquid electrolyte
spilling out. This liquid can cause injury to skin and damage to clothing.
In the event of contact of the electrolyte with eyes or skin, immediately rinse
the affected area with clean water and consult a doctor.
Do not burn battery packs and protect them against naked flames as they can
explode when exposed to heat.
Protect the battery pack against water. Do not immerse it as this could result in
short circuits and permanent damage to the batteries.
Do not short-circuit the battery pack. Short circuits result in high currents, which
can cause damage to the battery pack and/or the viaplus. Short circuits can also
cause fire.
When the batteries have reached the end of their service life, return them to your
Alber representative or authorised specialist dealer for proper disposal.
!
The battery pack of your viaplus can be charged/discharged in any
chosen position. As the batteries are as safe as dry cells, they are
approved by DOT and IATA for transport in airplanes.
•
•
•
•
•
•
•
•
•
•
•
•
•
•
GA-V12_GB.indd 12 26.05.2010 13:04:06

813
13
1
6
23
22
4. Transport
Normally, the viaplus is permanently attached to the wheelchair. If necessary for
transport, the system can however be dismantled into its individual components.
To do this, proceed as follows:
4.1 Removing viaplus from wheelchair
At the chassis:
Switch off the viaplus (see chapter 2.6).
Hold the plug [13] by the release sleeve and pull it from the socket [2] at
the chassis.
The control unit remains attached to the handle of the wheelchair.
At the rear of the battery pack [18]:
Using your thumb and index finger, push together the two locking mechanisms on
the plug [1] of the viaplus.
Disconnect the plug [1] from the socket [14] of the battery pack.
Remove the battery pack from the bag or box.
At the viaplus:
Retract the drive wheels (see chapter 2.7).
Hold the viaplus at the pedal [6].
At the wheelchair (both sides):
Push in the releasing device at the centre of the quickpin [13], using your thumb.
Pull the quickpin [13] from the bracket [22].
The viaplus is now detached from the wheelchair and can be removed by holding
it by the pedal.
To transport the unit, ensure that all components of the viaplus are properly
stowed away.
Observe the instructions for the transport of the viaplus and the wheelchair in
chapter 4.3.
•
•
•
•
•
•
•
•
•
•
•
•
•
GA-V12_GB.indd 13 26.05.2010 13:04:07

14
8
25
24
23
4
5
22
4
5
22
23
4.2 Attaching viaplus to wheelchair
To attach the viaplus to the wheelchair, we recommend holding the unit by its
pedal [6] and sliding it under the wheelchair.
At the wheelchair (both sides):
Ensure that the mounting forks [8] engage at the cross strut of the wheelchair [25]
as shown in the diagram.
Slide the bolts [4] of the viaplus into the mounting forks [24] of the bracket [22].
The setting ring [5] attached to the bolt [4] must thereby be located inside the
bracket [22] (i.e. towards the centre of the wheelchair).
Press down the releasing device at the centre of the quickpin [23] and move
the quickpin to the stop through the mounting fork [24] and along the inserted
bolt [4].
!
Ensure that the viaplus is properly attached to the two brackets [22]
mounted on the wheelchair.
It must be impossible to remove the viaplus from the mounting
forks [24] without first removing the quickpin [23]!
•
•
•
GA-V12_GB.indd 14 26.05.2010 13:04:07

815
2
13
14
1
At the chassis:
Insert the plug [13] of the control unit into the socket [2] at the chassis.
To position the plug correctly, you might need to turn it a little.
At the rear of the battery pack housing [18]:
Place the battery pack in the bag or box and secure it with the Velcro strap.
Insert the plug [1] into the socket [14] of the battery pack.
Check whether the plug [1] is properly engaged in the socket [14] so that it
cannot inadvertently become loose.
Your viaplus is now ready for operation and can be started.
•
•
•
•
GA-V12_GB.indd 15 26.05.2010 13:04:08

16
4.3 Transport instructions for viaplus and wheelchair
To transport the wheelchair, follow the instructions of the wheelchair manufacturer. You might need to secure the wheelchair
or certain components.
During transport, the viaplus or its dismantled parts must be properly secured so that they do not pose a risk to the driver or
passengers in the event of a sudden brake manoeuvre.
Please check whether there are specific statutory regulations regarding the transport of wheelchairs, wheelchair wheels or
add-on drives in your country and strictly adhere to these regulations.
For safety reasons, it is strictly forbidden to sit in the wheelchair while travelling in another vehicle.
Always adhere to the statutory requirements.
Ulrich Alber GmbH and its agents shall not be liable for any damage resulting from non-compliance with these instructions.
5. Storage
To store the viaplus, place it on a surface that is easy to clean.
If you wish to store the viaplus for a prolonged period of time, you must keep the device and in particular the battery pack
in a dry environment, preferably at room temperature (+15 °C to 25 °C).
Recharge the battery pack every 30 days with the supplied battery charger. This ensures that your viaplus is working properly
even after prolonged storage.
After the battery pack has been charged, disconnect the charger from the power mains.
The batteries consist of dry cells. If stored and handled correctly, they are leak-proof and do not require any maintenance apart
from regular recharging. For more details regarding the batteries used in the viaplus, see chapter 3.4.
If the viaplus is to be stored for a prolonged period of time together with the wheelchair, we recommend lifting the drive wheels
from the ground by operating the pedal (see chapter 2.7).
Switch on the viaplus once a month and move the wheelchair a few meters forward and back to prevent seizing of the brake and
similar damage.
•
•
•
•
•
•
•
•
•
•
•
•
•
GA-V12_GB.indd 16 26.05.2010 13:04:08

817
6. Fault signals
6.1 LED status indicator continuously on
As a rule, the LED status indicator [11] is continuously on, if the viaplus is working properly.
If the battery pack is nearly empty, its residual capacity might under certain circumstances not be large enough to activate a flash
code. In this case, the LED status indicator remains continuously on until the battery pack is fully discharged. Recharge the battery.
6.2 LED status indicator flash codes
Faults in the operation of your viaplus are indicated by means of flash codes of the LED status indicator [11].
Codes:
LED flash code Cause of problem Remedy
(flashing 1x) The battery pack of the viaplus is
discharged.
Recharge the battery pack as soon as
possible.
(flashing 3x) The battery pack has been automatically
recharged to its full capacity by the motor
during downhill travel.
Switch the viaplus off and on again
(see chapter 2.2 / 2.6).
Continue the downhill travel at the lowest
possible speed.
If possible, avoid prolonged steep descents
while the battery pack is fully recharged.
(flashing 6x) The locking device to prevent unintentio-
nal drive function activation has noticed
that you have actuated the driving lever
[12] while switching on the viaplus.
Release the driving lever [12] and switch
off the viaplus.
Then switch on the viaplus again without
actuating the driving lever [12].
(flashing 9x)
Internal error Switch the viaplus off and on again
(see chapter 2.2 / 2.6).
If the error persists, the viaplus cannot
be used. Contact your authorised specia-
list dealer or Alber representative.
!
If one of the fault codes listed in the table above occurs, the electronic system of the viaplus has detected
a fault or defect in the device. In such a case, it is not possible to operate the add-on drive.
Contact your authorised specialist dealer or Alber representative.
GA-V12_GB.indd 17 26.05.2010 13:04:09
Table of contents
Other Alber Wheelchair manuals

Alber
Alber viamobil Series User manual

Alber
Alber Twion Mobility Plus Paket User manual

Alber
Alber e-motion DuoDrive User manual

Alber
Alber E-Motion M25 User manual

Alber
Alber e-fix E35 User manual

Alber
Alber viamobil V15 User manual

Alber
Alber twion User manual

Alber
Alber E34z User manual

Alber
Alber viamobil V15 User manual

Alber
Alber twion User manual

Alber
Alber Adventure A10 Guide

Alber
Alber e-fix User manual

Alber
Alber viamobil User manual

Alber
Alber twion User manual

Alber
Alber e-motion M15 User manual

Alber
Alber e-fix E35 User manual

Alber
Alber twion User manual

Alber
Alber e-fix E36 User manual

Alber
Alber e-fix E35 User manual

Alber
Alber e-fix E35 User manual