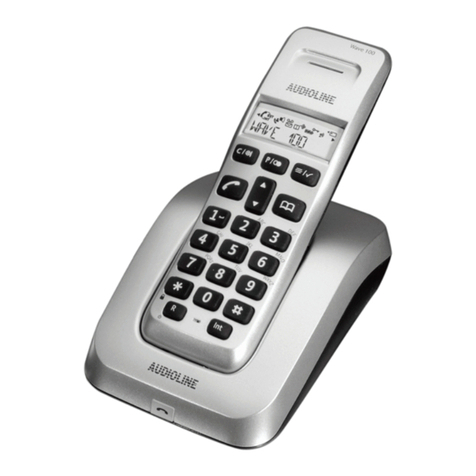
ALcom ADT800 User manual

USER GUI
DE
ADT800

2
www.alcomonline.com
Contents
What’s in the box?.......................................................... 3
Connecting the Base Station and Power Plug.............. 4
Getting to know your phone .......................................... 6
Using the phone ............................................................. 8
Handset Setting............................................................ 11
Phonebook ................................................................... 15
Caller-ID Functions....................................................... 17
Date Time Setting......................................................... 19
Register / De-register a Handset................................. 20
Call Transfer and Intercom between 2 Handsets........ 21
Reset of the Handset ................................................... 22
Base Setting ................................................................. 23
Troubleshooting............................................................ 25
Warranty and Service Information ............................... 27

3
www.alcomonline.com
IMPORTANT!
This equipment is not designed to make emergency
telephone call when the power fails. Alternative ar-
rangements should be made for access to emergency
services. This product is intended for connection to
analogue public switched telephone networks and
private switchboards.
Congratulations!
On purchasing our high quality ALCOM DECT PHONE
ADT800. Please read the manual carefully to nd out
all features and how your telephone works, so you can
get the best out of your new phone.
What’s in the box?
Packing content:
Content SINGLE TWIN TRIPLE
Base Unit 1 1 1
Handset 1 2 3
Base power
adapter 1 1 1
Telephone line
cord 1 1 1
AAA rechargeable
battery 2 4 6
Charger with
power adapter X 1 2
User Guide 1 1 1

4
www.alcomonline.com
Connecting the Base Station and
Power Plug
Setting up the base and handset
Plug the telephone line in the telephone connection
socket.
Insert the power plug at the other end in the power
outlet. The base station is now ready to operate.
Only use the connection cable supplied.
CAUTION:
Plug the adaptor to a power outlet
that is nearby and easily accessible.
USE ONLY THE ADAPTER SUPPLIED
WITH THIS EQUIPMENT
. Using other power
supplies may damage the unit.
Install and charge the batteries
Insert supplied 2 pieces AAA rechargeable batteries
in the compartment, ensuring correct polarity and
close the compartment. Place the handset in the base
station to charge for 16 hours prior to rst use. If you
don’t properly charge the phone, battery performance
will be compromised.

5
www.alcomonline.com
Warning:
Use only approved rechargeable
batteries supplied. Please do not use alkaline
or non-rechargeable batteries. It may cause
permanent damage to the product and void the
warranty.
If batteries are empty, handset LCD will be OFF and
the handset will not respond to any key. Handset
is then required to be put back on Base Station /
Charger cradle to charge. Handset cannot be used
until handset name and icon appear. If a handset is
not fully charged before use, handset may emit battery
low alert tone and battery level indicator shows empty
or low level.
Battery Low Indications
When batteries are empty, the handset no longer
works. When batteries are completely empty and
you have put the handset on the base unit for a short
period of time, the Battery symbol may appear to be
fully charged but this is actually not the case. The
battery capacity will decrease rapidly. We advise you
to put the handset on the base unit for 16 hrs so that
it can be recharged completely.
Full battery Empty battery
6
www.alcomonline.com
When you are in the middle of a conversation and
the battery is almost empty, the handset will emit a
warning signal. Place the handset on the base unit to
charge.
Getting to know your phone
Handset buttons
Receiver
Display
Phonebook
Redialing/Navigate up
Call list / Navigate down
On-hook button
Digit Keys
Dialing pause
Hash button / Key lock
Receiver volume / Ringing tone
volume and melody
Mute / Delete
Microphone
Cancel / 1 level back / Internal
call
Star button Ringing tone off
Call button / Handsfree function
Menu / Ok / R-button
1.
2.
3.
4.
5.
6.
7.
8.
9.
10.
11.
12.
13.
14.
15.
16.
The call list is only available if you have the ID function
subscribed with your telephone service provider.
*
8
45
D
E
F
23
J
K
L
A
B
C
M
N
O
W X
Y Z
T
U
V
G
H
I
PQ
RS
1
6
7
0
R
9
P
E S C
I N T C
O K
1
9
8
10
12
14
11
13
15
16
2
4
6
3
5
7

7
www.alcomonline.com
icon Intercom call indica-
tor
In use icon Battery level indicator
Key lock icon Phone book
No ring icon Caller ID icon
Mute Left arrow
Speakerphone icon Right arrow
Navigating the menu
Phonebook
New Entry
Edit Entry
Delete Entry
Delete all
handset
Ring tone
Auto Talk
Handset Name
Keypad Beep
Select Base
Reset
Language
Base
Dial Mode
Recall
System Pin
Register
Base 1
Base 2
Base 3
Base 4
PIN
Handset display icons

8
www.alcomonline.com
Using the phone
Power on/off
Press and hold key
Access the menu
To enter the menu, press key.
Use or keys to scroll to the menu option you
want.
Press key to select further options or to
conrm the setting displayed.
To go back in the menu press key.
Setting the language
Press key. Use or keys to scroll to
‘HANDSET’ and press key.
Use or keys to scroll to ‘LANGUAGE’ and
press key.
Scroll to the language you want with or keys
and select key.
Outgoing calls
Making a phone call
Press key. You will hear the dial tone.
Enter the desired telephone number.
1.
2.
3.
4.
1.
2.
3.
1.
2.

9
www.alcomonline.com
Press key when you want to terminate the
call.
Call setup with dial preparation
Enter the desired telephone number. An incorrect
number can be corrected by pressing key.
NOTE:
When you haven’t pressed a button
for 20 seconds, the handset returns to standby
mode.
Press key. The number will be dialled
automatically.
Press key again when you want to terminate
the call.
Redialling the last number dialled
Press key. You will hear the dial tone.
Press key. The number you last called is dialled
automatically.
Redial one of the last 3 numbers dialled
Press key. The number you last called appears
on the display.
If you would like to dial one of the last 3 numbers
dialled, press or key to select the desired
number.
Press key. The number shown on the display
is dialled automatically. After nishing the call,
press to hang up.
3.
1.
2.
3.
1.
2.
1.
2.
3.

10
www.alcomonline.com
Incoming calls
When a call comes in, the handset will start to ring.
Press key to answer the incoming call.
Activate/deactivate hands free
speakerphone
This function allows you to communicate in hands free
mode without having to put the handset in your ears.
When you are on the phone, press key to
activate the hands free speakerphone.
Press key again to deactivate the hands free
speakerphone.
Mute function
It is possible to deactivate the microphone during
a conversation. Now you can speak openly without
being heard by the other party on the line.
Press key during a conversation. The
microphone will be deactivated.
The appears on the display.
Press key again when you want to continue
the conversation.
Setting the receiver volume
During a conversation you can set the volume by
pressing the key. You can set the volume alterna-
tively in between 1-5. You can also use or keys
to do so.
1.
2.
1.
2.
3.

11
www.alcomonline.com
NOTE:
You can turn the ringer volume of each
individual handset ON or OFF by simply press
and hold key in standby.
Handset Setting
Setting the ring volume and melody
You can change the ringer melody for an incoming call
(external) and intercom call (internal).
Handset melody
Press key. Use or keys to scroll to
‘HANDSET’ and press key.
Use or keys to scroll to ‘RING TONE’ and
press key.
Use or keys to scroll to ‘EXTERNAL’ or
‘INTERNAL’ and press key.
Select the melody you want, and then press
key.
Handset ring volume
Press key. Use or keys to scroll to
‘HANDSET’ and press key.
Use or to scroll to ‘RING TONE’ and press
key.
Use or to scroll to ‘VOLUME’ and press
key.
1.
2.
3.
4.
1.
2.
3.

12
www.alcomonline.com
Select the volume level you want, and then press
key.
OR
Press key in standby. The handset will ring in
the current volume.
Use or keys to select the desired volume
(0-5).
Press key again to conrm the setting.
NOTE:
When the volume is set to 0, the handset
will not ring when there is an incoming call and the
display will show .
Auto answer
When there is an incoming call and the handset is on
the base, the phone automatically takes the line when
lifted. This function can be turned on or off.
Press . Use or keys to scroll to
‘HANDSET’ and press key.
Use or keys to scroll to ‘AUTO TALK’ and
press key.
Use or keys to select to ‘ON’.
Handset name
You can change the name that appears on the screen
(max. 9 characters) when handset is in standby mode:
Press key. Use or keys to scroll to
‘HANDSET’ and press key.
4.
1.
2.
3.
1.
2.
3.
1.

13
www.alcomonline.com
Use or keys to scroll to ‘HANDSET NAME’
and press key.
The current handset name is shown. Delete the
character by key. Use the keypad to enter the
new name.
Press key to conrm.
Turning key beep ON/OFF
You can set the handset to make a beep whenever
you press a key.
Press key. Use or keys to scroll to
‘HANDSET’ and press key.
Use or keys to scroll to ‘KEYPAD BEEP’
and press key.
Use or keys to scroll to ‘ON’ and press
key.
Select base
If you set the handset to ‘manual selection’, the hand-
set will only choose the base unit you have set.
Press key. Use or keys to scroll to
‘HANDSET’ and press key.
Use or keys to scroll to ‘SELECT BASE’ and
press key.
Use or keys to select to ‘MANUAL’ or
‘AUTO’.
2.
3.
4.
1.
2.
3.
1.
2.
3.

14
www.alcomonline.com
Select ‘MANUAL’ if you want to set it as MANUAL
mode.
NOTE:
When you have activated Automatic
base selection and the handset is out of range
from the current base, the handset will search
for the nearest base only during standby (not
during communication).
CAUTION:
Before you can select a base
unit, the handset must be registered to the
base rst.
Key lock
When the keypad is locked, pressing any key will have
no effect during standby (except holding the key).
Press and hold key. Appears on the display
and the keypad is locked.
Press and hold key again to un-lock the
keypad.
When there is an incoming call, you can still answer
the call by pressing key.
During the call, the keypad functions as normal.
When the call is ended, the keypad will be locked
again.
4.
1.
2.
3.
4.

15
www.alcomonline.com
Phonebook
You can program 50 phonebook entries in the phone’s
memory. Names can be up to 16 characters long and
numbers up to 24 digits.
Add phonebook entries
Press key until the icon is ON.
Press key and ‘NEW ENTRY’ will display.
Press key and enter the name by using the
keypad.
Press key to conrm the name.
Enter the telephone number, press key to
conrm.
Dial a phonebook entry
Press key to enter the phonebook.
Enter the rst letter of the desired name via the
keypad. The rst name in the list with this letter
appears on the display.
Press or keys to search the name you want
to dial.
Press key and the number will be dialled
automatically.
Press key again when you want to terminate
the call.
1.
2.
3.
4.
5.
1.
2.
3.
4.
5.

16
www.alcomonline.com
Edit name or number
Press key to enter the phonebook.
Press or keys to search the name you want
to edit.
Press key to enter the Phonebook Menu.
Press or keys to select ‘EDIT ENTRY’.
Delete the character by the key. Use the
keypad to enter the new name.
Press key to conrm.
Enter / delete the telephone number, press
key to conrm.
Delete an entry
Press key to enter the phonebook.
Press or keys to search the name you want
to delete.
Press key to enter the Phonebook Menu.
Press or keys to select ‘DELETE ENTRY’.
Press key to conrm.
Delete all entry
Press key to enter the phonebook.
Press key to enter the Phonebook options.
Press or keys to select ‘DELETE ALL’.
1.
2.
3.
4.
5.
6.
7.
1.
2.
3.
4.
5.
1.
2.
3.

17
www.alcomonline.com
Press key to conrm and the handset will
prompt you to reconrm the delete all function.
Press key to conrm.
Caller-ID Functions
The handset displays the telephone numbers of
incoming calls. This function is only possible if you
have subscribed to a telephone operator that provides
this service.
Contact your telephone provider for more information.
When you receive a call, the numbers are saved in a
Call list. This list can hold 20 telephone numbers (each
of max. 23 digits). If the number is longer than 14 dig-
its, you can press the key to show the other digits.
New calls
When you’ve received a new unanswered call, the
display will show ‘XX MISSED’ and ‘XX’ indicates the
number of calls missed.
Consulting the call list
Press key. The last received call is shown on the
display.
NOTE:
If the list is empty, ‘EMPTY’ is shown on
the display. If not, you can see the name, number
and date / time.
Pressing the key the following will be shown on
the display. You can scroll from name to number
4.
5.
1.
2.
3.

18
www.alcomonline.com
and date time by pressing the button. Use
key to scroll to the next call. Use key to show
the previous call.
You can leave the Call list by pressing the key.
Calling a number from the call list
Scroll through the Call list until the desired number is
shown on the display.
Press key. The number will be dialled
automatically.
Erasing a number from the call list
Scroll through the Call list until the desired number is
shown on the display.
Press key and then use or keys to
select ‘DELETE’.
Press key to erase the number.
Erasing all numbers from the call list
NOTE:
You can only erase those read
numbers from the call list.
Scroll through the Call list until the desired number is
shown on the display.
Press key and then use or keys to
select ‘DELETE ALL’.
Then press key to erase the number.
4.
1.
2.
1.
2.

19
www.alcomonline.com
Store a number from the call log into the
phonebook memory
Scroll through the Call list until the desired number is
shown on the display.
Press key and then use or keys to
select ‘SAVE TO PB’.
Press key again.
The last character of the current CID name will be
blinking and you can then edit the name.
Press key to save the name, and you can
then edit the telephone number.
The last digit of the telephone number will blink and
you can then edit the telephone number.
Press key again to conrm and to go back to
the call list.
Date Time Setting
No manual setting is required to adjust Date and Time
as there are no clock enabled features in this unit.
If you have Caller ID on your telephone line and the
operator sends date and time*, your unit’s clock will
be set automatically on an incoming call. This is just to
register the Date & the time the call was received.
Applicable only for FSK caller ID system.
1.
2.
3.
4.
5.
6.
*

20
www.alcomonline.com
Register / De-register a Handset
Register to a DECT base
You can register 5 handsets to one base unit. By
default, a handset is registered as handset 1 on a
base unit upon delivery (base unit 1). You only need to
register a handset if:
The handset registration has been removed from
the base unit. (e.g. for re-initialization)
If you want to subscribe a different handset to this
base unit.
Press key. Use or keys to scroll to
‘REGISTER’ and press key.
Use scroll key to select the number of the base unit
(1-4) you would like to register the handset. The
unit will ask for the PIN code (4 digits, default one
is 0000), then the display will show ‘PRESS BASE’.
Now disconnect or power OFF the main base AC
adaptor (not charge cradle) from the power plug
and connect back, so that the base unit will go in
to registration mode automatically and start looking
for handsets. When the handset is registered, it will
show ‘ALCOM’ followed by the handset number. .
Note:
Base unit will exit registration mode
after 3mins. If you cannot register within 3mins
please start again from the beginning.
•
•
1.
2.
3.
Table of contents
Other ALcom Cordless Telephone manuals

ALcom
ALcom CL-3399 ID User manual

ALcom
ALcom AT6128 User manual

ALcom
ALcom CL-3375 User manual

ALcom
ALcom CL-3332 IDM User manual

ALcom
ALcom SN200 User manual

ALcom
ALcom Studio Digital Cordless Phone User manual

ALcom
ALcom DT-830 User manual

ALcom
ALcom BL100 User manual

ALcom
ALcom Colombo Combo User manual

ALcom
ALcom Lifestyle 1900 User manual