manuals.online logo
Brands
  1. Home
  2. •
  3. Brands
  4. •
  5. Allen-Bradley
  6. •
  7. Power Supply
  8. •
  9. Allen-Bradley 1771-PS7 C Series Installation and user guide

Allen-Bradley 1771-PS7 C Series Installation and user guide

Other Allen-Bradley Power Supply manuals

Allen-Bradley 1756-PA30XT User manual

Allen-Bradley

Allen-Bradley 1756-PA30XT User manual

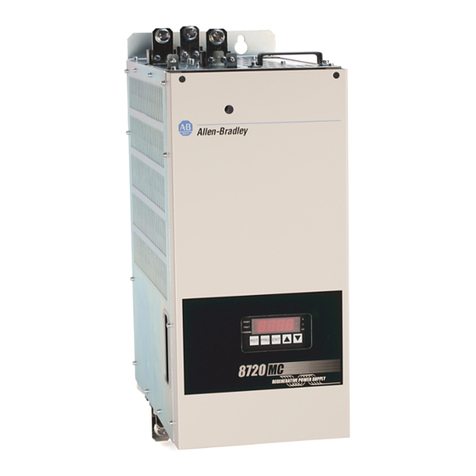
Allen-Bradley FLEX Ex 1797-PS2E2 User manual

Allen-Bradley

Allen-Bradley FLEX Ex 1797-PS2E2 User manual

Allen-Bradley 1769-PA2 User manual

Allen-Bradley

Allen-Bradley 1769-PA2 User manual

Allen-Bradley 1606-XLB36EH User manual

Allen-Bradley

Allen-Bradley 1606-XLB36EH User manual

Allen-Bradley 1769-PB2 User manual

Allen-Bradley

Allen-Bradley 1769-PB2 User manual

Allen-Bradley 1606-XLS960F-3 User manual

Allen-Bradley

Allen-Bradley 1606-XLS960F-3 User manual

Allen-Bradley 1606-XLS240E User manual

Allen-Bradley

Allen-Bradley 1606-XLS240E User manual

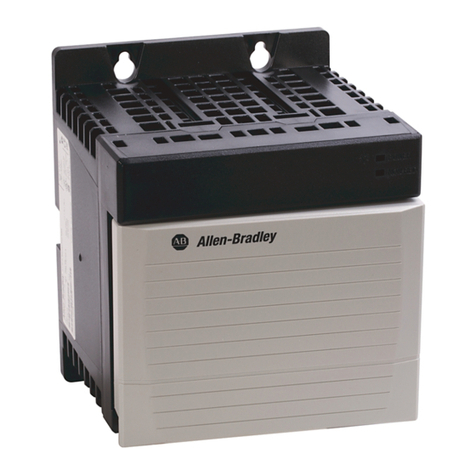
Allen-Bradley ControlLogix 1756-PA75/B User manual

Allen-Bradley

Allen-Bradley ControlLogix 1756-PA75/B User manual

Allen-Bradley 1771-p7 User manual

Allen-Bradley

Allen-Bradley 1771-p7 User manual

Allen-Bradley 1771-P2 User manual

Allen-Bradley

Allen-Bradley 1771-P2 User manual

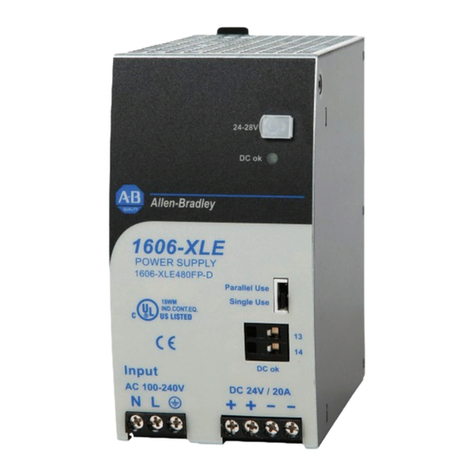
Allen-Bradley 1606-XLE480FP User manual

Allen-Bradley

Allen-Bradley 1606-XLE480FP User manual

Allen-Bradley 1794-PS3 User manual

Allen-Bradley

Allen-Bradley 1794-PS3 User manual

Allen-Bradley 1606-XLB60E User manual

Allen-Bradley

Allen-Bradley 1606-XLB60E User manual

Allen-Bradley Bulletin 1606 User manual

Allen-Bradley

Allen-Bradley Bulletin 1606 User manual

Allen-Bradley 1609-HDK1 User manual

Allen-Bradley

Allen-Bradley 1609-HDK1 User manual

Allen-Bradley 1606-XLERED20Y User manual

Allen-Bradley

Allen-Bradley 1606-XLERED20Y User manual

Allen-Bradley Series B User manual

Allen-Bradley

Allen-Bradley Series B User manual

Allen-Bradley 1606-XLB36EH User manual

Allen-Bradley

Allen-Bradley 1606-XLB36EH User manual

Allen-Bradley 1756-PA75R Service manual

Allen-Bradley

Allen-Bradley 1756-PA75R Service manual

Allen-Bradley Kinetix 5700 User manual

Allen-Bradley

Allen-Bradley Kinetix 5700 User manual

Allen-Bradley 1606-XLE240ERL User manual

Allen-Bradley

Allen-Bradley 1606-XLE240ERL User manual

Allen-Bradley ControlLogix 1756-PA75R/A User manual
Allen-Bradley

Allen-Bradley ControlLogix 1756-PA75R/A User manual

Allen-Bradley PowerFlex 700 AFE User manual

Allen-Bradley

Allen-Bradley PowerFlex 700 AFE User manual

Allen-Bradley Bulletin 1606 User manual

Allen-Bradley

Allen-Bradley Bulletin 1606 User manual

Popular Power Supply manuals by other brands

Videx 520MR Installation instruction

Videx

Videx 520MR Installation instruction

Poppstar 1008821 Instructions for use

Poppstar

Poppstar 1008821 Instructions for use

TDK-Lambda LZS-A1000-3 Installation, operation and maintenance manual

TDK-Lambda

TDK-Lambda LZS-A1000-3 Installation, operation and maintenance manual

TDK-Lambda 500A instruction manual

TDK-Lambda

TDK-Lambda 500A instruction manual

Calira EVS 17/07-DS/IU operating instructions

Calira

Calira EVS 17/07-DS/IU operating instructions

Monacor PS-12CCD instruction manual

Monacor

Monacor PS-12CCD instruction manual

VOLTIMA MagicBox 15 Installation and operating instructions

VOLTIMA

VOLTIMA MagicBox 15 Installation and operating instructions

Miller Auto Deltaweld 452 owner's manual

Miller

Miller Auto Deltaweld 452 owner's manual

BCP PUOUBK How to install

BCP

BCP PUOUBK How to install

HC 2210 manual

HC

HC 2210 manual

Agilent Technologies 6032A Service manual

Agilent Technologies

Agilent Technologies 6032A Service manual

Radial Engineering SB-48UB user guide

Radial Engineering

Radial Engineering SB-48UB user guide

Puls CT5.241 installation manual

Puls

Puls CT5.241 installation manual

OCZ ZX1250W Technical specifications

OCZ

OCZ ZX1250W Technical specifications

iseg ECH 238 manual

iseg

iseg ECH 238 manual

Agilent Technologies 6631B Service manual

Agilent Technologies

Agilent Technologies 6631B Service manual

Power XXL A Series instruction manual

Power

Power XXL A Series instruction manual

HP 6200B Operating and service manual

HP

HP 6200B Operating and service manual

manuals.online logo
manuals.online logoBrands
  • About & Mission
  • Contact us
  • Privacy Policy
  • Terms and Conditions

Copyright 2025 Manuals.Online. All Rights Reserved.

120/220V AC Power Supply
with User Power
(Cat. No. 1771-PS7 Series C)
Installation Data
Use this publication to install a 1771-PS7 external power supply.
You perform these tasks:
prepare to mount the 1771-PS7
mount the 1771-PS7 and connect backplane power
connect user power to modules (optional)
connect ac power source to the 1771-PS7
The 1771-PS7 provides:
Power: For: Output
V
oltage:
backplane power 1771I/O chassis 5V dc at 16A (max)
user power IMC 120, 120AR, 121 and 123 motion
controller modules
nonIMC products
+5V dc at 8A (max)
+15V dc at 2A (max)
-15V dc at 2A (max)
+24V dc at 2.5A (max)
ATTENTION: To avoid overloading the power supply:
limit backplane power to 80W, or
limit user power to 65W, or
limit total system power (backplane + user) to 100W
To Calculate the Power Requirements for: See: Pub. No.
IMC 120 Motion Control System IMC 120 Motion Control System Installation Manual 17716.5.45
IMC 121 Motion Control System IMC 121 Installation Manual 17716.2.4
IMC 123 Motion Control System IMC 123 Motion Control System Installation Manual 17716.2.3
To
the Installer
Prepare for Installation
Installation Data
120/220V AC Power Supply with User Power
1771PS7 Series C
2
Before mounting the 1771-PS7, you should:
mount the I/O chassis. See the Universal I/O Chassis Installation Data
(1771-2.210) for information on mounting the I/O chassis.
set the power supply configuration jumper. The 1771-PS7 is an external
power supply. Set the configuration jumper on the I/O chassis to the
N position.
NY
Using
Power
Supply
Module in
the Chassis?
The 1771-PS7 has a D-sub power connector that provides power to the I/O
chassis backplane.
1771PS7
right side
A1
3
4
5
A2
1
2
A1 backplane common
A2 backplane +5V dc
1 no connection
2 backplane processor enable
3 backplane +5V dc sense
4 backplane signal ground sense
5 no connection
What to Do Next
To Attach the 1771PS7 to this Chassis: Go to:
1771A1B, A2B, A3B1, A4B panel mount page 3
1771A3B 19" rack mount page 6
Mount
the 1771PS7 and
Connect Backplane Power
Installation Data
120/220V AC Power Supply with User Power
1771PS7 Series C
3
Attaching to PanelMounted I/O Chassis
To attach the 1771-PS7 to a panel-mounted chassis:
1. Remove the four #10-32 nuts and separate the mounting plate from
the power supply.
19536
1771PS7
mounting
plate
2. Use four 0.312-inch screws (#10-32) and washers to install the
mounting plate onto the side plate of the I/O chassis.
ATTENTION: Do not use screws longer than 0.312 inch to
mount the 1771-PS7 to the I/O chassis. Longer screws may
damage the equipment.
Important: Leave the screws loose to allow the mounting plate
to move until alignment procedure is complete.
16596
#1032 screw
washer
mounting
plate
side plate
of chassis
Installation Data
120/220V AC Power Supply with User Power
1771PS7 Series C
4
3. Install the supplied alignment fixture onto the taper pins of the
mounting plate (moving mounting plate as necessary) and push until
the alignment fixture is fully inserted into the receptacle on the
chassis.
Alignment fixture
mounting
plate
4. Tighten the #10-32 screws to permanently attach the mounting plate
to the I/O chassis.
mounting
plate
5. Remove the alignment fixture.
Installation Data
120/220V AC Power Supply with User Power
1771PS7 Series C
5
6. Align the receiving holes of the power supply over the taper pins on
the mounting plate and push until the plug on the power supply is
fully inserted into the receptacle on the chassis.
15870
mounting
plate
taper pin
1771PS7
7. Install four #10-32 nuts supplied onto the #10-32 studs now
protruding through the power supply mounting holes from the
mounting plate.
19537
1771PS7
Installation Data
120/220V AC Power Supply with User Power
1771PS7 Series C
6
Attaching to RackMounted I/O Chassis
When mounted separately, the 1771-PS7 may be mounted above or next to
the I/O chassis. It may not be mounted below, since it is necessary to
allow convection cooling of both the power supply and the I/O chassis.
A minimum vertical distance of six inches should be maintained.
If
Y
ou Are Mounting the 1771PS7: Use this Power Cable
(Cat. No.)
within 1 cablefoot of the I/O chassis 1771CA3B
within 5 cablefeet (1.68M) of the I/O chassis 1771PSCC
To attach the 1771-PS7 to a rack-mounted I/O chassis (1771-A3B):
1. Mount the 1771-PS7 vertically, above and within the specified
cable-feet (for your cable) of the D-sub connector on the top of the
I/O chassis.
Allow for a generous bend of the
cable to reduce the stress on the
connectors mounted on the chassis
and the power supply.
Use the rear flanges on the
1771PS7 to mount it to a panel.
16595
1771A3B
1771PS7
1771CA3B
or
1771PSCC
Installation Data
120/220V AC Power Supply with User Power
1771PS7 Series C
7
2. Connect one end of the power cable to the D-sub connector located
on the side of the 1771-PS7 power supply and tighten the
connector screws.
3. Connect the other end of the power cable to the D-sub connector
located on the top of the chassis and tighten the
connector screws.
The 1771-PS7 has 4 connectors for distributing power through 1771-CAS
cables to modules within an I/O chassis. The 1771-PS7 can distribute
power to:
IMC controller modules:
- 3 IMC 120, 120AR motion-controller modules and
1 resolver-excitation module
- 3 IMC 121 motion-controller modules and 1 resolver-excitation
module
- 3 IMC 123 motion-controller modules and 1 resolver-excitation
module
non-IMC products
Each connector is a 12-pin latch-and-lock shielded type. The pinout of the
connector is shown below:
1
2
4
8
10
3
6
11
5
9
7
12
+24V dc
24V dc Com.
+24V dc
24V dc Com.
+15V dc
Com.
-15V dc
Com.
+5V dc
Com.
+5V dc
Com.
Shield
Can
Power
Connector
1
2
1771PS7 side
Connect
User Power
to Modules
Installation Data
120/220V AC Power Supply with User Power
1771PS7 Series C
8
Connecting User Power to IMC Controller Modules
To connect the 1771-PS7 to an IMC 120, 120AR, 121 or 123
motion-controller module and a resolver-excitation module:
1. Make sure the power switch is set to OFF.
2. Connect one end of a 1771-CAS cable:
a. to a user power connector on the 1771-PS7
b. to the axis on the controller module
processor or adapter
motioncontroller module
1771CAS
1771CAS
Route these cables away from
ac input power and other cables.
Repeat for the resolverexcitation module
and each additional controller module.
resolverexcitation module
IMC 120 and IMC 120AR IMC 121 and IMC 123
processor or adapter
motioncontroller module
1771CAS
1771CAS
resolverexcitation module
17473
15861
For More Information On: See this Documentation Set(s) Cat. No.
IMC 120 motion control system
IMC 120AR motion control system
IMC 120 Motion Control
IMC 120AR Motion Control
1771HCDOC
1771HSARS
IMC 121 motion control system IMC 121 Motion Control 1771H1DOC
IMC 123 motion control system IMC 123 Motion Control 1771H3DOC
Installation Data
120/220V AC Power Supply with User Power
1771PS7 Series C
9
Connecting Power to NonIMC Products
The following figure shows physical dimensions and wiring details for the
1771-CAS cable.
15970
48"
(
±2.00")
1.310"
(±0.015")
Type.
1. Materialhousing:
Polycarbonate 940: UL94V
0; color: G.E. 70455 silver gray
.
Insulator:
Polyphenyiene oxidebased resin in accordance with MILP46129 (MR).
UL94V1.
Contacts:
1/4 hard copper nickel alloy with welded gold dot 1000
µ
" thick in contact area;
heat treated beryllium copper spring.
Shield:
1/2 hard 260 brass. 100300
µ
" 9317 T
inlead.
2.
12 conductor
, 24A
WG (7/32) tinned copper
, color as shown.
3. Aluminized mylar shield, aluminized side in.
4. 26A
WG (7/34) tinned copper drain.
5.
0.035" thick PVC outer jacket. Low gloss finish. Color to match G.E. 70455 silver gray
,
O.D. 0.259"
±0.009".
1771CAS Cable
1
2
4
8
10
3
6
11
5
9
1
2
3
4
6
8
9
10
11
12
7
12
7
5
+24V dc
24V dc Com.
+24V dc
24V dc Com.
+15V dc
Com.
-15V dc
Com.
+5V dc
Com.
+5V dc
Com.
Yellow
White
Orange
Gray
Green
Blue
Red
Brown
Violet
Black
Pink
Tan
Shield
Can
Shield
Can
Drain
1771PS7
Wiring Diagram
To connect the 1771-PS7 to non-IMC products, you must modify a
1771-CAS cable. Cut the cable as short as possible to minimize voltage
losses. Double-up on +24V dc, +5V dc, +24V dc common, +5V dc
common and 15V dc commons on each connector, as shown:
When Using: Tie Pins Together As Shown:
+24V dc 1 to 3
and
2 to 4
1
2
4
3
5
+24V dc
24V dc Com.1
+24V dc
24V dc Com.1
+15V dc
Yellow
White
Orange
Gray
Green
+24V dc
+24V dc Com.
+15V dc
1771PS7 end
+5V dc 9 to 11
and
10 to 12 8
10
6
11
5
9
7
+
1
5
V
d
c
Com.1
-15V dc
Com.1
+5V dc
Com.1
+5V dc
Blue
Red
Brown
Violet
Black
Pink
+15V
dc
Com.
+5V dc
-15V dc
Com.
+15 V dc and -15V dc 6 to 8 11
12
17645
+5V dc
Com.1
Pink
Tan
Drain
Shield
Can
1
See
Figure 1
on page
10.
ON
POWER
OFF
120V
220V
Installation Data
120/220V AC Power Supply with User Power
1771PS7 Series C
10
Figure 1
Signals
Designated as COM
1
2
4
8
10
3
6
11
5
9
7
12
+24V dc
24V dc Com.
+24V dc
24V dc Com.
+15V dc
Com.
-15V dc
Com.
+5V dc
Com.
+5V dc
Com.
Shield
Can
1771PS7 end
24V
+15V
-15V
+5V
Signals designated as Com. (for +5V dc, +15V dc and -15V dc)
are tied together in the 1771PS7 and are isolated from the signal
designated as 24V dc Com. so that the 24V supply can be used
as a negative supply if required. All the commons are isolated
from chassis ground and the backplane (+5V) ground.
+
+
-
-
-
+
-
+
GND
Terminal
The 1771-PS7 requires input from a 120V ac or 220V ac source. As a
safety precaution, the 1771-PS7 is shipped with the input voltage selector
switch set to 220V.
To connect power to the 1771-PS7:
1. Make sure the power switch is set to OFF.
2. Use a 1/8” slotted screwdriver to set the input voltage selector switch
for 120V ac or 220V ac as required for the input voltage available at
installation.
ATTENTION: To avoid damaging the power supply, do
not place the screwdriver blade more than 1/4” into the
switch slot.
Connect
ac Power Source
to the 1771PS7