manuals.online logo
Brands
  1. Home
  2. •
  3. Brands
  4. •
  5. Allen + Roth
  6. •
  7. Indoor Furnishing
  8. •
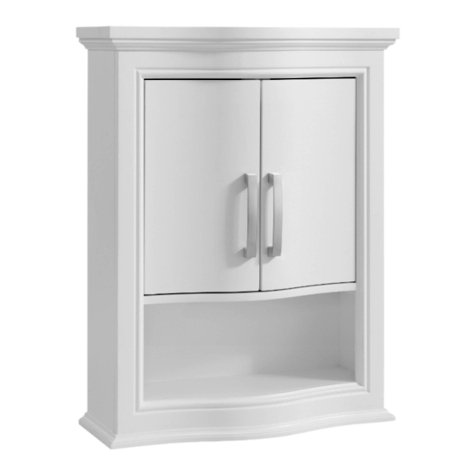
  9. Allen + Roth LW113P06 User manual

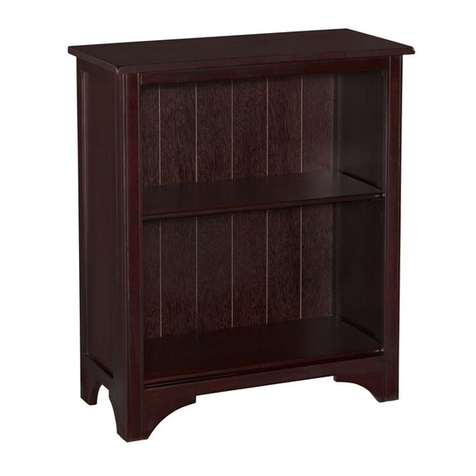
Allen + Roth LW113P06 User manual

ITEM/ #0398439
Questions/
Call customer service at 1-866-439-9800,
8 a.m. - 8 p.m., EST, Monday - Friday.
•To maintain and protect the finish of the unit, clean with a soft, damp cloth only.
The manufacturer warrants this product to be free from defects in workmanship and material present at time of shipment from
the factory for a limited lifetime from the date of purchase. This warranty applies only to the original purchaser. To obtain
warranty service, call our customer service department at 1-866-439-9800 for return authorization and shipping instructions.
Any damage to the product by accident, misuse or improper installation, or by affixing accessories not produced by the
manufacturer are the purchaser's responsibility. The manufacturer assumes no responsibility whatsoever for product installation
during the warranty period. There is no further expressed warranty. The manufacturer disclaims any and all implied warranties.
The manufacturer shall not be liable for incidental, consequential or special damages arising at or in connection with product
use or performance except as may otherwise be accorded by law. This warranty supersedes all prior warranties.
ATTACH YOUR RECEIPT HERE
Serial Number/
Pur chase Date/
MODEL/ #LW113P06
A
x1
x 1
Cabinet French Cleat
B
Note: Hardware shown actual size./
AA CC
BB
x1
Shelf
C
x4
Shelf Bracket
.yadirF`-`yadnoM,TSE,.m.p8-.m.a8,0089-934-668-1tatnemtrapedecivresremotsucruollac,straptnemecalperroF /
allen + roth® is a registered trademark of LF, LLC.
All Rights Reserved.
AA
BB
CC
Screw
Anchor
Shelf Bracket
x2
x2
Part #Part Description
Sun016
Sun017
Sun018
7
STORAGE CABINET
Lowes.com/allenandroth
allen + roth® is a registered trademark of LF, LLC.
All Rights Reserved.
Lowes.com/allenandroth
ARTICLE/ARTÍCULO
MOD LE/
É MODELO
ARMOIRE DE RANGEMENT
GABINETE PARA ALMACENAJE
JOIGNEZ VOTRE REÇU ICI
ADJUNTE SU RECIBO AQUÍ
Numéro de série/
Número de serie
Date d'achat/Fecha de compra
Armoire
Gabinete
Cale française
Barra de sujeción Tablette
Repisa
allen + roth® est une marque de commerce déposée
de LF, LLC. Tous droits réservés
Allen + roth® es una marca registrada de LF, LLC.
Todos los derechos reservados
Des questions?/¿Preguntas?
Communiquez avec notre service à la clientèle au
1 866 439-9800, entre 8 h et 20 h (HNE), du lundi
au vendredi.
Llame al Servicio al Cliente al 1-866-439-9800, de
8 a.m. a 8 p.m. hora estándar del Este, de lunes a
viernes.
Remarque : La quincaillerie est illustrée en grandeur réelle./ Nota: Los aditamentos se
muestran en tamaño real.
Support pour tablette
Soporte de repisa
• Pour conserver et protéger le fini de l'armoire, nettoyez-la uniquement à l'aide d'un linge doux et humide.
• Para mantener y proteger el acabado de la unidad, limpie sólo con un paño suave humedecido.
Le fabricant garantit cet article contre les défauts de matériaux ou de fabrication présents au moment de l'expédition de l'usine
pendant une période limitée à compter de la date d'achat. Cette garantie ne s'applique qu'à l'acheteur initial. Pour effectuer une
réclamation au titre de la garantie, communiquez avec notre service à la clientèle au 1 866 439-9800 afin d'obtenir une autorisation
de retour et des instructions d'expédition. L'acheteur est responsable de tout dommage causé au produit par un accident, un
usage inapproprié ou une installation inadéquate, ou par l'ajout d'accessoires qui ne sont pas produits par le fabricant. Le
fabricant n'est aucunement responsable de l'installation du produit durant la période de garantie. Aucune autre garantie explicite
n'est consentie. Le fabricant décline toute garantie implicite. Le fabricant n'est pas responsable des dommages accessoires,
consécutifs ou spéciaux découlant de l'utilisation ou du rendement du produit, à l'exception de ce qui pourrait être prévu
autrement par la loi. Cette garantie remplace toute garantie antérieure.
El fabricante garantiza que este producto no presenta defectos en la fabricación ni los materiales presentes en el momento del
transporte desde la fábrica durante un período limitado de por vida a partir de la fecha de compra. Esta garantía es válida sólo
para el comprador original. Para obtener los servicios cubiertos por la garantía, llame a nuestro Departamento de Servicio al
Cliente al 1-866-439-9800 para recibir una autorización de devolución y las instrucciones de envío. Cualquier daño al producto
producido por accidente, uso indebido o instalación incorrecta, o a causa de elementos accesorios que no son del fabricante,
será responsabilidad del comprador. El fabricante no asume ningún tipo de responsabilidad por la instalación del producto
durante el período de garantía. No existe otro tipo de garantía explícita. El fabricante rechaza cualquiera y todas las garantías
implícitas. El fabricante no se hará responsable por da?os accidentales, resultantes o especiales que surjan en relación con
el uso o el funcionamiento del producto, excepto que la ley indique lo contrario. Esta garantía sustituye cualquier garantía previa.
Pour obtenir des pièces de rechange, communiquez avec notre service à la clientèle au 1 866 439-9800, entre 8 h et 20 h (HNE),
du lundi au vendredi.
Para obtener piezas de repuesto, llame a nuestro Departamento de Servicio al Cliente al 1-866-439-9800, de lunes a viernes de 8
a.m. a 8 p.m., hora estándar del Este.
Impreso en China
Imprimé en Chine
allen + roth® est une marque de commerce
déposée de LF, LLC. Tous droits réservés
Allen + roth® es una marca registrada de LF,
LLC. Todos los derechos reservados
JOIGNEZ VOTRE REÇU ICI
ADJUNTE SU RECIBO AQUÍ
Screw
Anchor
( not show n to siz e)
Vis (grandeur non réelle)
Cheville d'ancrage (grandeur
non réelle)
Tornillo (no se muestra en
tamaño real)
Ancla de expansión (no se
muestra en tamaño real)
( not show n to siz e)
(grandeur
non réelle) (no se muestra
entamaño real)
REPLACEMENT PARTS LIST/LISTE DES PIECES DE RECHANGE/LISTA DE PIEZAS DE REPUESTO
WARRANTY/GARANTIE/GARANTíA
CARE AND MAINTENANCE/ENTRETIEN/CUIDADO Y MANTENIMIENTO
'
HARDWARE CONTENTS/QUINCAILLERIE INCLUSE/ADITAMENTOS
PACKAGE CONTENTS/CONTENU DE L’EMBALLAGE/CONTENIDO DEL PAQUETE
Please read and understand this entire manual before attempting to assemble, operate or install the product.
•The assistance of another person may be required to help install this unit.
• Take care when moving the product and never drag the pieces across the floor as this will`cause damage tothe joints.
hardware contents list. If any part is missing or damaged, do not attempt to assemble, install or operate the product. Contact
customer service for replacement parts.
Estimated Assembly Time: 30 minutes.
Tools Required for Assembly (not included):
1. Place French cleat (B) on the wall and use it as a guide to determine the insertion points of the
2.
3. Reposition French cleat (B) on the wall, aligning the holes with anchor (BB). Using a 3/16 in.
dna)B(taelchcnerFhguorht)AA(wercstresnI.llawehtnodekramselohllird,)dedulcniton(tibllird
4. With help from another person, align the slot of the back of cabinet (A) slightly above French cleat
(B) and slide cabinet (A) down until the slot rests on French cleat (B).
5.
Gently push down to secure.
1
2
3
4
5
taelchcnerFfoselohdellirderpehthguorhtllawehtkramot)dedulcniton(licnepaesU.)BB(rohcna
(B). Use bmulpdnaleveleblliw)A(tenibac)dedulcniton(licneperusneot)dedulcniton(levela
against the wall.
fossecerni)dedulcniton(revirdwercsspillihPaecalP.edisatitesdna)B(taelchcnerFevomeR
anchor
(BB). Slowly turn anchor (BB) clockwise with slight pressure until the flange just touches the
wall
Insert shelf bracket (CC) into coordinating holes at desired level. Place shelf (C) over shelf brackets
.)CC(`
.
.
at each pencil mark. NOTE:D .)dedulcniton(llirdagnisu)BB(rohcnatsniagahsuptono
turn clockwise. Tighten screws (AA) until they emoceb tluciffid ot turn.
Lowes.com/allenandroth Lowes.com/allenandroth
Lea y comprenda completamente este manual antes de intentar ensamblar, usar o instalar el producto.
•
•
Vous pourriez avoir besoin de l'aide d'une autre personne pour installer cet article.
Puede ser necesaria la ayuda de otra persona para instalar esta unidad.
•
•
Lorsque vous déplacez l'article, prenez soin de ne jamais faire glisser les pièces sur le sol afin d'éviter d'endommager
les joints.
Tenga cuidado al mover el producto y nunca arrastre las piezas en el piso, ya que al hacerlo puede dañar las juntas.
Avant de commencer l'installation de l'article, assurez-vous d'avoir toutes les pièces. Comparez le contenu de l'emballage avec
la liste des pièces et celle de la quincaillerie. S'il y a des pièces manquantes ou endommagées, ne tentez pas d'assembler,
d'installer ni d'utiliser l'article. Communiquez avec notre service à la clientèle pour obtenir des pièces de rechange.
Temps d'assemblage approximatif : 30 minutes
Antes de comenzar a instalar el producto, asegúrese de tener todas las piezas. Compare las piezas con la lista del contenido del
paquete y la lista de aditamentos. No intente ensamblar, instalar ni usar el producto si falta alguna pieza o si estas están dañadas.
Póngase en contacto con el Departamento de Servicio al Cliente para obtener piezas de repuesto.
Temps d'assemblage approximatif : 30 minutes
Tiempo estimado de ensamblaje: 30 minutosTiempo estimado de ensamblaje: 30 minutos
Assurez-vous de lire et de comprendre l'intégralité du présent manuel avant de tenter d'assembler, d'installer ou
d'utiliser l'article.
Placez la cale française (B) sur le mur et servez-vous-en comme guide pour déterminer les points
vérifiez que l'armoire (A) est de niveau et d'aplomb contre le mur.
la pared.
Coloque la barra de sujeción (B) en la pared y úsela como guía para determinar los puntos de
inserción del anclaje (BB). Use un lápiz (no se incluye) para marcar la pared a través de los orificios
pretaladrados de la barra de sujeción (B).
Use un nivel (no se incluye) para asegurarse de que el
gabinete (A) quede nivelado y a plomo en
@ Retirez la cale française (B) et mettez-la de côté. Placez un tournevis cruciforme (non inclus) dans
la cavité d'une cheville d'ancrage (BB). Tournez lentement la cheville d'ancrage (BB) dans le sens
des aiguilles d'une montre en exer çant une légère pression, jusqu'à ce que la bride effleure le mur
à chacun des emplacements marqués. REMARQUE : N'exercez pas une pression sur la cheville
d'ancrage (BB) à l'aide de la perceuse (non incluse).
Retire la barra de sujeción (B) y déjela a un lado. Coloque un destornillador Phillips (no se incluye)
en la ranura de las anclas de expansión (BB). Gire lentamente las anclas de expansión (BB) en
dirección de las manecillas del reloj presionando levemente hasta que la pestaña toque la pared en
Replacez la cale française (B) sur le mur en alignant les trous sur les chevilles d'ancrage (BB). à l'aide
d'une perceuse et d'un foret de 3/16 po (non inclus), percez un trou à chacun des emplacements
d'une montre. Serrez les vis (AA) jusqu'à ce qu'elles soient difficiles à tourner.
Vuelva a colocar la barra de sujeción (B) en la pared y alinee los orificios con las anclas de
expansión (BB). Con una broca para taladro de 3/16 pulg. (0,48 cm) (no se incluye) taladre los puntos
marcados en la pared. Introduzca los tornillos (AA) a través de la barra de sujeción (B) y gírelos en el
sentido de las manecillas del reloj. Apriete los tornillos (AA) hasta que sea difícil seguir girándolos.
Avec l'aide d'une autre personne, alignez la fente située au dos de l'armoire (A) légèrement en
haut de la cale fran çaise (B) et faites glisser l'armoire vers le bas jusqu'à ce que la fente repose
sur la cale française (B).
Con la ayuda de otra persona, alinee la ranura de la parte posterior del gabinete (A) levemente por
sobre la barra de sujeción (B) y deslice el gabinete (A) hacia abajo hasta que la ranura descanse
en la barra de sujeción (B).
Insérez les supports pour tablette (CC) dans les trous correspondants, à la hauteur voulue. Placez
la tablette (C) sur les supports pour tablette (CC). Poussez doucement vers le bas pour la fixer.
Introduzca el soporte de la repisa (CC) en los orificios dispuestos al nivel deseado. Coloque la
repisa (C) sobre los soportes de repisa (CC). Presiónela suavemente hacia abajo para asegurarla.
.leveLdnalicneP,tiB.ni61/3,llirDcirtcelE,revirdwercSspiillhP
Outils nécessaires pour l'assemblage (non inclus) : tournevis cruciforme, perceuse électrique, foret de 3/16 po, crayon et niveau.
Before beginning installation of product, make sure all parts are present. Compare parts with package contents list and2.
À
d'insertion de la cheville d'ancrage (BB). l'aide d'un crayon, faites des marques sur le mur aux
endroits où se trouvent les trous préperforés de la cale française (B). l'aide d'un niveau (non inclus),
À
Herramientas necesarias para el ensamblaje (no se incluyen): Destornillador Phillips, taladro. Nivel, lápiz
cada lugar marcado con el lápiz. NOTA: No presione las anclas de expansión (BB) con el taladro
(no se incluye).
marqués sur le mur. Insérez les vis (AA) dans la cale fran çaise (B) et tournez dans le sens des
aiguilles
SAFETY INFORMATION/CONSIGNES DE SECURITE/INFORMACION DE SEGURIDAD
'
'
'
WARNING/AVERTISSEMENT/ADVERTENCIA
CAUTION/MISE EN GARDE/PRECAUCION
'
PREPARATION/PREPARATION/PREPARACION
'
ASSEMBLY INSTRUCTIONS/INSTRUCTIONS POUR L’ASSEMBLAGE/INSTRUCCIONES DE ENSAMBLAJE

Other Allen + Roth Indoor Furnishing manuals

Allen + Roth 1116VA-36-320-901 User manual

Allen + Roth

Allen + Roth 1116VA-36-320-901 User manual

Allen + Roth LLBVT4839D User manual

Allen + Roth

Allen + Roth LLBVT4839D User manual

Allen + Roth SP4972FF User manual

Allen + Roth

Allen + Roth SP4972FF User manual

Allen + Roth NLS113RBSCT User manual

Allen + Roth

Allen + Roth NLS113RBSCT User manual

Allen + Roth NORRIS 42RAL User manual

Allen + Roth

Allen + Roth NORRIS 42RAL User manual

Allen + Roth 1789MR-22-201 User manual

Allen + Roth

Allen + Roth 1789MR-22-201 User manual

Allen + Roth 39BV239XCH User manual

Allen + Roth

Allen + Roth 39BV239XCH User manual

Allen + Roth RIGSBY RGWVT2439 User manual

Allen + Roth

Allen + Roth RIGSBY RGWVT2439 User manual

Allen + Roth CLARITA 60W User manual

Allen + Roth

Allen + Roth CLARITA 60W User manual

Allen + Roth DINING CHAIRS SET OF 4 User manual

Allen + Roth

Allen + Roth DINING CHAIRS SET OF 4 User manual

Allen + Roth LARSEN 1694VA-36-241-900-UM User manual

Allen + Roth

Allen + Roth LARSEN 1694VA-36-241-900-UM User manual

Allen + Roth Hartford WSL48SSJ User manual

Allen + Roth

Allen + Roth Hartford WSL48SSJ User manual

Allen + Roth SP4971 User manual

Allen + Roth

Allen + Roth SP4971 User manual

Allen + Roth LG-3098-LC-F1-CT User manual

Allen + Roth

Allen + Roth LG-3098-LC-F1-CT User manual

Allen + Roth MAITLAND PS-215-MC User manual

Allen + Roth

Allen + Roth MAITLAND PS-215-MC User manual

Allen + Roth 70743 User manual

Allen + Roth

Allen + Roth 70743 User manual

Allen + Roth Landen 2550860 User manual

Allen + Roth

Allen + Roth Landen 2550860 User manual

Allen + Roth SERENA PARK LOVESEAT FRS90466 User manual

Allen + Roth

Allen + Roth SERENA PARK LOVESEAT FRS90466 User manual

Allen + Roth Hartford WSL72VSJ User manual

Allen + Roth

Allen + Roth Hartford WSL72VSJ User manual

Allen + Roth 144723 User manual

Allen + Roth

Allen + Roth 144723 User manual

Allen + Roth WSL3IPS User manual

Allen + Roth

Allen + Roth WSL3IPS User manual

Allen + Roth DE14164 User manual

Allen + Roth

Allen + Roth DE14164 User manual

Allen + Roth 9006BNMV User manual

Allen + Roth

Allen + Roth 9006BNMV User manual

Allen + Roth WHITTAKER LPWVT2439 User manual

Allen + Roth

Allen + Roth WHITTAKER LPWVT2439 User manual

Popular Indoor Furnishing manuals by other brands

J D Williams AT HOME Tiverton XK551 Assembly instructions

J D Williams

J D Williams AT HOME Tiverton XK551 Assembly instructions

Jason.L Switch System Small Round Meeting Table Assembly instructions

Jason.L

Jason.L Switch System Small Round Meeting Table Assembly instructions

Simpli Home brooklin+max WyndenHall 3AXCRGL002-FG Assembly instructions

Simpli Home

Simpli Home brooklin+max WyndenHall 3AXCRGL002-FG Assembly instructions

Open Plan Systems L2 Lumen Assembly guide

Open Plan Systems

Open Plan Systems L2 Lumen Assembly guide

Home Styles 20 05507 0503 Assembly instructions

Home Styles

Home Styles 20 05507 0503 Assembly instructions

HOMEDEPOT TV0397 Assembly instructions

HOMEDEPOT

HOMEDEPOT TV0397 Assembly instructions

RIGHT ANGLE R-STYLE Series Assembly instructions

RIGHT ANGLE

RIGHT ANGLE R-STYLE Series Assembly instructions

West Elm Andes RA 1046403 quick start guide

West Elm

West Elm Andes RA 1046403 quick start guide

Herman Miller Canvas Vista Installation and Disassembly for Recycling Instructions

Herman Miller

Herman Miller Canvas Vista Installation and Disassembly for Recycling Instructions

mlmeble NEVIO 12 Assembling Instruction

mlmeble

mlmeble NEVIO 12 Assembling Instruction

sleep8 450 owner's manual

sleep8

sleep8 450 owner's manual

ID USA 182329 Assembly instruction

ID USA

ID USA 182329 Assembly instruction

TREX Yacht Club TXN37 Assembly instructions

TREX

TREX Yacht Club TXN37 Assembly instructions

Fromm&Starck STAR MFCM 02 user manual

Fromm&Starck

Fromm&Starck STAR MFCM 02 user manual

Simpli Home ADAMS 3AXCADABEN USER ASSEMBLY GUIDE

Simpli Home

Simpli Home ADAMS 3AXCADABEN USER ASSEMBLY GUIDE

SouthShore 3107 Assembly instructions

SouthShore

SouthShore 3107 Assembly instructions

Moe's TIBURON SR-1022-29 Assembly instructions

Moe's

Moe's TIBURON SR-1022-29 Assembly instructions

M-TI 400 user manual

M-TI

M-TI 400 user manual

manuals.online logo
manuals.online logoBrands
  • About & Mission
  • Contact us
  • Privacy Policy
  • Terms and Conditions

Copyright 2025 Manuals.Online. All Rights Reserved.