5 6
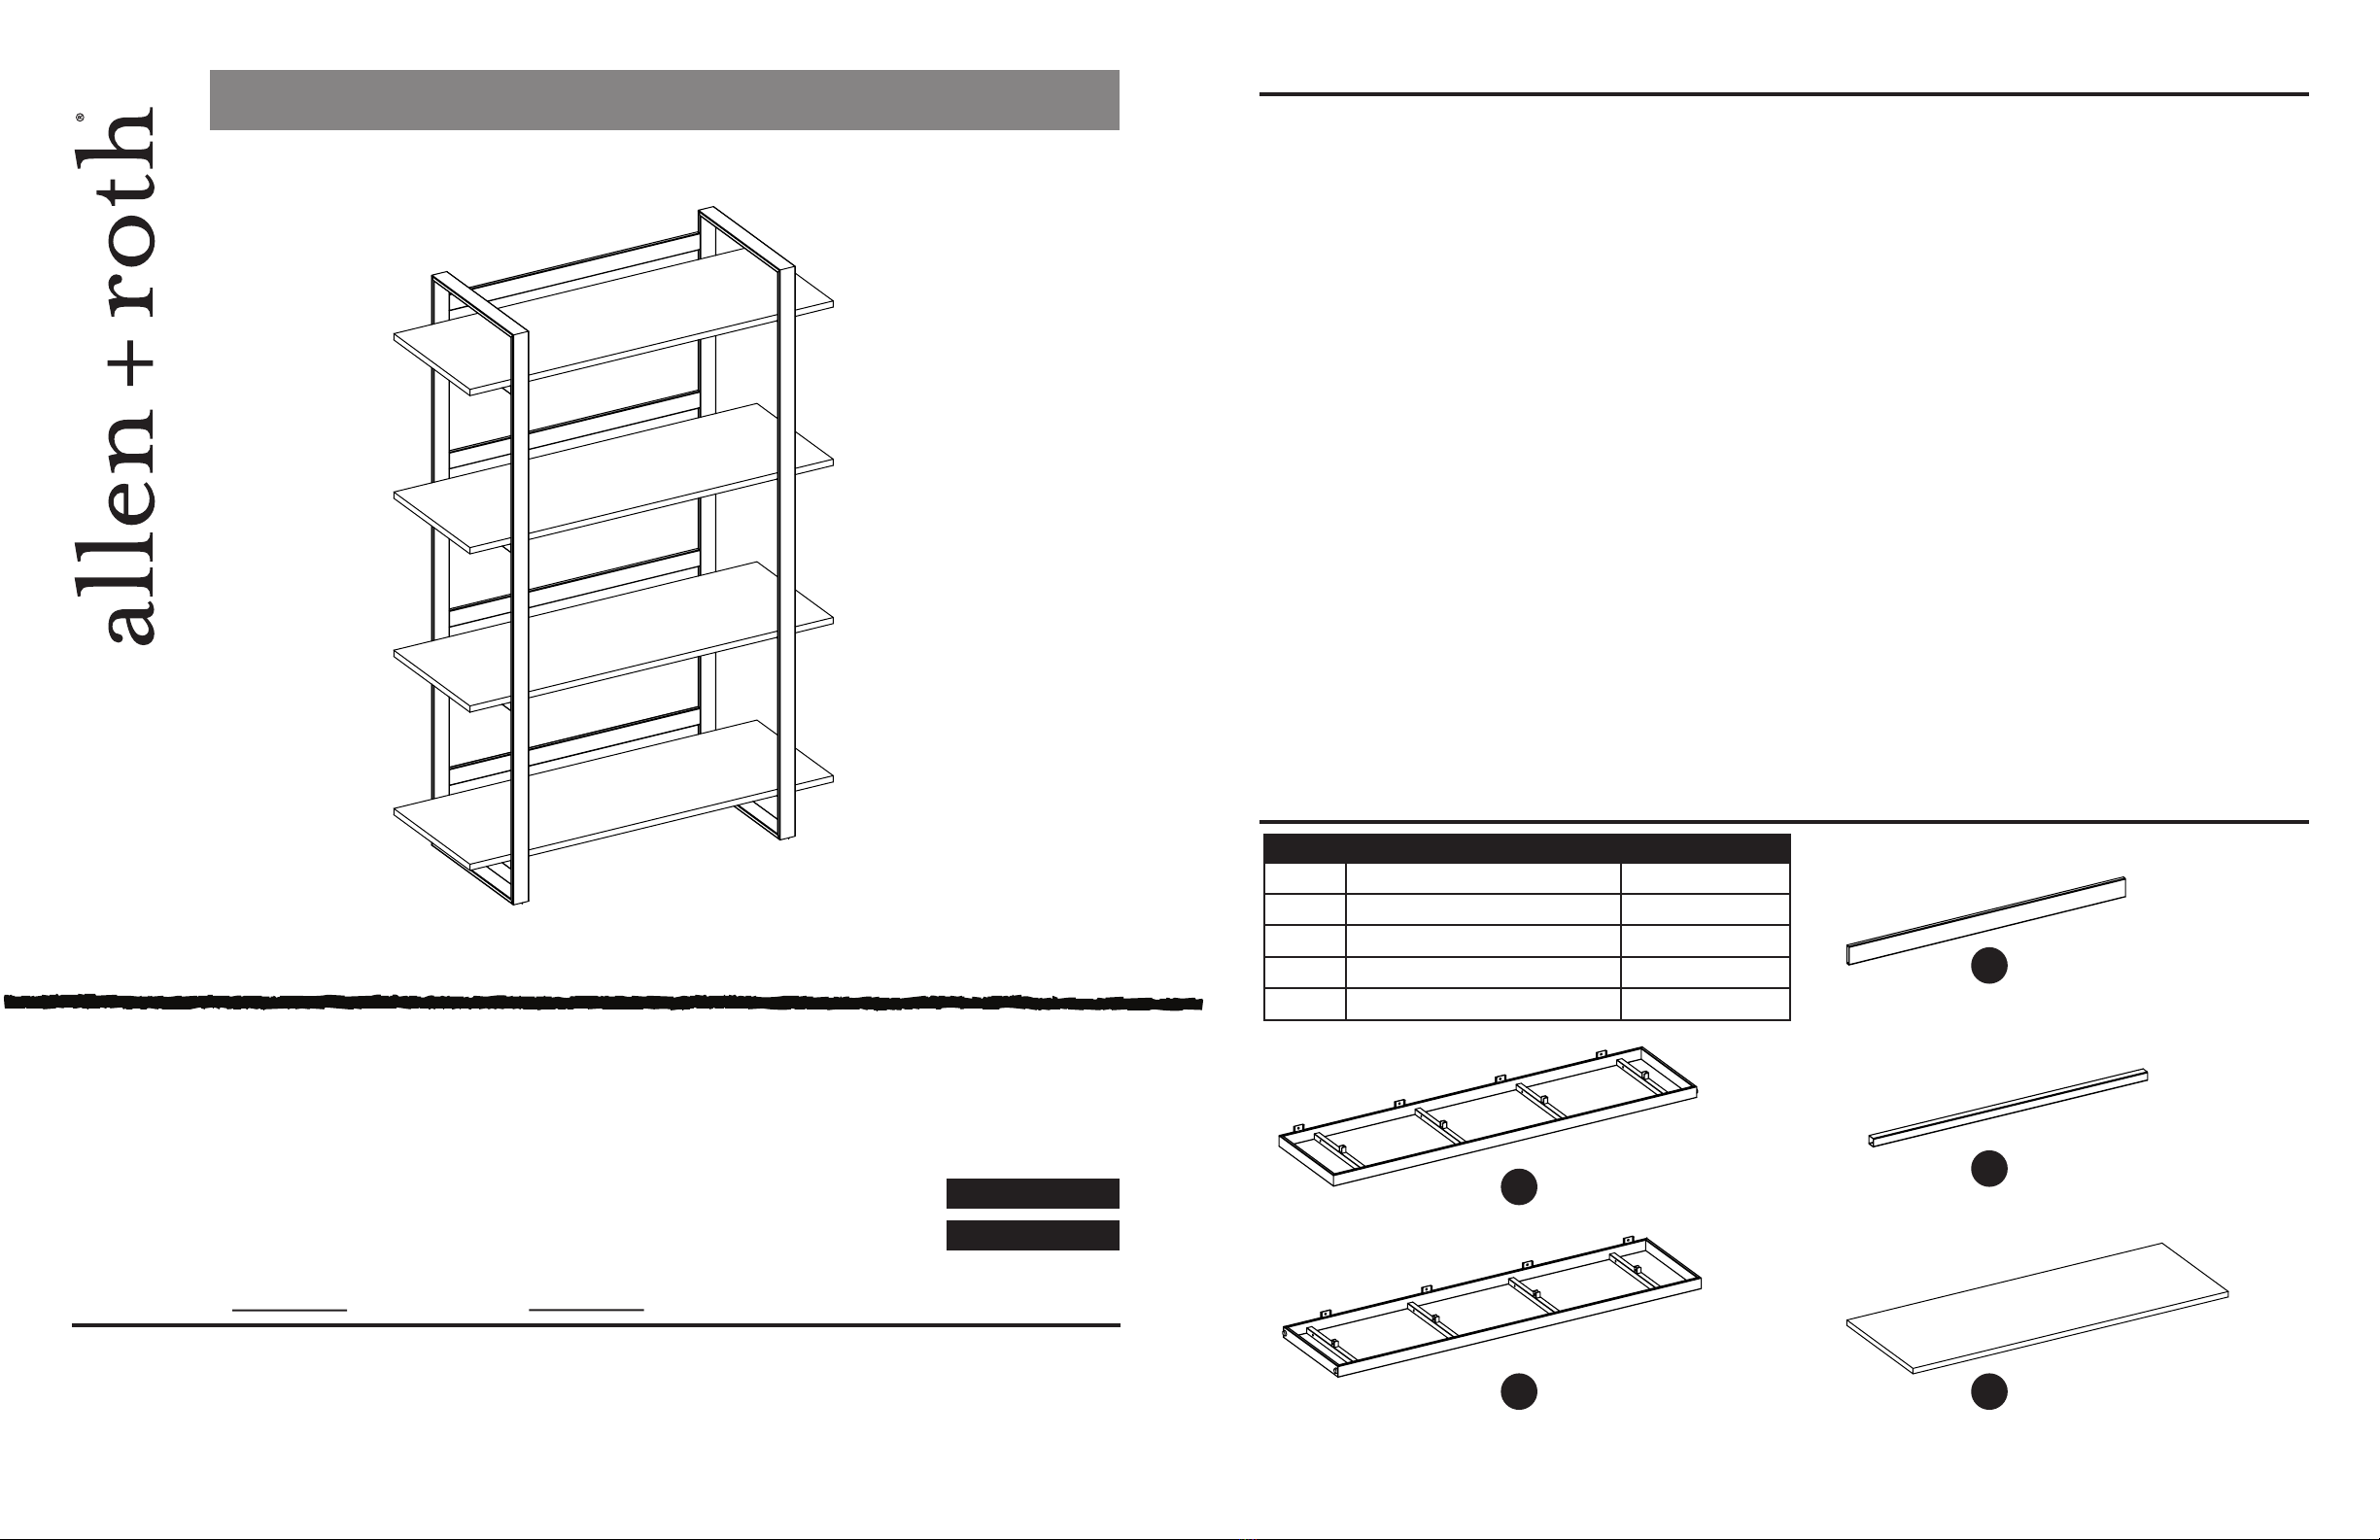
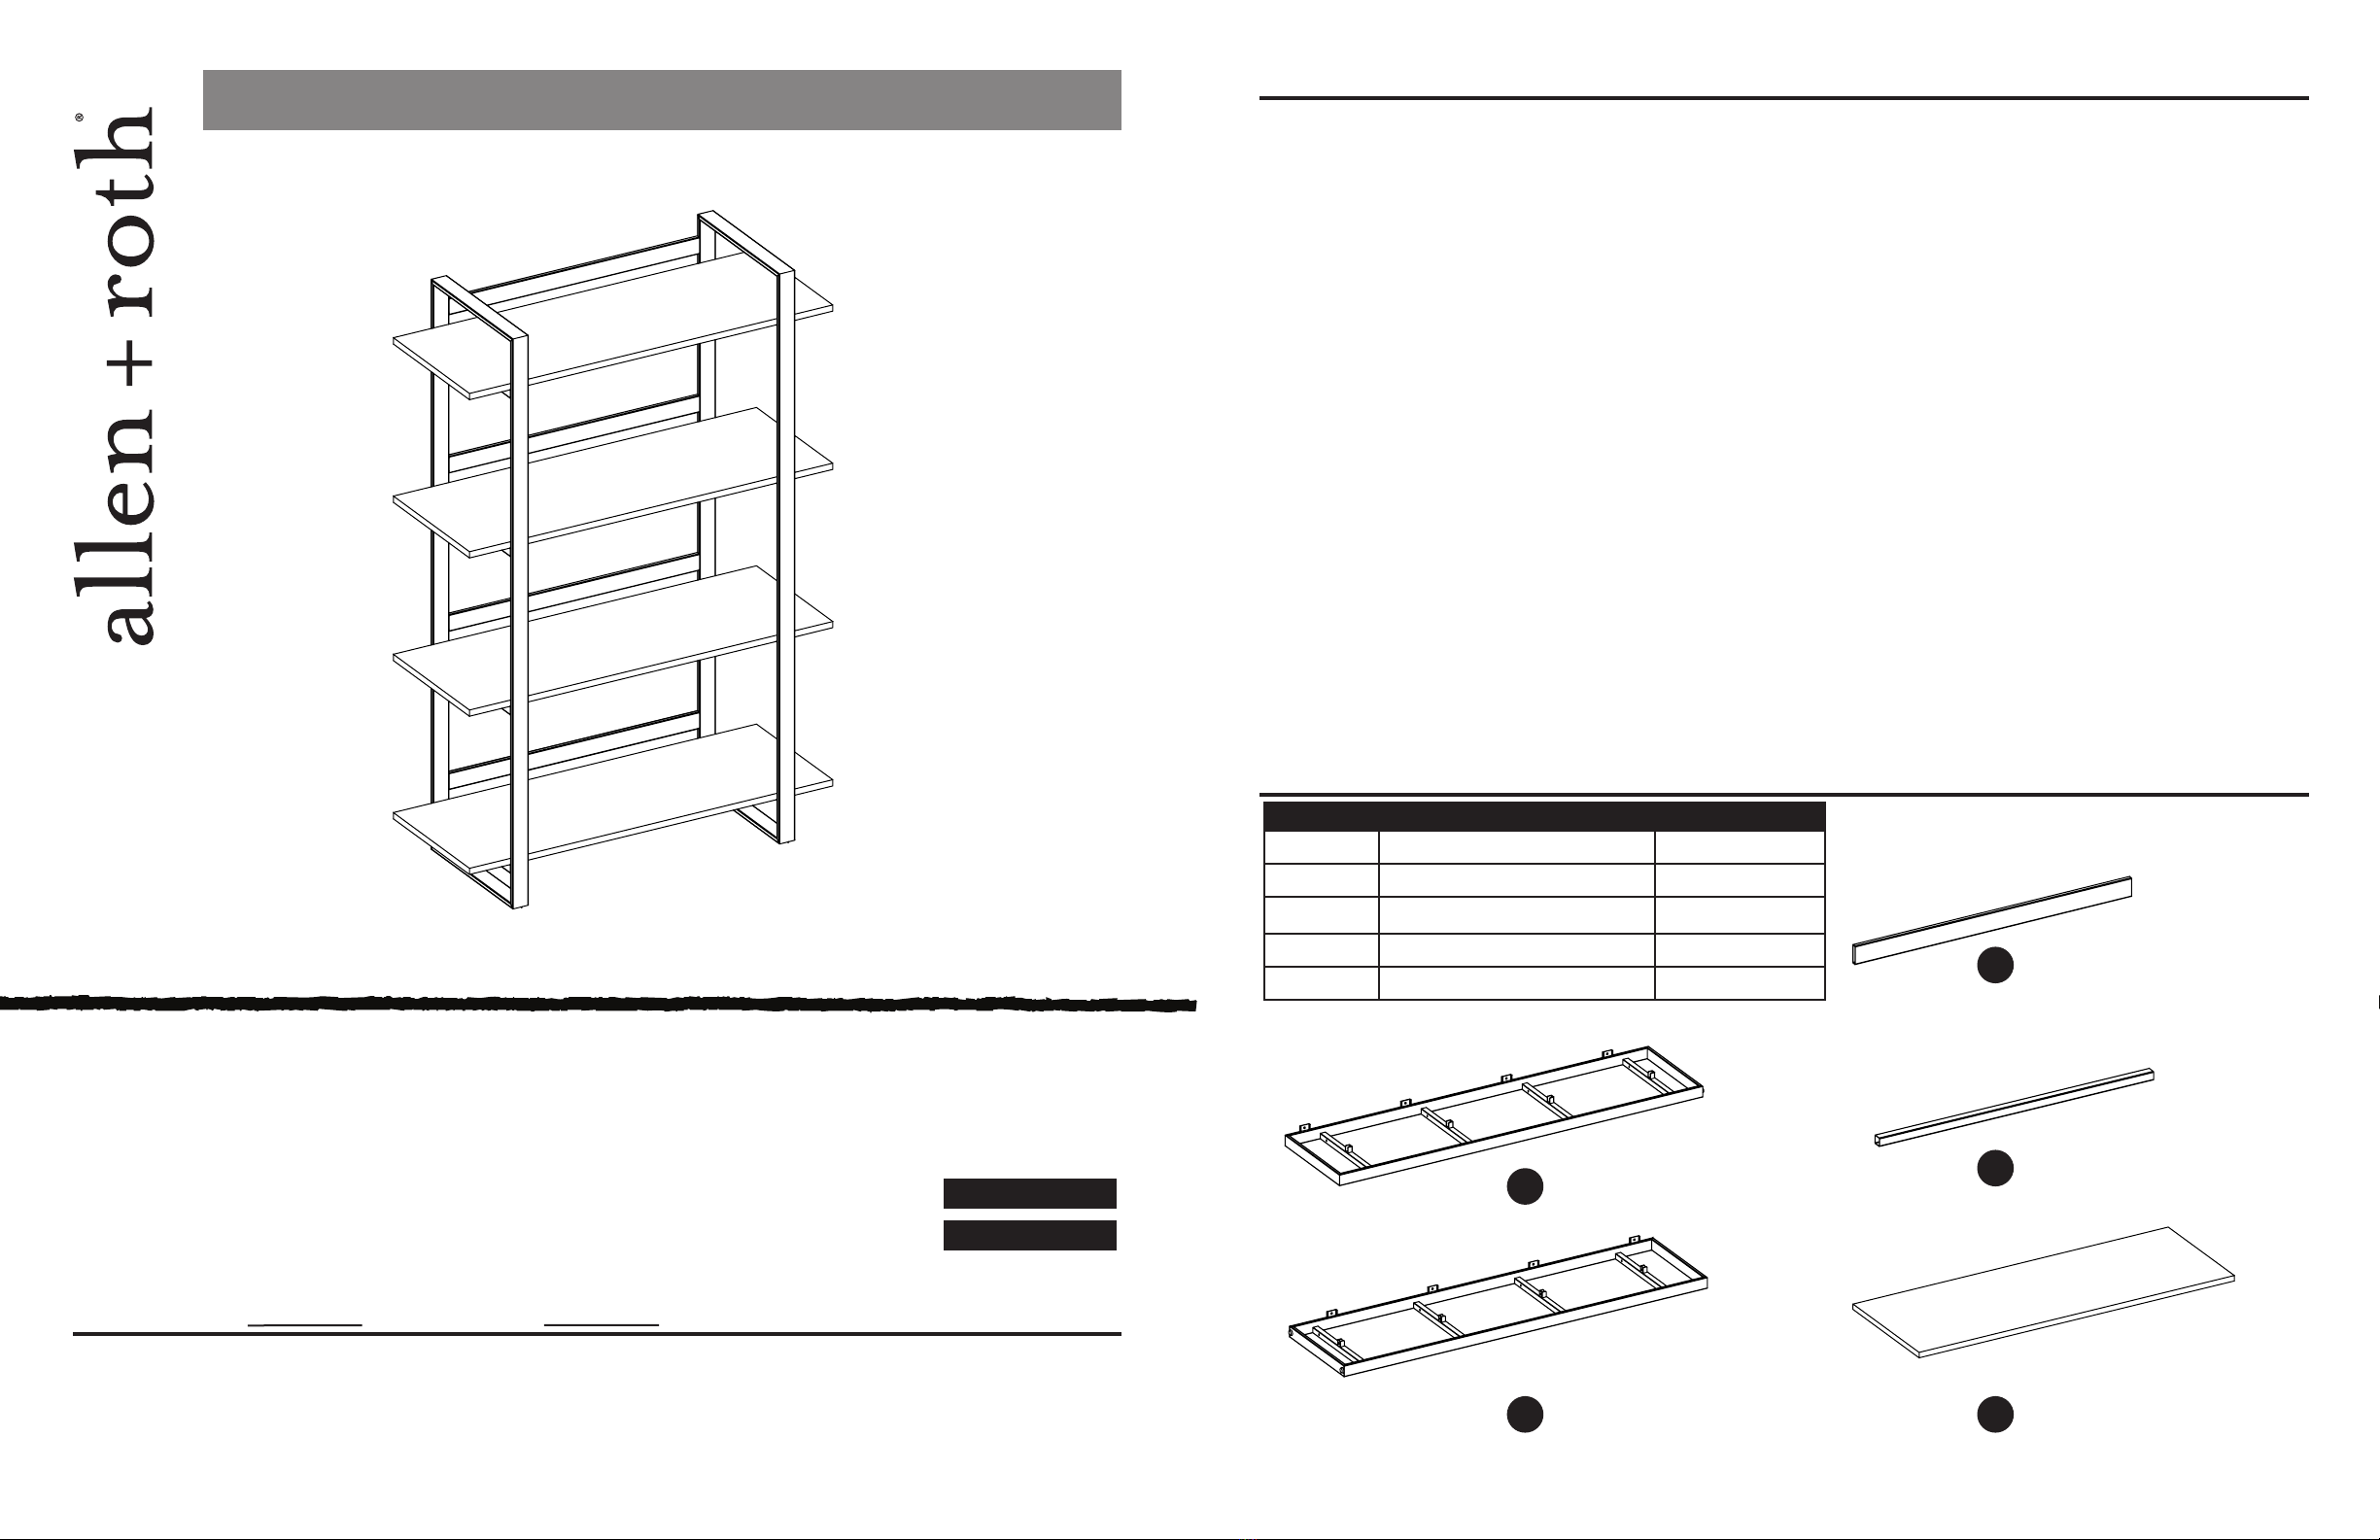
ASSEMBLY INSTRUCTIONS
Hardware Used
1
2
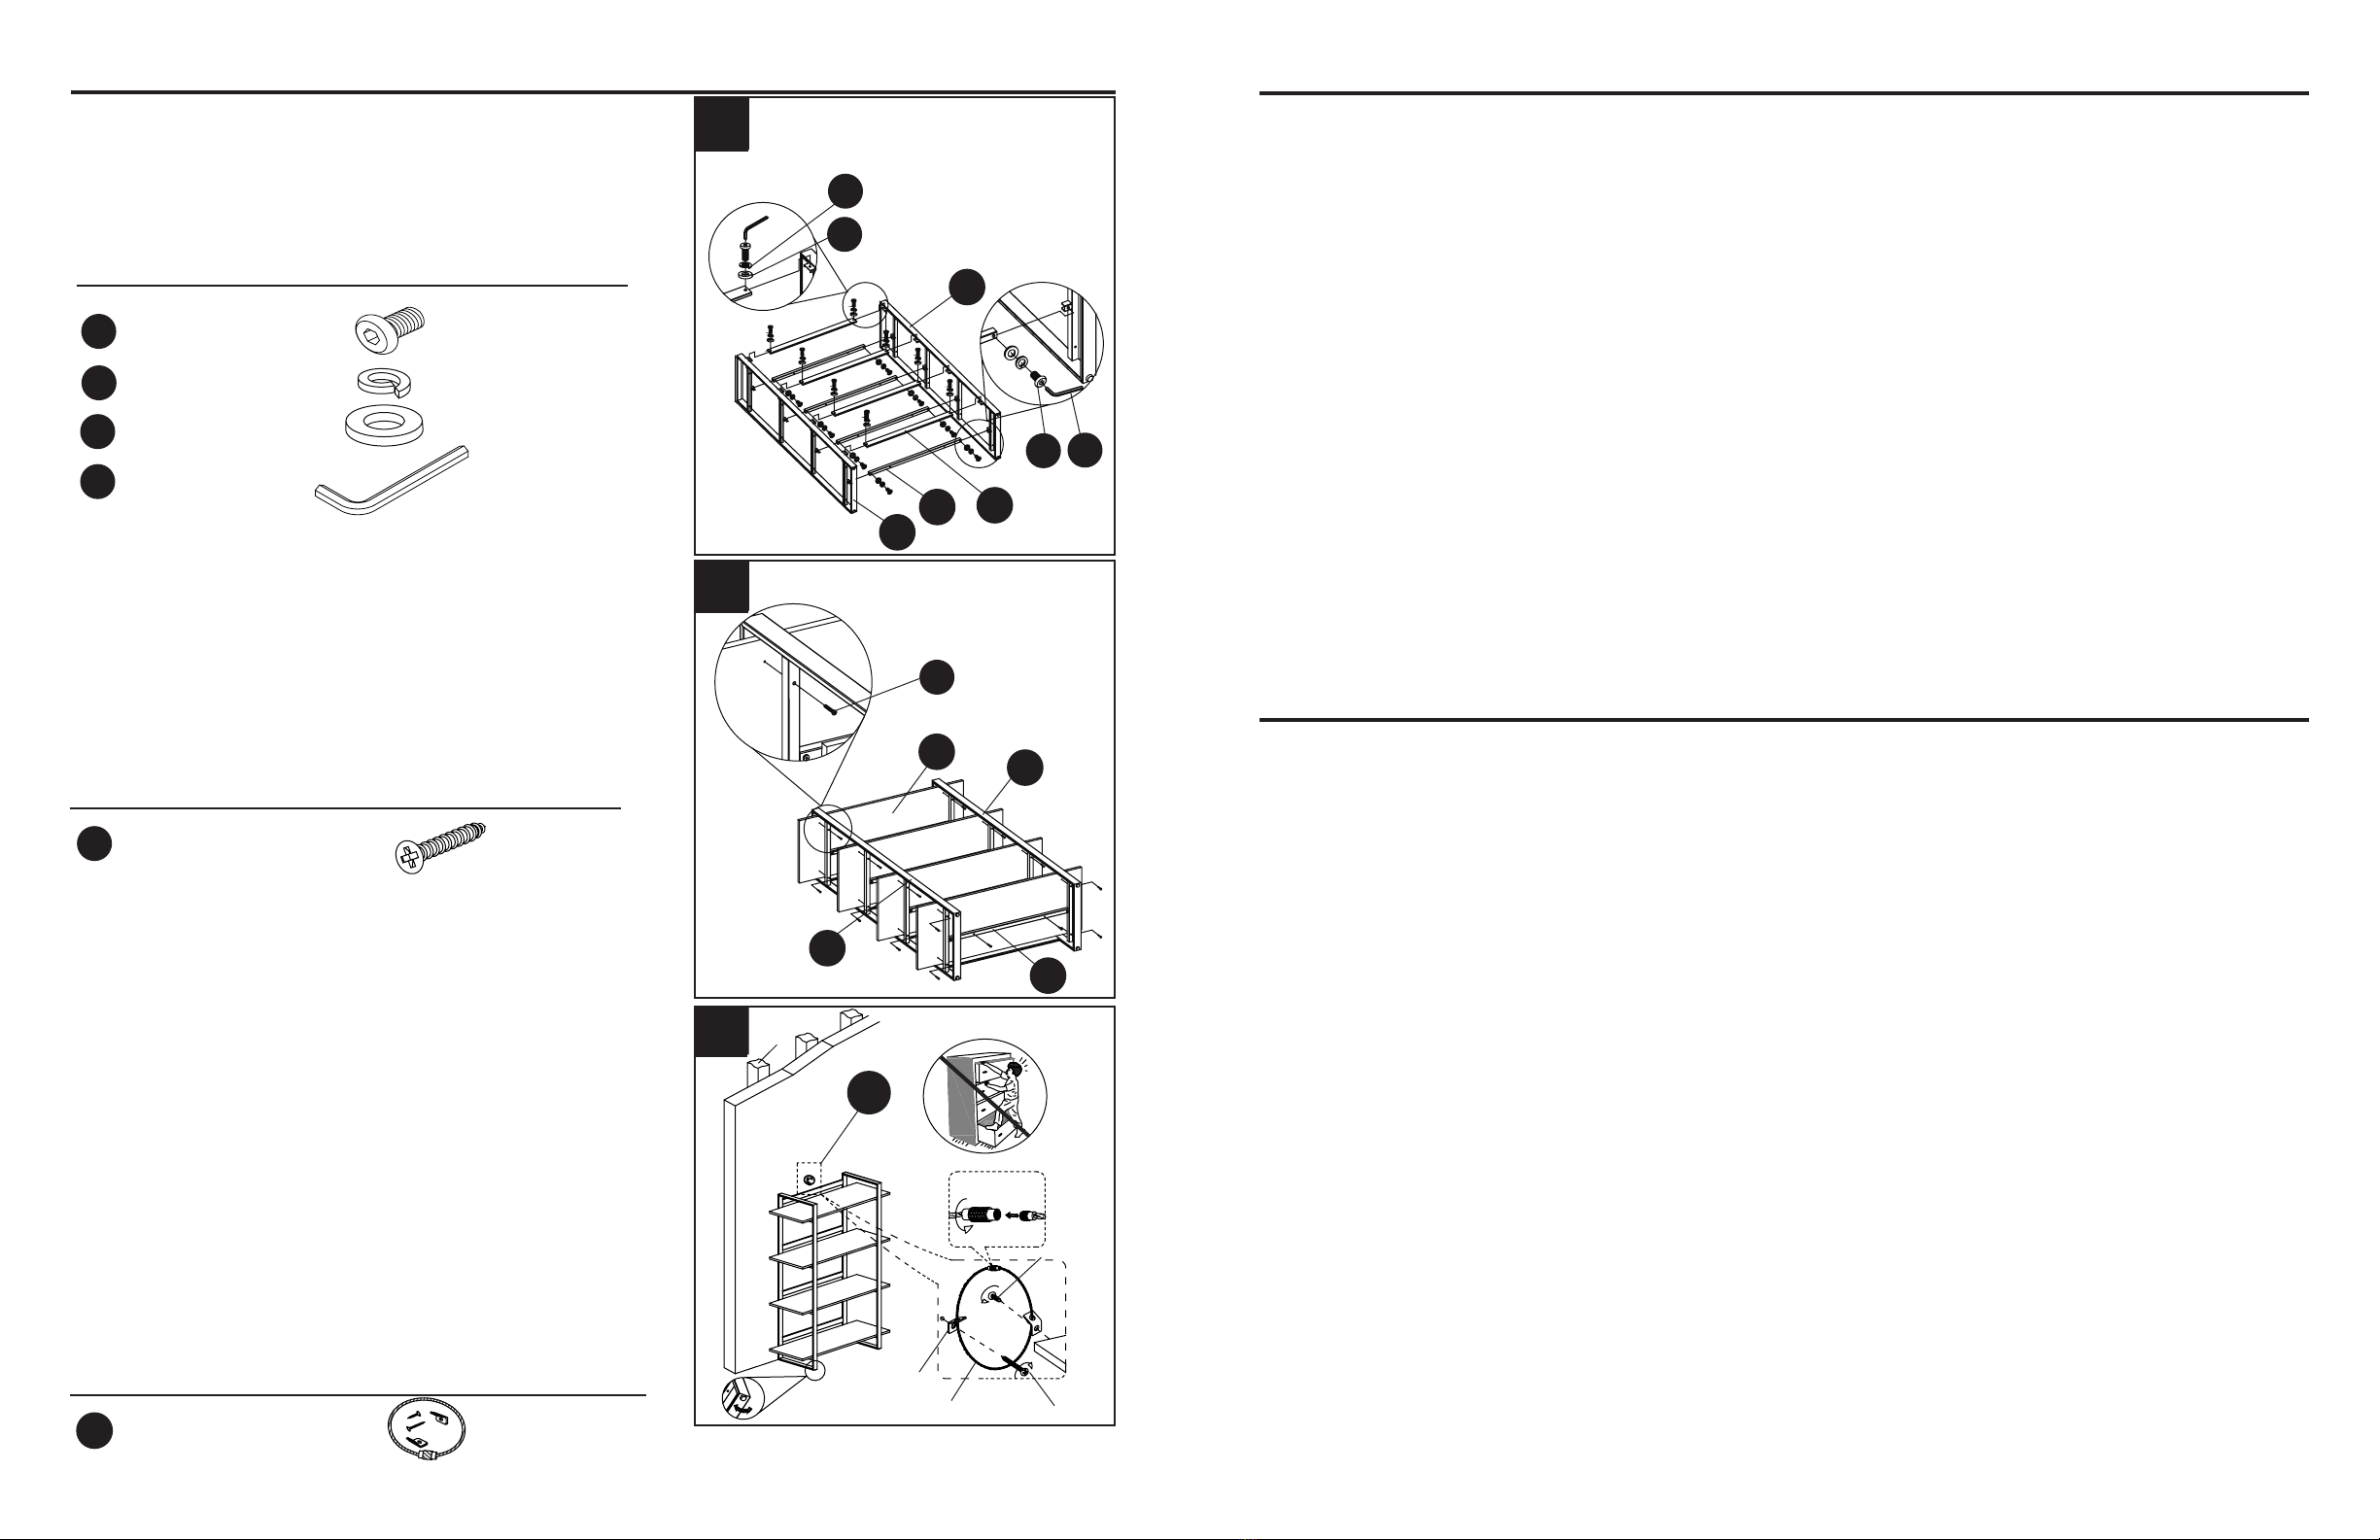
2. Attach the Panel Shelf (E) to the Left Side Frame (A)
and Right Side Frame (B) and Connect Beam (D), using the
M4 x 32mm Screw (BB).
3. NOTE:The tipping restraint hardware included is for
wooden stud wall construction. It must be attached to a
wall stud. Depending upon your wall construction, dier-
ent anchor hardware maybe required. Please contact your
local hardware store for assistance. Young children can be
seriously injured by tipping furniture. You must install the
tipping restraint hardware with the unit to prevent the unit
from tipping, causing any accidents or damage. The tipping
restraints are intended only as a deterrent, they are not a
substitute for proper adult supervision. The tipping restraints
are not earthquake restraints. If you wish to add the extra
security of earthquake restraints, they must be purchased
and installed separately.
3
Hardware Used
1. Attach the Back Crosser (C), Connect Beam (D) to the
Left Side Frame (A) and Right Side Frame (B), using the
1/4”x 12mm (AA), 1/4” Lock Washer (CC), 1/4” Flat Washer
(DD), tighten with Allen Wrench (GG).
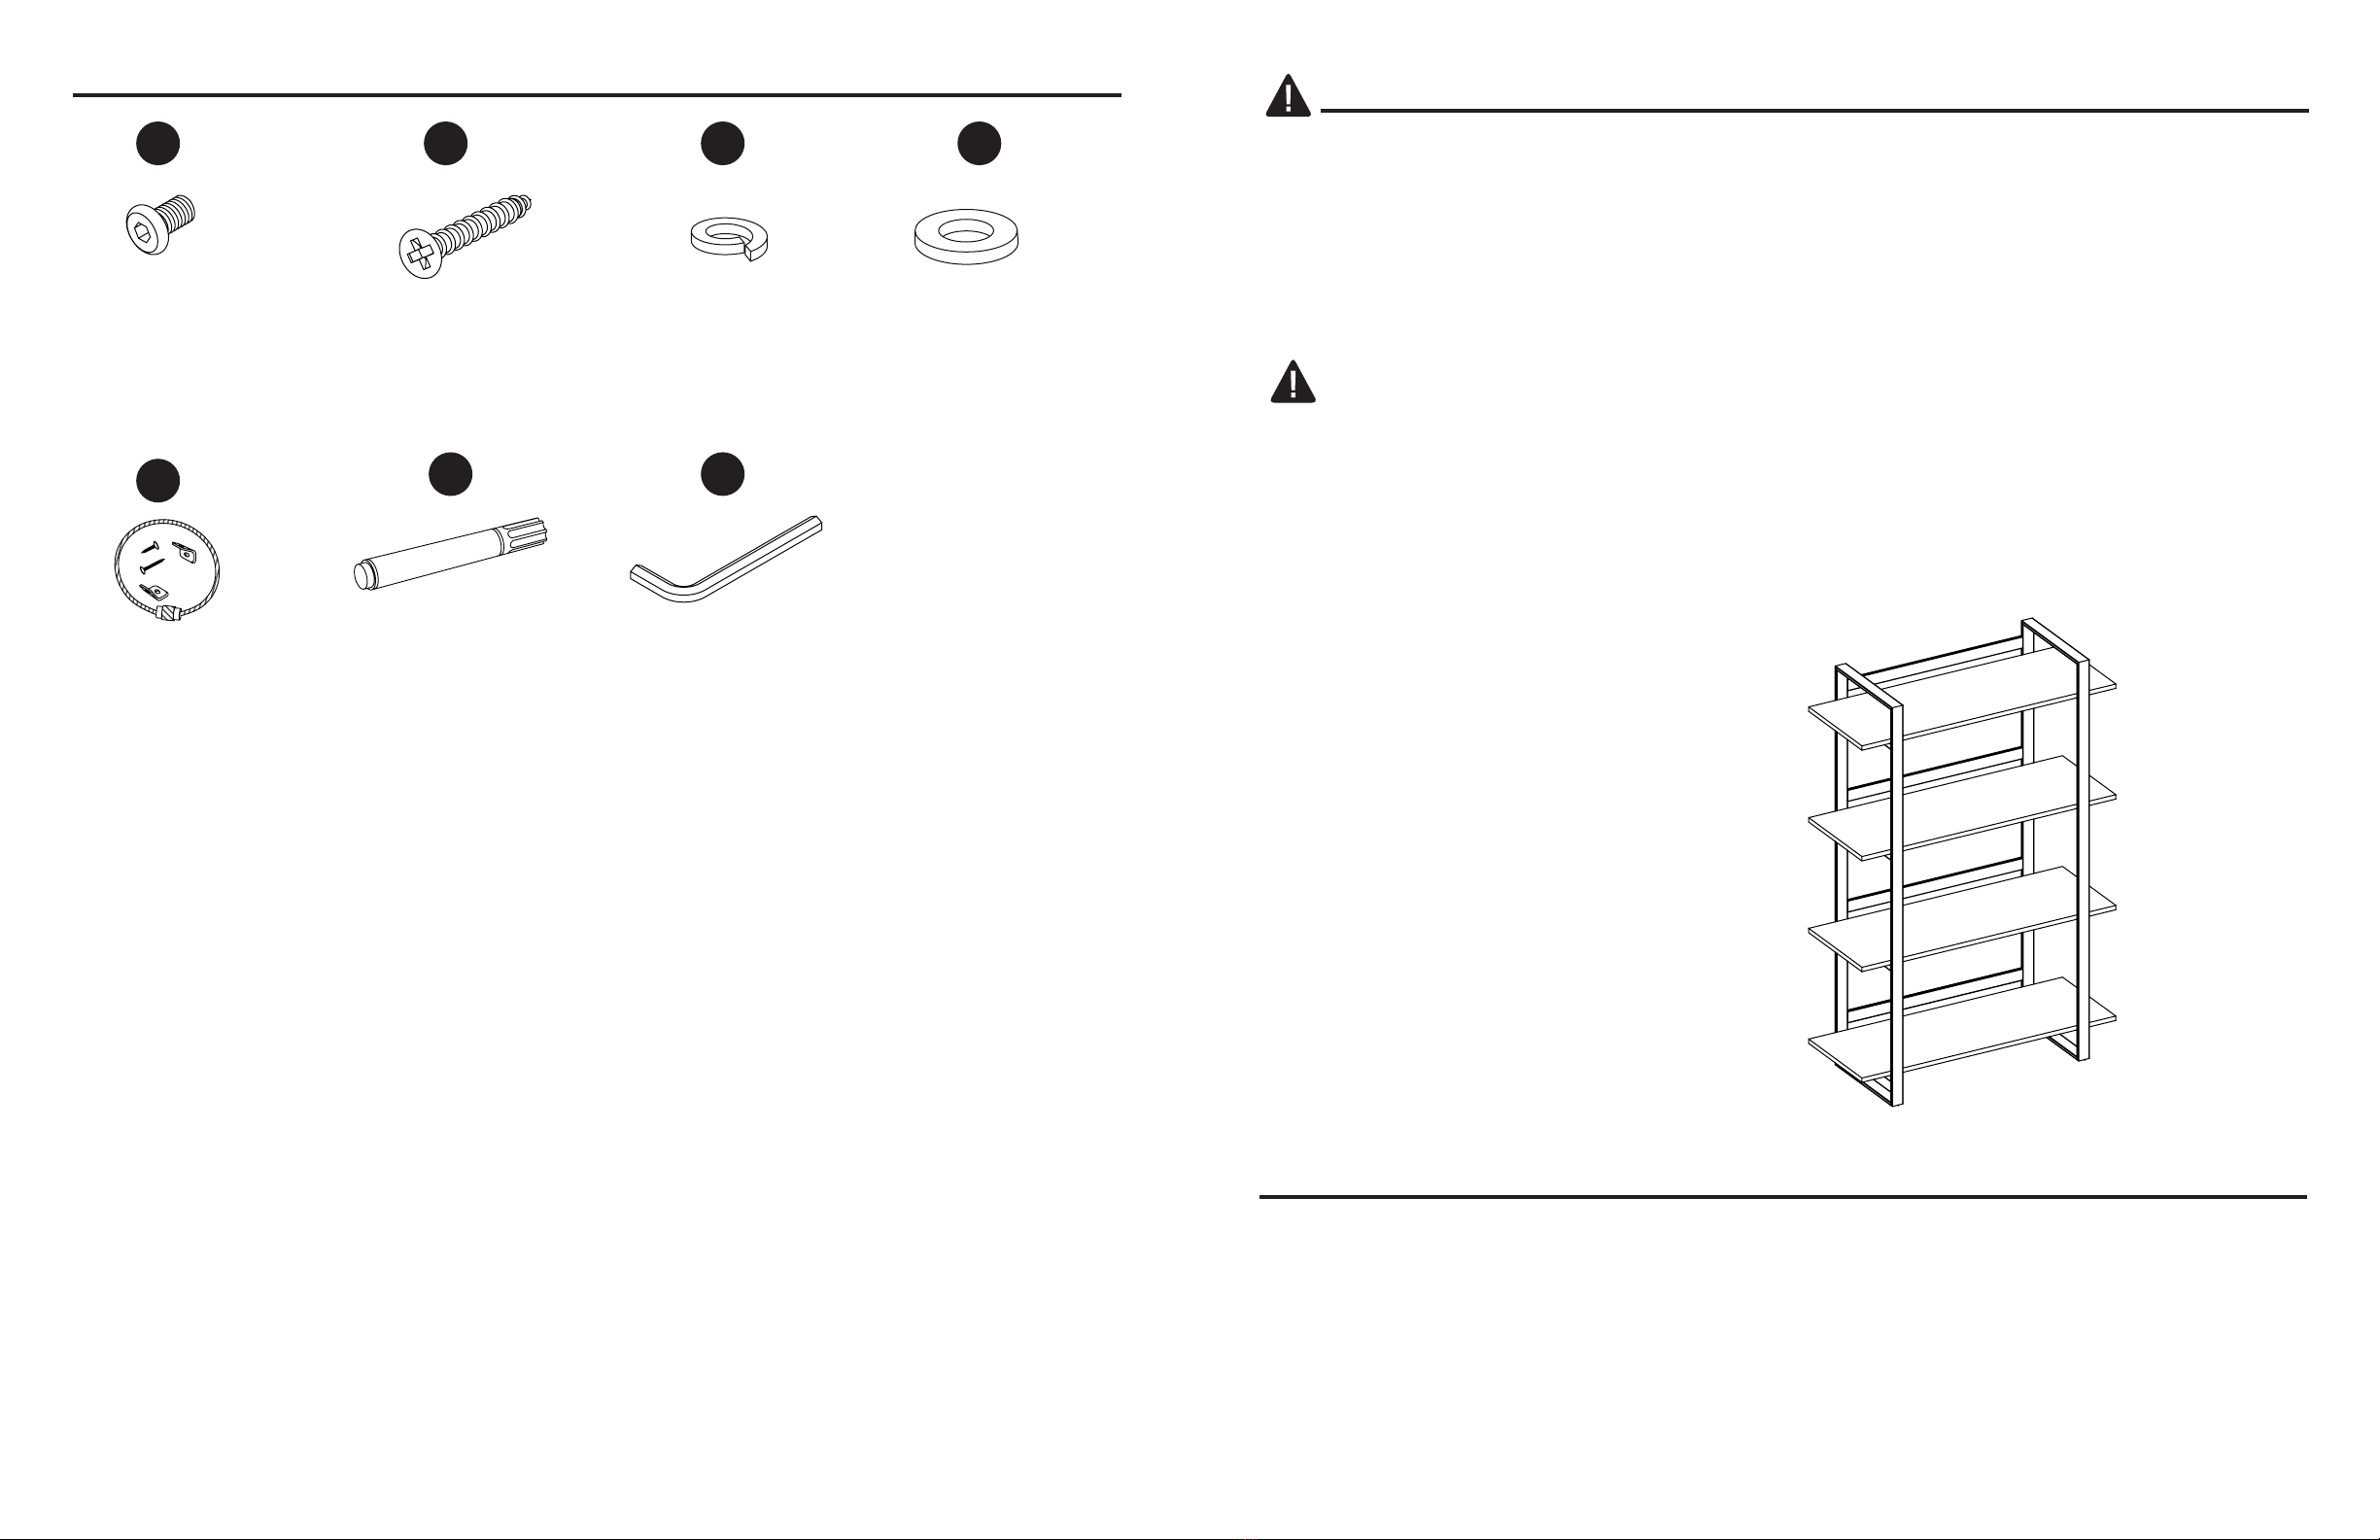
AA
CC
DD
GG Allen Wrench
1/4”x 12mm Bolt
1/4” Lock Washer
1/4” Flat Washer
x1
x16
x16
x16
A
A
B
E
D
D
C
B
AA GG
DD
BB
CC
BB M4 x 32mm Screw x 24
Hardware Used
EE Tipping Restraint
Hardware 1set
Wooden
stud
Wall
Connector
Wall Short screw
Metal bracket
Long screw
Steel cable
EE
CARE AND MAINTENANCE
• Use a soft, clean cloth that will not scratch the surface when dusting.
• Use of furniture polishes is not necessary. Should you choose to use polishes, test rst in an
inconspicuous area.
• Using solvents of any kind on your furniture may damage the nish.
• Never use water to clean your furniture as it may cause damage to the nish.
• Always use coasters under beverage glasses and owerpots.
• Liquid spills should be removed immediately. Using a soft clean cloth, blot the spill gently. Avoid
rubbing.
• Always use protective pads under hot dishes and plates. Heat can cause chemical changes that
may create spotting within the furniture nish.
• Stains or marks from crayons or ink markers will be dicult to remove.
• In the event that your furniture is stained or otherwise damaged during use, we recommend that
you call a professional to repair your furniture.
• Check bolts/nuts periodically and tighten them if necessary.
• Touch-up Pen (FF) has been provided to repair any small nicks or scratches that may occur
during assembly or shipping.
LIMITED LIFETIME WARRANTY
This product is warranted to the original purchaser. If there is a failure in this unit due to defects
in materials or workmanship, the manufacturer will repair or replace this item at our discretion
without charge. Warranty is void if product has been assembled incorrectly, misused, abused by
overloading, altered in any way or damaged due to accident. This warranty is not transferable and
does not cover chipping, aking, scratches, rust, dents, or other damages to the surfaces of this
product. Responsibility of the manufacturer is limited to repair or replacement of this product. The
manufacturer is not responsible for consequential, incidental, or other damages or losses resulting
from product failure.
This warranty is in lieu of all other expressed warranties. Some states do not allow the exclusion or
limitation of incidental or consequential damages, so the above limitation may not apply to you. This
warranty gives you specic legal rights and you may have other rights which vary from state to state.