manuals.online logo
Brands
  1. Home
  2. •
  3. Brands
  4. •
  5. Allmatic
  6. •
  7. Control Unit
  8. •
  9. Allmatic AS24 Safety guide

Allmatic AS24 Safety guide

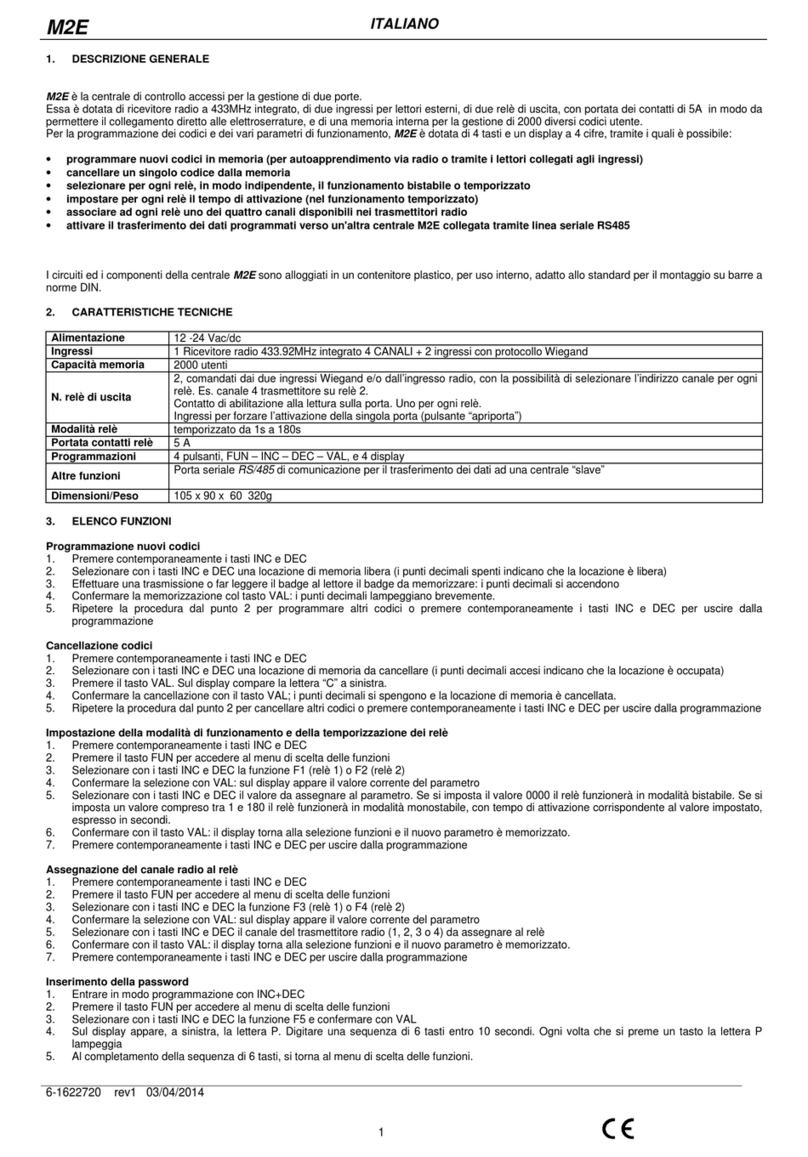
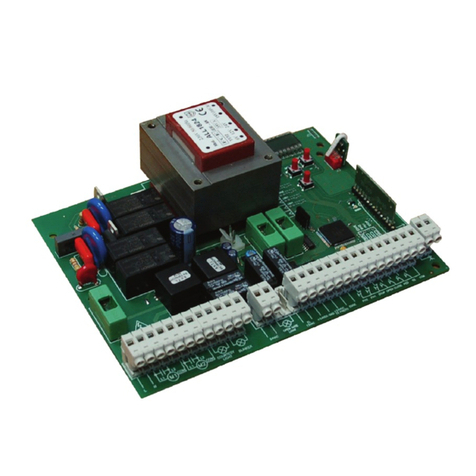
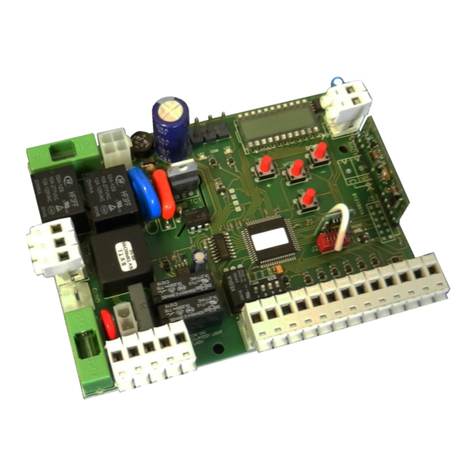
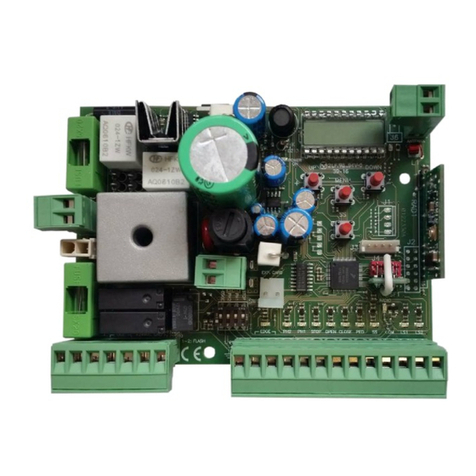
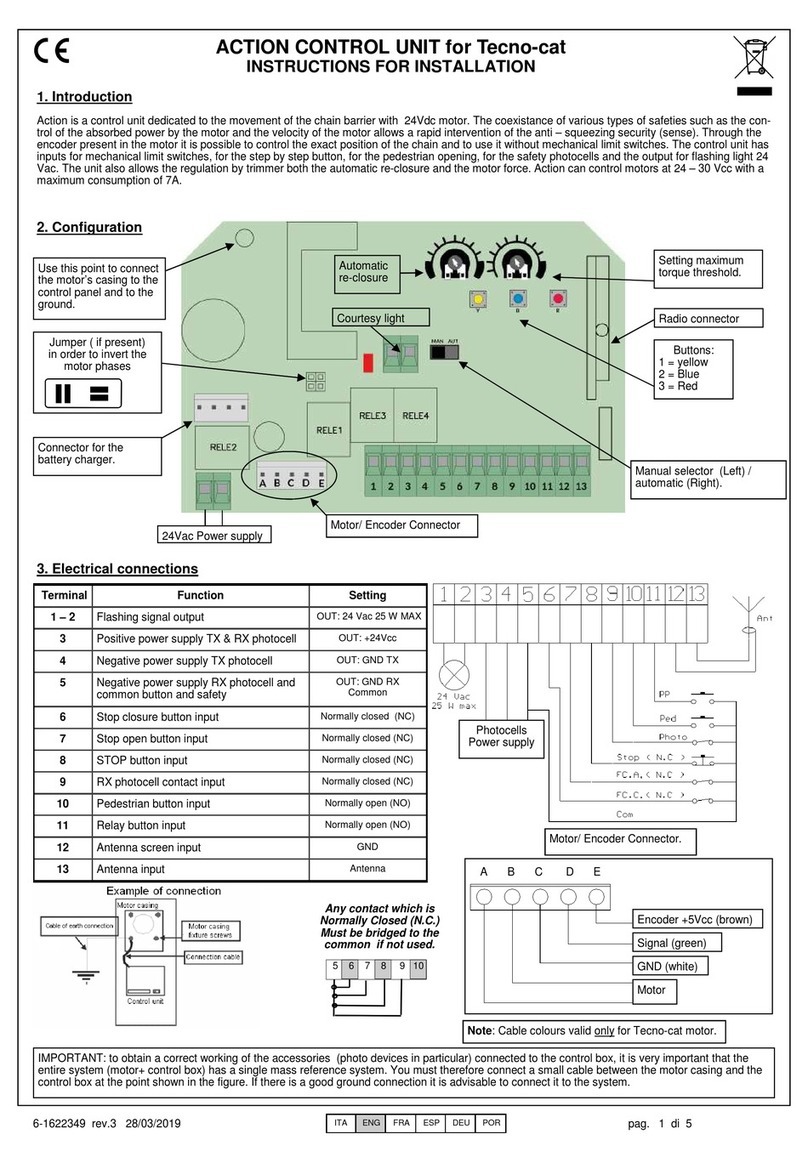
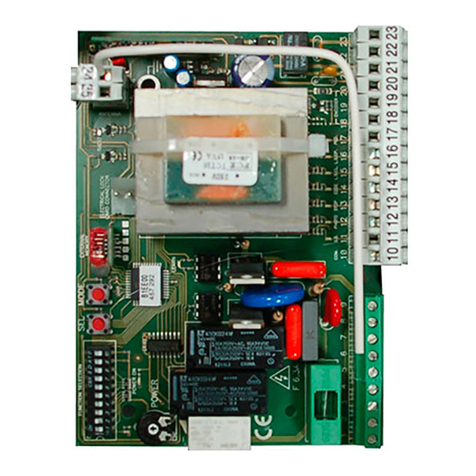
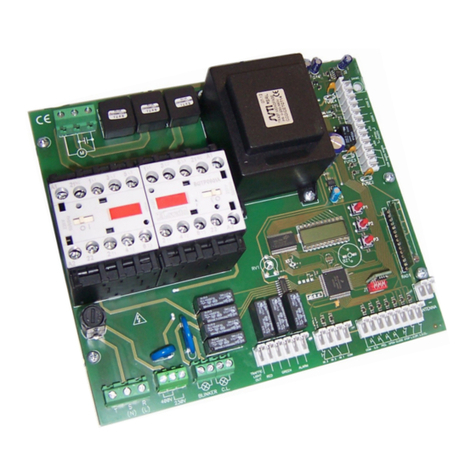
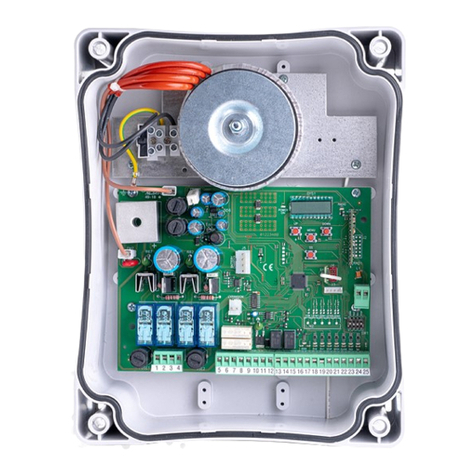
CONTROL UNIT AS24
Control unit for 1-2 motors 24Vdc
Manual for installation
Compatible from firmware version AS2405 - running velocity is modificable
ITA ENG FRA ESP DEU POR
6-1622372 rev.5 04/02/2016
Compatible from firmware version AS2405 - running velocity is modificable
Pag 2 di 10
The control unit AS24 is particularly indicated for the installation of 1 or 2 wing gates with motors with direct current 24V and a maximum absorption of
7A.The control unit allows a precise regulation of the thrust of the gates, of the velocity and sensitivity on slowing phase and of the velocity and sensitivity
on the running phase. The running velocity is adjustable between the 50% and the 100% of the maximum velocity of the motors and it is set at 60% as
default value. It is also possible to adjust the delay in closure of the second wing during the learning phase. The control unit can memorize up to 30
transmitters and up to 8000 transmitters with the external memory, with the step by step and pedestrian functions. It is supplied with inputs for interior and
exterior photocell, limit switch in opening and possibility to connect the buttons for step by step, pedestrian and stop. The outputs include a 24Vac flashing
light, the possibility to connect a 2°auxiliary radio channel (by using a molex receiver) and an expansion card with more functions.
The use of buffer batteries is expected where it would be necessary to assure the service in case of lack of power.
1. Introduction
2. Configuration
Fig.1
24 Vac
Any Normally Closed contact
(N.C.) must be bridged to the com-
mon if it is not used.
7 8 9 10 11 12
5 6
3. Electrical connections
CHOOSING MOTORS
For wing gates, connect the wing which beats to MOTOR 1 output, an electro-lock may be added. MOTOR 1 is always activated as first during opening
phase and as second in closing phase.
EARTH CONNECTION
In order to obtain correct operation of the accessories (photo devices in particular) connected to the control panel, it is very important that the entire
system (automation + motors + control panel) has a single mass reference. You must therefore connect the metallic automation structure, the motor
casing and the control panel to each other with the terminal earthed. For the connection on the control panel see figure 1.
Running
AMP.SENS
Automatic
RECLOSING
Slowdown
VELOCITY
Slowdown
AMP.SENS
FUNCTION SELECT
J1
Rosso Blu
WARNING: Before carrying out any activation and/or setting up, carefully read the following paragraphs which describe the programming and
the main setting up of the automation. During the programming, carefully follow the order and the instructions shown. Do not enter into the
working range of the system whilst it is moving or being programmed. Before carrying out any modification wait for the complete stop of the
system. Do not allow unauthorized and/or unqualified people to intervene or to enter into the system's working range.
For a correct functioning of the system, it is absolutely indispensable the use of mechanical stops in
opening and closing.
Connector
radio
module
Buttons
Led of signaling
Connectore for R2 card
(not supplied)
Use this point to
connect the
motor casing to
the control panel
and to earth.
Molex radio
module
Adjustment
trimmer
Dip switch
Modality of
functioning on
sense (see
paragraph 16) Fuse 10A
for motor 1 Fuse 10A
for motor 2
Fuse 2.5A for
blinker
Fig 2
Table of contents:
PP : Step by step button.
PED : Pedestrian button or clock input.
Stop: Stop.
Com : Common.
Foto INT: Inside photocell .
Foto EST: Outside photocell.
F.C.1: Limit switch 1.
F.C.2: Limit switch 2.
Ant.: Antenna
GND ANT.: Braiding antenna
4W MAX
(170mA)
Examples of maximum load for Vdc accessories
(4W):
•
3 couples of FTALL photocells.
•
2 couples of FTALL photocells and 1 R.CO.O
receiver (safety edge system).
•
2 couples of FTALL photocells and 1 B.RO X40
DISPLAY receiver.
•
1 couples of FTALL photocells and 1 B.RO X40
DISPLAY receiver and 1 R.CO.O receiver.
ITA ENG FRA ESP DEU POR
6-1622372 rev.5 04/02/2016
Compatible from firmware version AS2405 - running velocity is modificable
Pag 3 di 10
Before connecting the control panel to the power supply, check all wirings which have been carried out. In particular check that there are no
damaged wires, short-circuits between wires and that all accessories are connected to the terminal board in the points shown on the diagram on
the previous page. Once the power supply is connected check that:
1. The POWER LED is constantly lit.
2. The normally closed inputs must have the corresponding LED lit. The LED must turn off when the input contact is opened.
3. Check that the radio module is inserted and working.
4. Set the dipswitch 1 on ON
5. Check the motor connection by following the procedure as described below
4. Preliminary checks
Press and keep press the
RED button (P1): Wing 1 (the
beating one) must open.
Dipswitch position
If wing 1 closes, stop everything and invert the
motor 1 wires (terminals 18 and 19).
Release the RED button. Press and
keep pressed the BLUE one (P2).
Wing 2 should open.
SI
If wing 2 closes, stop everything and invert the
motor 2 wires (terminals 20 and 21)
Release the BLUE button. Press and keep pressed
again the BLUE one (P2). Wing 2 should close. Bring
it in close position then release the button.
Press and keep pressed again the
RED button (P1). Wing 1 should
close. Bring it in close position then
release the button.
Check the wirings
and repeat the test.
Check the wirings
and repeat the test.
If wing 2 moves, stop everything and invert motor 1
wires with motor 2 wires.
If wing 1 does not move, check the wiring of motor
1 (terminals 18 and 19) and repeat the test.
If wing 2 does not move, check the wiring of motor
2 (terminals 20 and 21) and repeat the test.
SI
SI
NO
NO
NO
NO
PLEASE NOTE: During these movements the photocells, the radio and the buttons are NOT active.
SI
Memorize at least one 2-key remote control. In order to program the wing stroke use a 2-key remote control. During normal operation however, (i.e.
not during programming) the 1st memorized key carries out the step by step function (opening and closing of the gate), the 2
nd
key carries out the
pedestrian opening (complete opening of the 1
st
wing). The 3
rd
key operates the courtesy light.
5. Remote control learning
Press and release the RED
button: The flashing signal's
LED is permanently lit .
Press the remote control's 1st key. The flashing
signal emits 2 flashes .
The remote control's 1st key is now memorized.
Press and release the RED button: The flashing
signal's LED is permanently lit.
If flashing signal has emitted 1 flash, the pressed key had
already been memorized and it is possible to continue with the
procedure. Otherwise, check that the remote control is working,
that it has the same decoding settings of the control panel and
that the radio module is correctly inserted. Then repeat the test
Press the remote control's 2nd key. The flashing
signal emits 1 flash
The 2 buttons are now memorized and the
procedure ends. Repeat the procedure from
point « A » if you want to learn the button for the
courtesy light control.
Check that the dipswitch 1 and
2 are set OFF. repeat the test
Check that the remote control works, that it has the same
decoding set in the control panel and that the radio mo-
dule is inserted. Then repeat the test .
SI
SI
SI
SI
NO
NO
NO
A
Dipswitch position
Check that the dipswitch 1 and
2 are set OFF. repeat the test
NO
Dipswitch position
ITA ENG FRA ESP DEU POR
6-1622372 rev.5 04/02/2016
Compatible from firmware version AS2405 - running velocity is modificable
Pag 4 di 10
6. Setting the wing stroke
This procedure must ONLY be carried out by the installer and ONLY during the setting up of the system. If you do not utilize any transmitter, it is
necessary to use the Red key (P1) and BLUE (P2) present on the card or with P.P and PED buttons. Then you must carry out the following procedure:
1. Close the door, see point 4, to move the wings manually.
2. Select if the control unit must work one wing (DIP 8 on ON) or 2 wings (DIP 8 on OFF).
3. Put the DIP 1 on OFF.
4. Put the DIP 2 on ON. The flashing light blinks slowly.
The flashing light starts
to blink lightly
WARNING: during the learning of the strokes, the phase shift of the wings is also set.
Dipswitch position
2 wings door 1 wing door
1
2
Press and release the 1° memorized key or
press the RED key (P1) The wing 1 begins
to open.
3
Once the wing 1 reaches the desired phase
shit, press and release the 2°memorized key or
the BLUE key (P2)
The wing 2 begins
to open.
If you are using a single wing gate, pass to the point 4
Setting of the wings number
4
Once the gate reaches the position of
completely open it re – closes automatically.The gate re – closes.
5
Dipswitch position
The learning is ended.
The control unit is ready to work regularly.
Once the gate reaches the position of
completely closed the flashing light emits 4
blinking
The learning has had a successful conclusion.
6
Setting of the wings stroke
7. Adjusting threshold of the ampere sensor operating
This procedure must ONLY be carried out by the installer and ONLY during the put in function of the system. For a correct programming, before
carrying out the modifications, bring always back the door to the totally closed position.
RUNNING
AMP.SENS
With the wing in movement check,
through a dynamometer, the pushing
force at the edge of the wing.
The edge of the ampere sense
is too low.
It is possible to turn the RUNNING AMP.
SENSE trimmer in clockwise sense to
increase the threshold of the ampere
sensor.
It is possible to turn the RUNNING
AMP.SENS. trimmer in anti – clockwise
sense to lower the threshold of the
ampere sensor.
The edge of the ampere sensor
is too high.
Repeat the measure
of the torque
RUNNING
AMP.SENS
Repeat the measure
of the torque
ITA ENG FRA ESP DEU POR
6-1622372 rev.5 04/02/2016
Compatible from firmware version AS2405 - running velocity is modificable
Pag 5 di 10
9. Adjusting of the motors running velocity
This procedure must ONLY be carried out by the installer and ONLY during the put in function of the system. For a correct programming, before
carrying out any modification, bring always back the door to the totally closed position.
SLOW.DOWN.
VELOCITY
With the gate in movement,
check the running velocity.
It is possible to turn the SLOW DOWN VE-
LOCITY trimmer in clockwise sense to in-
crease the velocity of the motors.
It is possible to turn the SLOW DOWN
VELOCITY trimmer in anti clockwise sense to
lower the velocity.
The velocity is too high SLOW.DOWN.
VELOCITY
The velocity is too low
WARNING: it is indispensable to carry out, after adjusting the desired running velocity, a new programming
of the strokes (see paragraph 6). Check also that the adjusting thresholds of the ampere sensor are still
suitable (see paragraphs 7 and 8).
Keep pressed
BLUE key (P2)
Keep pressed
BLUE key (P2)
Press BLUE key (P2) and keep
it pressed.
The flashing switch on.
1
2
Release BLUE key (P2).
The flashing switch off.
The new velocity is set.
3
Set the velocity during the
slowing down mode. Follow
the procedure of the
paragraph 10.
4
WARNING: in case of total deletion of the memory
(see paragraph 17), the running velocity will be set at its
default value, equal to 60%.
8. Adjusting threshold of the ampere sensor in slowing down
This procedure must ONLY be carried out by the installer and ONLY during the put in function of the system. For a correct programming, before
carrying out any modification, bring always back the door to the totally closed position.
SLOW.DOWN.
AMP.SENS
SLOW.DOWN.
AMP.SENS
With the door in phase of slowing down
check, through a dynamometer, the pushing
force at the edge of the wing.
The edge of the ampere sense
is too low
It is possible to turn the SLOW.DOWN.SENS. in
clockwise sense to increase the ampere sense
threshold.
It is possible to turn the SLOW.DOWN.SENS.
trimmer in anti – clockwise sense to lower the
threshold of the ampere sensor.
The edge of the ampere sensor
is too high
Repeat the measure
of the torque
Repeat the measure
of the torque
ITA ENG FRA ESP DEU POR
6-1622372 rev.5 04/02/2016
Compatible from firmware version AS2405 - running velocity is modificable
Pag 6 di 10
10. Adjusting of the motors velocity in slowing down
This procedure must ONLY be carried out by the installer and ONLY during the put in function of the system. For a correct programming, before
carrying out any modification, bring always back the door to the totally closed position. SLOW.DOWN.
VELOCITY
With the door in movement check
the velocity of the door in slowing
down phase.
It is possible to turn the SLOW DOWN
VELOCITY trimmer in clockwise sense to
increase the velocity of the motors.
It is possible to turn the SLOW DOWN
VELOCITY trimmer in anti clockwise sense to
lower the velocity.
The velocity is too high SLOW.DOWN.
VELOCITY
The velocity is too low
11. Adjusting the automatic reclosure time
This procedure must ONLY be carried out by the installer and ONLY during the setting up of the system. For a correct programming, before any
modification, bring always the gate back to the totally closed position.
With gate closed give a step by
step command and wait for
complete opening.
The Automatic re-closure
time is too short
Turn the trimmer A. RE-CLOSURE TIME in clockwise sense. In this
way the automatic reclosure time increases.
The Automatic re-closure
time is too long
Turn the trimmer A. RE-CLOSURE TIME in anti-clockwise sense. In
this way the automatic reclosure time decreases.
AUTOMATIC
RECLOSING
AUTOMATIC
RECLOSING
Turn the trimmer A. RE-CLOSURE TIME completely in clockwise
sense. In this way the automatic reclosure is disabled.
AUTOMATIC
RECLOSING
AUTOMATIC
RECLOSING
Turn the trimmer AUTOMATIC RECLOSING completely in anti-clockwise
sense to enable the photocells automatic reclosing. If the photocells
beam is not interrupted, the control unit re-closes itself after 2 min.
WARNING: it is indispensable to carry out, after adjusting the desired velocity in slowing down, a new programming of the strokes in
the case in which the slowing down phase is personalized.
ITA ENG FRA ESP DEU POR
6-1622372 rev.5 04/02/2016
Compatible from firmware version AS2405 - running velocity is modificable
Pag 7 di 10
12. Personalization of pedestrian opening
This procedure must ONLY be carried out by the installer and ONLY during the put in function of the system. For a correct programming, before
carrying out any modification, bring always back the door to the totally close position. If not personalized, pedestrian opening corresponds to the
total opening of first wing. In order to personalize the pedestrian opening proceed as follows:
The flashing light starts
to blink lightly
Dipswitch position
1
2
Press and release the 1°memorized key or
press the RED key (P1) The wing 1 starts to open.
3
When the wing gets the desired position, press
and release again on the 1°memorized key or
the RED key (P1).
The wing stops and after a few seconds
the wing automatically closes.
4
Once the wing is closed, the flashing light
emits 4 blinking. The programming has had a successful conclusion.
5
Dipswitch position
The learning has ended
The control unit is ready to work regularly
13. Personalization of the slowing down phase
This procedure must ONLY be carried out by the installer and ONLY during the put in function of the system. For a correct programming, before
carrying out any modification, bring always back the door to the totally closed position. During the learning phase, it is possible to decide where the
wing must begin the slowing down phase. In case of different slowing down between the 2 wings, make sure that the delay of the second wing is
enough to grant the correct functioning of the automation.
The flashing light starts
to blink lightly
Dipswitch position
1
2
Press and release the 1°memorized
key or press the RED key (P1) The wing 1 begins
to open.
3
Once the wing 1 reaches the desired phase shit, press the 2°
memorized key or the BLUE key (P2) The wing 2 begins
to open.
If you are using 1 wing gate, pass to the point 4
6
The gate re – closes.
4
Dipswitch position
The learning is ended.
The control unit is ready to work regularly.
Once the gate reaches the position of completely closed the
flashing light emits 4 blinking
The learning has had a successful conclusion.
9
10
Once the wing 1 reaches the starting position of slowing
down, press and release again the 1° memorized key or the
RED key (P1). The wing 1 pass to the slowing down in opening.
5
Once the wing 2 reaches the starting position of slowing
down, press and release again the 2° memorized key or the
BLUE key (P2). The wing 2 pass to the slowing down in opening.
7
Once the wing 1 reaches the starting position of slowing
down, press and release again the 1° memorized key or the
RED key (P1). The wing 1 pass to the slowing down in closing.
8
Once the wing 2 reaches the starting position of slowing
down, press and release again the 2° memorized key or the
BLUE key (P2). The wing 2 pass to the slowing down in closing.
Once the gate reaches the position of completely open it re –
closes automatically.
PLEASE NOTE : it is indispensable to carry out a new programming of the torques , after having set the desired torque on slowing
down, in case the slowing down phase is personalized.
PLEASE NOTE: if no slowing down zone are defined, the control unit will load the factory settings
ITA ENG FRA ESP DEU POR
6-1622372 rev.5 04/02/2016
Compatible from firmware version AS2405 - running velocity is modificable
Pag 8 di 10
14.5 Water hammer and electrical lock
If the automation is equipped with an electro lock it is advisable that, with the gate closed, the motor acts in closure for a short time before starting
the opening phase. This functions allows you to un-lock the electro lock even in harsh weather conditions (e.g. ice). In order to activate the water
hammer set dip no. 5 to ON.
14.6 Photocells check
This control unit is equipped with a function which allows you to carry out a check of the photocells operation before any turning on of the motor. In
this way there is the possibility of increasing the safety of the system in case of photo device damaging (for example output relay stuck) or of an
unwanted short – circuit on the photocell input. In case of breakdown, the control panel will signal it through a single flashing when a key is
pressed and no movement will take place. This check is carried out after the control panel has received an order to move, but therefore powering
the motor. Set dip n°6 on ON to activate the photo cell check.
14.7 Clock function
Setting the dip n°7 on ON the timing function is activated. The pedestrian input becomes timing input where it is possible to connect a timer for the
programming opening of the gate. The contact is interpreted as request of opening and of permanence on the opening state until the contact
remains closed. When the contact opens, the gate automatically closes.
14.8 Wings number setting
The control unit AS24 can work with 1 or 2 wing gates. This setting is carried out putting the dip n°8 on OFF if you want a 2 wing functioning and
on ON if you want a single wing functioning. This setting MUST be carried out before the learning of the strokes.
14. Advanced functions
Through the 8-position dip switch, it is possible to personalize further the automation functions. As standard the control panel leaves the factory
with all the main functions already set, however, it is always possible to modify them by following the table:
Dip No. function Dip OFF Dip ON
1 modality of functioning
Automatic
Manual
2 learning of the courses disabled enabled
3 Pre-flashing Not active Active
4 Condominium function Not active Active
5 electrical lock + water hammer
Not active Active
6 Photocell check disabled enabled
7 time set
Not active Active
8 number of wings
2 wings functioning
1 wing functioning
14.3 Pre – flashing
Setting the dip nr.3 on ON the pre – flashing is enabled. This function means that before any movement there will be a brief flashing in order to
indicate the movement is about to begin. Remember to turn the control unit off and then on again after modifying the dip switch’s configuration.
14.1 Modality of functioning
Setting the dip n°1 on ON and the dip n°2 on OFF, the manual functioning is enabled. This functioning allows the displacement of the wing with
the red and blue keys present on the card (see paragraph 4)
14.2 Strokes learning
Setting the dip n°1 on OFF and the dip n°2 on ON, t he learning of the strokes is enabled. This functioning allows to learn the courses and the
phase shift of the wings (see paragraph 6).
Setting the dip n°1 on ON and the dip n°2 on ON, the pedestrian opening is enabled. This functioning allows to learn the opening of the first wing
when the pedestrian opening key is pressed (see paragraph 11).
14.4 Condominium function
Every command sent via radio or with the step by step buttons and/or pedestrian buttons will only open the door. Reclosure is entrusted to the
automatic reclosure function, which must be activated since all closure command are ignored. In case the condominium function is active and the
automatic reclosure is deactivated by means of the respective regulation trimmer (turned completely in clockwise sense), the control panel puts
itself in state of signalled alarm, with door closed, through fast blinkings of the flashing light. Set dip n°4 on ON to activate the condominium
function.
ITA ENG FRA ESP DEU POR
6-1622372 rev.5 04/02/2016
Compatible from firmware version AS2405 - running velocity is modificable
Pag 9 di 10
18. State of alarm of the control unit
If the flashing light blinks fastly or remains fixed, it means that the control unit is in state of alarm. Any command is ignored until the resolution of the
problem.
Condominium active + automatic reclosure
deactivated
Enable the automatic re-closure by turning the
trimmer in anti clockwise sense or deactivate the
condominium function (dip 4 off).
Probable cause SolutionType of problem
Fast blinking of the flashing light
Flashing light still and lit
Intervention of thermical protection of the
control unit. Too high stream absorption. The
value must not be higher than 7A for more
than 3 sec.
Each command is ignored for 20 seconds. Check
the motor status and their absorption.
In case it would be necessary to modify the decoding type (from rolling code to fix code or vice versa), or cancel all the learned transmitters,
proceed as follows:
1. Cut off the power supply to the system
2. Press the blue key if you want to select the fix code decoding or press the red if you want to select the rolling code decoding
3. Keep them pressed while you give again tension
4. Keep them again pressed until the flashing light lights on 3 times
5. At this point release the key and wait until the flashing light lights off. The selection of the decoding and the total deletion of the memory
have not been carried out.
17. Selection of the decoding type and total deletion of the memory
15. Modality of photocells intervention
The modality of photocells intervention is different:
•
The internal photocells unlock the movement until the obstacle is removed, so they involve the complete opening of the gate.
•
The external photocells do not intervene in opening, while they immediately invert the motion until the complete re opening in case of ob-
stacle in closing.
16. Control unit operation mode
The modality of intervention of the current sensor is only one. In case of intervention of the sensor in opening, the gate carry out a short inversion.
In case of intervention in closing , the immediate inversion is got with the total re opening of the gate.
In case the condominium function is selected, the happening of a sense in closing involves a short inversion in opening with a successive stop of
the motion until the reception of an order.
A B
C
D
C
D
E
E
WARNING: cutting the little bridge “J1” the inversion movement
zone is cancelled (zone “A”) and substituted with the setting of the
position reached as total closing/opening position (zone “C”).
A= Intervention zone of the amperometric sensor
with movement inversion
B= Normal speed run zone
C= Intervention zone of the amperometric sensor
with movement stop and setting of the reached
position as total closing/opening position. In the
version with encoder this area is not present.
D= Low speed run zone
E= Mechanical stops at opening and closing
(Absolutely necessary )
16.1 Forced opening of the wings
In case of wing’s overlap and consequent block of the automation, it is necessary to force the opening (re – synchronization). To do this, proceed
as follows:
1. Press the first key of the transmitter for a time superior than 8 seconds.
2. The control unit signals the imminent re – synchronization with a pre – flashing. DO NOT release the key.
3. The two wings start to open contemporarily. DO NOT release the key.
4. When the wings have reached an opening sufficient to not come into collision, release the key. The wings stop.
5. Press again the key of the transmitter. The wing 1 starts to close itself and once closed, the wing 2 also closes .
6. Once closed the gate, the operation of re – synchronization is ended and the wing is ready to work regularly.
NOTE: During the phase of re – synchronization, it is possible to close only 1 wing at a time. The functioning come back to be regular only when
both wings are correctly closed.
WARNING: during the operation of re – synchronization the intervention of the anti – squashing security is interpreted as identification
of the close position. In order to avoid the voluntary intervention, the sensitivity of the same results remarkably reduced respect to the
conditions of normal functioning.
ITA ENG FRA ESP DEU POR
6-1622372 rev.5 04/02/2016
Compatible from firmware version AS2405 - running velocity is modificable
Pag 10 di 10
21. Problem solving
This paragraph intends to give some indications for solving the most common problems. Before proceeding, check that the LED present on the
panel are correctly on or off, according to the following diagram:
If one of more LED are not in the correct status check the corresponding input. In case exclude the external accessories bridging the related
inputs (photocell, stop, limit switch) with the common in case of normally closed contact.
Check the points in the following table:
Step by step Pedestrian setting
or clock stop External
photocell Internal
photocell Limit switch
Wing 1 Limit switch
Wing 2
off off on on on on on
LED STATUS
Type of problem possible cause Solution
On activating the open command, the wings do
not move.
Loss of electrical power. Check the presence of electrical power and all
the connections of the electrical network.
Burned fuse Replace the fuse with one with the same
characteristics
On activating the open command, the wings
move for a brief moment and then stop. Incorrect encoder connection Check encoder wiring
On activating the open command, the wings
close. Motor cables inverted
Impossible to programme remote controls. The type of decoding set in the control
panel does not correspond to the type of
remote control used.
Check which decoding was set and select the
one which corresponds to the remote controls in
use.
It is impossible to enter in wing stroke
programming mode. The gate is not closed
Close (in manual) the gate. If the gate was
closed, set the SW1 selector to manual mode,
wait 1 second and put it back into automatic
mode. Try again to enter into setting mode.
Check motor wiring, inverting them if necessary.
During the learning, a wing stop before to reach
the total opening. RUNNING AMP.SENS. Trimmer threshold
too low Increase the intervention value of the ampere
sensor.
On learning phase, le wings arrive on total
opening but the gate does not re-close. RUNNING AMP.SENS. Trimmer threshold
too high Decrease the intervention value of the ampere
sensor.
GUARANTEE - In compliance with legislation, the manufacturer’s guarantee is valid from the date stamped on the product and is restricted to the
repair or free replacement of the parts accepted by the manufacturer as being defective due to poor quality materials or manufacturing defects.
The guarantee does not cover damage or defects caused by external agents, faulty maintenance, overloading, natural wear and tear, choice of
incorrect product, assembly errors, or any other cause not imputable to the manufacturer. Products that have been misused will not be guaran-
teed or repaired. Printed specifications are only indicative. The manufacturer does not accept any responsibility for range reductions or malfunc-
tions caused by environmental interference. The manufacturer’s responsibility for damage caused to persons resulting from accidents of any na-
ture caused by our defective products, are only those responsibilities that come under Italian law.
The control unit AS24 has a connector (see diagram on page 1) where it is possible to insert an additional card in order to have the outputs for
connection of the electric lock and the courtesy light. The lighting time of the courtesy light is fixed at 1 minute and 30 seconds. It lights for every
operation of the user.
19. Additional card (not supplied as standard)
In case in which you utilize a radio receiver with card, it is possible to provide the control unit with an output terminal for a second radio channel
(with N.O. contact). Instead, if you want to utilize the radio module present on the card, the second radio channel is not available.
20. Second radio channel
CONNECTOR TO BE INSTALLED IN
THE CONTROL UNIT.
TERMINALS 1 & 2: Output for courtesylight. Timed for 90 SEC.
TERMINALS 3 & 4: Output for electrical lock. Timed for 3 SEC.
HOLE TO CONNECT THE SPACER
BETWEEN THE ADDITIONAL CARD
AND THE CONTROL BOX. CLEAN CONTACTS WITHOUT VOLTAGE
Max load 220 V - 5 A
1 2 3 4
ELS
LC
Vac/dc
Vac/dc

Other manuals for AS24

1

Other Allmatic Control Unit manuals

Allmatic M2E User manual

Allmatic

Allmatic M2E User manual

Allmatic BIOS2 Safety guide

Allmatic

Allmatic BIOS2 Safety guide

Allmatic BIOS1 BRT Safety guide

Allmatic

Allmatic BIOS1 BRT Safety guide

Allmatic BIOS1 24V User manual

Allmatic

Allmatic BIOS1 24V User manual

Allmatic SCOR.AS User manual

Allmatic

Allmatic SCOR.AS User manual

Allmatic HELIOS KAIROS User manual

Allmatic

Allmatic HELIOS KAIROS User manual

Allmatic AS24 User manual

Allmatic

Allmatic AS24 User manual

Allmatic AV User manual

Allmatic

Allmatic AV User manual

Allmatic BAXS900 User manual

Allmatic

Allmatic BAXS900 User manual

Allmatic ACTION Guide

Allmatic

Allmatic ACTION Guide

Allmatic ACTION Guide

Allmatic

Allmatic ACTION Guide

Allmatic HELIOS KAIROS User manual

Allmatic

Allmatic HELIOS KAIROS User manual

Allmatic AV4 Guide

Allmatic

Allmatic AV4 Guide

Allmatic BIOS1 24V User manual

Allmatic

Allmatic BIOS1 24V User manual

Allmatic Clamp assist User manual

Allmatic

Allmatic Clamp assist User manual

Allmatic B1EE ERMES2 Safety guide

Allmatic

Allmatic B1EE ERMES2 Safety guide

Allmatic BAX900 User manual

Allmatic

Allmatic BAX900 User manual

Allmatic AM900ECO User manual

Allmatic

Allmatic AM900ECO User manual

Allmatic BIOS1 24V User manual

Allmatic

Allmatic BIOS1 24V User manual

Allmatic SCOR.AS User manual

Allmatic

Allmatic SCOR.AS User manual

Allmatic B1VR PROX User manual

Allmatic

Allmatic B1VR PROX User manual

Allmatic CT3IND Safety guide

Allmatic

Allmatic CT3IND Safety guide

Allmatic BIOS2 24V User manual

Allmatic

Allmatic BIOS2 24V User manual

Allmatic MICRO CAP SENS User manual

Allmatic

Allmatic MICRO CAP SENS User manual

Popular Control Unit manuals by other brands

oventrop DynaTemp RBG-C F installation instructions

oventrop

oventrop DynaTemp RBG-C F installation instructions

HMS CM CANopen user manual

HMS

HMS CM CANopen user manual

Panasonic GP-KS162CUDE Operating	 instruction

Panasonic

Panasonic GP-KS162CUDE Operating instruction

Honeywell Home H600A installation instructions

Honeywell Home

Honeywell Home H600A installation instructions

Forbes Marshall FMTD64 Installation and maintenance manual

Forbes Marshall

Forbes Marshall FMTD64 Installation and maintenance manual

ITT Engineered Valves 970 Installation, operation and maintenance manual

ITT

ITT Engineered Valves 970 Installation, operation and maintenance manual

Quectel EC2 Series Command manual

Quectel

Quectel EC2 Series Command manual

MD mXion TLS user manual

MD

MD mXion TLS user manual

CyberPower RELAYIO500 user manual

CyberPower

CyberPower RELAYIO500 user manual

Burkert 6020 operating instructions

Burkert

Burkert 6020 operating instructions

WAGO 753-647 manual

WAGO

WAGO 753-647 manual

Siemens LEC1/8853 manual

Siemens

Siemens LEC1/8853 manual

powersoft LiteMod user guide

powersoft

powersoft LiteMod user guide

usi WM-BAN-MT-41 user manual

usi

usi WM-BAN-MT-41 user manual

AAON RSMVQ Technical guide

AAON

AAON RSMVQ Technical guide

FAAC 540 BPR manual

FAAC

FAAC 540 BPR manual

DOLD SAFEMASTER RK 5924 operating instructions

DOLD

DOLD SAFEMASTER RK 5924 operating instructions

resideo Braukmann R295SP-F installation instructions

resideo

resideo Braukmann R295SP-F installation instructions

manuals.online logo
manuals.online logoBrands
  • About & Mission
  • Contact us
  • Privacy Policy
  • Terms and Conditions

Copyright 2025 Manuals.Online. All Rights Reserved.