ALLOMATIC SL-45DC User manual

Rev. UL2 10/17


TABLE OF CONTENTS
SAFETY AND INTRODUCTION
Safety Instructions . . . . . . . . . . . . . . . . . . . . . . . . . . . . . . . . . . . . . . . . . . . . . . . 1-2
UL 325 Class Types . . . . . . . . . . . . . . . . . . . . . . . . . . . . . . . . . . . . . . . . . . . . . . . 3
Operator Specifications . . . . . . . . . . . . . . . . . . . . . . . . . . . . . . . . . . . . . . . . . . . 4-5
INSTALLATION
SL-45 DC Concrete Pad Installation . . . . . . . . . . . . . . . . . . . . . . . . . . . . . . . . . . . 6
SL-90 DC Concrete Pad Installation . . . . . . . . . . . . . . . . . . . . . . . . . . . . . . . . . . . 7
SL-100 DC [FP] Concrete Pad Installation . . . . . . . . . . . . . . . . . . . . . . . . . . . . . . 8
SL-150 DC Concrete Pad Installation . . . . . . . . . . . . . . . . . . . . . . . . . . . . . . . . . . 9
Front and Rear Mount Installation . . . . . . . . . . . . . . . . . . . . . . . . . . . . . . . . . 10-12
Entrapment Protection Installation . . . . . . . . . . . . . . . . . . . . . . . . . . . . . . . . . . . 13
Loop Layout . . . . . . . . . . . . . . . . . . . . . . . . . . . . . . . . . . . . . . . . . . . . . . . . . . . . 14
Electrical Connection . . . . . . . . . . . . . . . . . . . . . . . . . . . . . . . . . . . . . . . . . . . . . 15
Gate Travel Adjustment. . . . . . . . . . . . . . . . . . . . . . . . . . . . . . . . . . . . . . . . . . . . 16
SL-150 DC Clutch Adjustment . . . . . . . . . . . . . . . . . . . . . . . . . . . . . . . . . . . . . . 17
BOARD FEATURES
Gate Opening Direction Setting . . . . . . . . . . . . . . . . . . . . . . . . . . . . . . . . . . . . . 18
Programmable Relay and Leaf Delay . . . . . . . . . . . . . . . . . . . . . . . . . . . . . . . . . 19
Electronic Reversing Device (ERD) Adjustment . . . . . . . . . . . . . . . . . . . . . . . . . 20
Timer Adjustment and Radio Setting. . . . . . . . . . . . . . . . . . . . . . . . . . . . . . . . . . 21
Dip Switch Functions . . . . . . . . . . . . . . . . . . . . . . . . . . . . . . . . . . . . . . . . . . . . . 22
LED Diagnostics . . . . . . . . . . . . . . . . . . . . . . . . . . . . . . . . . . . . . . . . . . . . . . . . . 23
ACCESSORY INSTALLATION
Accessory Connections . . . . . . . . . . . . . . . . . . . . . . . . . . . . . . . . . . . . . . . . . . . 24
Monitored Entrapment Protection Device Connections . . . . . . . . . . . . . . . . . 25-27
Plug-in Detector Installation . . . . . . . . . . . . . . . . . . . . . . . . . . . . . . . . . . . . . . . . 28
Three Button Station Connection . . . . . . . . . . . . . . . . . . . . . . . . . . . . . . . . . . . . 29
Master/Slave Connection . . . . . . . . . . . . . . . . . . . . . . . . . . . . . . . . . . . . . . . . . . 30
Magnetic/Solenoid Lock Connection. . . . . . . . . . . . . . . . . . . . . . . . . . . . . . . . . . 31
Radio Receiver Connection . . . . . . . . . . . . . . . . . . . . . . . . . . . . . . . . . . . . . . . . 32
SOLAR INSTALLATION
Solar Panel Connection . . . . . . . . . . . . . . . . . . . . . . . . . . . . . . . . . . . . . . . . . . . 33
External Solar System Installation . . . . . . . . . . . . . . . . . . . . . . . . . . . . . . . . . . . 34
EMERGENCY RELEASE INSTRUCTIONS
Emergency Release for SL-45 DC . . . . . . . . . . . . . . . . . . . . . . . . . . . . . . . . . . . 35
Emergency Release for SL-90 DC, SL-100 DCFP, and SL-150 DC . . . . . . . . . . 36
ACCESSORIES AND PARTS BREAKDOWN
Pad Lock Tabs. . . . . . . . . . . . . . . . . . . . . . . . . . . . . . . . . . . . . . . . . . . . . . . . . . . 37
SL-45 DC Blowout Drawing . . . . . . . . . . . . . . . . . . . . . . . . . . . . . . Check Website
SL-90 DC Blowout Drawing . . . . . . . . . . . . . . . . . . . . . . . . . . . . . . Check Website
SL-100 DC[FP] Blowout Drawing . . . . . . . . . . . . . . . . . . . . . . . . . . Check Website
SL-150 DC Blowout Drawing . . . . . . . . . . . . . . . . . . . . . . . . . . . . . Check Website
WARRANTY AND CUSTOMER RECORD. . . . . . . . . . . . . . . . . . . . . . . . . . . . . . . . . . 38

1
IMPORTANT SAFETY INSTRUCTIONS
WARNING
TO REDUCE THE RISK OF :INJURY
READ AND FOLLOW ALL INSTALLATION INSTRUCTIONS. DO NOT START INSTALLATION UNTIL
YOU HAVE READ AND UNDERSTAND THESE DIRECTIONS. IF THERE IS SOMETHING YOU DO NOT
UNDERSTAND, PLEASE CALL US.
NEVER let children operate or play with gate controls.
Locate the control station and make sure it is (a) within sight of the gate and (b) at a minimum height of 5
feet so small children cannot reach it.
Install the enclosed entrapment warning signs next to the control station and in a prominent location.
For operators equipped with a manual release, instruct the end user on the correct operation of the manual
release. Use the manual release only when the gate is not moving. It is advised that the power be turned
off.
Always keep people and objects away from the gate. No one should cross the path of a moving gate.
The gate operator must be tested monthly. The gate must reverse on contact with a rigid object, or stop
when an object activates the non-contact sensor(s). Always re-test the operator after adjusting the limits
and/or force. Failure to adjust and re-test the gate operator properly may cause severe injury or death.
Keep gate(s) properly maintained. Have a qualified service technician make repairs to gate hardware and
make proper adjustments to gate operator.
This gate entrance/exit is for vehicles only. Pedestrians must use a separate entrance.
There is nothing on a gate operator that is easily repaired or adjusted without a great deal of experience.
Call a qualified gate service technician who knows your gate operator.
SAVE THESE INSTRUCTIONS

2
IMPORTANT SAFETY INSTRUCTIONS
(CONTINUED)
BEFORE GATE OPERATOR INSTALLATION
ŸConfirm that the gate operator being installed is
appropriate for the application.
ŸConfirm that the gate is designed and built
according to the current published industry
standards.
ŸConfirm that all appropriate safety features and
safety accessory devices are being installed,
including all entrapment protection devices.
ŸMake sure that the gate opens and closes freely
(by hand) before installing the operator.
ŸRepair or replace worn or damaged gate
hardware before installing the gate operator.
ŸEliminate all gaps in the sliding gate below a 6
foot height that permits a 2 1/4” sphere to pass
through any location. This includes the area of
the adjacent fence covered when the gate is in
the open position
ŸEliminate all gaps in a swing gate below a 4 foot
height that permits a 4” sphere to pass through
any location. This includes the hinge area of the
gate.
GATE OPERATOR INSTALLATION
ŸOperator must be disconnected from the power
source before attempting any installation of
accessories.
ŸInstall gate operator according to the installation
instructions in this manual.
ŸAdjust the operator clutch or load sensing device
to the minimum force setting that will allow for
reliable gate operation.
ŸInstall the operator inside the fence line. Do not
install the operator on the public side of the fence
line.
ŸInstall a proper electrical ground to the gate
operator.
ŸControls intended for user activation must be
located at least 6 feet away from any moving part
of the gate, and where the user is prevented
from reaching over, under, around, or through
the gate to operate the controls.
ŸOutdoor or easily accessible controls shall have
a security feature to prevent unauthorized use.
ŸThe stop and/or reset button must be located in
the line of sight of the gate. Activation of the
operator reset control shall not cause the
operator to move.
ŸInstall a minimum of 2 warning signs, one on
each side of the gate where they are easily
visible.
ŸTake pictures of the installation.
ŸTest all safety features for proper function before
placing the automatic vehicular gate in
operation.
MAINTENANCE
ŸTrain owners/users on the basic functions and
safety features of the gate system, including
how to turn off the power and operate the
manual disconnect feature.
ŸLeave safety instructions, product literature,
installation manual, and maintenance manual
with the owner or end user.
ŸExplain to the owner or end user the importance
of routine service and operator testing on a
monthly basis.
INSTALL THE GATE OPERATOR ONLY WHEN YOU
HAVE READ THE FOLLOWING

3
UL 325 CLASS TYPES AND
OBSTRUCTION SENSING SYSTEMS
UL 325 CLASS TYPES
CLASS ONE: RESIDENTIAL
ŸA vehicular gate operator intended for use in
garages or parking areas associated with a
residence of one to four single families.
CLASS TWO: COMMERCIAL OR GENERAL
PUBLIC ACCESS
ŸA vehicular gate operator intended for use at a
commercial location or building, such as a
multi-family housing unit (five or more single
family units), hotel, garages, retail stores, or
other buildings accessible by or servicing the
general public.
CLASS THREE: INDUSTRIAL OR LIMITED
ACCESS
ŸA vehicular gate operator intended for use at
an industrial location or building, such as a
factory, loading dock area, or other locations
not accessible by or intended to service the
general public.
CLASS FOUR: RESTRICTED ACCESS
ŸA vehicular gate operator intended for use at a
guarded industrial location or building, such as
airport security areas or other restricted
access locations not servicing the general
public and where unauthorized access is
prevented via supervision by security
personnel.
THE SIX TYPES OF OBSTRUCTION
SENSING SYSTEMS
TYPE A:
ŸInherent entrapment protection system. This
system must sense and initiate the reverse of
the gate within 2 seconds of contact with a
solid object.
TYPE B1:
ŸNon-contact sensor (photoelectric sensor or
equivalent). This system shall, upon sensing
an obstruction in the direction of the gate
travel, reverse the gate within a maximum of 2
seconds.
TYPE B2:
ŸContact sensor (edge device or equivalent).
This system shall, upon sensing an obstruction
in the direction of the gate travel, initiate the
reversal of the gate within a maximum of 2
seconds.
TYPE C:
ŸInherent force limiting, inherent adjustable
clutch, or pressure relief valve.
TYPE D:
ŸActuating device requiring continuous pressure
to maintain opening or closing motion of the
gate.
Each class must have (2) monitored entrapment protection devices in each entrapment zone to sense and react
to obstructions within 2 seconds.
All-O-Matic’s gate operators conform to the most rigid Class One.

4
OPERATOR SPECIFICATIONS
Max Gate Weight
800 lbs.
1,600 lbs.
Max Gate Length
30 feet
50 feet
Warranty
5 year residential
7 year residential
5 year commercial
Motor
24 VDC brushless with
planetary gearbox
24 VDC brushless
1/2 HP motor
Gate Speed
12” per second
12” per second
Power Options
115 VAC 50/60Hz single phase - 2 amps
230 VAC 50/60Hz single phase - 1 amp
24 VDC solar panel up to 80 watts
115 VAC 50/60Hz single phase - 4 amps
230 VAC 50/60Hz single phase - 2 amps
24 VDC solar panel up to 80 watts
Duty Cycle
Continuous
Continuous
Temperature Range
-40º to 160º
-40º to 160º
Gearbox Ratio
Approx. 29:1
20:1 with internal disconnect
Width X Length X Height
11” W X 14.5” L X 15.5” H
15.5” W X 18.5” L X 16” H
Shipping Weight
60 lbs.
95 lbs.
Emergency Release
Push open in the event
of a power failure
Mechanical foot pedal release
Belt Size
N/A
4L-230 (AX21)
Main Sprocket Size
41B15X5/8
41B22X7/8
Chain Size
41NP (20’ included)
41NP (20’ included)
Gearbox Sprocket
N/A
N/A
Limit Shaft Sprocket
41B10X5/8”
41B15X5/8
Breaker Requirement
20 amp dedicated
20 amp dedicated
Gearbox Pulley
N/A
2 1/2” with 5/8” bore
Motor Pulley
N/A
2” with 5/8” bore
UL Classes
I & II
I, II, III & IV
SL-45 DC
SL-90 DC

5
OPERATOR SPECIFICATIONS (CONTINUED)
Max Gate Weight
2,000 lbs.
1/2 HP: 3,000 lbs.
1 HP: 4,000 lbs.
Max Gate Length
50 feet
60 feet
Warranty
7 year residential
5 year commercial
7 year residential
5 year commercial
Motor
24 VDC brushless
1/2 HP motor
24 VDC brushless
1/2 and 1 HP motor
Gate Speed
12” per second
12” per second
Power Options
115 VAC, 50/60Hz single phase - 6 amps
230 VAC, 50/60Hz single phase - 3 amps
24 VDC solar panel up to 80 watts
115/230 VAC, 50/60Hz single phase
1/2 HP: 6/3.5 amps, 1 HP: 8/4.5 amps
24 VDC solar panel up to 80 watts
Duty Cycle
Continuous
Continuous
Temperature Range
-40º to 160º
-40º to 160º
Gearbox Ratio
20:1 with internal disconnect
30:1 with internal clutch
Width X Length X Height
12” W X 17.5” L X 23.5” H
15” W X 19.5” L X 25” H
Shipping Weight
130 lbs.
150 lbs.
Emergency Release
Mechanical foot pedal release
Mechanical foot pedal release
Belt Size
4L-260 (AX24)
N/A
Main Sprocket Size
41B22X7/8
40B22X1
Chain Size
41NP (20’ included)
40NP (20’ included)
Gearbox Sprocket
N/A
40B22X1
Limit Shaft Sprocket
41B15X5/8
41B10X5/8
Breaker Requirement
20 amp dedicated
20 amp dedicated
Gearbox Pulley
2 1/2” with 5/8” bore
N/A
Motor Pulley
2” with 5/8” bore
N/A
UL Classes
I, II, III & IV
I, II, III & IV
SL-100 DCFP
SL-150 DC

6
SL-45 DC CONCRETE PAD
8”
24”
4”
FOOTING FOR
GATE OPERATOR
15.5”
10.25”
3.75”
6”
TOTAL COVER HEIGHT
LOW VOLTAGE CONDUIT
HIGH VOLTAGE CONDUIT
TRACK FOOTING
TOP VIEW
FRONT VIEW
INSTALL 4”
ABOVE GROUND
(WHEN POSSIBLE)
24”
8.5”
24”
8.5”
4 RED HEAD BOLTS
1/2” X 3 1/2”
AREA FOR CONDUIT
OPERATOR CONCRETE PAD
OPERATOR FRAME
GATE TRACK GATETRACK FOOTING
MINIMUM 5”
10”
11”
10”
3”

7
SL-90 DC CONCRETE PAD
16”
TRACK FOOTING
8”
24”
4”
7”
TOTAL COVER HEIGHT
INSTALL 4”
ABOVE GROUND
WHEN POSSIBLE
FOOTING FOR
GATE OPERATOR
LOW VOLTAGE CONDUIT
HIGH VOLTAGE CONDUIT
FRONT VIEW
TOP VIEW
24”
24”
15”
2.25”
18”
4 RED HEAD BOLTS
½”X 3 ½”
AREA FOR CONDUIT(S)
OPERATOR CONCRETE PAD
OPERATOR PLASTIC COVER
GATE TRACK GATE
TRACK FOOTING
MINIMUM 5”
10”
10.5”
13.5”
4.5”
11.5”

8
SL-100 DC [FP] CONCRETE PAD
24”
9.5”
24”
10”
4 RED HEAD BOLTS
1/2” X 3 1/2”
AREA FOR CONDUIT
OPERATOR CONCRETE PAD
OPERATOR FRAME
OPERATOR PLASTIC
COVER
GATE TRACK GATETRACK FOOTING
MINIMUM 5”
10”
17”
2.5”
CHAIN LINE
23.5”
TRACK FOOTING
8”
24”
4”
6.5”
4.5”
13.5”
INSTALL 4”
ABOVE GROUND
(WHEN POSSIBLE)
FOOTING FOR
GATE OPERATOR
12.25”
TOP VIEW
FRONT VIEW

9
SL-150 DC CONCRETE PAD
24”
16.25”
30”
7.5”
4 RED HEAD BOLTS
½”X 3 ½”
AREA FOR CONDUIT
GATE TRACK GATETRACK FOOTING
MINIMUM 5”
10”
15”
20”
1.75” CHAIN LINE
8”
24”
4”
INSTALL 4” ABOVE GROUND
(WHEN POSSIBLE)
FOOTING FOR
GATE OPERATOR
TRACK
6”
10”
25”
TOP VIEW
FRONT VIEW
3”

10
FRONT MOUNT INSTALLATION
DRIVEWAY
GATE CLOSED
GATE OPERATOR TRACK FOOTING
OPERATOR FOOTING
FRONT VIEW
OVERHEAD VIEW
TRACK FOOTING
OPERATOR FOOTING
GATE IN OPEN POSITION

11
DRIVE CHAIN
LEVEL
DRIVE CHAIN
LEVEL
TOP OF
OPERATOR PAD
TOP OF
OPERATOR PAD
SL-150 DC
SL-100 DC & SL-100 DC FP
23 ”½
6.5”
SL-45 DC SL-90FP DC
15.5”
6”
TOTAL COVER
HEIGHT
DRIVE CHAIN
LEVEL
TOTAL COVER
HEIGHT
DRIVE CHAIN
LEVEL
TOTAL COVER
HEIGHT
TOP OF
OPERATOR PAD
TOP OF
OPERATOR PAD
TOTAL COVER
HEIGHT
FRONT MOUNT INSTALLATION
(CONTINUED)
6”
25”
16”
6.5”

12
REAR MOUNT INSTALLATION
DRIVEWAY
GATE IN OPEN POSITION GATE CLOSED
GATE OPERATOR
OPERATOR FOOTING
OPERATOR FOOTING
TRACK FOOTING
TRACK FOOTING
FRONT VIEW
OVERHEAD VIEW
GATE OPERATOR
FOOTING
MOVE ONE IDLER
TO THE BOTTOM
CENTER HOLE AND
FOLLOW THE
CHAIN PATH
AS SHOWN
CHAIN PATH
GATE POST
FRONT IDLER
SAFETY GUARD
GATE
CHAIN CONNECTION TO GATE

13
ENTRAPMENT PROTECTION INSTALLATION
ŸA minimum of (2) monitored entrapment protection devices are REQUIRED for each entrapment zone.
ŸAn entrapment zone is a location or point of contact where a person can become entrapped between a moving
gate and a rigid object.
ŸThe operator is equipped with an inherent entrapment protection system (ERD).
ŸThe gate operator requires an external monitored entrapment protection device (non-contact photoelectric
sensor or contact edge) for each entrapment zone prior to gate operation. The operator cycles power to the
external entrapment protection device and checks for device signals. If the operator does not receive the
correct feedback from the device, the gate will not operate.
INSIDE PROPERTY
OUTSIDE PROPERTY
OUTSIDE PROPERTY
OVERHEAD VIEW
FRONT INSTALLATION
REAR INSTALLATION
OVERHEAD VIEW
PHOTOELECTRIC
SENSOR
PHOTOELECTRIC
SENSOR
CONTACT EDGE
SENSOR
CONTACT EDGE
SENSOR
PHOTOELECTRIC
SENSOR
PHOTOELECTRIC
SENSOR
ENTRAPMENT ZONE
ENTRAPMENT ZONE
INSIDE PROPERTY
ENTRAPMENT ZONE
ENTRAPMENT ZONE

14
LOOP LAYOUT
1/4 IN
1 1/2 IN
SAFETY LOOP
WHEN USED
EXIT LOOP
4 FT 4 FT
8 FT
8 FT
4 FT4 FT
4 FT
GATE OPERATOR
GATE
GATE TRACK
TWISTED 6 TURNS
PER FOOT
NOTE: IF WIRES ARE
NOT TWISTED, LOOP
WILL MALFUNCTION.
WIRED IN SERIES
OUTSIDE PROPERTY
SAFETY LOOP
— Below is a typical loop layout. When connecting to an All-O-Matic circuit board, use the following:
— SAFETY LOOP - Normally Closed (N.C.) Contacts
— EXIT/OPEN CMD - Normally Open (N.O.) Contacts
(See page 27 for LPR-1 loop rack wiring)
— Wires MUST be twisted from the exit point of the loop saw cut to the loop detector.
—Twist loop wires 6 turns per foot, as shown below. Improper twisting of wires can cause loop issues.
— When using an inside and outside safety loop, loops must be WIRED IN SERIES.
INSIDE PROPERTY

15
ŸAll gate operators MUST be properly grounded. This minimizes or prevents damage due to electrical charge,
such as a near lightning strike or an electrical static discharge.
ŸUse a single wire for the ground. DO NOT splice two wires for the ground. If the wire breaks or is cut, replace it
with a single length wire. NEVER use two wires for the ground.
ŸCheck the local city code for proper earth ground rod type and grounding procedures.
ŸUse UL listed conduits for power wire enclosure.
OPERATORS MUST BE PROPERLY GROUNDED!
230V
115V
GRD LINE 2 LINE 1
ŸUse a minimum of a 20-amp, dedicated circuit for power.
Power
115 VAC 50/60Hz
230 VAC 50/60Hz Single Phase
LINE 1
115V HOT
230V LINE 1
LINE 2
115V NEUTRAL
230V LINE 2
GND
GROUND
GROUND
POWER AND BATTERY
SWITCHES
NOTE: WHEN APPLYING
230V TO THE OPERATOR,
MAKE SURE VOLTAGE
SWITCH IS FLIPPED TO 230V
POWER BOARD
ELECTRICAL CONNECTION
10 AMP FUSE

16
EACH NOTCH
EQUALS
ABOUT 1/2” OF
TRAVEL
EACH NOTCH
EQUALS ABOUT
1/2” OF TRAVEL
LIMIT NUTS
LIMIT NUT LOCK PLATE
SL-100 DC[FP]
LIMIT NUTSLIMIT SWITCH
LIMIT NUT LOCK PLATE
SL-150 DC
Locate the limit switches (limit switches will be in the limit box on SL-150 DC) and follow the steps below:
1: Turn the power OFF on the operator.
2: Push the limit lock plate down (on the SL-45 DC, SL-90 DC, and SL-100 DC) or outwards (on the
SL-150 DC)
3: Turn the limit nut toward the switch to DECREASE travel and away from the switch to INCREASE
travel.
4: Place limit plate back to its locked position. (MUST be done for gate to hold its limits)
5: Turn the power ON to the operator.
6: Run the gate operator open and close. If additional adjustment is needed, repeat the steps.
7: When limits are set, move the gate to the closed position. Press and release “RESET” on the circuit
board and run the gate one uninterrupted cycle (full open and full close) to learn the slow down.
SL-45 DC
SL-90 DC
GATE TRAVEL ADJUSTMENT

17
AD
The SL-150 DC gearbox is equipped with an internal clutch to protect the operator when gate is reversed in
mid-cycle.
The clutch comes from the factory set at 60 lbs. of torque. In some applications, where the gates are heavier than
normal, the clutch may require some adjustment to increase the amount of torque. It is important to have the clutch
tight enough to be able to move the gate without slipping. It is as important to not over tighten the clutch, as it is a
method of protecting the operator.
Follow these instructions to adjust the clutch when necessary:
ŸTo increase the torque, use a pipe wrench to turn the clutch nut clockwise .
ŸTurn the nut 1/2 a turn at a time until the operator is able to move the load of the gate without the clutch slipping.
ŸOnce the operator is able to move the gate without the clutch slipping, turn the nut one full turn. This will allow
the operator to move the gate, but also slip when the gate is reversed mid cycle or in the event the gate gets
jammed.
CLUTCH NUT
SL-150 DC CLUTCH ADJUSTMENT
This manual suits for next models
16
Table of contents
Other ALLOMATIC Gate Opener manuals
ALLOMATIC
ALLOMATIC DC Series User manual
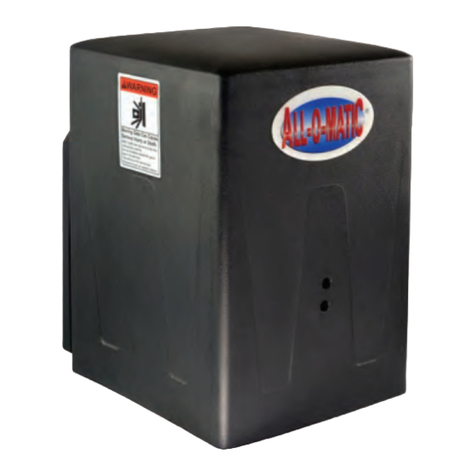
ALLOMATIC
ALLOMATIC SL-45 DC User manual
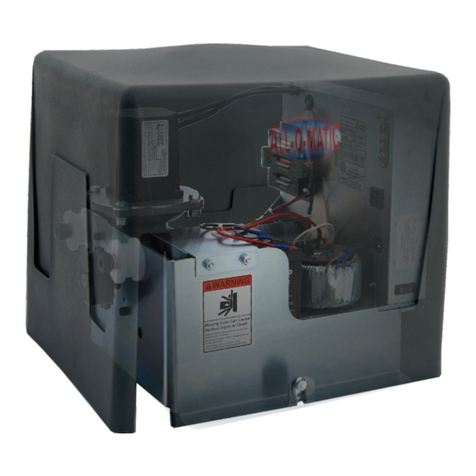
ALLOMATIC
ALLOMATIC SL-90DC User manual
ALLOMATIC
ALLOMATIC SL-100AC User manual
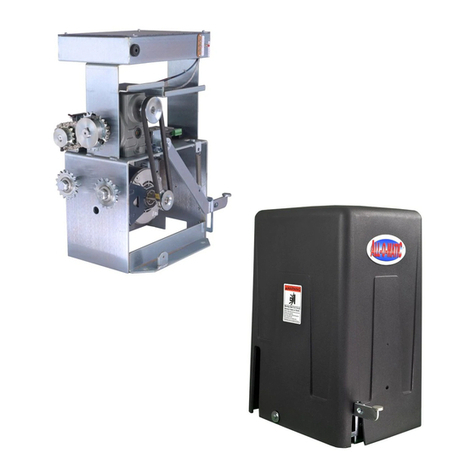
ALLOMATIC
ALLOMATIC SL-100 AC User manual
ALLOMATIC
ALLOMATIC TORO 24 User manual
ALLOMATIC
ALLOMATIC OH-200DC User manual
ALLOMATIC
ALLOMATIC TORO 24 User manual
ALLOMATIC
ALLOMATIC SW-350DC User manual
ALLOMATIC
ALLOMATIC SL-175 User manual
