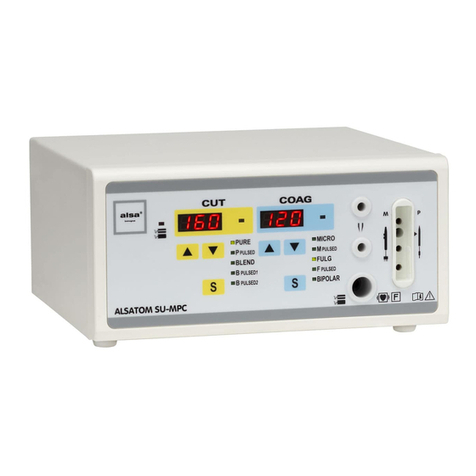
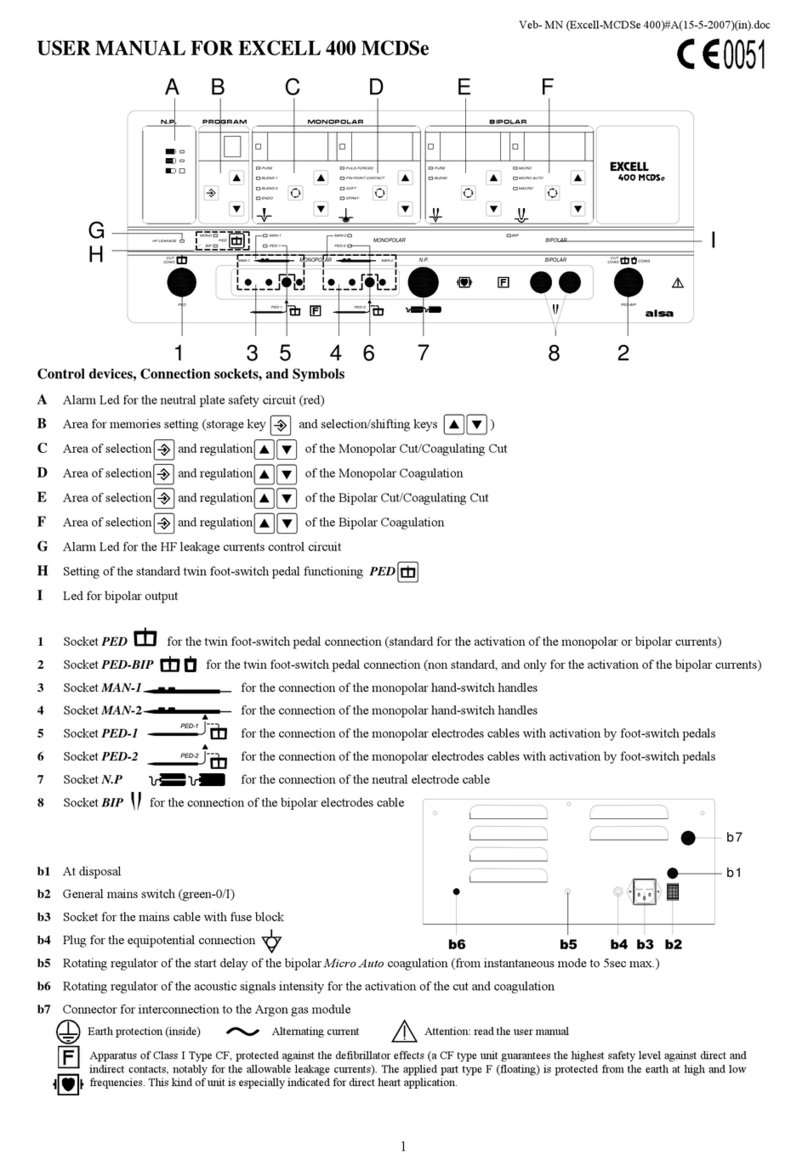
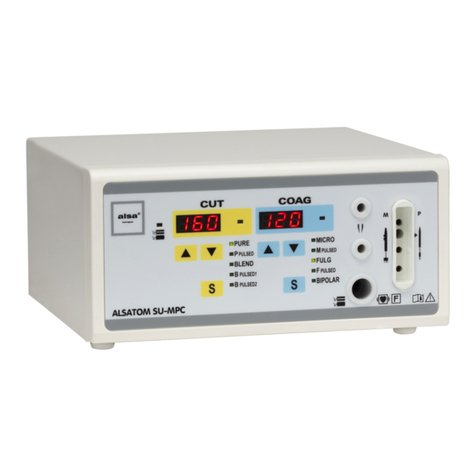
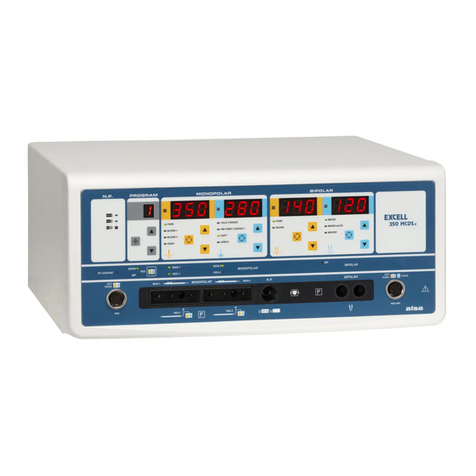
ALSA EXCELL MCDSe Series User manual

EXCELL
MCDSe
Series
Service Manual

Excell MCDSe series
Rel. 1
alsa apparecchi medicali srl 2
INDEX
INSTRUMENTS REQUIRED ............................................................................................................................2
INTRODUCTION...............................................................................................................................................2
PRELIMINARY..................................................................................................................................................4
CALIBRATION OF THE POWER SUPPLY SECTION – SETTING OF THE LOW VOLTAGES.....................5
CALIBRATION OF THE MASTER MICROCONTROLLER BOARD REFERENCE VOLTAGE ......................5
CALIBRATION OF THE SLAVE MICROCONTROLLER BOARD REFERENCE VOLTAGE ..........................6
CALIBRATION OF THE POWER SUPPLY SECTION –SETTING OF THE HIGH VOLTAGE........................6
CONTROL AND CALIBRATION OF THE INTERNAL PARAMETERS............................................................6
CALIBRATION OF THE READING BOARD “VOLTAGE/OUTPUT CURRENT”..............................................7
MATCHING OF THE POWER MOSFETS DRAIN CURRENT ........................................................................9
CALIBRATION OF THE OUTPUT VOLTAGE PEAK FOR EACH MODE .........................................................9
CALIBRATION OF THE MAXIMUM POWER STAGE MOSFETS CURRENT FOR EACH FUNCTION .........10
CONTROL OF THE H.F. LEAKAGE CURRENTS..........................................................................................11
CALIBRATION OF THE OUTPUT CURRENT................................................................................................11
CALIBRATION OF THE NEUTRAL PLATE CIRCUIT....................................................................................12
SECTION FOR THE ARGON GAS COAGULATOR ......................................................................................13
LIST OF THE ERROR CODES.......................................................................................................................14
SCHEMATIC DIAGRAMS, COMPONENTS DISPOSITION AND OTHER LISTS.........................................17
INSTRUMENTS REQUIRED
•True RMS Digital multimeter example: TEKTRONIX DMM912
•Oscilloscope with Bandwidth > 60 MHz example: TEKTRONIX TDS3012
•Current probe with Bandwidth 200 Hz÷50 MHz example: TEKTRONIX P6021
•Analyser for electrosurgery example: FLUKE DNY 454A
•Flowmeter full scale 20lt/min
•Manometer full scale 3bar
INTRODUCTION
The electrosurgical units EXCELL of the series MCDSe are composed of the following sections:
•Power supply section;
•R.F. power stage;
•Power reading section;
•Microcontroller section;
•Section for activations by hand-switch and neutral plate contact control;
•Argon gas section control (/A models only).
The power supply section allows the following voltages:
o+5V for the functioning of the master and slave microcontroller sections; this voltage is delivered by
an integrated switching regulator LM2676 properly calibrated;
o+15V and -15V for the control and driving circuits; +15V are obtained by a regulator LM2676 that
has been calibrated expressly to supply this voltage; -15V are delivered by a voltage regulator
LM7915 LDO , needed for all the circuits that require a dual supply;
o+24V for the functioning of the Argon gas solenoid valves, obtained by a voltage regulator LM7824
LDO;

Excell MCDSe series
Rel. 1
alsa apparecchi medicali srl 3
o+5V for the foot-switch activation circuit, delivered by a voltage regulator LM7805 LDO; because of
insulation, this voltage has a ground reference separated from the other circuits;
The power supply section allows also the variable continuous voltage, from 3 to 135V, to supply the R.F.
power stage; this voltage is obtained by a switching section, driven by an integrated circuit UC3525 PWM,
as main element. It provides for the driving signals of two IRF740 mosfets: at their output, it is possible to
take the filtered and continuous voltage that must be supplied to the following circuits.
The R.F. power stage is an oscillator section composed of four power mosfets dynamically connected in
parallel; each of them is driven independently by a MIC4451mosfet driver. The square wave signal coming
from the mosfets is filtered by a L/C section, which makes it sinusoidal; then, it is transferred to the output
transformer. In this section, there are also the output voltage peak and maximum current monitoring circuits
of the mosfets.
Before reaching the patient, the R.F. energy is detected by the power reading section, which identifies in
real time output current and voltage, by sending proportional signals to the microcontroller: the latter
provides for the general control of the supply of each single unit function.
The microcontroller section is composed of two elements: the first one acts as Master, while the other one
as Slave. In this way, it is possible to have many advantages; the most important ones are:
oThe correct division of the tasks between the microcontrollers, in order to avoid the overload of one
of them only and, consequently, a lower control speed;
oThe mutual check of the two microcontrollers, in order to eliminate the possibility to have a
functioning outside the safety limits.
Both of them are equipped with a FLASH EPROM: therefore, the functioning software is placed inside them,
and there is no need of external memories, except for a small E2PROM to store the settings shown on the
panel at the moment of the switching off, which will be shown again during the next activation. The
communication between the two microcontrollers is possible thanks to the I2CBUS standard of serial
communication, with which they “speak” also with some I/O expanders placed on the supply section, the
control section of the activations by hand-switch and the neutral plate, as well as the main board. The use
of these devices reduces the connections inside the unit.
The control section for the activations by the hand-switch and the detection of quality of the neutral plate/
tissue contact provides for the organization of the signals that come from the buttons placed on the handles;
these signals are sent to the microcontroller that verifies them and gives the right power according to the
activation. The signals must be properly insulated from the output circuit; this section is able to manage the
simultaneous presence of two handles as well.
The circuit of the neutral plate provides to inform visually and in real time the operator about the quality of
the contact between the neutral plate and the patient tissue, in order to avoid the risk that a non optimum
contact burns the patient. If split neutral plates are adopted, some lights on the panel will give this
information until the complete interruption, if necessary, of the R.F. power delivery, or until the re-settlement
of a good contact.
Into the /A models, there is the Argon gas control section, which improves the versatility of these
electrosurgical units, by matching all the functions of the electrosurgical unit with those of the Argon gas
coagulator. This section is composed of some pneumatic components that send and receive signals from a
dedicated control board; thanks to it, the operator can set the gas flow to be delivered, he is informed in

Excell MCDSe series
Rel. 1
alsa apparecchi medicali srl 4
case of the cylinder pressure is not sufficient or it is too high, and finally he can see the real gas flow that
has been supplied.
PRELIMINARY
In order to avoid the use of the unit in case of failure, at the moment of the switching on a selftest phase
verifies all the main parameters for the use in total safety; only if there is no damage and the calibration is
adequate, the unit finishes its selftest positively, allowing the operator to use the machine. By the contrary,
if some problems are detected, it will not be possible to activate the equipment: on the display will appear
an error message about the test that has given a negative result during the selftest phase.
As the normal use mode does not allow the execution of tests in case of anomaly, it has been introduced
the possibility to switch the unit in the calibration mode: the latter, which is selectable through a particular
combination of buttons, avoids the tests that, in case of negative results, would block the functioning of the
equipment. In this way, the operators can verify some diagnostic parameters, and thanks to them they can
determine the section where the failure has occurred. Moreover, some parameters are calibrated by the
software first, and then memorized in an E2PROM placed inside the unit.
The access to the calibration mode is possible in two ways:
1) by switching the unit on, and keeping the hidden calibration button pressed;
2) with the unit already on, by pressing at the same time the buttons of calibration, bipolar coagulation
mode and the monopolar coagulation output level increase (this mode cannot be used in case of a
failure detected at the switching on, as the identification of a problem interrupts the functioning of
the keyboard; so, it is useful in case of change of the calibration without failure).
BIPOLAR ARGON
SOFT
SPRAY
FULG FORCED
PIN POINT CONTACT
PURE
BLEND
SEAL HC
MICRO AUTO
MACRO
MICRO CV
MICRO HC
AN-2
ED-2
5
10
=15
=1
MONOPOLAR BIPOLAR BIP-1
BIP-2 CAL
In the calibration mode, the displays show values in hexadecimal codes, which are different from those
visualized during the normal use; in order to perform any type of calibration, it is necessary to press the
button CAL. At this point, the monopolar section displays start blinking, the light for the setting mode gives a
signal and the bipolar section displays remain switched off. In the monopolar Cut section, the operator sets
the type of test he wants to perform; if the test requires additional parameters, these are selected into the
monopolar Coagulation section. For example, if the operator wants to verify the reading of the A/D inputs
(one of the internal parameters), he will set 01 on the display of the Cut (i.e. reading of the A/D converters)
and a number on the display of the Coagulation related to the input to be read (i.e.: 04 means that the
operator wants to read the A/D input no. 4). During the activation, the result will be visualized on the
monopolar Cut display of the unit; it will be always the monopolar Cut display to be used, independently of
the selected function (example: the reading of a A/D converter that concerns one mode of the bipolar
Coagulation will be set, if necessary, on the interested function, but it will be always visualized on the
monopolar Cut display).
Once selected what has to be calibrated, if further settings about the modality to test are not necessary, it is
sufficient to activate the unit into the function that needs the calibration: automatically, the equipment goes

Excell MCDSe series
Rel. 1
alsa apparecchi medicali srl 5
from the visualization of the calibration parameter to the visualization of the power setting (by remaining in
the calibration mode); in order to proceed to the next calibration, it is necessary to press the CAL button
again and go back to the mode of the monopolar section with the blinking displays. The following Table
shows the whole list of the selectable tests:
Monopolar Cut Display
Test n° Description
00 Continuous supply of the power stage
01 Internal parameters of the R.F. section
02 Functioning of the R.F. section without feed-back
03 Peak voltage R.F. (Voutpk)
04 Drain current into the mosfets of the R.F. section
05 R.F. leakage current with control made by the software
06 R.F. leakage current without control
07 Start/Stop impedance adjustment for the automatic bipolar mode
08 Not Used
09 Reading of the data that come from the analogical inputs of the micro Slave
0b Visualization of the current software release
0C Loading of the default values
0d Reading of the errors memorization
0E Cancellation of the errors list into the E
2
PROM
0F Complete cancellation of the E
2
PROM
CALIBRATION OF THE POWER SUPPLY SECTION –SETTING OF THE LOW VOLTAGES
Before proceeding with the calibration of the section that controls the supply of the power R.F. generator
stage, it is necessary to verify the continuous low voltages. To do that, connect the positive terminal of a
multimeter to the points indicated in the following Table:
Test Point Voltage (VDC)
L6 +5.08
L7 -15V
L8 +15V
U6 (pin 3) +24V
U13 (pin 3) +5V
Set the R31 pot placed on the Power Supply board (Alsa code: 801471) in order to set exactly the +5V
continuous voltage for the microcontroller section.
CALIBRATION OF THE MASTER MICROCONTROLLER BOARD REFERENCE VOLTAGE
If present, remove the J11 jumper.
Connect a multimeter between the test point J10 and GND; set the R102 pot placed on the Master
Microcontroller board (Alsa code: 801469) in order to obtain a voltage of 5.00V (± 0.01V).
Once the calibration has been performed, close the J11 jumper.

Excell MCDSe series
Rel. 1
alsa apparecchi medicali srl 6
CALIBRATION OF THE SLAVE MICROCONTROLLER BOARD REFERENCE VOLTAGE
If present, remove the J12 jumper.
Connect one multimeter between the pin n°2 of J12 and GND; set the R60 pot placed on the Slave
Microcontroller board (Alsa code: 801467) in order to obtain a voltage of 5.00V (± 0.01V).
Once the calibration has been performed, close the J12 jumper.
CALIBRATION OF THE POWER SUPPLY SECTION –SETTING OF THE HIGH VOLTAGE
Press the CAL button; when the displays blink, set the monopolar Cut section, as shown into the Figure:
MONOPOLAR BIPOLAR
G
RAM
PURE
BLEND-1
FULG FORCED
PIN POINT CONTACT
PURE
BLEND
MICRO CV
MICRO HC
Press the CAL button so that the displays stop blinking. Connect one load of 500ohm/100W to J1 and J2
connectors placed on the Supply board (Alsa code: 801471); connect one multimeter in order to measure
the voltage in parallel to the load. Set the R52 (maximum level) and the R24 (minimum level) pots to obtain
the values shown in the following Table:
Setting Voltage (VDC) Monopolar Coag
05
E6 135,5
0C 8,8
With the blinking displays, and by setting 05 into the monopolar Coagulation section, it is
possible to read the converter A/D “AD5” that sends the value, detected by the
microcontroller, about the supply voltage of the power section.
As these calibrations are interactive, it is advisable to repeat the control of the minimum and maximum
levels at least twice.
CONTROL AND CALIBRATION OF THE INTERNAL PARAMETERS
Press the CAL button; when the displays blink, set the monopolar Cut section, as shown into the Figure:
MONOPOLAR BIPOLAR
G
RAM
PURE
BLEND-1
FULG FORCED
PIN POINT CONTACT
PURE
BLEND
MICRO CV
MICRO HC
Connect the current probe to one of the conductors of the damping resistor, placed at the bottom of the
metal box.
Press the CAL button so that the displays stop blinking; set 42 in the monopolar Pure Cut mode. Switch the
equipment on: the measured current must be 331mA (± 3%). If the measured value is deeply different with
respect to the one indicated, operate on the loops of the L1 inductor, by changing its position around the
core until the indicated value is obtained (ATTENTION: In order to modify the position of the loops, it is
necessary to take the R.F. generator board away, then make the intervention, and finally place the generator
board again. At this point, repeat the measure).
Set 12 in the bipolar Pure Cut mode; by switching the equipment on, the measured current must be 70mA (±
2mA).

Excell MCDSe series
Rel. 1
alsa apparecchi medicali srl 7
CALIBRATION OF THE READING BOARD “VOLTAGE/OUTPUT CURRENT”
The calibration must be performed only when a component of the reading board “voltage/current” is
replaced; in this case, it is advisable to match the board to the new tolerances present in this
section.
Press the CAL button; when the displays blink, set the monopolar Cut section, as shown into the Figure:
MONOPOLAR BIPOLAR
G
RAM
PURE
BLEND-1
FULG FORCED
PIN POINT CONTACT
PURE
BLEND
MICRO CV
MICRO HC
02 permits the R.F. power delivery without feed-back, by allowing the calibration of the reading section; thanks to the absence of the
feed-back, it is possible to detect directly the influence of the calibrations performed by the operators on the R.F. power delivery, by
avoiding the intervention of the microcontroller that wants to stabilize the power itself.
Press the CAL button again.
Connect the probe of the oscilloscope at the test point indicated with Vref on the R.F. board Output Current
and Voltage board” (Alsa code: 801464). Set the R24 pot in order to obtain a voltage of -2.835V. Connect
the probes of the oscilloscope to the test points indicated with “V” (TP3) and “I” (TP4); set 22 in the
monopolar Pure Cut mode; connect a 400ohms non-inductive load to the active monopolar output. Switch
the unit on and verify that the signals having the probes connected to are in phase. Repeat the same
operation in the bipolar Pure Cut mode, by setting 29 and by connecting a 400ohms load to the active
bipolar output.
Monopolar
Bipolar
Connect a simulation load (composed of a resistance of 250ohm/50W that is connected in parallel to a
capacitor of 1.5nF) at the bipolar output:
R1
20/50W
R2
200/50W C1
1n5
Connect the oscilloscope probe to the test point indicated with “Phase”; switch the equipment on, by setting
22 in the bipolar Pure Cut mode, and set the R57 pot in order to obtain a voltage of 3.00V.

Excell MCDSe series
Rel. 1
alsa apparecchi medicali srl 8
Set 5 in the monopolar Pure Cut mode, and connect a load 400ohms to the selected monopolar output;
connect the current probe in series to the load, and a voltage probe to the test point indicated with “I-IN”
(TP1). Switch the equipment on, and set the R54 pot: the value read by the voltage probe must be exactly
the double of the current measured by the probe connected in series to the load.
The main aim of this check consists in obtaining an output current of 500mA (in other words, 1.00V at the
test point “I-IN”): to do that, it is necessary to find the better “compromise” between the value of the power
set and the load connected to the output that permits the delivery of this current.
Start by setting 71 in the monopolar Pure Cut mode: switch the equipment on, and change the load at the
output until the current flowing in the load reaches 500mA; connect a probe of the oscilloscope at the test
point indicated with “I-IN” (TP1), and a second probe at the test point “IdB”. Switch the equipment on: the
signal “I-IN” must be 1V. Set the R49 pot: “IdB” must be 0.00V (± 1%). In order to obtain the maximum
reading reliability, set the vertical sensibility at 20mV/div for the reading of “IdB”.
Set 0A in the monopolar Pure Cut mode; switch the equipment on, and set the R61 pot: at the test point
“IdB”, the value must correspond to the logarithm of the voltage measured at the point “I-IN”:
)ln( INIdB VI −
=
if, for example, the operator obtains a voltage of 110mV when activating the unit, the value to set R61 will
be:
2021100 ,),ln(
−
=
=
dB
I
Set again in the monopolar Pure Cut mode the value that had permitted before to obtain 500mA of current,
and verify that “IdB” still is 0.00V.
Connect the probes to the test points indicated with “V-IN” and “VdB”; set 52 in the monopolar Pure Cut
mode. By switching the equipment on, the measured value in “V-IN” must be 1.00V; just in case the voltage
is different from this value, change the setting of the power in order to obtain the specified value. Once this
setting has been completed, set the R50 pot to have on “VdB” a signal at 0.00V in correspondence of 1.00V
on “V-IN”. Also in this case, it is advisable to set the sensibility of the oscilloscope at 20mV/div in order to
obtain the maximum reading reliability; moreover, for the measurement of the signals with continuous wave
shape, the operator must reduce the bandwidth on the channel of the oscilloscope in order to eliminate as
much as possible the noises on the low amplitude signals.
Set 05 in the monopolar Pure Cut mode; switch the equipment on, and measure the value at the test point
“V-IN”. Now, activate the unit and set the R62 pot in order to obtain at the test point “VdB” a value that
corresponds to the natural logarithm of “V-IN”:
)ln( INVdB VV −
=
At the end, verify again if, by setting the power in the Pure Cut mode in order to have “V-IN” at 1.00V, “VdB”
still is 0.00V.
Exit from the calibration mode by pressing the combination of the three buttons: calibration, selection of the
bipolar coagulation mode and monopolar coagulation power increase. The operator can also exit by
switching off and then switching on the equipment without pressing any button. Set 100 into the SPRAY
coagulation mode; connect at the selected monopolar output a 350ohms load with the current probe placed
in series to the load. Switch the equipment on, and set the R81 pot in order to calibrate the value of the
power supplied according to what had been set. Notably, a power of 100W corresponds to a current of

Excell MCDSe series
Rel. 1
alsa apparecchi medicali srl 9
535mA on the load indicated before. Check the right supply of power, by setting also other lower values and,
if necessary, set the R81 pot again.
Set the Auto Pure monopolar function at 200; at the selected monopolar output, connect a 200ohms load;
switch the equipment on, and set the R30 pot in order to obtain an output current of 1.0A. Verify the
correspondence existing between the selection and the R.F. power delivery, even in the Pure Cut mode and
in the bipolar Blend mode.
MATCHING OF THE POWER MOSFETS DRAIN CURRENT
Press the CAL button; when the displays blink, set the monopolar Cut section, as shown into the Figure:
MONOPOLAR BIPOLAR
R
AM
PURE
BLEND-1
FULG FORCED
PIN POINT CONTACT
PURE
BLEND
MICRO CV
MICRO HC
Press the CAL button in order to interrupt the displays blinking, and set 35 in the SPRAY mode. Connect a
200ohms non-inductive load at the output of the equipment. Connect the probes of the oscilloscope to the
signals indicated with DRIVRF and IPKISOG on the R.F. power generator board (Alsa code: 801465), and
check the following waveforms:
Just in case the signals measured by the probes are different, it is necessary to change the position of the
jumpers connections J1 and J4, placed on the R.F. power generator board (from horizontal to vertical
position, and vice versa). At the end, put the R.F. power generator board in its right position.
CALIBRATION OF THE OUTPUT VOLTAGE PEAK FOR EACH MODE
Press the CAL button; when the displays blink, set the monopolar Cut section, as shown into the Figure:
MONOPOLAR BIPOLARRAM
PURE
BLEND-1
FULG FORCED
PIN POINT CONTACT
PURE
BLEND
MICRO CV
MICRO HC
Press the CAL button in order to interrupt the displays blinking.
Connect the high voltage probe to the selected output; in order to perform this calibration, it is necessary to
use standard length cables connected to the output (even better if placed according to the Standard CEI EN

Excell MCDSe series
Rel. 1
alsa apparecchi medicali srl 10
60601-2-2 – art. 6.8.3 Technical Description, point cc). By switching each single function on, and by
operating on the buttons of power increase/decrease, it is possible to adjust the maximum value of the peak
voltage. The values of these voltages are illustrated in the following Table:
Function Minimum Value Maximum Value
Monopolar Functions
Pure 3300* 3600
Blend 1 3400 3650
Blend 2 7600 7700
Endo 1600 1900
Fulg Forced 4500 4800
PinPoint Contact 3400 3500
Soft 3400 3500
Spray 7500 7800
Bipolar Functions
Pure 700 840
Blend 880 980
Micro 400 430
Macro 700 760
NOTE: Into the Table, the bipolar function of MICRO AUTO does not appear because it delivers the same
voltage as the function MICRO.
CALIBRATION OF THE MAXIMUM POWER STAGE MOSFETS CURRENT FOR EACH
FUNCTION
Press the CAL button; when the displays blink, set the monopolar Cut section, as shown into the Figure:
MONOPOLAR BIPOLAR
R
AM
PURE
BLEND-1
FULG FORCED
PIN POINT CONTACT
PURE
BLEND
MICRO CV
MICRO HC
Press the CAL button in order to interrupt the displays blinking.
The calibration of the maximum current must be performed in each single function, by setting its maximum
level. During the activation, operate on the buttons of power increase/decrease, in order to obtain the current
values indicated in the following Table:

Excell MCDSe series
Rel. 1
alsa apparecchi medicali srl 11
Monopolar Function
50ohm
100ohm
150ohm
min max min max min max
Pure Cut 150 1.68 1.44 1.48 1.28 1.35
Blend 1 1.64 1.68 1.44 1.46 1.37 1.39
Blend 2 1.40 1.46 1.04 1.06
Endo 1.35 1.49 1.19 1.28 1.11 1.21
Fulg Forced 1.48 1.55 1.11 1.15 0.92 0.95
PinPoint Contact 1.57 1.58 1.40 1.46 1.24 1.26
Monopolar Function
50ohm
100ohm
150ohm
Soft 1.50 1.53 1.32 1.36 1.21 1.26
Spray 1.41 1.46 1.04 1.06 0.88 0.89
Bipolar Function
10ohm
50ohm
100ohm
min max min max min max
Pure Cut 2.58 2.7 1.51 1.56 1.13 1.18
Blend 2.34 2.42 1.44 1.48 1.07 1.10
Micro 2.39 2.43 1.44 1.47 1.07 1.10
Macro 2.39 2.43 1.44 1.46 1.07 1.10
CONTROL OF THE H.F. LEAKAGE CURRENTS
Press the CAL button; when the displays blink, set the monopolar Cut section, as shown into the Figure:
MONOPOLAR BIPOLAR
R
AM
PURE
BLEND-1
FULG FORCED
PIN POINT CONTACT
PURE
BLEND
MICRO CV
MICRO HC
Press the CAL button in order to interrupt the displays blinking.
For each function of the equipment, it is necessary to adjust the limit of the R.F. leakage current. To do that,
connect the equipment under test to a system for the measurement of the high frequency leakage currents;
then, switch every single function and operate on the buttons of power increase/decrease, in order to bring
the registered value within the limits established by the Standard (lower than 150mA for monopolar – less
than 1% of maximum power for bipolar).
CALIBRATION OF THE OUTPUT CURRENT
Press the CAL button; when the displays blink, set the monopolar Cut and Coagulation section, as shown
into the Figure:
MONOPOLAR BIPOLAR
R
AM
PURE
BLEND-1
FULG FORCED
PIN POINT CONTACT
PURE
BLEND
MICRO CV
MICRO HC
Connect at the bipolar output a 200ohms non-inductive load with the current probe placed in series to the
load. Activate the bipolar Pure Cut mode. The setting values are reported in the following table. During the
switching on, operate on the buttons of power increase/decrease, in order to obtain the correspondent

Excell MCDSe series
Rel. 1
alsa apparecchi medicali srl 12
values, as indicated in the column “I-Out”; if necessary, use the R1 pot placed on the main board (Alsa code
801463) in order to obtain the right H.F. current values on the load, as indicated in the column “Current”:
Setting Current (A) I-Out (Hex)
31 0.22 24
47 0.32 34
71 0.50 54
9d 0.70 75
CALIBRATION OF THE NEUTRAL PLATE CIRCUIT
Connect the probe of the oscilloscope to the point indicated with TP2 on the board for the hand-switch
control (Alsa code: 801462).
Connect a 250ohms resistor to the terminals of the neutral plate.
Calibrate the R27 pot in order to obtain a sinusoidal waveform, which is symmetric with respect to the
horizontal axis. The following Figures show an example of right and wrong waveform:
Wrong Right
NOTE: The points indicated with “start” and “end” must coincide as much as possible with the X axis.
At the end of the calibration, the frequency of the sinusoidal wave is about 100kHz; anyway, it must be said
that the calibration establishes the exact “coupling point” of the neutral plate circuit, while the frequency
represents its natural consequence.
The control circuit of the contact between the plate and the patient verifies the condition for an optimum
contact as well as some intermediate levels, which are shown to the operator through the lights, placed into
the section indicated on the panel with “N.P.”. Notably, we can distinguish the following cases:
1) from 0 to 160 ohms: optimum contact. All the luminous signals that concern the neutral plate are
switched off. The equipment can be used by setting any power, and the supply will correspond to
what has been set;
2) from 160 to 190 ohms: the quality of the contact begin to decrease. The first luminous signal lights
up in order to inform the operator on the current status of the contact;
3) from 190 to 250 ohms: the quality of the contact worsens considerably. Also the second luminous
signal lights up in order to capture the attention of the operator. Besides this threshold, the

Excell MCDSe series
Rel. 1
alsa apparecchi medicali srl 13
equipment will automatically reduce the output power delivered to 50%, in order to avoid all risks of
burns due to a bad contact between the plate and the patient;
4) from 250 to 380 ohms: the quality of the contact does not allow the delivery of the electrosurgical
unit maximum power anymore. Besides the luminous signals mentioned above, there is also here a
blinking red light, which tells the operator that something is going wrong;
5) more than 380 ohms: the contact between the plate and the patient is definitely not enough. The red
light remains lit; the equipment gives an intermittent acoustic alarm signal, and on the display the
message no nP appears. The equipment interrupts the output power delivery until the quality of the
contact is re-settled again.
Set the R40 pot placed on the board for the Handle Control (Alsa code: 801462), by using a simulation
potentiometer connected to the terminals of the neutral plate, in order to allow the unit functioning as
described above.
SECTION FOR THE ARGON GAS COAGULATOR
Connect the cylinder at the rear input, and adjust the pressure until the light for the absence of gas is
switched off. The recommended input pressure is 2.5-3 bar. The activation of this section is possible only
when the input pressure is considered adequate for the use. By the contrary, it is not possible when:
•the input pressure is not sufficient at all (the red light placed under the setting bar for the output flow
lights up);
•the input pressure is too high (the equipment shows the alarm signal HI PrS).
By pressing the button indicated with:
the coagulator section is activated; at this point, the unit performs a short selftest for this specific section. If
no anomaly is present, the equipment is ready for the use of the Argon gas; the operator must set the
desired flow level, by using the increase/decrease buttons. At the same time, the luminous signal for the
activation of the SPRAY coagulation and the one for the radiofrequency output to be used start blinking. At
the switching on, the indication will show exactly the flow supplied, and not simply the level that had been
set.
In order to verify this action, first of all it is necessary to test the status of the control board. To do that,
switch the equipment on, and on the board with Alsa code 801468 (Argon Management board) verify what
follows:
•Vref on J7: the multimeter must indicate 10V (± 0.1V); if not, set the R40 pot of the board with Alsa
code: 801468;
•the offset of the input pressure sensor on J2: the multimeter must indicate 0V (± 0.01V); if not, set
the R26 pot;
•the offset of the input pressure sensor on J3: the multimeter must indicate 0V (± 0.01V); if not, set
the R39 pot.
The control of the Argon gas supply is possible by using a flowmeter with full scale of about 20lt/min, and a
manometer with full scale of about 3bar.
By connecting the Argon supply handle to the output of the unit, check the correspondence between the flow
set and the flow supplied. If necessary, set the screw regulator placed at the output of the pressure reducer,

Excell MCDSe series
Rel. 1
alsa apparecchi medicali srl 14
which is inside the equipment. The adjustment can have a tolerance of 20%. Verify that the output pressure
does not exceed 2 bars. The nominal value is around 1.5 bars.
LIST OF THE ERROR CODES
In order to facilitate the technical assistance, an error code for each anomaly is memorized inside the
E2PROM; thanks to a particular procedure, which can be selectable exclusively in the calibration mode, it is
possible to visualize the last 32 errors that occurred to the unit. It is also possible to cancel this list, in order
to avoid repeated checks when the equipment is switched on again.
HOW READING THE LIST OF THE ERRORS
To visualize the list of the errors, it is necessary to enter into the calibration mode, by pressing at the same
time the three buttons: CAL, selection of the bipolar coagulation mode, and increase of the monopolar
coagulation power. After the appearance of the signal message about the calibration status on the display
(CAL on), press the CAL button again, and, with the blinking displays, select 0d into the monopolar Cut
section and a number from 00 to 20 (from 0 to 20 in the hexadecimal scale corresponds to 32 positions in
the decimal scale) into the monopolar coagulation section (the latter represents the number of the
memorized error; the last error that has occurred is indicated by the signal on the Cut display that will be
FF). By pressing the monopolar Cut activation pedal-switch, the error code about the position selected
before with the monopolar Coagulation section will appear.
HOW DELETING THE LIST OF THE MEMORIZED ERRORS
Always in the calibration mode, press the CAL button and, with the blinking displays, select 0E into the
monopolar Cut section; by pressing the monopolar Cut activation pedal-switch, the display will show the
code E2P CLr, to inform the operator that the memories for the errors have been deleted. By repeating the
reading sequence of the errors (see the previous paragraph), all the memories will contain FF.

Excell MCDSe series
Rel. 1
alsa apparecchi medicali srl 15
Type of Error Code Code memorized in E2PROM
(in CAL mode, select “
0d
”)1
Errors of setting or on the activation circuits
Anomaly on the neutral plate no nP -
Error registered into the neutral plate circuit Err nPC 81
Error on the control circuit of the plate/tissue contact Err 53 35
Error on the hand-switch activation circuit at the switching on Err Hnd 82
Error on the pedal-switch activation circuit at the switching on Err PEd 83
Simultaneous activation of two devices not allowed USr Act 85
Error on the keyboard registered during the self test Err 14 0E
Errors on the Argon gas section
Input pressure of the Argon gas too high HI PrS 88
Error in the Argon gas section during the Argon selection Err 30 1E
Loss of Argon gas due to an internal leakage Err 31 1F
Pressure of the Argon gas not sufficient during the activation Err 29 1d
Activation of the Argon input placed backside during the
switching on Err Ein 84
Errors on the Master microcontroller
RAM memory Err 32 20
FLASH memory Err 34 22
Complemented variables of the system Err 35 23
Errors on the power supply section
Watchdog Timer Err 33 21
Error +5V Err 36 24
Error of the R.F. power supply with lower setting value Err 37 25
Error of the R.F. power supply with higher setting value Err 38 26
R.F. power supply higher than the pre-set value during the
activation phase Err 97 61
Errors on the serial communication
Error on the serial communication peripherals placed on the
main board (Alsa code: 801463)
2 slow acoustic
repetitions and then rapid
intermittence 3d
Error on the serial communication peripheral placed on the
power supply board (Alsa code: 801471)
3 slow acoustic
repetitions and then rapid
intermittence 3E
1According to the numerical indication of error which appears on the display when an anomaly occurs, the hexadecimal value
correspondent to one of the Error Codes shown in the column Code is memorized inside the E2PROM.

Excell MCDSe series
Rel. 1
alsa apparecchi medicali srl 16
Type of Error Code Code memorized in E2PROM
(in CAL mode, select “
0d
”)2
Error on the serial communication peripheral placed on the
hand-switch control board (Alsa code: 801462) 4 slow acoustic
repetitions and then rapid
intermittence 3F
Error in the communication with the E
2
PROM 5 slow acoustic
repetitions and then rapid
intermittence 40
Absence of connection I
2
CBUS (during the use) 6 slow acoustic
repetitions and then rapid
intermittence 43
Non Master-Slave connection (during the self test) 7 slow acoustic
repetitions and then rapid
intermittence 41
Error on the Slave microcontroller 8 slow acoustic
repetitions and then rapid
intermittence 44
Errors on the Slave microcontroller
Error on a Slave microcontroller internal peripheral Err 60 3C
Errors on the R.F. power section
Error in the internal dummy load used during the self test Err 39 27
Error in the R.F. output power measurement circuit (with lower
setting value Err 51 33
Error in the R.F. output power measurement circuit (with higher
setting value) Err 52 34
Error in the bipolar power circuit with lower setting value Err 43 2b
Error in the bipolar power circuit (with higher setting value) Err 42 2A
Error of functioning in the monopolar circuit in the PURE mode Err 40 28
Error of functioning in the monopolar circuit in the SPRAY
mode Err 41 29
Error on the modulation signal of the function BLEND-1 Err 44 2C
Error on the modulation signal of the function FULG FORCED Err 45 2d
Error on the modulation signal of the function SPRAY Err 46 2E
Error in the reading of the output peak voltage (with lower
setting value Err 47 2F
Error in the reading of the output peak voltage (with higher
setting value) Err 48 30
Error in the reading of the output peak current (with lower
setting value Err 49 31
Error in the reading of the output peak current (with higher
setting value) Err 50 32
HF output power higher than expected Err 98 62
Errors on the thermal protections
Thermal protection of the power supply unit Err 27 1b
Thermal protection of the R.F. power section Err 28 1C
2According to the numerical indication of error which appears on the display when an anomaly occurs, the hexadecimal value
correspondent to one of the Error Codes shown in the column Code is memorized inside the E2PROM.

alsa apparecchi medicali s.r.l.
alsa code: 801462
EXCELL MCDSe
Rel.: 3.5 24/11/2008
Approval:
Drawn by:
Double Handswitch & NP control board
BisMy03HandleSwitch.Schdoc
R4
560_SMD
C10
100N_SMD
+15VF R5
1K_SMD
D1
15V_SMD
D2
15V_SMD
.
R27
5KT/L/10G
R24
3K3_SMD
C25
2N2_SMD
.
C23
100p/1%_SMD
R14
10K_SMD
.
R15
10K_SMD
R6
1K_SMD
C13
100N_SMD
.
.
+15VF
R36
330K_SMD
R31
1K_SMD
R37
330K_SMD
R32
1K_SMD
R9
1K_SMD
D6
1N4148_SMD
D7
1N4148_SMD
1 2
U5A
74HCT14_SMD
C6
1U_SMD_1210
R38
330K_SMD
.
R46
1K5/1%_SMD
R45
390/1%_SMD
R40
5KT/L/10G
.
5
67
U3B
LM324_SMD
12
13 14
U3D
LM324_SMD
3
21
411
U3A
LM324_SMD
+15VF R35
8K2/1%_SMD
TR
2
CV
5
Q3
DIS 7
THR 6
R4
VCC 8
GND
1
U1
NE555_SMD
C11
100N_SMD
C5
1U_SMD_1210
+15VF
-15VF
C4
1U_SMD_1210
C3
1U_SMD_1210
.
.
C1
1U_SMD_1210
.
CT
5
RT
6
VREF
16
SYNC
3
NI INP
2
INV INP
1
COMP
9
SS
8
DIS
7
OSC.OUT
4
GND
12
SHUNT 10
OUT B 14
+VIN 15
VC 13
OUT A 11
U4
UC3525_SMD
R47
10_SMD
+15VF
C7
1U_SMD_1210
.
C8
1U_SMD_1210
.
.
C22
100N_SMD
C24
100p/1%_SMD
R44
2K2_SMD
R3
5K6_SMD
R49
10_SMD
R54
4K7_SMD
R55
4K7_SMD
.
.
C26
1n/1%_SMD
10
98
U3C
LM324_SMD
R25
3K3_SMD
R30
12K_SMD
R28
10K_SMD
.
14sp
8sp8sp
D8
1N4148_SMD
D9
1N4148_SMD
C17
100N_SMD
C19
100N_SMD
C16
100N_SMD
C14
100N_SMD
C30
100N_SMD
C31
100N_SMD
C21
100N_SMD
C20
100N_SMD
C18
100N_SMD
C15
100N_SMD
R20
100_SMD_1206
R21
100_SMD_1206
R22
100_SMD_1206
R23
100_SMD_1206
R50
150_SMD
R51
150_SMD
R52
150_SMD
R53
150_SMD
CGHND1
CTHND2
CTHND1
CGHND2
RFHND1
RFHND2
R11
1K_SMD
R12
1K_SMD
R13
1K_SMD
.
.
.
.
CUT1
CUT2
COAG1
COAG2
INT
13
A0
1
A1
2
SCL
14 SDA
15
A2
3
P0 4
P1 5
P2 6
P3 7
P4 9
P5 10
P6 11
P7 12
U6
PCF8574_SMD
R16
100_SMD
+5VF VDC
R2
5K6_SMD
R1
5K6_SMD
R17
100_SMD
R18
100_SMD
+5VF
. .
R10
1K_SMD
R8
1K_SMD
C12
100N_SMD
.
INTIIA
R19
100_SMD
R7
1K_SMD
.
SDA
SCL
3 4
U5B
74HCT14_SMD
5 6
U5C
74HCT14_SMD
9 8
U5D
74HCT14_SMD
11 10
U5E
74HCT14_SMD
13 12
U5F
74HCT14_SMD
+5VF
+5VF
+5VF
+5VF
R26
3K3_SMD
D4
5V1_SMD
.
R33
220_SMD
/AUTBIP
N/P OK
C2
1U_SMD_1210
.
+5VFVDD
..
C9
1U_SMD_1210
1
3
2
4
J1
1
3
2
4
J2
.
SDA
SCL
To power supply
Board
To front Panel
Board
L1
47UH/0.7A
L3
47UH/0.7A
C27
47u/E/35V
C29
47u/E/35V
.
.
+15VF
+5VF
N/S
R29
100K_SMD
N/S D3
5V1_SMD
18sp
6sp
TP2
TP3
TP5
R39
NU
1
2 3
4
T1
3E25NP
1
2
6
5
4
3
T2
3E25HND
12
3 4
U7
OPI1264B
12
3 4
U8
OPI1264B
12
3 4
U9
OPI1264B
12
3 4
U10
OPI1264B
L2
47UH/0.7A
C28
47u/E/35V
.
-15VF
+15V
+5V
LEDNP
REMLEV
ENBIPAUT
PN 1
PN 2
R34
220_SMD
R43
2K2_SMD
+5VF
GND1
R42
1K5_SMD
D5
5V1_SMD
GNDVSS
S2
8
V-
7V+ 4
IN
6VL 5
G
3
D1
S1 2
U2
ADG419_SMD
VDD
+5VF
CTHND1
RFHND1
CGHND1
CTHND2
RFHND2
CGHND2
PN 1
PN 2
+15VF
GND
ENHND1
ENHND2
RLSFLT2
SwitchOver Section
bismy03 rele.schdoc
CTHND1
CTHND2
RFHND1
RFHND2
CGHND1
CGHND2
PN 1
PN 2
1
3
5
2
4
6
7
8
9
10
11
12
13
14
J3
PICO_14
ENHND1
ENHND2
GND
GND
RLSFLT2
+15V
LEDNP
ENBIPAUT
REMLEV
INTIIA
+5V
-15V
-15V
+15VF
GND
ENHND1
ENHND2
RLSFLT2
R41
1K5_SMD
R48
10_SMD
TP4
TP1
TP1: NP Driving signal frequency
TP3: NP Coupling level
TP2: NP Driving signal
TP4: NP blinking led
TP5: Handswitch driving signal
TEST POINTS LIST
R80
NU
.
D19
+5VF
D21
R82
NU
-15VF
.
D20
R81
NU
+15VF
.
To Power Supply Board
L4
L5
L6
L7
V1

alsa apparecchi medicali s.r.l.
alsa code: 801462
EXCELL MCDSe
Rel.: 3.5 24/11/2008
Approval:
Drawn by:
Switch-over section
bismy03 rele.schdoc
+15VF
+15VF ENREL1
ENHND1
RFHND1
+15VF
ENREL1
ENHND1
+15VF
+15VF ENREL2
ENHND2
RFMONIL
+15VF
ENREL2
ENHND2
+15VFRLSFLT2
HANDLE1HANDLE2
CGHND1
RFHND1
CTHND1
CGHND2
RFHND2
CTHND2
ENHND1
ENHND2
RLSFLT2
+15VF
GND
TO NEUTRAL PLATE
R68
R57
R61
R64
R67
R56
R60
R70
R59
R63
R65
R69
R58
R62
R66
C32
C35
C34
J6
J7
1 2
34
5
RL2
1 2
34
5
RL1
1 2
34
5
RL4
R71
PN 2
PN 2
J5
OUT
CG
CT
J8
OUT
CG
CT
J9
RFHND1
CTHND1
CGHND1
CGHND2
CTHND2
RFHND2
.
...
...
...
...
CTHND1
RFHND1
CGHND1
CTHND2
RFHND2
CGHND2
PN 1
PN 2
PN 1
PN 2
PN 1
C36
C37
ENHND1
ENHND2
RLSFLT2
+15VF
GND 1 8
32
67
5
4
RL5
SGR282Z
Q2
Q1
Q4Q3
*
D15
D14
D17
D16
*
*
*
D18
C33
1 2
34
5
RL3
J4
RFHND2
J10
J11
D10
D13
D12
D11
RFMONP
J12
RFMONIL


File name: Double handswitch & NP control board alsa code: [801462] Rev.: [3.5]
Date: Nov 24, 2008
Ref. Part Type Description alsa code
__________________________________________________________________________
1
R1 5K6_SMD STANDARD CHIP RESISTOR 430512/S
R2 5K6_SMD STANDARD CHIP RESISTOR 430512/S
R3 5K6_SMD STANDARD CHIP RESISTOR 430512/S
R4 560_SMD STANDARD CHIP RESISTOR 430500/S
R5 1K_SMD STANDARD CHIP RESISTOR 430502/S
R6 1K_SMD STANDARD CHIP RESISTOR 430502/S
R7 1K_SMD STANDARD CHIP RESISTOR 430502/S
R8 1K_SMD STANDARD CHIP RESISTOR 430502/S
R9 1K_SMD STANDARD CHIP RESISTOR 430502/S
R10 1K_SMD STANDARD CHIP RESISTOR 430502/S
R11 1K_SMD STANDARD CHIP RESISTOR 430502/S
R12 1K_SMD STANDARD CHIP RESISTOR 430502/S
R13 1K_SMD STANDARD CHIP RESISTOR 430502/S
R14 10K_SMD STANDARD CHIP RESISTOR 430513/S
R15 10K_SMD STANDARD CHIP RESISTOR 430513/S
R16 100_SMD STANDARD CHIP RESISTOR 430496/S
R17 100_SMD STANDARD CHIP RESISTOR 430496/S
R18 100_SMD STANDARD CHIP RESISTOR 430496/S
R19 100_SMD STANDARD CHIP RESISTOR 430496/S
R20 100_SMD_1206 STANDARD CHIP RESISTOR 430540/S
R21 100_SMD_1206 STANDARD CHIP RESISTOR 430540/S
R22 100_SMD_1206 STANDARD CHIP RESISTOR 430540/S
R23 100_SMD_1206 STANDARD CHIP RESISTOR 430540/S
R24 3K3_SMD STANDARD CHIP RESISTOR 430508/S
R25 3K3_SMD STANDARD CHIP RESISTOR 430508/S
R26 3K3_SMD STANDARD CHIP RESISTOR 430508/S
R27 5KT/L/10G PRESET POTENTIOMETER MULTITURN 403123
R28 10K_SMD STANDARD CHIP RESISTOR 430513/S
R29 100K_SMD STANDARD CHIP RESISTOR 430528/S
R30 12K_SMD STANDARD CHIP RESISTOR 430515/S
R31 1K_SMD STANDARD CHIP RESISTOR 430502/S
R32 1K_SMD STANDARD CHIP RESISTOR 430502/S
R33 220_SMD STANDARD CHIP RESISTOR 430497/S
R34 220_SMD STANDARD CHIP RESISTOR 430497/S
R35 8K2/1%_SMD 1% PRECISION CHIP RESISTOR 430539/S
R36 330K_SMD STANDARD CHIP RESISTOR 430537/S
R37 330K_SMD STANDARD CHIP RESISTOR 430537/S
R38 330K_SMD STANDARD CHIP RESISTOR 430537/S
R39 NU NOT USED ------
R40 5KT/L/10G PRESET POTENTIOMETER MULTITURN 403123
R41 1K5_SMD STANDARD CHIP RESISTOR 430503/S
R42 1K5_SMD STANDARD CHIP RESISTOR 430503/S
R43 2K2_SMD STANDARD CHIP RESISTOR 430506/S
R44 2K2_SMD STANDARD CHIP RESISTOR 430506/S
R45 390/1%_SMD 1% PRECISION CHIP RESISTOR 430538/S
R46 1K5/1%_SMD 1% PRECISION CHIP RESISTOR 430504/S
R47 10_SMD STANDARD CHIP RESISTOR 430493/S
R48 10_SMD STANDARD CHIP RESISTOR 430493/S
R49 10_SMD STANDARD CHIP RESISTOR 430493/S
R50 150_SMD STANDARD CHIP RESISTOR 430531/S
R51 150_SMD STANDARD CHIP RESISTOR 430531/S
R52 150_SMD STANDARD CHIP RESISTOR 430531/S
R53 150_SMD STANDARD CHIP RESISTOR 430531/S
R54 4K7_SMD STANDARD CHIP RESISTOR 430511/S
R55 4K7_SMD STANDARD CHIP RESISTOR 430511/S
R56 10K_SMD STANDARD CHIP RESISTOR 430513/S
R57 10K_SMD STANDARD CHIP RESISTOR 430513/S
R58 10K_SMD STANDARD CHIP RESISTOR 430513/S
R59 10K_SMD STANDARD CHIP RESISTOR 430513/S
R60 NU NOT USED ------
R61 NU NOT USED ------
R62 NU NOT USED ------
R63 NU NOT USED ------
R64 47_SMD STANDARD CHIP RESISTOR 430495/S
R65 47_SMD STANDARD CHIP RESISTOR 430495/S
R66 0/0_SMD STANDARD CHIP RESISTOR 0 OHMS 430579/S
R67 4K7_SMD STANDARD CHIP RESISTOR 430511/S
R68 4K7_SMD STANDARD CHIP RESISTOR 430511/S
R69 4K7_SMD STANDARD CHIP RESISTOR 430511/S
Table of contents
Other ALSA Medical Equipment manuals
Popular Medical Equipment manuals by other brands

Carestream HEALTH
Carestream HEALTH DRX-1 System Hardware user's guide

Nellcor
Nellcor N-20 Operator's manual

agiliti
agiliti NP Adjust user manual

Medezine
Medezine 5000 Safety instructions

Getinge
Getinge 9900 Series operating instructions

Welch Allyn
Welch Allyn Spot Vision Screener VS100 Directions for use