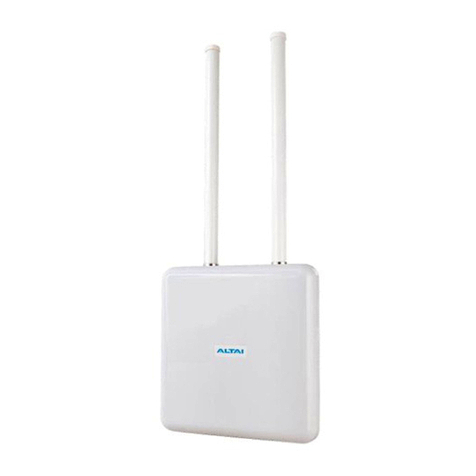
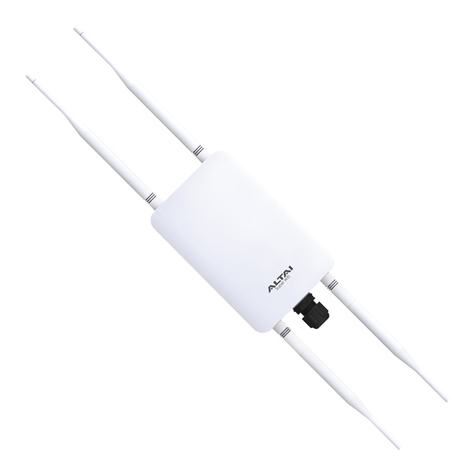
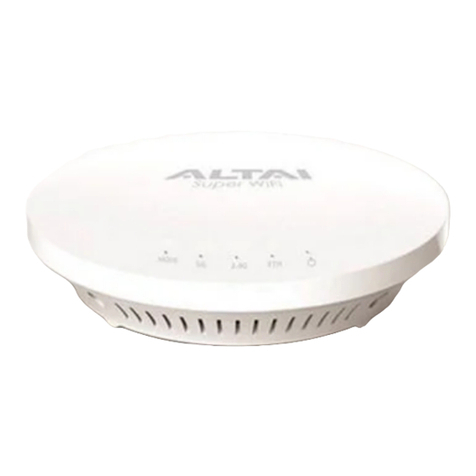
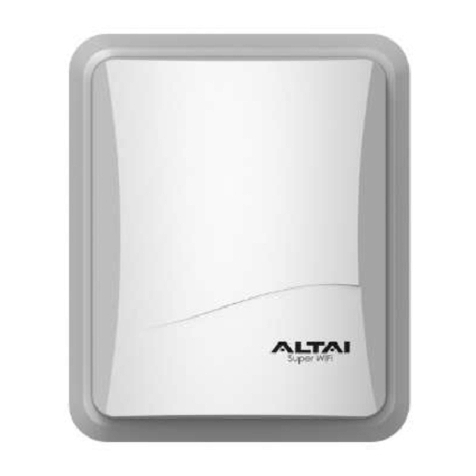
ALTAI A3 Series User manual

Altai Technologies Ltd. All rights reserved
Configuration Guide
Version 1.0
Altai A3 Series
Dual-band 3x3 802.11 ac
WiFi Access Point

ii
Altai Technologies Ltd. All rights reserved
Altai A3 Series Dual-band 3x3 802.11 ac WiFi Access Point
Configuration Guide
Copyright © 2015 Altai Technologies Limited
ALL RIGHTS RESERVED.
Altai Technologies Limited
Unit 209, 2/F, Lakeside 2,
10 Science Park West Avenue,
Hong Kong Science Park,
Shatin, New Territories,
Hong Kong
Telephone: +852 3758 6000
Fax: +852 2607 4021
Web: www.altaitechnologies.com
Customer Support Centre:
Email: [email protected]

iii
Altai Technologies Ltd. All rights reserved
Altai A3 Series Dual-band 3x3 802.11 ac WiFi Access Point
Configuration Guide
Radio Frequency Interference Requirements
This device complies with Part 15 of FCC Rules.
Operation is subject to the following conditions:
1. This device may not cause harmful interference.
2. This device must accept any interference received, including
interference that may cause undesired operation.
3. This device should not be co-located or operating in conjunction
with any other antenna or transmitter.
Interference Statement
This equipment has been tested and found to comply with the limits for
a Class B digital device, pursuant to Part 15 of the FCC Rules; these
limits are designed to provide reasonable protection against harmful
interference in a residential installation. This equipment generates uses
and can radiate radio frequency energy and, if not installed and used
in accordance with the instructions, may cause harmful interference to
radio communications.
However, there is no guarantee that interference will not occur in a
particular installation. If this equipment does cause harmful interference
to radio or television reception, which can be determined by turning
the equipment off and on, the user is encouraged to try to correct the
interference by one of the following measures:
Reorient or relocate the receiving antenna.
Increase the separation between the equipment and receiver.
Connect the equipment into an outlet on a circuit different from
that to which the receiver is connected.
Consult the dealer or an experienced radio/TV technician for
help.
FCC Caution: To assure continued compliance, (example –use only
shielded interface cables when connecting to computer or peripheral
devices). Any changes or modifications not expressly approved by the
party responsible for compliance could void the user’s authority to
operate this equipment.

iv
Altai Technologies Ltd. All rights reserved
Altai A3 Series Dual-band 3x3 802.11 ac WiFi Access Point
Configuration Guide
Warning
The user is advised to keep apart from the base-station and antenna
with at least 45cm when the base-station is in operation.
A3 series access points require professional installation.
The user is advised to keep apart from the base-station and antenna
with at least 45cm when the base-station is in operation.
Please install a lightning arrestor to protect the access point for
lightning dissipation during rainstorms. Lightning arrestors are mounted
outside the structure and must be grounded by means of a ground
wire to the nearest ground rod or item that is grounded.
Disclaimer
All specifications are subject to change without prior notice. Altai
Technologies assumes no responsibilities for any inaccuracies in this
document or for any obligation to update information in this
document. This document is provided for information purposes only.
Altai Technologies reserves the right to change, modify, transfer, or
otherwise revise this publication without notice.

v
Altai Technologies Ltd. All rights reserved
Altai A3 Series Dual-band 3x3 802.11 ac WiFi Access Point
Configuration Guide
Table of contents
1. INTRODUCTION.........................................................................................................................1
2. GETTING STARTED .................................................................................................................... 2
2.1. PREPARING THE ADMINISTRATOR COMPUTER ..................................................................................2
2.2. CONNECT TO YOUR ALTAI ACCESS POINT ........................................................................................3
2.3. HOW TO LOGIN THE AP (VIA ETHERNET)......................................................................................... 4
2.4. SECONDARY IP ADDRESS OF A3 SERIES PRODUCTS ...........................................................................4
2.5. INTERFACE GUIDE....................................................................................................................... 5
2.6. HOW TO LOGOUT FROM WEB UI...................................................................................................6
2.7. HOW TO REBOOT AP VIA WEB UI .................................................................................................6
3. SUMMARY OF BASIC CONFIGURATION TASKS .......................................................................... 7
3.1. HOW TO CONFIGURE AS ACCESS POINT (AP)...................................................................................7
3.2. HOW TO CONFIGURE AS STATION (CPE/STA) .................................................................................7
3.3. HOW TO CONFIGURE AS REPEATER ................................................................................................ 8
3.4. HOW TO CONFIGURE AS THIN AP.................................................................................................. 8
4. CONFIGURE YOUR ACCESS POINT ............................................................................................. 9
4.1. BASIC CONFIGURATIONS ............................................................................................................10
4.1.1. How to synchronize AP’s system clock with NTP server..................................................10
4.1.2. How to assign Internet Connection Type for AP (IPv4) –Static / DCHP ..........................11
4.1.3. How to Configure Radio Interface as Access Point (AP).................................................. 12
4.1.3.1. Radio 0 –2.4GHz Radio ....................................................................................................... 12
4.1.3.1.1. Radio General Configuration ......................................................................................... 12
4.1.3.1.2. WLAN List....................................................................................................................... 14
4.1.3.1.3. WLAN 0-15 General Configuration................................................................................. 15
4.1.3.1.4. WLAN 0-15 Security Configuration ................................................................................ 17
4.1.3.1.4.1. How to configure WLAN as Open network ............................................................. 17
4.1.3.1.4.2. How to configure WLAN as Open network with WEP encryption .......................... 18
4.1.3.1.4.3. How to configure WLAN with Shared Key Authentication...................................... 19
4.1.3.1.4.4. How to configure WLAN with WPA / WPA2 / WPA-auto Authentication............... 20
4.1.3.1.4.5. How to configure WLAN with WPA-PSK / WPA2-PSK / WPA-auto-PSK
Authentication............................................................................................................................... 22
4.1.3.1.4.6. How to configure WLAN with WAPI Authentication............................................... 23
4.1.3.1.4.7. How to configure WLAN with WAPI-PSK Authentication........................................ 25
4.1.3.2. Radio 1 –5GHz Radio .......................................................................................................... 26
4.1.3.2.1. Radio General Configuration ......................................................................................... 26
4.1.3.2.2. WLAN List....................................................................................................................... 28
4.1.3.1.2. WLAN 0 - 15 General Configuration............................................................................... 28
4.1.3.1.3. WLAN 0 - 15 Security Configuration .............................................................................. 28
4.1.4. How to Configure Radio Interface as Station (STA/CPE).................................................29
4.1.4.1. Radio 0 –2.4GHz Radio ....................................................................................................... 29
4.1.4.1.1. Radio General Configuration ......................................................................................... 29
4.1.4.1.2. Station General Configuration ....................................................................................... 30
4.1.4.1.3. Station Security Configuration ....................................................................................... 32
4.1.4.1.3.1. How to configure Station to associate Open network ............................................ 32
4.1.4.1.3.2. How to configure Station to associate Open network with WEP encryption ......... 32
4.1.4.1.3.3. How to configure Station to associate network with Shared Key authentication .. 33
4.1.4.1.3.4. How to configure Station to associate network with WPA / WPA2 authentication33
4.1.4.1.3.5. How to configure Station to associate network with WPA-PSK / WPA2-PSK
authentication ............................................................................................................................... 34
4.1.4.2. Radio 1 –5GHz Radio .......................................................................................................... 36
4.1.4.2.1. Radio General Configuration ......................................................................................... 36
4.1.4.2.2. Station Configuration..................................................................................................... 37
4.1.4.2.3. Station Security Configuration ....................................................................................... 38
4.1.5. How to Configure Radio Interface as Repeater...............................................................39

vi
Altai Technologies Ltd. All rights reserved
Altai A3 Series Dual-band 3x3 802.11 ac WiFi Access Point
Configuration Guide
4.1.5.1. Radio 0 –2.4GHz Radio ....................................................................................................... 39
4.1.5.1.1. Radio General Configuration ......................................................................................... 39
4.1.5.1.2. Repeater WLAN Configuration....................................................................................... 40
4.1.5.2. Radio 1 –5GHz Radio .......................................................................................................... 41
4.1.5.2.1. Radio General Configuration ......................................................................................... 41
4.1.5.2.2. Repeater WLAN Configuration....................................................................................... 42
4.2. ADVANCE CONFIGURATIONS....................................................................................................... 43
4.2.1. How to provide a unique identification on AP for network management ...................... 43
4.2.2. How to configure syslog settings .................................................................................... 44
4.2.3. How to configure historical statistics settings ................................................................ 45
4.2.4. How to configure refresh interval of on-screen information on Web UI......................... 45
4.2.5. How to configure AP as IP Gateway ...............................................................................46
4.2.6. How to enable Spanning Tree Protocol on A3 ................................................................ 47
4.2.7. How to configure the operating mode on Ethernet interface......................................... 47
4.2.8. VLAN ............................................................................................................................... 48
4.2.8.1. How to enable VLAN on A3 device...................................................................................... 48
4.2.9. DHCP ............................................................................................................................... 50
4.2.9.1. How to enable DHCP server on A3 device........................................................................... 50
4.2.10. Port Forward .............................................................................................................. 51
4.2.10.1. How to enable port forward on A3 device.......................................................................... 51
4.2.11. Safe Mode ..................................................................................................................52
4.2.11.1. How to enable safe mode on A3 device.............................................................................. 52
4.2.12. Advance Settings on Radio Interface ......................................................................... 53
4.2.12.1. Advance Settings................................................................................................................. 53
4.2.12.1.1. How to enable AMPDU and AMSDU on radio interface ............................................... 53
4.2.12.1.2. How to enable short guard interval .............................................................................. 54
4.2.12.1.3. How to configure the number of transmit radio chains and receive radio chains ........ 54
5.1.4.1.1. How to change beacon interval of BSS .......................................................................... 54
4.2.12.1.4. How to change Delivery Traffic Indication Message (DTIM) time ................................. 55
4.2.12.1.5. How to change protect mechanism on hidden node problem of Wi-Fi network.......... 55
4.2.12.1.6. How to change distance setting on A3.......................................................................... 56
4.2.12.1.7. How to enable IGMP Snooping on A3 ........................................................................... 56
4.2.12.1.8. How to enable multicast traffic on A3 .......................................................................... 57
4.2.12.1.9. How to enable Nearby AP List on A3............................................................................. 57
4.2.12.2. AirFi Settings ....................................................................................................................... 57
4.2.12.3. Data Rate Setting ................................................................................................................ 58
5.1.4.1.2. How to change data rate setting on A3 ......................................................................... 58
4.2.13. Quality of Service on Radio Interface ......................................................................... 58
4.2.13.1.1. How to change the QoS setting on Radio ...................................................................... 59
4.2.13.1.2. How to change the QoS setting on WLAN 0 –15........................................................... 59
4.2.14. Bandwidth Control on WLAN .....................................................................................60
4.2.14.1.1. How to enable bandwidth control for the WLAN on WLAN 0 –15................................ 60
4.2.14.1.2. How to enable bandwidth control per station on WLAN 0 –15 .................................... 60
4.2.15. WEP Key .....................................................................................................................61
4.2.15.1. How to define WEP Key ...................................................................................................... 61
4.2.16. Thin AP .......................................................................................................................61
5. MONITOR YOUR ACCESS POINT .............................................................................................. 62
5.1. LED COLORS AND WHAT THEY MEAN..........................................................................................62
5.1.1. A3-Ei................................................................................................................................62
5.1.2. A3c / A3w........................................................................................................................63
5.2. STATUS >OVERVIEW ................................................................................................................65
5.2.1. SYSTEM STATUS........................................................................................................................65
5.2.2. THIN AP ................................................................................................................................. 66
5.2.3. NETWORKS .............................................................................................................................66
5.2.3.1. Switch Mode ....................................................................................................................... 66
5.2.3.2. Gateway Mode.................................................................................................................... 67
5.2.3.2.1. WAN............................................................................................................................... 67
5.2.3.2.2. LAN................................................................................................................................. 67

vii
Altai Technologies Ltd. All rights reserved
Altai A3 Series Dual-band 3x3 802.11 ac WiFi Access Point
Configuration Guide
5.2.4. Interfaces ........................................................................................................................ 67
5.2.4.1. Ethernet (eth0).................................................................................................................... 68
5.2.4.2. Ethernet (eth1).................................................................................................................... 68
5.2.4.3. Radio0 (2.4G) ...................................................................................................................... 68
5.2.4.4. Radio1 (5G) ......................................................................................................................... 69
5.3. STATUS >RADIO0(2.4G) ..........................................................................................................70
5.3.1. Status > Radio0(2.4G) > Status ....................................................................................... 70
5.3.1.1. Radio Settings ..................................................................................................................... 70
5.3.1.2. Channel Usage List .............................................................................................................. 71
5.3.1.3. Nearby AP List ..................................................................................................................... 71
5.3.1.4. Tx/Rx Statistics .................................................................................................................... 71
5.3.2. Status > Radio0(2.4G) > Association List.........................................................................71
5.3.2.1. WAN.................................................................................................................................... 71
5.3.2.2. Station List........................................................................................................................... 72
5.3.2.3. Rouge Station List................................................................................................................ 72
5.3.3. Status > Radio0(2.4G) > Connection Info ........................................................................72
5.3.3.1. STA Info ............................................................................................................................... 72
5.3.3.2. AP Info................................................................................................................................. 72
5.4. STATUS >RADIO1(5G) .............................................................................................................73
5.4.1. Status > Radio1(5G) > Status ..........................................................................................73
5.4.1.1. Radio Settings ..................................................................................................................... 73
5.4.1.2. Channel Usage List .............................................................................................................. 73
5.4.1.3. Nearby AP List ..................................................................................................................... 73
5.4.1.4. Tx/Rx Statistics .................................................................................................................... 74
5.4.2. Status > Radio1(5G) > Association List............................................................................74
5.4.2.1. WAN.................................................................................................................................... 74
5.4.2.2. Station List........................................................................................................................... 74
5.4.2.3. Rouge Station List................................................................................................................ 74
5.4.3. Status > Radio1(5G) > Connection Info ...........................................................................75
5.4.3.1. STA Info ............................................................................................................................... 75
5.4.3.2. AP Info................................................................................................................................. 75
5.5. STATUS >ETHERNET .................................................................................................................75
5.5.1. Status > Ethernet > Status............................................................................................... 75
5.6. STATUS >LOGS ........................................................................................................................76
6. MANAGE YOUR ACCESS POINT ............................................................................................... 77
6.1. USER ADMIN ...........................................................................................................................77
6.1.1. Local authentication ....................................................................................................... 77
6.1.1.1. How to modify admin account’s password ......................................................................... 77
6.1.1.2. How to modify guest account’s password .......................................................................... 77
6.1.2. RADIUS authentication ................................................................................................... 78
6.1.2.1. How to enable RADIUS authentication in A3 products ....................................................... 78
6.2. SNMP ................................................................................................................................... 79
6.2.1. How to enable SNMP in A3 products .............................................................................. 79
6.3. CERTIFICATE ............................................................................................................................80
6.3.1. How to upload the customized certification for HTTPS connection on A3 products ....... 80
6.4. FIRMWARE UPDATE ..................................................................................................................81
6.4.1. How to update A3 device’s firmware..............................................................................81
6.5. FACTORY DEFAULT.................................................................................................................... 82
6.5.1. How to restore A3 device’s settings with default settings .............................................. 82
6.6. BACKUP/RESTORE ....................................................................................................................82
6.6.1. How to backup A3 device’s settings................................................................................ 82
6.6.2. How to restore A3 device’s settings with configuration file ........................................... 83
6.7. CUSTOMIZATION ......................................................................................................................83
6.7.1. How to create customized configuration file for A3 products ........................................ 83
7. EMBEDDED TOOLS FOR DEPLOYMENT / OPERATION / TROUBLESHOOTING........................... 85
7.1. CHANNEL SCAN........................................................................................................................85

viii
Altai Technologies Ltd. All rights reserved
Altai A3 Series Dual-band 3x3 802.11 ac WiFi Access Point
Configuration Guide
7.1.1. How to perform channel scan on 2.4G radio .................................................................. 85
7.1.2. How to perform channel scan on 5G radio ..................................................................... 86
7.2. DIAGNOSIS.............................................................................................................................. 86
7.2.1. Ping Test ......................................................................................................................... 86
7.2.1.1. How to perform ping test...........................................................................................86
7.2.2. Traceroute Test ...............................................................................................................87
7.2.2.1. How to perform traceroute test .................................................................................87
7.2.3. Tcpdump ......................................................................................................................... 88
7.2.3.1. How to perform packet capture on A3’s interface.....................................................88
7.3. WATCHDOG ............................................................................................................................88
7.3.1. Schedule Reboot .............................................................................................................88
7.3.1.1. How to enable periodic reboot................................................................................... 89
7.3.1.2. How to enable periodic log upload ............................................................................89
7.3.2. Ping Watchdog ...............................................................................................................90
7.3.2.1. How to enable ping watchdog ................................................................................... 90
8. COLLECT DEVICE’S PRODUCT INFORMATION .......................................................................... 91

1
Altai A3 Series Dual-band 3x3 802.11 ac WiFi Access Point
Configuration Guide
Altai Technologies Ltd. All rights reserved
1.Introduction
This guide covers the initial configuration of Altai A3 Series 3x3 802.11 ac
Wireless Access Point via Web Administration Interface (Web UI). Web
Administration Interface is the built-in and user-friendly graphic
interface on all Altai A3 Series products. It allows you to configure,
monitor, and manage the devices using web browser. Mozilla Firefox,
Google Chrome, and Internet Explorer 8+ are recommended.
This guide is applicable with firmware version 2.0.0.504 or above for
hardware platforms with the following models:
Product Name
A3-Ei
A3c
A3w
Model Number
WA3311NAC-E
WA3311NAC-C
WA3311NAC-W
Table 1 –A3 Series products

2
Altai A3 Series Dual-band 3x3 802.11 ac WiFi Access Point
Configuration Guide
Altai Technologies Ltd. All rights reserved
2.Getting Started
This chapter covers the procedures for logging into / out A3 Series
Products Web Administration Interface (Web UI) via Ethernet, and
restarting the device via Web UI.
2.1. Preparing the Administrator Computer
1. On your Windows XP or Windows 7 computer, open the Network
Connections (or Change adapter settings) control panel according
to how the Start menu is set up:
On Windows XP, click Start > Control Panel > Network Connections.
On Windows 7, click Start > Control Panel > Network and Internet >
Network and Sharing Center > Change adapter settings.
2. Right-click the icon for Local Area Connection, and then click
Properties.
3. When the Local Area Connection Properties dialog box appears,
select Internet Protocol (TCP/IP) (or Internet Protocol Version 4
(TCP/IPv4)) from the scrolling list, and then click Properties. The
Internet Protocol (TCP/IP) Properties dialog box appears.
4. Write down all of the currently active network settings. You will need
this information later when you restore your computer to its current
network configuration.
5. Configure the IP address settings with the values listed in Table 2.
IP Address
Any address in the 192.168.1.x, except
192.168.1.222 and 192.168.1.255
Example: 192.168.1.2
Subnet Mask
255.255.255.0
Default Gateway
Blank
DNS
Blank
Table 2 - Configure administrative computer’s IP address settings
6. Click OK to save the changes and close the TCP/IP Properties dialog
box.
7. Click OK again to close the Local Area Connection Properties
dialog box.

3
Altai A3 Series Dual-band 3x3 802.11 ac WiFi Access Point
Configuration Guide
Altai Technologies Ltd. All rights reserved
2.2. Connect to Your Altai Access Point
1. Connect your laptop to Data/IN port on the PoE Injector provided in
the Altai’s package using Ethernet cable
2. Connect the Ethernet port of AP to P+D/Out port on the PoE Injector
provided in the Altai’s package using Ethernet cable.
Note:
-Connect to Eth0 for A3c and A3w to P+D/Out port on the
PoE Injector
3. Connect the power cord to the power port on the PoE Injector.
Connect the other end of the power cord to a power outlet.
Figure 1 –A3-Ei Connection Diagram
Figure 2 –A3c / A3w Connection Diagram
4. Verify the AP’s Power LED is steady orange (Thick AP) or steady
green (Thin AP) after a minute

4
Altai A3 Series Dual-band 3x3 802.11 ac WiFi Access Point
Configuration Guide
Altai Technologies Ltd. All rights reserved
2.3. How to Login the AP (via Ethernet)
1. Verify the AP’s Power LED is steady orange (Thick AP) or steady
green (Thin AP)
2. Open a Web browser from the computer.
3. Type http://192.168.1.222 in the address bar or location bar (see
Figure 3).
4. Type admin (default username) in Username
5. Type admin (default password) in Password
6. Click Login
Figure 3 –A3 Series Product’s Login Page
2.4. Secondary IP Address of A3 Series Products
The default IP address of A3 series access points is 192.168.1.222/24. A3
series products support a fixed IP address on the Ethernet connection
calledSecondary IP Address. This secondary IP address is
192.168.99.x/24 where x denotes as the decimal value of the last byte
of the Ethernet MAC address on the access point.
Example 1:
Device Ethernet MAC address: 00:19:BE:20:03:8C
Secondary IP Address of this device:
192.168.99.140 (8C (HEX) 140 (DEC))
The secondary IP address uses IP range from 192.168.99.5/24 to
192.168.99.254/24. The rest of IP addresses are reserved. If the last byte
of a MAC address matches any of the reserved IP addresses, the
supported device shall follow the MAC to IP address mapping shown in
Table 3:

5
Altai A3 Series Dual-band 3x3 802.11 ac WiFi Access Point
Configuration Guide
Altai Technologies Ltd. All rights reserved
Ethernet MAC
address
Reserved Purpose
Replaced MAC
byte
Secondary IP
address
XX:XX:XX:XX:XX:00
Invalid IP
A0
192.168.99.160
XX:XX:XX:XX:XX:01
For gateway
A1
192.168.99.161
XX:XX:XX:XX:XX:02
For operator
computer
A2
192.168.99.162
XX:XX:XX:XX:XX:03
For operator
computer
A3
192.168.99.163
XX:XX:XX:XX:XX:04
For operator
computer
A4
192.168.99.164
XX:XX:XX:XX:XX:FF
Invalid IP
AF
192.168.99.175
Table 3 - A3 Series Product Secondary IP Address
Example 2
Device Ethernet MAC address: 00:19:BE:20:03:FF
Secondary IP Address of this device:
192.168.99.175 (FF (HEX) AF (HEX) 175 (DEC))
2.5. Interface Guide
Figure 4 –AP Status Overview
Web Administration Interface (Web UI) consists of five primary tabs:
Status Tab - Show system status information, like interfaces status,
system logs … etc.
Configuration Tab –Allow the configuration of device operation
parameters, such as IP address, VLAN, wireless LAN … etc.
Administration Tab –Allow the management of device, including
firmware update, configuration backup / restore, SNMP … etc.
Tools Tab –Provide tools for radio planning, diagnosis, and device’s
maintenance, like ping test, channel scan … etc.

6
Altai A3 Series Dual-band 3x3 802.11 ac WiFi Access Point
Configuration Guide
Altai Technologies Ltd. All rights reserved
About Tab –Show product information, such as hardware version,
firmware version … etc.
Also, Web UI has a quick tools bar on its top-right hand corner in all
pages. It provides some quick tools and basic information. They are
chosen language, device reboot, system logs download, and
configuration application, …etc.
2.6. How to logout from Web UI
1. Click Logout on top-right hand corner of Web UI
Figure 5 –Logout from Web UI
2. Click OK
2.7. How to Reboot AP via Web UI
1. Click Reboot AP on top-right hand corner of Web UI
2. Click Perform reboot
Figure 6 –Reboot the device via Web UI

7
Altai A3 Series Dual-band 3x3 802.11 ac WiFi Access Point
Configuration Guide
Altai Technologies Ltd. All rights reserved
3.Summary of Basic Configuration Tasks
This chapter summarizes the quick setup procedures for configuring A3
Series products to operate in different roles in your network, including
Access Point (AP), Station (CPE/STA), Repeater, and Bridge Peer.
3.1. How to Configure as Access Point (AP)
1. Select suitable internet connection type (DHCP / Static)
2. Configure IP Address on the device (static internet connection only)
3. Select AP in Operating Mode on 2.4G radio and/or 5G radio the
device.
4. Select suitable Country Code that matches your device’s installation
location.
5. Select suitable Wireless Mode on 2.4G radio and/or 5G radio;
Hints:
-802.11 ng HT20 is recommended option on 2.4G radio;
-802.11 ac HT80 is recommended option on 5G radio.
6. Select the suitable Radio Frequency.
7. Select the suitable Transmission Power.
8. Provide unique SSID on each enabled WLAN
9. Setup suitable settings of WLAN Security on each operating WLAN
10.Save and apply the settings
3.2. How to Configure as Station (CPE/STA)
1. Select your ISP’s internet connection type (DHCP / Static)
2. Configure IP Address on the device (for static internet connection
type only)
3. Select Station as Operating Mode on 2.4G radio and/or 5G radio
the device.
4. Select suitable Country Code that matches your device’s installation
location.
5. Select the suitable Transmission Power.
6. Scan and select the suitable SSID your ISP provides
7. Setup suitable settings of WLAN Security that your ISP provides
8. Save and apply the settings

8
Altai A3 Series Dual-band 3x3 802.11 ac WiFi Access Point
Configuration Guide
Altai Technologies Ltd. All rights reserved
3.3. How to Configure as Repeater
1. Select suitable internet connection type (DHCP / Static)
2. Configure IP Address on the device (for static internet connection
type only)
3. Select Repeater as Operating Mode on 2.4G radio and/or 5G radio
the device.
4. Select suitable Country Code that matches your device’s installation
location.
5. Select the suitable Transmission Power
6. Scan and select the suitable SSID from remote AP that your device
associate with on WLAN 15
7. Setup suitable settings of WLAN Security that matches the remote
AP
8. Provide unique SSID on each operating WLAN
9. Setup suitable settings of WLAN Security on each operating WLAN
10.Save and apply the settings
3.4. How to Configure as Thin AP
1. Configure IP Address on the device.
2. Configure VLAN properly
3. Enable Thin AP option
4. Type in IP address of Access Controller
5. Select the radio interface that AC manages
6. Save and apply the settings

9
Altai A3 Series Dual-band 3x3 802.11 ac WiFi Access Point
Configuration Guide
Altai Technologies Ltd. All rights reserved
4.Configure Your Access Point
This chapter covers the AP configurations including network
configuration, wireless configuration, VLAN … etc.
Notes:
-Click Submit to submit the modified configuration into
temporary memory
-Click Save & Apply (top-right hand corner) to apply the
modified configuration
-Click Unsaved Change (top-right hand corner) to review all
modified configuration in temporary memory
Hints:
-You should click Submit to submit all changes on the same
configuration page.
-You may click Save & Apply to apply all submitted change at
the end of configuration

10
Altai A3 Series Dual-band 3x3 802.11 ac WiFi Access Point
Configuration Guide
Altai Technologies Ltd. All rights reserved
4.1. Basic Configurations
This section covers the basic configuration on A3 Series products.
4.1.1. How to synchronize AP’s system clock with
NTP server
Figure 7 –NTP Setting
1. Go to Configuration > System
2. You can change the following settings:
NTP Server IP –You can provide either the domain name / IP
address of NTP server which you want to sync with.
NTP Polling Interval –You can specify the interval in second
between each synchronization request from the AP to NTP server.
The default setting is 600 seconds
NTP Time Zone –You can select the appropriate time zone. The
default setting is Asia/Hong Kong
Daylight Saving Time –You can enable it if your location has
daylight saving time
3. Click Submit
4. Click Save & Apply
Note:
-IP Address Type is changed by AP automatically based on
whether IPv6 is enabled or not
-If providing NTP server’s domain name in NTP Server IP, you
must provide valid DNS server information in XXXX. Otherwise,
NTP setting cannot take effect.

11
Altai A3 Series Dual-band 3x3 802.11 ac WiFi Access Point
Configuration Guide
Altai Technologies Ltd. All rights reserved
4.1.2. How to assign Internet Connection Type for
AP (IPv4) –Static / DCHP
Figure 8 –WAN Settings (IPv4)
1. Go to Configuration > Network > General > WAN Settings
2. You can change the following settings:
Internet Connection Type –You can set AP as a client with fixed IP
address or DCHP client; you can select:
Static
Stand for Static IP addressing; AP will not update its IP
address automatically
DHCP Client
Require an IP address from DCHP server on the network;
AP renews its IP address periodically
IPv4 Address –You can provide an IP address for AP (Static Internet
Connection Type only)
IPv4 Subnet Mask –You can provide a subnet mask for AP (Static
Internet Connection Type only)
IPv4 Default Gateway –You can provide default gateway for AP
(Static Internet Connection Type only)
IPv4 DNS Server –You can provide one or more DNS server for AP
(Static Internet Connection Type only).
Note:
-Click for adding more DNS;
-Click to remove existing DNS server entry
3. Click Submit
4. Click Save & Apply

12
Altai A3 Series Dual-band 3x3 802.11 ac WiFi Access Point
Configuration Guide
Altai Technologies Ltd. All rights reserved
4.1.3. How to Configure Radio Interface as Access
Point (AP)
4.1.3.1. Radio 0 –2.4GHz Radio
4.1.3.1.1. Radio General Configuration
Figure 9 –Radio0 (2.4G) General Settings of AP
1. Go to Configuration > Wireless > Radio0(2.4G) > General;
2. Select Enable Radio checkbox to enable radio interface
3. Select AP in Radio Mode
4. You can change the following settings:
Country Code –Select an option that matches your device’s
installation location; Hong Kong is the default setting.
Note:
-Country code enforces regulatory restrictions on radio
frequencies and maximum transmission power that the AP
can operate in.
Wireless Mode –Select suitable Wi-Fi operating mode for the AP;
you can select:
2.4G 11Mbps (802.11 b)
2.4G 54Mbps (802.11 bg)
2.4G 54Mbps (802.11 g-only)
Table of contents
Other ALTAI Wireless Access Point manuals
Popular Wireless Access Point manuals by other brands

D-Link
D-Link DAP-2230 Quick installation guide

Sprint
Sprint Phone Connect 3 Get started

Ubiquiti
Ubiquiti NanoStationM Series manual

Proxim
Proxim Tsunami MP-8100 Series Reference manual

3Com
3Com 3CRWX375075A - Wireless LAN Managed Access Point... quick start guide

Sophos
Sophos AP 55 Safety Instructions and Regulatory Information