Altrex Pop Up TL Smart User manual

TL SMART
UP
INSTRUCTIONS FOR
MANUAL TELESCOPIC LADDERS
+44 (0)1244 833 933 info@popupproducts.co.uk popupproducts.co.uk

INSTRUCTIONS FOR
MANUAL TELESCOPIC LADDERS

INSTRUCTIONS FOR
MANUAL TELESCOPIC LADDERS

THE SAFE USE OF A TELESCOPIC LADDER
Congratulations on your purchase of an Altrex telescopic ladder. You have chosen a product in which
the latest techniques in the areas of safety and material have been employed. You will nd this Altrex
telescopic ladder very easy to use as a result of the full attention given to its design.
BEFORE USING THE TELESCOPIC LADDER, READ THESE INSTRUCTIONS CAREFULLY!
Save these instructions in case they are needed for future reference. Also study the illustrations/
pictograms that are shown on the product itself. All telescopic ladders which are marketed in the
Netherlands must meet the Commodities Act legislation as set out in the Portable Climbing Materials
Order. For more information please consult www.altrex.com and the stickers on the telescopic ladder. In
order to work professionally and safely on telescopic ladders, safety level NEN2484 and the Commodities
Act must be selected. Altrex Home & Garden products are not suitable for professional use.
GENERAL
Maximum usage weight 150 kg. To be used by a maximum of 1 person
BEFORE USE
- Before assembling use the stability beam provided according to the assembly instructions on the stability beam.
(See Fig. 3).
- NEVER use the ladder without the stability beam.
- Maintain a telescopic ladder according to the instructions
- Remain alert. Concentrate when climbing a telescopic ladder and never do so under the inuence of alcohol,
medication or substances that may aect your ability to react.
- Should you transport the telescopic ladder, ensure that this is folded up and make sure that the telescopic ladder
is properly supported and xed in place.
- Upon receipt and before use of the telescopic ladder, check the condition and operation of all parts. A telescopic
ladder must be completely collapsible! Make sure that all parts (including the feet and covers) are present.
- Every time before use, inspect the telescopic ladder for any defects, such as deformation or wear.
- Telescopic ladders that are used in a professional capacity must be inspected periodically by an expert.
- Every time before using the telescopic ladder make sure that it is suitable for its intended use.
- Only use the telescopic ladder for the purpose for which it has been made.
- Never use a damaged or broken telescopic ladder. Temporary repairs are not permitted. Make sure that any
damage to a telescopic ladder is repaired as soon as possible by a professional in this eld, in any case before it is
used again.
- As far as possible, ensure that the telescopic ladder is free from contamination by substances such as wet paint,
mud, sand, dirt, snow and oil.
- Prior to use, carry out a risk analysis should you be obliged/required to do so by local or national legislation
and regulations.
- Never use a telescopic ladder back to front or upside down.
- Dispose of telescopic ladders if they are broken, worn-out or irreparable.

POSITIONING AND/OR ERECTING A TELESCOPIC LADDER
- A telescopic ladder in ladder position has to be positioned in such a way that the distance from the
foot of the telescopic ladder to the wall is approximately equal to a quarter of the operational length
of the ladder. The set-up angle will then be approximately 75° (gure 1 C).
- Always stand the telescopic ladder on a rm, stable, horizontal surface, which is not slippery. This will
ensure that the feet of the telescopic ladder cannot sink into the ground and/or slip away. Therefore,
do not place the telescopic ladder on tables, boxes, crates or other unstable surfaces, such as muddy
soil or loose sand.
- Position a telescopic ladder in such a way that each of its four points are adequately supported by
a rm bearing surface, therefore never against a window, against circular or narrow pillars, poles or
trees or against corners (gure 1D).
- Satisfy yourself that the telescopic ladder is suciently stable and if required, is secured to ensure it
cannot slip.
- A telescopic ladder may never be repositioned if somebody is standing on the ladder, or from a
position that is higher than the ladder.
- Take extra precautions if the telescopic ladder has to be positioned in front of a door opening, an
opening window or in a corridor, etc. Make sure that nobody can walk against or under the telescopic
ladder.
- Never position a telescopic ladder within a range of 2.5 m from non-insulated electrical components
or low-voltage installations and networks which are under live current. Never position an aluminium
telescopic ladder in the vicinity of components of high-voltage installations.
- Take care when using electrical equipment. Telescopic ladders conduct electric current. Always
take precautions so that a power cable cannot become trapped or become caught when climbing,
sliding or repositioning the telescopic ladder. Check beforehand that your tool’s electrical cable is not
damaged.
- Telescopic ladders must always be positioned on their feet and not on the step/rung.
- Always position a telescopic ladder as close as possible to the work to be carried out.
- Do not operate the unlocking catches or the unlocking/locking buttons when someone is standing
on the telescopic ladder (gure 2 C, gure 2 D and gure 2F).
- Visually check that all steps/rungs are locked before climbing the telescopic ladder: this can be
checked through the position of the locking buttons below the rungs (gure 2 C) and the catches
(gure 2 D).

COLLAPSING AND EXTENDING A TELESCOPIC LADDER
Important! Follow the instructions below closely when collapsing and extending a telescopic ladder. This
will help prevent ngers becoming caught between the rungs and the uneven spaces in between!
EXTENDING THE INTEGRATED WALL SUPPORT WITH TOOLBAG
(ONLY TELE-PROMATIC/TL SMART UP PRO)
The Tele-Promatic/TL Smart Up Pro can be used with or without the wall support. Depending on the work that
has to be performed, you can decide whether or not to use the wall support.
- Undo the Velcro of the Toolbag
- Pull one side of the wall support from the ladder (do not lock this yet)
- Slide the other side of the wall support out of the ladder
- Lock both arms by pushing these down until they lock.
- Check both locks (gure 1 B)
- A weight of no more than 2.5 kg can be carried in the Toolbag of the wall support (gure 1 A).
- Do not place objects in the Toolbag that may damage the Toolbag (i.e. sharp or hot objects).
- Only place small objects in the Toolbag and no objects that protrude out of the Toolbag.
Extending the top arms
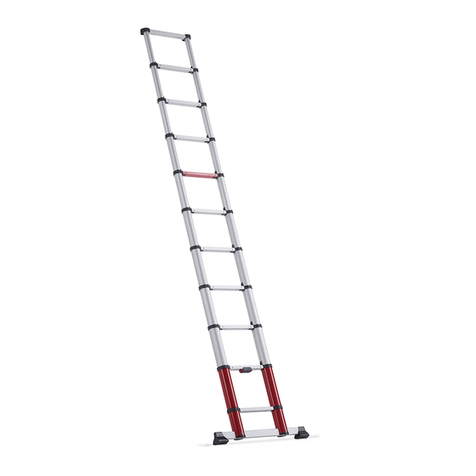
The TL Smart-up Active is tted with top arms. Extend one top arm until it locks. Repeat with the second arm.
Check the position of the unlocking/locking slides on the top rung of the ladder (Fig. 2D). No red marking should
be visible directly beside these slides.
EXTENDING A TELESCOPIC LADDER TO MAXIMUM HEIGHT
- Place the telescopic ladder upright on a clean and stable surface.
- Place a foot on the lowest rung or on the stability beam to keep the ladder in the correct position when
extending this.
- Make sure that the front side of the ladder is facing you. The front side can be recognized from the
unlocking/locking slides on the second rung at the bottom.
- When extending a telescopic ladder, start with the uppermost rung and extend this until the rung locks into
place. This will not lock until the rung that is underneath is also pulled upwards when extending the ladder.
The rung will not lock into place until this has happened. The rung has locked when the locking buttons (to
the left and right underneath the rung) are fully protruding (gure 2 C). For additional safety, the ladder has
been fully dampened preventing rapid closure when the ladder is collapsed or extended. Additional physical
strength may therefore be required to extend the ladder.
- Repeat this with the subsequent rungs until you have extended the telescopic ladder to its maximum height.
- Again check the position of all locking buttons underneath the rungs (gure 2 C) and the catches at the
bottom of the ladder (gure 2 D).
- Also ensure that all of the spaces between the rungs are equal (gure 2 B).

COLLAPSING AND EXTENDING A TELESCOPIC LADDER CONT.
EXTENDING A TELESCOPIC LADDER TO AN INTERMEDIATE LENGTH
- Place the telescopic ladder upright on a clean and stable surface.
- Place a foot on the lowest rung or on the stability beam to keep the ladder in the correct position when
extending this.
- Make sure that the front side of the ladder is facing you. The front side can be recognized from the unlocking/
locking slides on the second rung at the bottom.
- When extending a telescopic ladder, start with one rung after the lowest rung and extend until the rung
locks into place. Check this has locked by checking the position of the locking buttons (to the left and right)
underneath the rung (gure 2 C). For additional safety, the ladder has been fully dampened preventing rapid
closure when the ladder is collapsed or extended. Additional physical strength may therefore be required to
extend the ladder.
- Repeat this with the subsequent rungs until you have reached the required height. Again check the position of
all locking buttons underneath the rungs (gure 2 C) and the catches at the bottom of the ladder (gure 2 D).
- Ensure that all of the spaces between the rungs are equal (gure 2 B).
- The remaining rungs on a partially extended ladder will have stacked on top of one another at the top of the
ladder (gure 2 A).
COLLAPSING A TELESCOPIC LADDER
- Place the telescopic ladder upright on a clean and stable surface.
- When collapsing a telescopic ladder start with one rung after the lowest rung.
- Keep the ladder in a steady upright position with one hand on the ladder boom, preferably 2 rungs higher
(gure 2 E and gure 2 G).
- With the other hand, slide the two catches towards one another, using the thumb and rst nger, and guide
the ladder parts that are above down gently using the other hand (gure 2 E). Please note: all subsequent
rungs will automatically slide in! Make sure that your ngers do not become trapped between the sliding parts
or the rungs (gures 2 F, 2 G).
- Make sure that when collapsing the ladder any objects that you have placed in the Toolbag of the wall support
(TeleProMatic) do not fall out. Also make sure that the weight of the objects does not cause the ladder to fall
over before or when collapsing the ladder.
- Prevent a situation where you have a half step at all times; this may occur if you collapse higher rungs
- Never collapse the telescopic ladder by pushing the locking buttons (to the left and right underneath the
rungs) by hand (gure 2 F).
- Never unlock the telescopic ladder with one or two hands on a rung (trapping hazard!) (gure 2 F).
- If the wall support with Toolbag is used, this can be collapsed back in (TeleProMatic). To do this, unlock the
wall support on both sides using the left and right buttons positioned on the wall support. Now both sides can
be collapsed upwards and slid into the ladder.
- Both top arms of the TL Smart-up Active can now be retracted. Squeeze the unlocking slides towards each
other between your thumb and index nger to unlock and retract the top arms.
USE OF THE TELESCOPIC LADDER
Attention! If a telescopic ladder falls, immediately check if the ladder can be fully collapsed. If this is
not possible, do not use the ladder! Deformities may lead to breakages.
- Never load a telescopic ladder in excess of 150 kg (= a person climbing telescopic ladder including any
“baggage”).
- When carrying out work, always keep both feet on a step/rung of the telescopic ladder. Never stand, for
example, with just one foot on the telescopic ladder and the other foot resting on a window frame. Never
reach or lean too far to the side when working on a telescopic ladder (max. 1 arm length). If the centre of
gravity is moved from the centre of the telescopic ladder, this can become unstable and can collapse (rule of
thumb: keep your navel between the uprights of the telescopic ladder). If necessary, reposition the telescopic
ladder more frequently.
- Never climb a telescopic ladder any higher than the red rung or never higher than the 4th rung from the top
(the maximum safe standing position).
- Telescopic ladders may only be used for light work and for short periods of time.
- If there is an unavoidable risk of direct contact with electricity, do not use this telescopic ladder!
- Do not use a telescopic ladder outdoors in high winds (force 6) or other unfavourable weather conditions.
- Never leave a telescopic ladder unsupervised that has already been set up for use. Think about (playing)
children.
- When possible, close windows and doors (not emergency exits) in the immediate vicinity of the work.
- Climb the telescopic ladder when you have at least one hand free. When ascending/descending the
telescopic ladder, hold on properly. This should always be done while facing the telescopic ladder. Holding a
rung with at least one hand provides increased security should you slip or miss your footing.
- Do not use a telescopic ladder as a bridge (section).
- Wear sensible footwear to avoid slipping and/or painful knocks (no slippers, high-heeled shoes or clogs).
- Do not stand on a telescopic ladder for long periods without taking regular breaks.
- Tiredness is a risk!
- The telescopic ladder in ladder position should protrude by at least one metre above the required standing
or step-over height.
- Any tools that are used while standing on a telescopic ladder have to be light and easy to use.
- Avoid any work that could cause sideways pressure on the telescopic ladder, such as drilling into hard stone.
This can cause the telescopic ladder to tip over. While working, hold onto the telescopic ladder with at least
one hand, or take precautions if it is not possible to hold on.
- No more than one person should stand on a telescopic ladder at the same time.
- Never reposition the telescopic ladder/folding ladder while somebody is standing on it.

ADDITIONAL SAFETY TIPS WHEN USING TELESCOPIC LADDERS
- The fact that telescopic ladders are equipped with locking and sliding parts means that it is important to
keep these components clean in order for the equipment to function properly. For the telescopic action, it is
also important that dirt does not build up between the sliding parts. It is, therefore, important to keep these
ladders clean and dry and free from dirt.
- Never wear baggy clothing or jewellery. These could become caught when ascending or descending the
telescopic ladder which could lead to a fall.
- Frequently check that the feet are not worn. Worn feet may damage the support surface, or can result in the
telescopic ladder slipping.
- In the interest of personal safety, only use accessories or aids that have been recommended by Altrex.
- Do not leave any tools or other equipment at the bottom of the telescopic ladder which you might trip over.
MAINTENANCE
Maintain your telescopic ladder properly by keeping it free from contamination by substances such as paint,
mud, sand, dirt, snow and oil. Clean the sliding parts frequently to ensure that these work properly.
ASSEMBLY AND/OR REPAIR OF REPLACEMENT PARTS
Replacement parts supplied by Altrex must be assembled on the correct Altrex product and in the same way as
the part that is replaced. Assembly (attachment) and/or repair is eectuated at the own risk and expense of the
client. Altrex is not liable for damage caused by incorrect assembly and/or repair. For a fee, Altrex can be called
in for the repair of your product, and/or the assembly of the parts in question.

WARRANTY CONDITIONS
This Altrex product has been designed, manufactured and tested with the greatest care. Our products meet
all legal requirements applicable to climbing materials and, in addition, our own high Altrex standards are also
applied. Should this product be used in accordance with the instructions and its intended use, a warranty will
apply under the following conditions (the warranty period is indicated on the sticker at the side of our products):
1. Altrex guarantees the reliability of the product and the quality of the materials used.
2. We will rectify any defects that are covered by the warranty by replacing the defective part, or the product
itself, or by supplying a part for replacement.
3. Any defects that occur as a result of the following are not covered by the warranty:
a. Use of the product contrary to its intended use or contrary to the instructions for use.
b. Normal wear and tear of the product.
c. Assembly or repair by the client or by third parties (with the exception of tting the spare parts provided
by Altrex as indicated above under point 2).
d. Any modied governmental regulations concerning the nature or quality of the material used in the
product.
4. Any defects that are found upon the delivery of the product should be reported immediately to Altrex.
Should notication of these defects not take place immediately, the warranty will be null and void.
5. Any defects of the product have to be reported to Altrex or your Altrex dealer as soon as possible, but in
any case within 14 days of the defect being found.
6. a. Should a claim be made under the warranty conditions, Altrex has to have the opportunity to be able to
investigate the product in its Quality Centre. The client must make the product available for this purpose.
Should it be established during the investigation that the product has been used incorrectly, the costs of
the investigation will be charged to the client.
b. Should the client ask for an investigation to be carried out by an independent institute, the costs for
this investigation are at the expense of the client should it be established during the investigation that the
product has been used incorrectly. The costs of the investigation are also at the expense of the client if,
prior to this investigation, Altrex oered to repair or to replace the product at no charge to the client.

This manual suits for next models
1
Table of contents
Other Altrex Ladder manuals

Altrex
Altrex 503567 User manual

Altrex
Altrex Olympus Series Instructions for use

Altrex
Altrex TeleLogic 420 User manual

Altrex
Altrex Q-Tech 16.7033 User manual

Altrex
Altrex 3400 Quick setup guide

Altrex
Altrex RolGuard User manual

Altrex
Altrex RS TOWER Safe-Quick 51 User manual

Altrex
Altrex TL Smart up Go User manual
Popular Ladder manuals by other brands

PVI
PVI XP3 manual

TRI-ARC
TRI-ARC VersaStep TAVSM34-AS Assembly instructions

brennenstuhl
brennenstuhl 1420440 Use and Operating Instructions

Hailo
Hailo HobbyStep Duo Aluminium 7285-801 Use and Operating Instructions

DIVERSIFIED
DIVERSIFIED SJP-008 manual

TB Davies
TB Davies EuroFold TB Davies User's guide & instructions