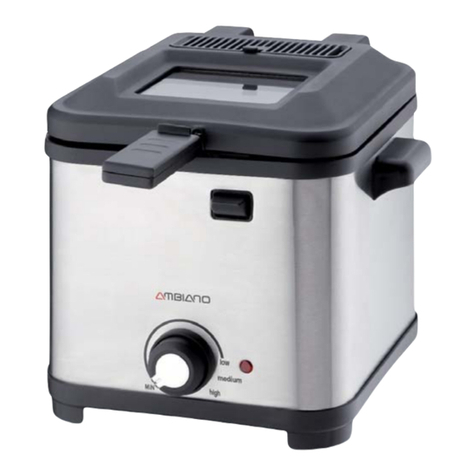
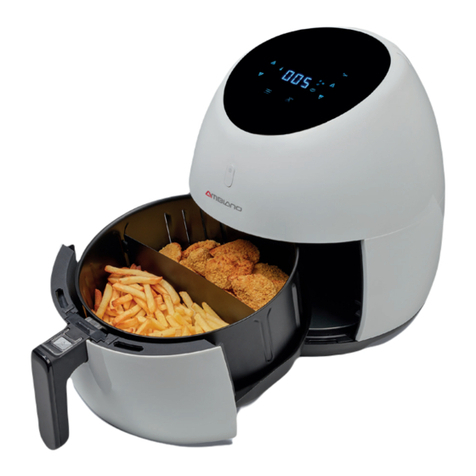
Ambiano GT-AF-02-US User manual

User Manual
Manual
del usuario
Made in China
DIST. & SOLD EXCLUSIVELY BY:
ALDI
BATAVIA, IL 60510
Contents
Features ..................................................................................................... 4
Parts............................................................................................................ 5
Features / parts........................................................................................ 6
General........................................................................................................7
Read and keep operating instructions .............................................7
Explanation of symbols.......................................................................... 8
Safety.......................................................................................................... 9
Intended use........................................................................................ 9
Important safeguards........................................................................10
Initial start-up .........................................................................................12
Checking the contents.......................................................................12
Before first use....................................................................................12
Setting up the device.........................................................................13
Assembly ..................................................................................................13
Operation..................................................................................................13
Manual preselection of cooking time and temperature...............15
Cooking with the program function................................................16
At the end of the cooking process ...................................................17
Cooking times, temperatures and quantities .................................18
Cleaning and storage........................................................................... 20
Cleaning.............................................................................................. 20
Storage................................................................................................ 20
Technical data..........................................................................................21
Troubleshooting .....................................................................................22
Responsible Disposal............................................................................ 23
AIR FRYER
FREIDORA DE AIRE
English .... 06
Español ... 25
US
98655
MODEL:
GT-AF-02-US 10/2019
3
1-866-558-8096
US
AFTER SALES SUPPORT
SERVICIO POSVENTA
YEARS WARRANTY
AÑOS DE GARANTÍA

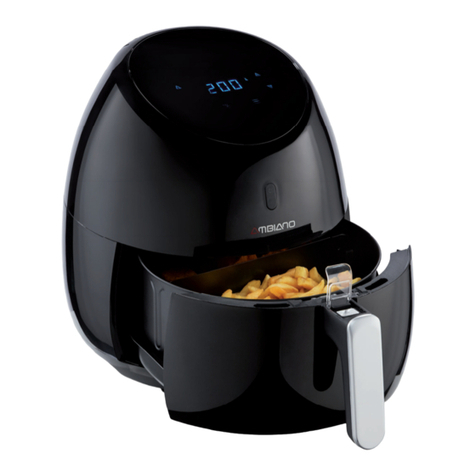
FEATURES / PARTS
1Insert
2Fry basket handle (Cool-touch handle)
3Safety element
4Fry basket lock (under the safety element)
5Air intake vent
6Air outlet vent
7Display/control panel (pos. 8 up to 15 program displays,
pos. 18 to 22 are touch-sensitive symbols, sensor fields)
8Default setting for “French Fries” 18 minutes at 400 °F
9Default setting for “Bacon” 10 minutes at 360 °F
10 Default setting for “Chicken” 22 minutes at 360 °F
11 Default setting for “Shrimps” 12 minutes at 360 °F
12 Default for setting “Steak/Chops” 15 minutes at 400 °F
13 Default setting for “Cake” 30 minutes at 320 °F
14 Default setting for “Vegetables” 17 minutes at 320 °F
15 Default setting for “Fish” 14 minutes at 360 °F
16 Temperature in degrees Fahrenheit (°F)
17 Time in minutes (min)
18 Sensor field Time/Temperature selection
19 Sensor field +(increase temperature or time)
20 Sensor field Start/Stop
21 Sensor field –(decrease temperature or time)
22 Sensor field MENU (menu selection)
23 Display “Heating on”
24 Display “Fan on”
25 Fry basket
26 Safety switch
- User manual/Warranty Card
A
3
4
2
1
24
23
16
17
8 9 10 11 12 13 14 15
22 21 20 19 18
7
5
6
25
26
1
B
MAX
64 5
Parts / PiezasFeatures / Características Scope of supply / Device parts
FEATURES / CARACTERÍSTICAS PARTS / PIEZAS

7
GENERAL
Read and keep operating instructions
The operating instructions provide important information on starting and oper-
ating the device.
Before using the device, read through the operating instructions
carefully, particularly the safety instructions. Failure to comply with
these operating instructions may lead to serious injuries or material
damage.
The operating instructions are based on the valid standards and rules in the Eu-
ropean Union. Please also note the country-specific directives and laws abroad.
Keep the operating instructions for further use. If you pass this device on to third
parties, please also ensure that you pass on these operating instructions.
You can also download these operating instructions from the website
www.gt-support.de in PDF format.
General

8
Explanation of symbols
EXPLANATION OF SYMBOLS
The following symbols and signal words are use in these operating instructions,
on the device or on the packaging.
DANGER!
This signal symbol/word indicates a hazard with a high de-
gree of risk, which could lead to death or serious injury if it
is not avoided.
WARNING!
This signal symbol/word indicates a hazard with a medium
degree of risk, which could lead to death or serious injury if it
is not avoided.
CAUTION!
This symbol/word indicates a hazard with a low degree of
risk, which could lead to minor or moderate injury if it is not
avoided.
Hot surface! This symbol indicates hot surfaces during operation - do
not touch with bare hand.
NOTE
This signal symbol/word warns of possible material dam-
age.
This symbol provides useful information about assembly or operation.

9
SAFETY
Intended use
This device is only suitable for the preparation of food in normal household
quantities and may only be used indoors.
It can be used to prepare vegetables, French fries, fish, meat and poultry as well
as cake.
HOUSEHOLD USE ONLY
Only use the device as described in these operating instructions.
Any other use is regarded as inappropriate and may lead to material damage or
even to personal injury.
Never use the Air Fryer to heat water or other liquids.
The manufacturer or retailer accepts no liability for damage caused by improper
use, improper repairs, unauthorized modifications or the use of unauthorized
accessories or spare parts.
This device is not suitable for commercial use, such as:
• in kitchens for employees or shops and other commercial areas,
• on agricultural farms,
• by customers in hotels, motels or other living facilities,
• at Bed&Breakfast facilities.
Safety

10
IMPORTANT SAFEGUARDS
When using electrical appliances, basic safety precautions
should always be followed including the following:
1. Read all instructions.
2. Do not touch hot surfaces. Use handles or knobs.
3. To protect against electrical shock do not immerse cord,
plugs, or (state specific part or parts in question) in water or
other liquid.
4. Close supervision is necessary when any appliance is used
by or near children.
5. Unplug from outlet when not in use and before cleaning. Al-
low to cool before putting on or taking off parts.
6. Do not operate any appliance with a damaged cord or plug
or after the appliance malfunctions or has been damaged in
any manner. Return appliance to the nearest authorized ser-
vice facility for examination, repair, or adjustment.
7. The use of accessory attachments not recommended by the
appliance manufacturer may cause injuries.
8. Do not use outdoors (this item may be omitted if the product
is specifically intended for outdoor use).
9. Do not let cord hang over edge of table or counter, or touch
hot surfaces.
10. Do not place on or near a hot gas or electric burner, or in a
heated oven.
11. Extreme caution must be used when moving an appliance
containing hot oil or other hot liquids.
12. Always attach plug to appliance first, then plug cord into the
wall outlet. To disconnect, turn any control to “off”, then re-
move plug from wall outlet.
Safety

11
13. Do not use appliance for other than intended use.
14. This appliance has a polarized plug (one blade is wider than
the other). To reduce the risk of electric shock, this plug is in-
tended to fit into a polarized outlet only one way. If the plug
does not fit fully into the outlet, reverse the plug. If it still does
not fit, contact a qualified electrician. Do not attempt to mod-
ify the plug in any way.
15. a) A short power-supply cord (or detachable power-supply
cord) is provided to reduce the risk resulting from becom-
ing entangled in or tripping over a longer cord.
b) Longer detachable power-supply cords or extension
cords are available and may be used if care is exercised in
their use.
c) If a longer detachable power-supply cord or extension
cord is used:
1) The marked electrical rating of the cord set or extension
cord should be at least as great as the electrical rating
of the appliance;
2) The cord should be arranged so that it will not drape
over the countertop or tabletop where it can be pulled
on by children or tripped over unintentionally; and
3) If the appliance is of the grounded type, the cord set
or extension cord should be a grounding-type 3-wire
cord.
SAVE THESE INSTRUCTIONS.
Any other servicing should be performed by an authorized
service representative.
Safety

12
INITIAL START-UP
Checking the contents
NOTE
Risk of damage!
Careless opening of the packaging with a sharp knife or other sharp object may
damage the device.
− Open the packaging carefully.
1. Remove all parts of the device and the operating instructions from the carton
and remove the protective foils and inserted cardboard pieces.
Use the fry basket handle
2
to pull the insert
1
out of the device. Lift up
the safety element
3
and press the fry basket lock
4
to remove the fry
basket
25
.
2. Check whether the delivery is complete (see Features/contents).
3. Check for any damaged individual parts. If this is the case, do not use them.
Please contact the service address indicated on the guarantee certificate.
Before first use
DANGER! Electric shock hazard!
Never immerse the Air Fryer in water or any other liquid
and never rinse it with water or cleaning agents!
NOTE
Do not use scouring agents, solvents or sharp-edged
objects!
1. Wipe the inside and outside of the Air Fryer with a slightly damp cloth.
NOTE
Risk of damage!
The Air Fryer’s fan and heating element are located at the top inside the insert
compartment. Wipe this area very carefully.
2. Wipe the inside and outside of the insert 1and the fry basket 25 with a
moist cloth.
Initial start-up

13
Setting up the device
Place the device on an easily accessible, level, dry, heat-resistant and sufficient-
ly stable work surface. The rubber feet underneath the device ensure a secure
hold.
Maintain a minimum distance of 11.8 in from the rear wall of the device to other
objects and at least 3.9 in from the sides.
ASSEMBLY
CAUTION!
Ensure that the device is NOT connected to
the outlet during assembly.
1. Now place the fry basket 25 into the insert 1as shown in Fig. B.
Ensure that the fry basket lock 4engages with an audible click.
2. Push the insert all the way into the Air Fryer as shown in Fig. B.
OPERATION
DANGER! Only connect the device to the outlet after
its complete ASSEMBLY.
Electric shock hazard! Ensure that the connecting cable
cannot come into contact with the hot parts of the fryer.
Do not reposition the device while it is in operation. Switch
off the device, unplug it and allow the device to cool for
30 minutes before repositioning it.
Do not use baking parchment as this could prevent suf-
ficient air circulation.
CAUTION!
When inserting or removing the slide-in
module, make sure that the protective flap
3is folded down over the cooking pot locking mecha-
nism 4, so that the locking mechanism cannot be pressed.
If the lock is pressed, the insert could detach and fall out.
Assembly / Operation

14
The housing and device parts become very hot dur-
ing operation. Use oven mitts when inserting or re-
moving the insert.
To ensure that the food is cooked evenly, you should redistribute / turn the food
after half the cooking time by removing the insert, carefully shaking the food
and reinserting the insert back into the device. Alternatively, place the insert on
a heat-resistant surface and turn / distribute the food with the help of the ap-
propriate utensils.
1. To set up the device, see Setting up the device and assemble it as described
in ASSEMBLY.
2. Prepare the food and place it in the fry basket 25 .
Ensure that the food does not protrude beyond the edge of the fry
basket. Please note the MAX mark in the cooking pot 25 .
When preparing individual pieces of food, distribute them as far apart as
possible so that the hot air can flow evenly around them. This ensures that
food is cooked evenly.
3. Push the insert 1all the way into the Air Fryer as shown in Fig. B.
4. Connect the plug to the power supply. All symbols in the display light up
briefly. The sensor field Start/Stop 20 remains lit.
5. Touch the sensor field . The display now alternately shows and flashes the
preselection option for the cooking time and temperature.
If you do not operate the device after switching it on, it will switch off
after approx. one minute.
Operation

15
Manual preselection of cooking time and temperature
1. Use the sensor field 18 to alternate between °F and min.
2. Use the sensor fields 19 and 21 to increase or reduce the tempera-
ture and/or the time.
- The temperature is changed in 10 °F increments ranging from 180 to 400 °F.
- The time is changed in minute increments ranging from one minute to 60
minutes.
If you continuously touch the sensor field, the temperature/time will scroll
forward/back quickly.
21 20 19 18
24
23
3. Start cooking by touching the sensor field 20 .
You can change the cooking time and temperature at any time during
operation as described above.
If you want to interrupt the heating process, touch the sensor field 20 dur-
ing operation. The heating process is interrupted; the time is stopped and the
sensor field flashes. During this time, the fan continues to operate for a few sec-
onds. Touching the sensor field again will continue the cooking process.
If you want to control the cooking process or add or remove ingredients, you
can pull out the insert 1during operation. This deactivates the fan and heat-
ing element and stops the time. Reinserting the insert will continue the cooking
process.
4. To switch off the device, touch the sensor field 20 for approx. 3 seconds.
The fan will continue to operate for some time after the device is switched off.
The indicator “Heating on” 23 lights up to indicate the heating process.
The indicator “Fan on” 24 flashes to indicate the fan’s operation.
Operation

16
Cooking with the program function
There are 8 programs available with default times and temperatures.
The figure shows the settings for “Cake” 13 .
1. After switching on the device, touch the sensor field 22 repeatedly to
alternate between the programs ( 8to 15 ).
The selected program is indicated by the flashing symbol.
8 9 10 11 12 13 14 15
22 20
The cooking time and/or the temperature can be changed at any time
before and during operation, as required, as described under Manual
preselection of the cooking time and the temperature.
If no further operation occurs after the program selection, the device will
switch off after approx. one minute.
Operation

17
At the end of the cooking process
Once the time has elapsed, the device will emit short beeps and switch
off. The fan will continue to operate for some time after the device is
switched off.
If you want to end the cooking process before the time has elapsed, touch and
hold the sensor field 20 for approx. 3 seconds. The fan will continue to oper-
ate for some time after the device is switched off.
1. Unplug the device from the power supply.
CAUTION!
Risk of injury!
Accidental detachment of the fry basket 25 can lead to in-
juries and damage.
When removing the insert from the device, always keep
your thumb on the safety element 3to avoid acciden-
tally activating the fry basket lock 4.
2. Use the fry basket handle 2to pull the insert 1out of the device and
place the insert on a heat-resistance surface.
3. Fold up the safety element 3.
4. Press the fry basket lock 4and lift the fry basket up and out of the insert
1.
5. Always place the fry basket 25 on a heat-resistant surface.
6. Remove the food from the fry basket.
Operation

18
Cooking times, temperatures and quantities
COOKING TIMES, TEMPERATURES AND QUANTITIES
The times, temperatures and quantities listed below are only approxi-
mate values. They can vary to a greater or lesser degree depending on
the nature of the food being cooked.
Potatoes /
French fries
Quantity
in oz.
Time in
minutes
Tempera-
ture in °F
Turn /
shake
Addition-
al infor-
mation
Fried potato
cakes
6.4 15 - 18 360 No
Thin frozen
French fries
11.2 - 14.4 18 - 25 400 Yes
Thick frozen
French fries
11.2 - 14.4 20 - 25 400 Yes
Raw French fries
(0.3 x 0.3 in)
11.2 - 14.4 20 - 25 400 Yes Add 1/2 ta-
blespoon
of oil
Potato Gratin 17.6 20 - 25 400 Yes Use ap-
propriate
container
Add a little oil to raw potatoes to prevent them from sticking together
and to make them crispier. Add the oil after you have cut the potatoes
and before placing them in the fry basket. Subsequent stirring will dis-
tribute the oil onto the cut surfaces. Drain any excess oil before placing the pota-
toes in the fry basket.

19
Cooking times, temperatures and quantities
Meat, poultry
and seafood
Quantity
in oz.
Time in
minutes
Tempera-
ture in °F
Additional
information
Fish 3.2 - 14.4 10 - 18 360
Shrimp 3.2 - 14.4 8 - 15 360
Steak 3.2 - 12.8 12 - 20 400 preheat
Pork chops 3.2 - 14.4 10 - 15 400 preheat
Chicken legs 3.2 - 17.6 20 - 25 360
Chicken breast 3.2 - 17.6 20 - 25 360
Chicken nuggets,
frozen
3.2 - 17.6 15 - 20 400 turn / shake
Avoid cooking foods with a very high fat content. Note that large pieces
take longer than two smaller ones, for example. Turn smaller pieces dur-
ing cooking to achieve even cooking.
Dessert / Vegetables Quantity
in oz.
Time in
minutes
Tem-
perature
in °F
Turn /
shake
Additional
informa-
tion
Cake 11.2 30 320 No Use ap-
propriate
container
Muffins 11.2 15 400 No
Spring rolls 3.2 - 14.4 8 - 10 400 Yes
Boiled vegetables 3.2 - 14.4 15 - 20 320 Yes Add 1/2
tablespoon
of oil
Breaded baking
cheese
3.2 - 14.4 8 - 10 360 No

20
Cleaning and storage
CLEANING AND STORAGE
Cleaning
DANGER! Electric shock hazard!
Before cleaning, switch off the device and unplug it from
the outlet.
Never immerse the Air Fryer in water or any other liquid
and never rinse it with water or cleaning agents!
WARNING! Hot surfaces!
Hot surfaces can pose a risk for burns.
Before cleaning, leave the device to cool for at least 30 min-
utes. Remove the insert 1and the fry basket 25 , so that the
device can cool down faster.
NOTE
Risk of damage!
Do not use scouring agents, solvents or sharp-edged objects!
Leave all parts to cool before cleaning them. Clean accessories thor-
oughly after use to prevent residues from drying.
1. Use a moist cloth to clean the surfaces of the device.
2. Clean the insert 1and the fry basket 25 with hot water, a little detergent
and a non-abrasive sponge.
You can use a degreasing detergent to remove any remaining dirt.
Dry all parts thoroughly.
3. Clean the interior of the Air Fryer with a moist cloth and a little detergent.
Storage
Clean the device and store it in a dry place away from dirt, out of the reach of
children.

21
Technical data
TECHNICAL DATA
Model: GT-AF-02-US
Supply voltage: 120 V~, 60 Hz, 1300 W
Cable length: approx. 3.3 feet
Capacity: Approx. 87.9 fl oz
Timer: 1-60 minutes
Temperature range: 180-400 °F
Because our products are constantly being further developed and improved,
design modifications and technical changes are possible.

22
TROUBLESHOOTING
Problem Possible cause and remedy
The device does not
work.
Device is not plugged in.
− Connect the plug to the power supply.
Sensor field 20 was not activated.
− Touch the symbol
Insert 1was not fully inserted.
− Push the insert in flush with the front of the device.
Overheating protection triggered.
− Unplug the device. Do not use the device. Contact
the Service Center.
Food is still raw. Too much food in the basket.
− Reduce the amount of food.
Temperature too low.
− Increase the temperature.
Cooking time too short.
− Increase the cooking time.
Food not cooked
evenly.
Food must be turned.
− Turn the food.
Insert cannot be
pushed in.
The fry basket is not fully engaged in the insert.
− When inserting the fry basket, the fry basket lock
4must engage with an audible click.
Escaping steam. A normal frying process.
Escaping white
smoke.
Very fatty foods.
− No negative effect. Avoid very fatty foods.
Oil residue in insert.
− Clean all parts after use.
The device contin-
ues to operate after
insert is removed.
Faulty safety switch 26 or other component.
− Unplug the device. Do not use the device. Contact
the Service Center.
Troubleshooting

23
RESPONSIBLE DISPOSAL
At the end of its working life, do not throw this device out with your household
trash. Electrical and electronic products contain substances that can have a
detrimental effect on the environment and human health if disposed of inappro-
priately. Observe any local regulations regarding the disposal of electric products
and dispose of it appropriately for recycling. Contact your local authorities for
advice on disposal/recycling facilities in your area.
Responsible Disposal

Table of contents
Languages:
Other Ambiano Fryer manuals

Ambiano
Ambiano DF-036 User manual

Ambiano
Ambiano GT-DFM-01-US User manual

Ambiano
Ambiano MD 19780 User manual

Ambiano
Ambiano XL 5.3 QUART User manual

Ambiano
Ambiano FREIDORA CON MANGO FRIODE 8 TAZAS User manual

Ambiano
Ambiano MINI DEEP FRYER User manual

Ambiano
Ambiano TXG-DS13 User manual

Ambiano
Ambiano AFOVEN-YULSS User manual

Ambiano
Ambiano MD 18763 User manual
Popular Fryer manuals by other brands

Dean
Dean SM40G Specification sheet

Kuppersbusch
Kuppersbusch VKEF3500.0 Instructions for use

CROWNFUL
CROWNFUL 19QT instruction manual

HOMCOM
HOMCOM 800-169V70 instruction manual

Roller Grill
Roller Grill MF 120 R Instructions for use and installation

Manitowoc
Manitowoc Frymaster FilterQuick FQE30 Installation, operation and maintenance manual