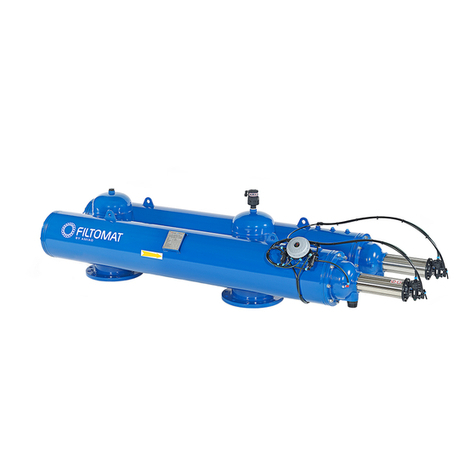
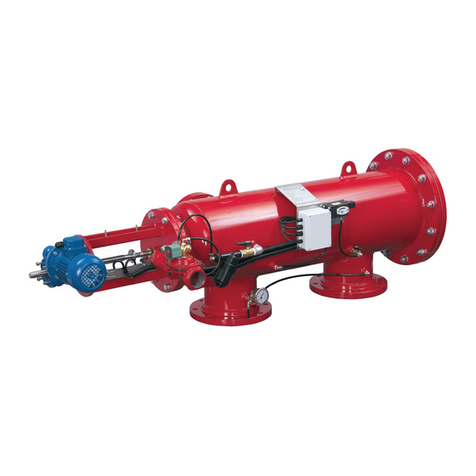
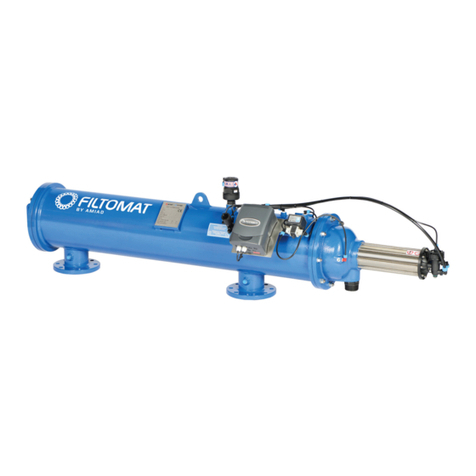
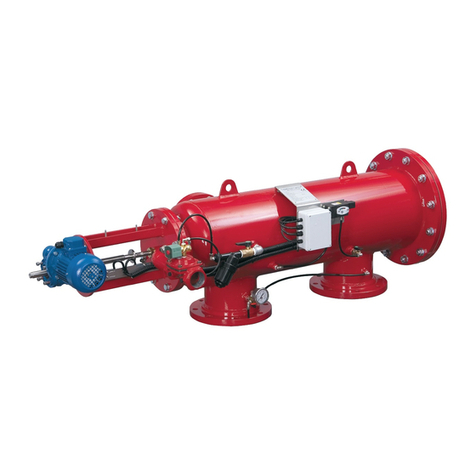
amiad SAF-3000 Manual

AMIAD Water Systems Ltd.
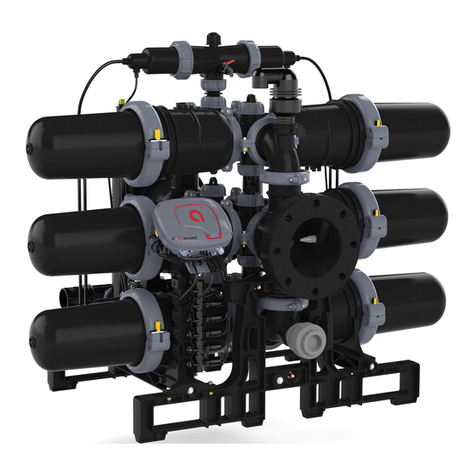
SAF-3000 FILTER
Serial number:
Order number:
Catalog number:
Filtration degree:
Tested by:
Installation, Operation and
Maintenance Instructions
910101-000112 / 07.2019
Original Instructions

SAF 3000 07.2019 Page 2 of 25
AMIAD Water Systems Ltd.
SAF-3000 FILTER
Disclaimer:
Copyright © 2018 Amiad Water Systems Ltd. All rights reserved.
The contents of this document, including without limitation all information and materials, images, illustrations, data, drawings, names and any other
such materials that appear in this document are the sole property of Amiad Water Systems Ltd., including any intellectual property rights, whether
registered or not, and all know-how contained or embodied therein. Amiad may alter, remove or change the Content without any further notice. You
may not reproduce, copy, modify, create derivative works from, sell or participate in any sale of, or exploit in any way, in whole or in part, any of this
document or its content.
The confidential nature of and/or privilege in the file enclosed is not waived or lost as a result of a mistake or error in this file.If you received this file
in error, please notify Amiad immediately at info@amiad.com.
This document does not replace any certified drawing, procedure or information provided by Amiad in reference to a specific customer, site or
project.
Amiad assumes that all users understand risks involved within this file and/or its attached materials.This document is given in good faith and is not
intended to impose any obligation to Amiad. While every effort has been made to ensure the information in this manual is accurate and complete, we
would appreciate if you can bring any errors or omissions to the knowledge of Amiad or consult Amiad experts or its authorized representatives if you
have any questions.
Amiad Water Systems Ltd. D.N. Galil Elyon 1, 1233500, Israel Tel: 972 4 690 9500 | Fax: 972 4 814 1159 Email: [email protected]m

SAF 3000 07.2019 Page 3 of 25
Table of Contents
Specifications............................................................................................................................................4
General .....................................................................................................................................................4
Flushing data.............................................................................................................................................4
Control and electricity ..............................................................................................................................4
Construction materials .............................................................................................................................4
Filtration degrees available ......................................................................................................................4
Safety Instructions....................................................................................................................................5
General Safety Instructions...................................................................................................................5
Installation.............................................................................................................................................5
Commissioning ......................................................................................................................................6
Operation and Control ..........................................................................................................................6
Maintenance..........................................................................................................................................7
Dimensional Drawing................................................................................................................................8
Description of Filter Operation.................................................................................................................9
Installation ..............................................................................................................................................11
Start-up and first operation....................................................................................................................12
Maintenance...........................................................................................................................................13
Cleaning the coarse screen:....................................................................................................................14
Dismantling and Assembling the Filter Components .............................................................................15
Parts Schedule –SAF-3000 Section 1 .....................................................................................................17
Parts Drawing #1 Page 1.........................................................................................................................18
Parts Drawing #1 Page 2.........................................................................................................................20
Parts Schedule and Drawing –SAF-3000 Section 2................................................................................21
Parts Schedule and Drawing –SAF-3000 Section 3 - Scanner................................................................22
Parts Schedule and Drawing –SAF-3000 Section 4 - SLN Scanner.........................................................23
Amiad Limited Warranty ...........................................................................Error! Bookmark not defined.
With any inquiry please quote Filter Serial Number, located on the filter housing.

SAF 3000 07.2019 Page 4 of 25
Specifications
General
Maximum flow rate
150 m3/h
660 USgpm
Consult manufacturer for optimum flow
depending on filtration degree & water
quality.
Min. working pressure
1.5 bar
21 psi
or lower if pressure is increased for flushing
Max. working pressure
10 bar
150 psi
Filter area
3,000 cm2
465 in2
Inlet/Outlet diameter
80,100,150 mm
3", 4", 6"
Flange standards as per request.
Filter housing
250 mm
10"
Epoxy-coated steel, or other on request.
Max. working temperature
500C
1220F
Weight
80 mm = 105 Kg
100 mm = 110 Kg
150 mm = 115 Kg
3" = 232 lb.
4" = 243 lb.
6" = 254 lb.
Flushing data
Exhaust valve
50 mm
2"
Flushing cycle time
20 seconds
20 seconds
Wasted water per cycle
64 liter
17 gallon
at 2 bar = 30 psi
Minimum flow for flushing
11 m3/h
50 USgpm
at 2 bar = 30 psi
Control and electricity
Control voltage
24V AC (12V or 24V DC upon request)
Electric motor
1/4 HP 50 / 60 Hz, 35 / 42 Gear output R.P.M.
Rated operation Voltage
3 phase, 220 / 380 / 440 V, 50 / 60 Hz
Single phase, 110 / 220 V, 50 / 60 Hz
DC 12V or 24V (upon request)
Current consumption
0.6 Amp. (With 3 phase 380 / 440 V)
Construction materials
Filter Housing and Lid
Epoxy-coated carbon steel 37-2 (Stainless Steel 316 available on request).
Screens
Stainless Steel 316
Cleaning mechanism
Stainless Steel 316, POM, PVC
Exhaust valve
Epoxy-coated cast iron, Natural Rubber
Seals
Synthetic Rubber
Control
Aluminum, Brass, Stainless Steel, PVC
Filtration degrees available
micron
500
300
200
130
100
80
50
40
30
20
10
mm
0.5
0.3
0.2
0.13
0.1
0.08
0.05
0.04
0.03
0.02
0.01

SAF 3000 07.2019 Page 5 of 25
Safety Instructions
General Safety Instructions
➢Amiad filtration products always operate as components in a larger system. It is essential for the system designers, installers and
operators to comply with all the relevant safety standards.
➢Prior to installation, operation, maintenance or any other type of action carried out on the filter, read carefully the safety,
installation and operation instructions.
➢During installation, operation or maintenance of the filter all conventional safety instructions should be observed in order to
avoid danger to the workers, the public or to property in the vicinity.
➢Please note: The filter enters into a flushing mode automatically, without prior warning.
➢No change or modification to the equipment is permitted without a written notification given in advance by the manufacturer or
by its representative, on the manufacturer’s behalf.
➢Always observe standard safety instructions and good engineering practices whilst working in the filter’s vicinity.
➢Use the filter only for its intended use as designed by Amiad, any misuse of the filter may lead to undesired damage and may
affect your warranty coverage. Please consult with Amiad prior to any non-regular use of this equipment.
Installation
General
➢Install the filter according to the detailed Installation Instructions provided with the filter by the manufacturer and according to
the description given in this manual.
➢Make sure to leave enough clearance so as to enable easy access for future treatments and safe maintenance operations.
➢The user should arrange suitable lighting at the area of the filter to enable good visibility and safe maintenance.
➢The user should arrange suitable platforms, ladders and safety barriers to enable easy and safe access to the filter without
climbing on pipes and other equipment. The user should verify that any platform, barrier, ladder or other such equipment is built,
installed and used in accordance with the relevant local authorized standards.
➢Check and re-tighten all bolts during commissioning and after the first week of operation.
➢Use only appropriate standard tools and equipment operated by qualified operators when installing, operating and maintaining
the filter.
➢When installation is required in hazardous environment sites, underground or high above ground, make sure that the site design
and the auxiliary equipment are appropriate and that installation procedures are carried out in accordance with the relevant
standards and regulations.
➢Ensure walking areas about the installation are slip free when wet.
Shipment and transporting
➢Shipping and transporting the filter must be done in a safe and stable manner and in accordance with the relevant standards and
regulations.
➢For shipping, lifting and positioning the filter, use only approved lifting equipment and authorized employees and contractors.
Electricity
➢Electric wiring should be performed by an authorized electrician only, using standardized and approved components.
➢Install a lockable main power cut-off switch close to the control panel.
➢If due to site constraints, the control panel is installed without a clear line-of sight of the filter, an additional lockable power
disconnect cut-off switch should be installed near each filter unit.
➢Installation of the filter should be performed so as to avoid direct water splashing on the electrical components or on the control
panel.
SAF 3000 07.2019 Page 6 of 25
Pneumatics
➢Install a lockable main cut-off switch, featured with a pressure release mechanism, on the compressed air supply line close to
the control panel.
➢If the control panel is installed far away and there is no eye contact with the filter, a lockable compressed air cut-off switch,
featured with a pressure release mechanism, should be installed near each filter unit.
➢The user should make sure that the compressed air supplied to the filter never exceeds the maximum designated pressure for
this filter. An air-pressure reduction valve should be installed on the compressed air supply line upstream of the filter’s pneumatic
inlet port.
Hydraulics
➢Extra safety devices should be installed on hot water applications to avoid skin burn danger.
➢The user should install a manual Water Cut-off Valve next to the filter’s inlet port.
➢In cases where the downstream piping network downstream of the filter is pressurized an additional manual Water Cut-off Valve
should be installed next to the filter outlet port.
➢The user should make sure that the system includes a Pressure Release / Drainage Valve to enable release of residual pressure
prior to any maintenance procedure performed on the filter.
➢The user should make sure that the filter is never exposed to water pressure exceeding the maximum designated pressure for this
filter, if needed a Pressure Reduction Valve should be installed upstream of the filter’s water inlet port.
➢Please note that the maximum working pressure indicated at the filter’s specifications table includes the pressure caused by fluid
hammer and pressure surge effects.
Civil Engineering
➢Make sure that the filter installation is done by Amiad qualified technicians.
➢Make sure that any civil engineering work at the installation site such as construction, lifting, welding, etc. is done by qualified
workers / technicians / contractors and in accordance with the relevant local standards.
➢While using lifting equipment, make sure that the filter or the lifted part is chained securely and in
a safe manner.
➢Do not leave lifted equipment if there is no necessity. Avoid working below lifted equipment.
➢Wear a safety helmet while using lifting equipment.
➢Make sure that the flooring is sloped for drainage and to avoid accumulation of liquids.
Commissioning
➢Read carefully the Commissioning and the First Start-up Operation instructions prior to any attempt to operate the filter.
➢In order to achieve maximum performance and smooth operation of the filter it is crucial to perform the Startup and First
Operation procedures exactly as described in this manual.
➢Commissioning the filter should be done by an authorized Amiad technician, do not attempt to commission the filter
unaccompanied since this may lead to undesired damage and may affect your warranty coverage.
Operation and Control
➢Do not operate the filter before reading carefully and being familiar with its operation instructions.
➢Observe the safety stickers on the filter and never perform any operation contradicting the instructions given.
➢Never operate or use the filter for purposes other than its original design and operational envelope.

SAF 3000 07.2019 Page 7 of 25
Maintenance
Before any maintenance or non-regular operation please read the following:
➢Servicing the filter should be done only by technicians authorized by Amiad.
➢Disconnect the filter from the power supply and lock the Main Power Switch.
➢Disconnect the compressed air supply, release the residual pressure and lock the Pneumatics Main Valve.
➢Disconnect the filter from the water system by closing and securing the Manual Inlet Valve. In cases where the downstream
piping network is pressurized, close and secure the Manual Outlet Valve also.
➢Release the residual water pressure by opening the Pressure Release / Drainage Valve.
➢Empty the filter by opening the Drainage Valve.
➢In hot water systems wait till the filter components cool off to a safe temperature.
➢Place warning signs around the work area as required by the local standards and procedures.
➢Inspect the filter’s safety stickers and replace any damaged or faded sticker.
Mechanical
➢When working on the filter use only appropriate standard tools.
➢Always open and close valves slowly and gradually.
➢Remove grease and fat material residues in order to avoid slipping.
➢Before disconnecting the filter from the water supply, electricity and pneumatics and before releasing the filter’s residual
pressure do NOT:
oloosen or unscrew bolts
oremove any protection cover
oopen any service port flange
➢Avoid splashing and water leakage so as to minimize slippage, electrification or damage to the equipment, caused by moisture.
➢While using lifting equipment, make sure that the filter or the lifted part is chained securely and in
a safe manner.
➢Do not leave lifted equipment if there is no necessity. Avoid working below lifted equipment.
➢Wear a safety helmet, goggles, gloves, and any other personal safety equipment required by the local standards and regulations.
➢Human entry into a filter must be done in accordance with the relevant local safety instructions, standards and regulations for
working in hazardous environment.
➢Manual cleaning of filter media using high water pressure or steam should be performed in accordance with the cleaning system
instructions, the local standards and regulations and without endangering the operator or the vicinity
➢Manual cleaning of filter element using acid or other chemical agents should be performed in accordance with the relevant
material safety instructions, the local standards and regulations and without endangering the operator or his vicinity.
Before returning to regular operation
➢Re-assemble any protection covers or protection mechanisms removed during service or maintenance operations.
➢Make sure that all the tools, ladders, lifting devices, etc. used during the maintenance procedures are taken away from the filter
area and stored
➢In order to return the filter to regular operation, follow the First Start-up Operation instructions as detailed in your user manual.
➢For filters used in potable water systems it is required to disinfect the filter according to the local water authority standards and
regulations before putting it back to service.

SAF 3000 07.2019 Page 8 of 25
Dimensional Drawing Standard SAF 3000

SAF 3000 07.2019 Page 9 of 25
Description of Filter Operation
Filtering process:
The SAF-3000 is a sophisticated yet easy-to-operate automatic filter, with a self-cleaning mechanism driven by an electric motor.
The SAF-3000 is designed to work with various types of screens in filtration degrees from 10 to 500 micron, and is available in 3", 4"
and 6" inlet/outlet diameter.
The water enters through the inlet pipe into the coarse screen from outside in, and through the fine screen from inside out. The
"filtration cake" accumulates on the fine screen surface and creates head loss to develop.
The coarse screen is designed to protect the cleaning mechanism from large dirt particles. Usually, it does not accumulate large
quantities of suspended solids and is not cleaned automatically.
Self-cleaning process:
The SAF 3000 initiates the self-cleaning process when either the pressure differential across the screen reaches a pre-set value or
the flush timer reaches its preset timed interval.
The fine screen filter element is cleaned by the suction scanner, which rotates in a spiral movement while removing the filtration
cake from the screen, and expels it out through the exhaust valve.
A 2-way (fwd/rev) drive unit that is attached to the scanner by a threaded shaft rotates the scanner and provides the linear
movement.
The exhaust valve is activated for the duration of the cleaning cycle by a 3-way solenoid. During the 20 seconds self-cleaning
process, filtered water continues to flow downstream.
System Operation modes:
The filtration system may be found in one of the following modes:
1. Filtering mode: This is the normal operating status. The flush mode is idle and the power light on the control board is lit.
2. Flush mode: The motor and exhaust valve activate according to the previously described self-cleaning process.
3. Continuous flushing mode: It is possible to activate the self-cleaning mechanism continuously by setting the SW1 switch in the
control board to "CONT." position.
4. Malfunction mode: If the filter malfunctions, the self-cleaning operation stops, the malfunction light on the control board is
turned on and a 24V AC external output is activated.
The filtration system enters a malfunction mode under any of the following conditions:
1st. A continuous signal from the pressure differential switch longer than the PD fault time-out (default value=15 minutes)
indicates that the filter is unable to clean itself.
2nd. The motor Over Load protector was activated, either manually or due to actual over load.
3rd. Limit Switch malfunction - (usually, simultaneous activation of both limit switches).

SAF 3000 07.2019 Page 10 of 25
Initiation of self-cleaning:
The filter initiates the self-cleaning process under any one of the following conditions:
1. PD flush - The Pressure Differential Switch (PDS) closes a free potential contact signal when the pressure differential across the
screen reaches the pre-set value (usually 0.5 bar =7 psi). The control board registers the signal and activates the flushing cycle.
2. Test flush - Manually pressing the "TEST" push button on the control board door activates a single flushing cycle.
3. Timed flush - SW1 must be in the DP/Time position. The T1 timer in the control panel activates the flushing cycles at time
intervals, regardless of the pressure differential. The timer resets after every flushing cycle. The PD flush mode is active in this
mode as well.
4. Continuous flush - SW1 must be in cont position. In this mode the filter flushes continuously. This mode is for use in
extraordinary circumstances and for a limited time. Please consult with the manufacturer regarding the uses of this mode.
Control system:
Two types of control boards are available: PLC Type and Relay Type. See Appendix A or B for details.

SAF 3000 07.2019 Page 11 of 25
Installation
Design recommendations:
1. Often, flow increases and pressure drop dramatically during fill-up of a water system. In this case, a pressure-sustaining valve
installed downstream of the filter will ensure the minimum required pressure for the filter and a controlled filling-up of the line.
2. If constant water flow is required even during maintenance, it is recommended that a manual or automatic by-pass be installed.
Isolating valves will be used to isolate each filter unit.
3. In applications where the water quality periodically worsens, it is possible to operate an emergency flush program. In order to do
so, an automatic Down Stream valve must be installed. For details, please consult the manufacturer.
Installation instructions:
1. Install the filter horizontally in a manner that will allow convenient access and enough space to dismantle the filter for
maintenance purposes.
2. Check the direction of flow according to the arrows marked on the filter housing.
3. It is recommended to install a mechanical non-return valve downstream of the filter.
4. The exhaust line (minimum 2” diameter) should be designed so that it creates minimal resistance to flow of 11m3/h (50 USgpm).
5. If the system is designed to operate with working pressure higher than 6 bar (85 psi), it is recommended that a manual throttling
valve be installed on the exhaust line, in order to enable regulation of the flushing flow rate.
6. The user should arrange suitable lighting at the area of the filter to enable good visibility and safe maintenance.
7. The user should arrange suitable platforms and safety barriers to enable easy access to the filter without climbing on pipes and
other equipment.
IMPORTANT !!
Prevent static back-pressure or reverse flow through the filter.
Install a manual or a hydraulic valve downstream of the filter.
Electric wiring
1. Install the control board in a dry and protected place (It is possible to order a special control board for severe out-door
installation).
For single phase or DC power supply, please refer to the electrical drawing inside the control board.
2. Power connection to the control board:
a. Connect a three-phase power source through a semi-automatic switch, or 16 Amp. fuse to the L1 L2 L3 connectors at the
terminal strip in the control board.
b. Ground the control board.
3. Power connection to the motor: Connect the drive unit to the control panel using 4 x 2.5 mm (12 or 14 AWG) wires in flex-
conduct. Use a long enough cable to allow removal of the drive unit and placing it near the filter for maintenance, without having
to disconnect it from the cable. (The installation should meet or exceed local or national electrical codes for "high" voltage).
4. Control wiring: Connect the terminals between the junction box and the control panel using 6 x 1.5 mm (16 AWG) wires in flex-
conduit. The numbers on the terminals in the board correspond with those in the junction box.

SAF 3000 07.2019 Page 12 of 25
Start-up and first operation
1. Make sure all the electric wiring is correct, according to the enclosed drawings.
2. Turn on control power and 24VAC but leave OL protector off. Verify that the limit switches are wired correctly by manually
toggling them. Monitor the appropriate inputs according to the wiring diagram accompanying the control panel. Proceed to
next step only after verifying correct wiring of all limit switches in the system.
3. CHECK ROTATION: The suction scanner shaft should turn clockwise (CW) and move towards the filter housing until it reaches
limit switch "A". If the motor rotates in the opposite direction (CCW), turn off the electricity immediately and change the
direction of the motor rotation by changing between two phases.
4. The motor must stop when the limit switch plate reaches limit switch "A" (opening the NC circuit).
5. Operate a "dry" flushing cycle by pressing on the "TEST" push button. Check that the flushing cycle runs as described in the
“Self-cleaning process” paragraph in this manual.
6. Open the inlet valve to the filter, leaving the outlet valve closed or with an open by-pass valve (This will keep the flow through
the filter to a minimum), and operate a flushing cycle.
7. Check that the exhaust valve opens and all stages of the flushing cycle perform properly. Attend to leakage, if any.
8. Close the 1/4" valve at the low pressure sensing port of the pressure differential switch for 5 seconds. The PDS hand will move
to the red area and the filter will start the flushing process. Re-open the 1/4" valve.
9. Gradually open the outlet valve and/or close the by-pass valve. Operate the filter under the designed hydraulic conditions.
10. Set the flushing interval timer (T1) for 6-8 hours.
11. Check and re-tighten all bolts after the first week of operation.
* When using Control board type "C" (Relay type) it is necessary to press the "Test" push button in order to start the motor operation
for the first time.

SAF 3000 07.2019 Page 13 of 25
Maintenance
General inspection
Initiate a flush cycle by closing the 1/4" valve at the low pressure sensing port of the pressure differential switch for 5 seconds. Check
that the exhaust valve opens, that the scanner moves properly, and when it reaches the limit switch - verify that the exhaust valve
closes.
Weekly maintenance:
1. Perform a general inspection as described above.
2. Clean the 3/4" filter connected to the exhaust solenoid. (Close the 3/4" valve and activate a flush cycle in order to release pressure
and then unscrew the filter bawl).
3. Check that there is grease on the drive shaft, and drive bushing. Add grease if necessary.
4. Check for any leakage from the scanner shaft. If necessary, replace the sealing nut internal O-ring (16 on page 21)
Changing the sealing nut internal O-ring:
1. Close the inlet valve to the filter and release the pressure.
2. Remove the cover (29) from the drive shaft housing (27) by unscrewing the wing nuts.
3. If the Suction Scanner is in the outer position, operate a flush cycle and bring it to the inner position.
4. Remove the split pin (9) and pull out the connecting pin (8).
5. Operate a flush cycle.
6. Power down the unit when the drive shaft is half way through its cycle. The drive shaft is now separated from the suction
scanner.
7. Unscrew the sealing nut (14 on page 21).
8. Remove the used internal O-ring and clean the O-ring seat.
9. Insert a new O-ring (16 on page 21)
10. Apply some grease on the external O-ring and on the shaft.
11. Tighten the sealing nut (14 on page 21).
12. Re-connect the drive shaft to the suction scanner shaft.
13. Operate the control board and open the filter inlet valve.
Maintenance prior to long term shutdown (end of season):
The following must be done if the filter will not be in operation for longer than a month.
1. Perform a flush cycle (If possible, with a closed downstream valve).
2. Release pressure from the filter.
3. Power down the unit when the drive shaft is half way and none of the limit switches is pressed.
4. Disconnect the power supply to the control board.
5. Grease the drive shaft and the drive bushing.
6. Clean the 3/4" control filter.
7. Clean the coarse screen.
Maintenance prior to renewing filter operation:
1. Connect the control board to the power supply.
2. Check proper operation of the filter, especially noting proper rotation.
3. Grease the drive shaft and the drive bushing.
4. If necessary, change the sealing nut internal O-ring.
IMPORTANT!!
THE DRIVE SHAFT MUST BE LUBRICATED WITH HEAVY-DUTY, WATER RESISTANT GREASE THAT WILL NOT OXIDIZE.
(SHELL, DARINA EP-2 OR SIMILAR).

SAF 3000 07.2019 Page 14 of 25
Cleaning the coarse screen:
1. Close the filter inlet valve.
2. Release pressure from the filter by performing a flush cycle.
3. Remove the filter lid (16), pull out the flushing chamber (14) with its seal (15).
4. Pull out the coarse screen (13) and clean it.
5. Insert the coarse screen (13) in its position, so that it rests on its supports.
6. Insert the flushing chamber (14), Make sure the seal is on top of the chamber centering ring with its opening facing the inside of
the filter housing. The insertion should be done at a slight angle and in a circular motion.
7. Close and tighten the filter lid.

SAF 3000 07.2019 Page 15 of 25
Dismantling and Assembling the Filter Components
Prior to opening the filter perform a flush cycle by pressing the "TEST" push button.
The screens
Dismantling:
1. Close the filter inlet and outlet valves and release the pressure by performing a flush cycle. Power down the control board.
2. Unscrew the lid bolts (17) and remove the lid (16).
3. Pull out the flush chamber (14) with its seal (15).
4. Pull out the coarse screen (13) and clean it if necessary.
5. Pull out the upper cylinder seal (10).
6. Pull the fine screen (11) from the filter housing.
7. If required, remove the lower screen seal (10).
Assembly:
1. Mount the lower screen seal (10) on the fine screen.
2. Insert the screen into the filter housing (1) with the support legs pointing upwards. After pushing the screen all the way in,
rotate the screen so that it sits on the support legs. Jiggle the screen until the locking pin (on the inner side of the housing wall)
seats in the slot on the centering ring.
3. Insert the cylinder seal (10), so that its open side faces outward.
4. Clean and apply some grease on the suction scanner pipe and on the O-ring of the suction scanner bearing , located in the flushing
chamber (14).
5. Insert the coarse screen (13) in its position, so that it rests on its supports.
6. Insert the flush chamber (14), make sure the seal is on top of the chamber’s centering ring with its open side facing inward. The
installation should be done at a slight angle and in circular motion.
7. Assemble the lid on the filter housing. Tighten the bolts (17) evenly.
8. Open the filter inlet valve; first and then open the outlet valve. Turn on the control board.
9. Check proper operation of the filter.
The suction scanner:
Dismantling:
1. Close the filter’s inlet valve, release the pressure and disconnect power supply from the control board.
2. Remove the cover (29) from the drive shaft housing (27) by unscrewing the wing nuts.
3. Remove the Split pin (9) and pull out the connecting pin (8).
4. Begin the dismantling procedure as per 1-6 in the chapter "dismantling the screens".
5. Pull the suction scanner (7) with a spiral motion from the filter housing.
Assembly:
1. Apply some grease on the smooth side of the suction scanner shaft (7) and insert it through the filter housing.
2. Insert the end of the suction scanner shaft (7) into the drive shaft (2 on page 21) and align the holes.
3. Insert the connecting pin (8) through the holes of the two shafts and lock it with the split pin (9).
4. Continue to assemble the parts as per 1-9 in the chapter "Assembling the screens".

SAF 3000 07.2019 Page 16 of 25
The drive shaft housing:
Dismantling:
1. Close the filter’s inlet valve, release the pressure and disconnect power supply from the control board.
2. Dismantle the suction scanner and screens as described above.
3. Remove the limit switch sling (6 on page 21) from the drive shaft housing by unscrewing the bolts (17 on page 21). Carefully put
the limit switch sling near the filter to avoid damaging the electrical wires.
4. Remove the drive unit (21) from the drive shaft housing (27) by unscrewing the nuts (26) from the bolts (22).
Slide the drive unit off the shaft and make sure not to lose the drive shaft key (20).
5. Dismantle the drive shaft housing (27) from the housing flange by unscrewing the bolts (4).
Assembly:
1. Verify that the O-ring (3) is clean and properly placed.
2. Tighten the bolts (4) to secure the flange of the drive shaft housing to the filter.
3. Insert the suction scanner (7), the fine screen (11) and the coarse screen as described previously.
4. Connect the drive shaft (2 on page 22) to the scanner shaft using the connecting pin (8) and split pin (9).
5. Make sure the drive shaft key (20) is fitted properly in the gearbox. Slide the drive unit over the drive shaft and make sure that the
drive shaft groove is aligned with the drive shaft key.
6. Connect the drive unit (21) to the drive shaft housing (27) with the bolts (22), and tighten them.
7. Assemble the limit switch sling (6 on page 22) in its place. Make sure that the Limit Switch Plate is halfway between the two limit
switches.
8. Power up the control board and make sure the filter is operating properly. Check Rotation!
9. Open the filter inlet valve; first and then open the outlet valve and recheck filter operation.

SAF 3000 07.2019 Page 17 of 25
Parts Schedule –Standard SAF-3000
Section 1
No.
Description
Qty.
1
Housing SAF-3000
1
2
Slotted Pin 10x30 DIN1481
1
3
O-Ring Seal P2-433 (Drive Unit Adaptor EBS H-SAF) NBR N/F
1
4
Hex Bolt Partial Thread M16X60 Zinc Plated C/ST
4
5
Flat Washer M16 DIN125 Zinc Plated C/ST
8
6
Hex Nut M16 Zinc Plated C/ST DIN934
4
7
Scan Assembly for SAF 3000 Injection Nozzels
1
8
Connecting Pin (SAF-1500,3000, 4500)
1
9
Split Pin 1.6X12 DIN94 S/ST316
1
10
Hydraulic Seal AM-02
1
11
Weavewire Screen XXXMic For SAF-3000
1
12
Flushing Chamber Seal AM-01
1
13
SAF-1500/3000 Coarse Screen
1
14
Flushing Chamber SAF-3000
1
15
Hydraulic Seal AM-07 (Polyester Lid)
1
16
Lid Polyester SAF-1500,3000
1
17
Hex Bolt Partial Thread M20X130 Zinc Plated C/ST
4
18
Flat Washer M20 DIN125 Zinc Plated C/ST
4
19
Hex Nut M20 Zinc Plated C/ST DIN934
4
20
Drive Shaft Key (SAF)
1
21
DR.UNIT 440AC3PH 0.18KW.RMI50 1/28 63 B5
1
22
Hex Bolt Full Thread M8X40 Zinc Plated C/ST
4
23
Flat Washer M8 DIN125 Zinc Plated C/ST
8
24
Spring Washer M8 DIN127 Zinc Plated C/St
4
25
Drive Shaft Cover (PVC) SAF
1
26
Hex Nut M8 Zinc Plated C/ST DIN934
4
27
Drive Shaft Assembly SAF-1500/3000
1
28
Socket Head Cap Screw M8X20 S/ST304 DIN912
4
29
Drive Shaft Housing SAF-1500
1
30
Instrumentation Combined Bracket SAF
1
31
Manometer Valve 1/4" W/ Drain
1
32
L-Connector 5/16"X1/4"
4
33
Aluminum Amiad Nameplate, CE, EN
1
34
Rivet Blind 3x6 DIN7337 S/ST316
4
35
Phillips Pan Machine Screw M5X16 304
4
36
Flat Washer M5 DIN125 S/ST304
4
37
Hex Nut M5 S/ST304 DIN934
4
38
Connector 5/16"x1/8"
1
39
L-Connector 5/16"X1/8"
2

SAF 3000 07.2019 Page 18 of 25
No.
Description
Qty.
40
Flat Washer M6 DIN125S/ST316
5
41
Hex Bolt Full Thread M6X20 S/ST304 DIN933
2
42
Spring Washer M6 DIN127 S/ST316
2
43
Hex Nut M6 S/ST316 DIN934
2
44
Ball Valve 3/4" M/F (BRASS)
1
45
L-Connector 3/4" F/M Galvanized
1
46
Raccord Nipple 1/4" for 3/4" Filter
1
47
O-Ring Seal P2-112 NBR
1
48
Raccord Nut 3/4" for 3/4" Filter
1
49
Hydraulic Valve
1
50
Connector 5/16"x1/4"
1
51
Pressure Check Point Connector 1/4"X1/4"
1
52
Solenoid Valve
1
53
Control Tube 5/16" Nylon Air Break
1.6m
54
Electrical Junction Box (SAF)
1
55
Presostat SUB-AS. Midwest W/O Fitting
1
56
3/4" Black Filter AC,W/O Valve, Nylon Screen 130 Mic
1

SAF 3000 07.2019 Page 19 of 25
Parts Drawing –Standard SAF-3000
Section 1: Page 1

SAF 3000 07.2019 Page 20 of 25
Parts Drawing –Standard SAF-3000
Section 1: Page 2
Table of contents
Other amiad Water Filtration System manuals

amiad
amiad TEQUATIC PLUS F-150 C Series User manual

amiad
amiad TEQUATIC PLUS F-75 User manual

amiad
amiad 2" Spin Klin Compact User manual

amiad
amiad Sigma Pro 4 User manual

amiad
amiad AMF-370K-S User manual

amiad
amiad AMF-36K User manual

amiad
amiad AGF Manual

amiad
amiad MEGA ABF 40,000 User manual

amiad
amiad Filtomat M103CL Manual

amiad
amiad Filtomat M102C Manual
Popular Water Filtration System manuals by other brands

Pentair
Pentair Fleck 5800 LXT Installer manual

Aqua Optima
Aqua Optima AWD001 instructions

Trimaco
Trimaco Envirosolutions EnviroWash ES160P Assembly and use instructions

BWT
BWT PERMAQ COMPACT 270 Series Installation and operating manual

SuperFish
SuperFish Pond Clear UVC 30000 user manual

Intellijel
Intellijel SVF 1U manual