PARTS LIST
TravelMate III #580003 – May 1, 2011 to Present
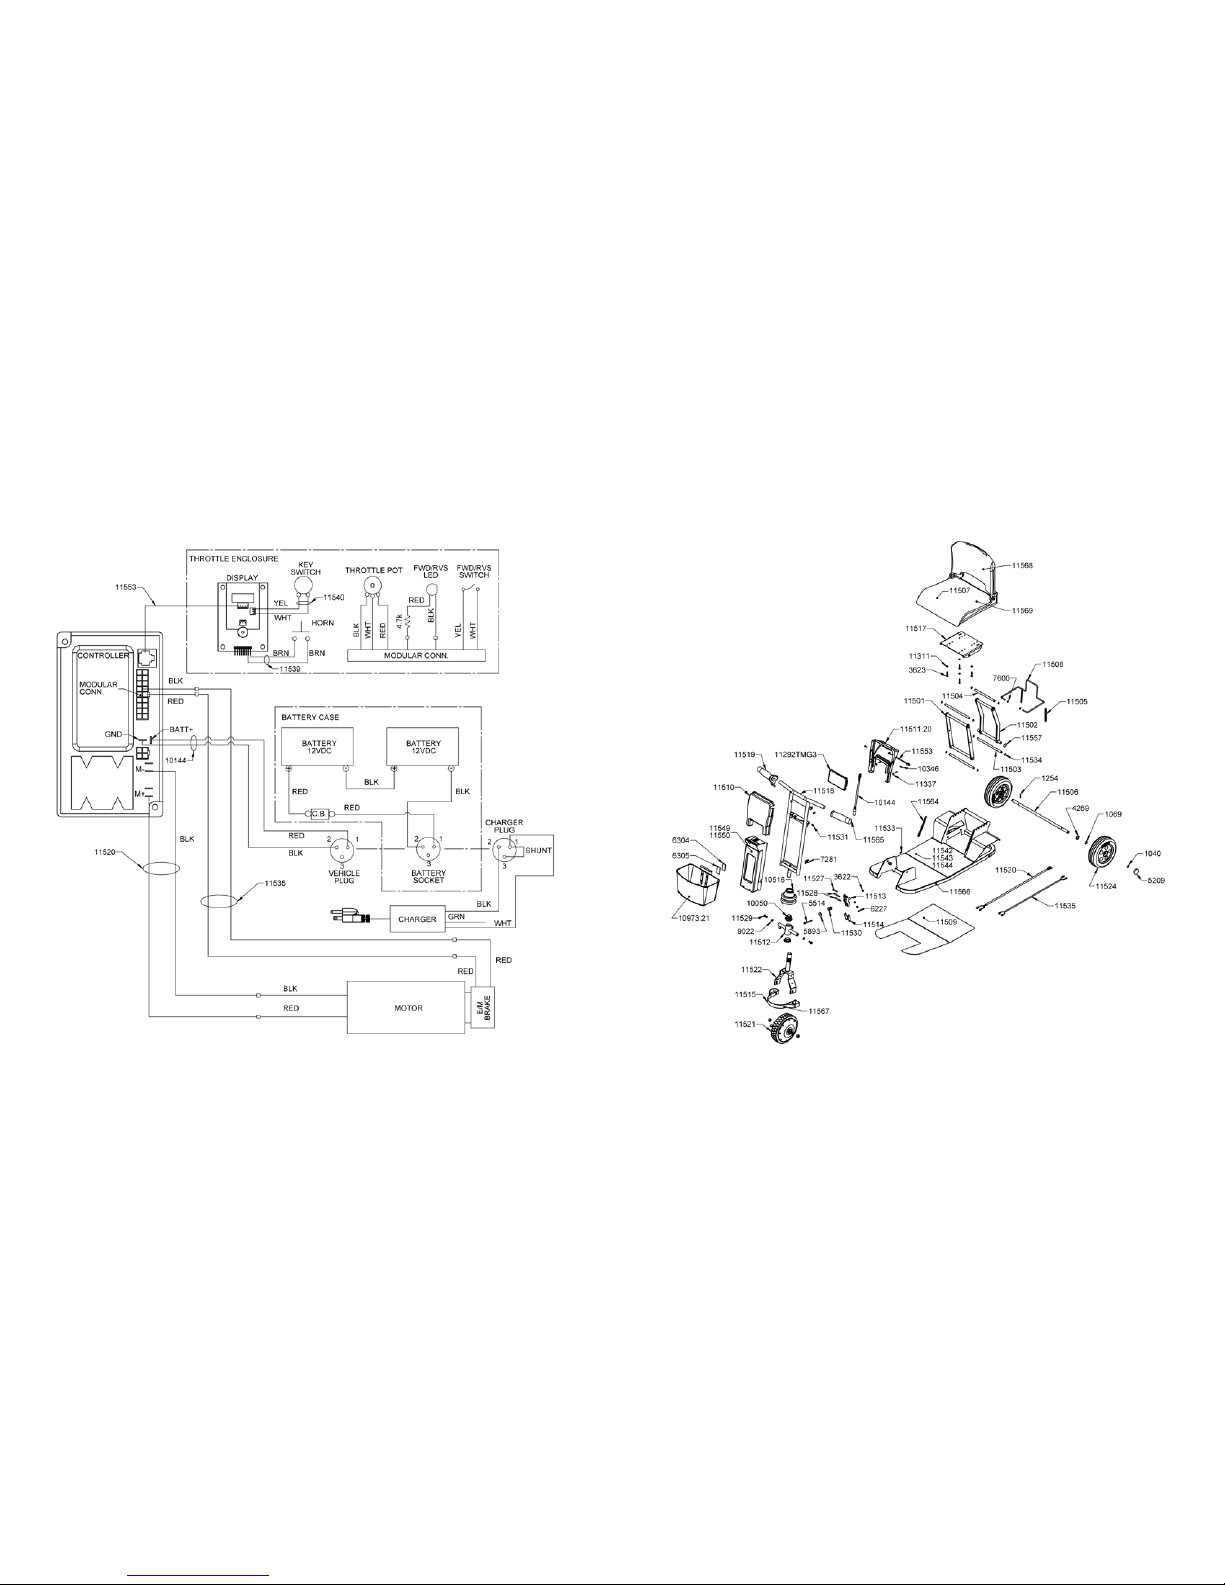
Part # Description Qty/unit
1040 Ring, Retaining 5/8 OD Shaft 2
1069 Washer, Shim, 5/8 ID x 7/8 OD x .016Thick 4
1254 Pin, Spring, 1/8 OD x 1 1/8 Lg 1
3622 Nut, Hex, Nylon Insert, 1/4-20 1
3623 Screw, Hex, 1/4-20 x 1 1/4 Lg 4
4269 Washer, Flat, 5/8 ID x 1 1/8 OD 2
5209 Cap, Black, Wheel 2
5514 Screw, Hex, 1/4-20 x 2 3/4 Lg 1
5893 Washer, Flat, 9/32 ID x 1 OD 1
6227 Nut, Hex, Nylon Insert, #10-24 3
6304 Velcro Dual Lock 400/In 1
6305 Velcro Dual Lock 170/In 1
7281 Screw, Hex Socket, 1/4-20 x 7/8 Lg 2
7600 Nut, Push, 1/4 Stud 2
9022 Washer, Nylon Shim, 3/8 ID x 11/16 OD x .02Thk 2
10050 Bearing Set 1
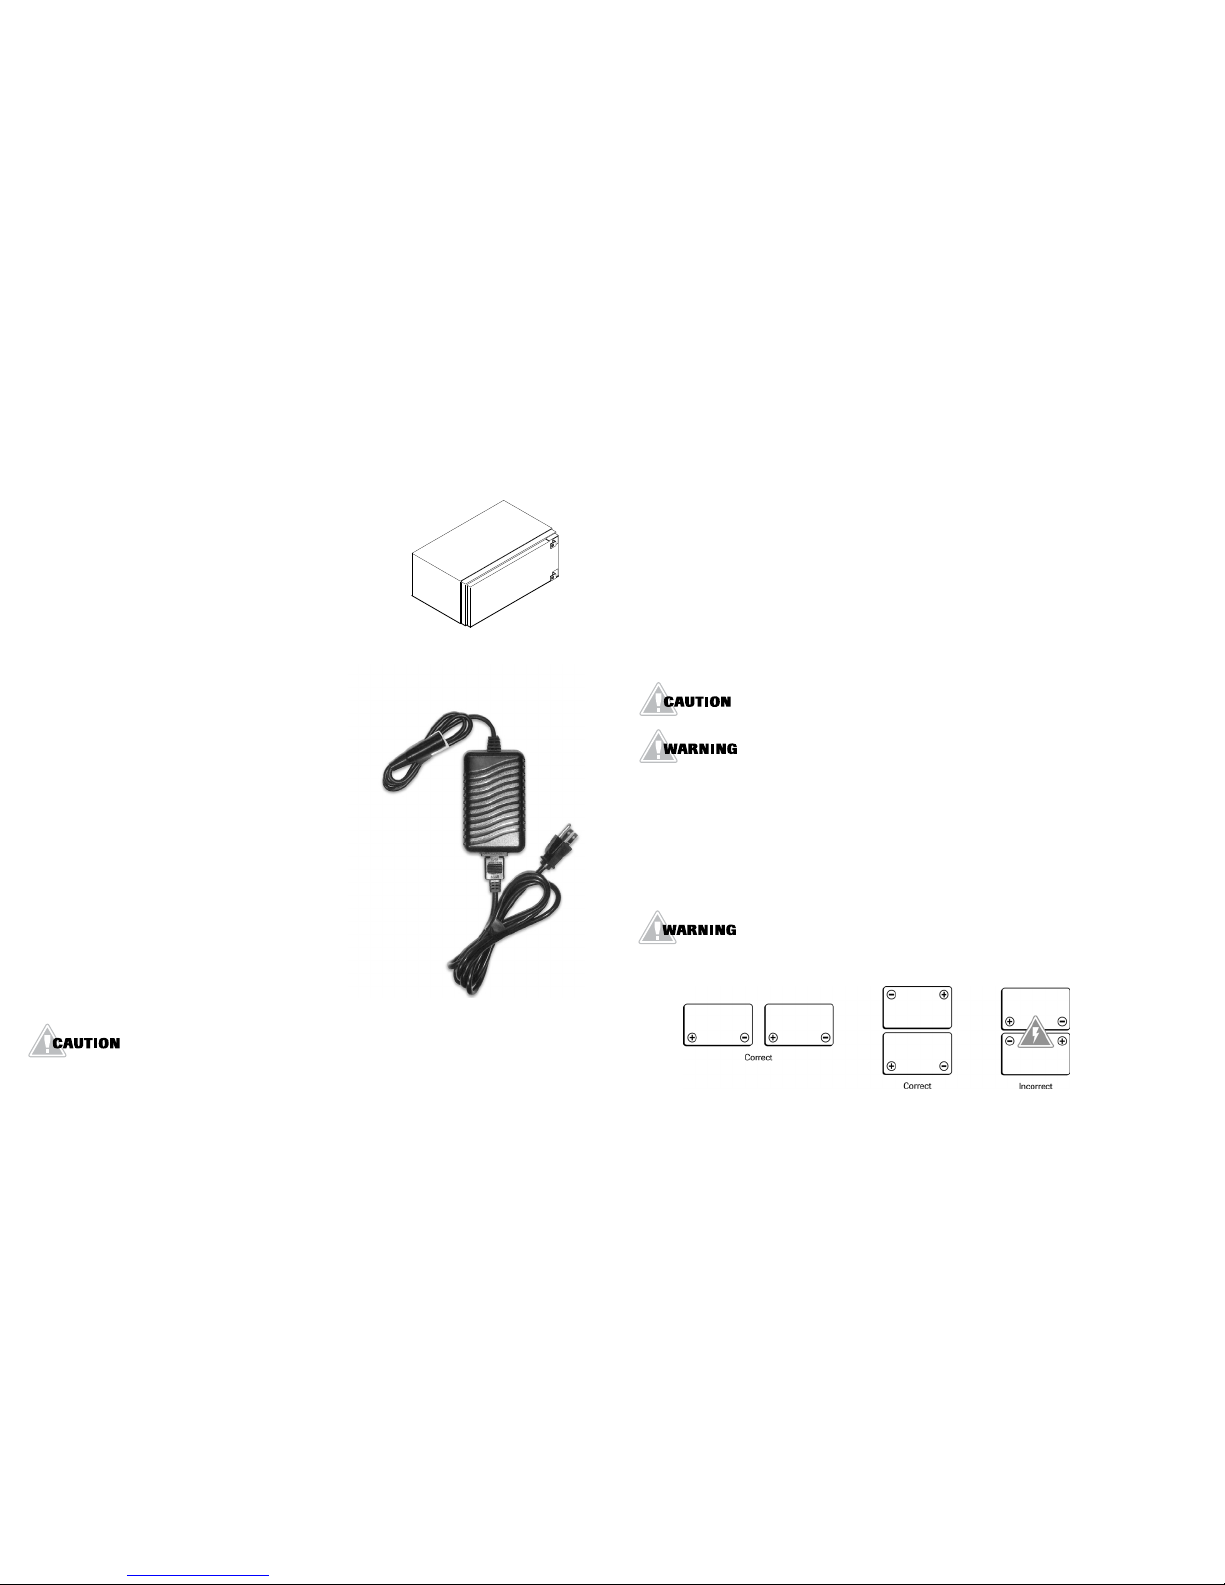
10144 Wire Asm Battery to Controller 1
10346 Screw, Phillips, #8 x 3/4 Lg Type B 4
10516 Boot, Lower Handle 1
10973.21 Basket Asm 1
11292TMG3 Controller CS1108S-1 Standard 1
11311 Washer, Lock, 1/4 ID 4
11501 Arm, Front Seat Mount 1
11502 Arm, Rear Seat Mount 1
11503 Shaft, Rear Seat Pivot 3
11504 Shaft, Long, Seat Pivot 1
11505 Spring, Extension 2
11506 Axle, Rear 1
11507 Seat, Folding Vinyl 1
11508 Latch, Seat Adjusting 1
11509 Mat, Standard 1
11510 Cover, Handle Front 1
11511.20 Cover Asm, Handle Rear 1
11512 Pivot Weldment, Steering 1
Part # Description Qty/unit
11513 Pivot Weldment Handle 1
11514 Link, Handle Latch 2
11515 Bumper, Front Wheel 1
11517 Bracket Asm, Seat Upper 1
11518 Handle Weldment 1
11519 Throttle, Twist Grip 1
11520 Wire Asm Motor 1
11521 Motor, Hub 8" w/ EM Brake 1
11522 Fork Weldment, Motor 1
11524 Wheel Asm, Rear 9" 2
11526 Bearing, 5/8 ID Roller 2
11527 Screw, Shoulder, #10-24 x 1 Lg 1
11528 Screw, Shoulder, #10-24 x 1 Lg 2
11529 Screw, Shoulder, 5/16-18 x 1/4 Lg 2
11530 Spring, Compression 3/4 OD x 1 Lg 1
11531 Nut, U-Spring #8 Screw 4
11533 Screw, Set, 5/16-18 x 5/8 Lg 1
11337 Washer, Flat, 13/64 ID x 1/2 OD 2
11534 Ring, Retaining 1/2 OD Shaft 8
11535 Wire Asm Brake 1
11542 Platform Pacic Blue 1
11543 Platform Cinnamon Red 1
11544 Platform Lime Green 1
11549 Battery Case Asm Standard 1
11550 Battery Case Asm Lithium 1
11553 Wire Asm, Cntrl/Display 1
11557 Ring, Spiral 2
11564 Guide, Latch Handle 2
11565 Handle Grip 1
11566 Trim, Frame TMG3 2
11567 Trim, Bumper TMG3 1
11568 Seat Cover, Back TMG3 1
11569 Seat Cover, BottomTMG3 1
WARRAnTy
TravelMate III Product Warranty
Effective May 1, 2011
Amigo Mobility International, Inc. (AMI) warranties the original completed unit it manufactures to the original purchaser.
Cuts and tears in seats are not covered by warranty.
or newspapers to avoid damage.
for that model is not recommended and voids warranty.
8. AMI is obligated to repair or replace products or parts returned by the purchaser, and found to be
defective under warranty at its headquarters in Bridgeport, Michigan.
such as LED lights, electrical and mechanical switches, wires, belts, chains and resistors, or use of products
for other than personal purposes. Damage during shipment is not covered by the warranty.
or date of purchase is not available, then AMI will use the production date of the unit as the effective warranty date.
authorized to give any warranties on behalf of AMI, nor to assume for AMI any other liability concerning any of its
products unless made in writing and signed by an official of AMI. Any unauthorized repair or modification will
void this warranty and release AMI from any liability.
This warranty gives you specific rights, with the possibility of other rights, which vary depending upon your locality.
www.myamigo.com