Amina AIW750i User manual

Installation Guide
V1.2 Aug 2015
High Performance
Invisible Loudspeaker
AIW750i
Products may vary from items pictured


Ensure that all installation mounting surfaces
are able to support the weight of the product.
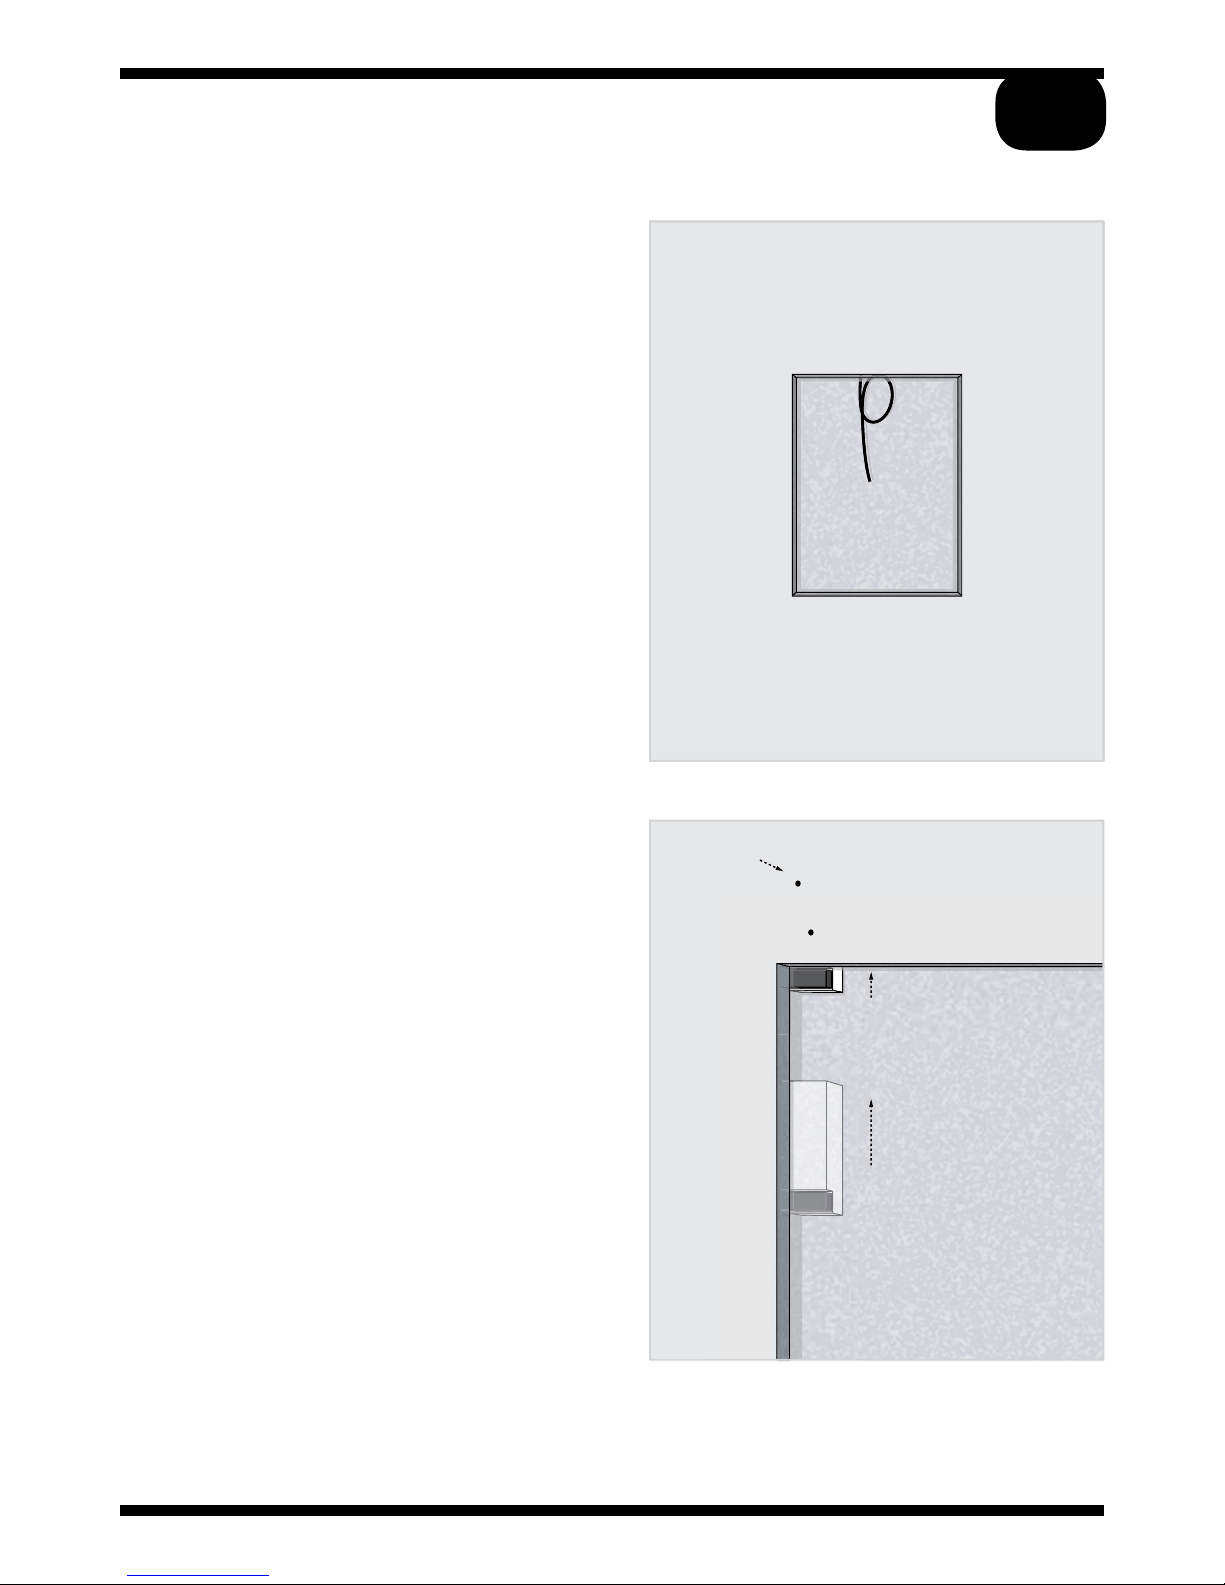
After installation, avoid pushing on the wall
or ceiling surface immediately in front of the
speaker. Excessive excursion, whilst unlikely to
damage the speaker, will undoubtedly crack
the plaster around its perimeter.
Do not attempt to modify or repair the product.
Contact your distributor or manufacturer if a
fault should occur.
The rear of the product should not be subject
to chemical cleaning and should not be painted
in any way.
When plastering over, ensure only 2mm of
material covers the product. More than this will
degrade the performance of the product and
could lead to product failure.
To ensure optimal performance, please read
this guide carefully and keep in a safe place
for future reference.
Install this product in a cool, dry, clean place
- away from direct sunlight and heat sources,
strong vibrational forces, chemical fumes,
dust and moisture (steam).
Do not expose this product to sudden
temperature changes or locate it in an
environment with high humidity. This is to
prevent condensation forming inside which
may cause damage to the product.
Do not clean this product with chemical
solvents as this may damage the finish. Use a
clean, dry or damp cloth.
Caution: Read before installing this product
>
>
>
>
>
>
>
>
>
ENVIRONMENTAL:
Before installing, ensure that the building is environmentally sealed, de-humidified and at a stable
temperature of at least 16 degrees centigrade (61 degrees Fahrenheit)
Never force dry the environment after installing speakers. Force drying should onl y be used to
ensure the entire environment and structural work is fully dry before installation of invisible
loudspeakers.
This product should not be used with single thick coat plaster solutions or with other finishing
methods that take days (rather than hours) to dry out.
Only use low shrinkage plaster types to skim coat these loudspeakers. Consult your plaster
supplier for advice.
Excessive moisture can damage the product. For expert advice contact your dealer or Amina
Technologies Ltd.
Please be aware that when this product is directl y fitted into a solid wall structure (e.g. when
using the solid wall backbox) vibrational energy is inevitabl y transferred into the solid wall
structure. This energy can travel for some considerable distance up, down and along the structure.
It is therefore recommended the product be fitted within acoustically insulated stud walls or
ceiling sections where possible. The use of the product directly embedded in solid walls is not
recommended in multi occupancy buildings.
Equally, using the product in simple (stud or rafter with plasterboard or floor board directly
attached on both sides) stud walls & wooden rafter ceiling/floor structures will also transfer
substantial sound energy to the other side of the wall or floor above. It is therefore recommended
that the product be fitted in acoustically isolated stud walls or ceiling sections where possible.
Completed and fully dried plaster surfaces should be finished with permeable coatings / materials
to allow moisture in that coating or the adhesives used to apply those materials, to dry into the
environment quickly.

01 Message from the Managing Director
02 Included in the carton / Packaging
03 How to use this manual
04 Installation overview diagram
Section
Preparing the wall / ceiling and
fixing the product
05 Cavity Installation steps 1 + 2
06 Cavity Installation steps 3 + 4
07 Cavity Installation steps 5 + 6
08 Cavity Installation with backbox steps 1 + 2
09 Cavity Installation with backbox steps 3
10 Solid Wall Installation with backbox steps 1 + 2
11 Solid Wall Installation with backbox steps 3 + 4
12 Solid Wall Installation with backbox step 5
Section
Alignment and plastering preparation
13 Retrofit (patch plastered)
14 Retrofit (feathered skim)
15 Retrofit (full wet skim)
16 Drywall (patch plastered)
17 Drywall (feathered skim)
Section
Testing
18 Testing the speakers
Section
Finishing
19 Plastering and decorating steps 1 + 2
20 Plastering and decorating steps 3 + 4
21 Setup tips
22 Setup tips
23 Set up tips
24 Further details
25 Troubleshooting
26 Specifications / Evolution Series & APU
27 Spacesaver information
28 Warranty & copyright information
29 Accessories
30 Wiring Schematic
Contents
A
B
C
D
WARNING:
No attempt should be made to install this product within existing building structures unless you
are certain that no electric cables, water pipes, gas pipes or supporting joists will be cut through.
FIRE PROTECTION:
When making an intrusion into an internal wall or ceiling to install an Amina loudspeaker be sure
to check the appropriate regulations pertaining to the required fire rating. Depending on the
location of the intrusion and the applicable regulations it may be necessary to build in or install
additional fire rated components or products to surround the speaker and back box. Amina
Technologies take no responsibility for the correct specification and installation of any such fire
protection system that is required behind their speakers.

Message from the Managing Director
Congratulations and thank you for purchasing an Amina Technologies Evolution Series high
performance invisible loudspeaker.
At Amina we are proud of being at the forefront of flat panel loudspeaker technology. All the
components that make up your Evolution Series loudspeaker have been developed specifically
to provide the ultimate in sound quality and reliability, whilst allowing you to decorate, furnish
and enjoy your home in any way you wish without any visible ‘clutter’ from your audio system.
At the heart of an Evolution Series loudspeaker is our high performance vibrational panel driver,
featuring a unique high power neodymium magnet motor system. This enables the product
to provide high quality, high sound pressure levels from such a compact design. Please take
a moment to read this guide which will help you achieve the best possible performance from
your product.
Thank you and enjoy listening.
Richard Newlove
MD - Amina Technologies Ltd
About the Manufacturer
Amina Technologies Ltd is the world’s leading designer and manufacturer of truly invisible
loudspeaker solutions. Our invisible loudspeakers have been used in a wide range of both
commercial and residential applications for over fifteen years.
Exclusive hotels & spas, fashion retail outlets and stunning private residences have all benefited
from using Amina invisible loudspeakers. Amina has created the very best discreet audio
solution for architects, interior designers and all design conscious clients.
See our website for more details about Amina and a selection of prestigious projects completed
using our products.
01

Included in the carton
Please check that your carton contains the correct number of items.
Model Number Single
AIW750i 1x HF loudspeaker panel (450mm x 200mm)
1x LF loudspeaker panel (450mm x 345mm)
1x APU750i (protection unit)
2x Spacesaver templates
Packaging
CAUTION: Take care when removing the speakers from the carton.
The packaging for the Evolution Series loudspeaker has been carefully designed to protect the
product during transit. Please retain it in the unlikely event you need to return the product to
your dealer or to Amina. Please recycle the packaging should you wish to dispose of it.
The outer carton is made up of 80% recycled single wall board.
Fixing options (ordered separately)
The AIW750i has been designed to work optimally within BackboxCV products installed in
plasterboard stud wall or ceiling installations. Slightly less optimal mounting solutions are also
available.
01 Basic fixing block kit
Used in cavity walls and ceilings, when BackboxCV345
cannot be used.
02 BackboxCV345/BackboxCV200
Used in cavity walls and ceilings to reduce airborne
sound generation from the rear of the speaker.
03 Firehood345/Firehood200
60 minute fire rated hood, fitted behind BackboxCV345
and CV200, further reduces airborne sound generation
from the rear of the speaker.
04 BackboxSW345/BackboxSW200
Metal backbox to build into solid walls prior to
installation of speaker.
05 Shims
Various thicknesses available to align speaker with the
front of non-standard plasterboard structures.
01
02
03
04
05
02

How to use this manual
The following pages contain step by step advice to help you achieve a successful installation of
your Evolution Series loudspeaker.
The Evolution Series loudspeaker can be installed into walls or ceilings of various construction
types. This installation guide covers the two basic building construction types; plasterboard
cavity walls/ceilings and brick/concrete walls/ceilings. For other construction types please
contact Amina Technologies Ltd.
Cavity wall or ceiling
This is the most common type of installation and requires you to use the Amina BackboxCV or
our basic fixing block kit (both BackboxCV and the basic fixing block kit are sold separately).
Wherever possible we recommend you use the BackboxCV as the Evolution Series loudspeaker
has been tuned to work optimally in this setup. The BackboxCV also reduces (although doesn’t
entirely stop) the rearward sound output of the Evolution Series loudspeaker which is important
when considering the amount of airborne sound transmission that is acceptable through to
adjacent rooms/properties.
Solid wall or ceiling
For installation into brickwork or concrete you will need to pre-install an Amina BackboxSW
(sold separately). When the BackboxSW is installed according to this guide it will position the
speaker correctly and securely in the wall/ceiling, ready to be plastered over.
The details below and the flow chart on the opposite page will allow you to select the correct
installation steps to follow for your particular type of installation.
Section : Preparing the wall / ceiling and fixing the product
In this section, select the type of installation you will be carrying out and begin from the start
page given. This will direct you through the stages, step by step. Throughout the step by step
process, reminders will advise you to view specific pages within Section B.
At this point you will need to ascertain the specific page that best matches your installation
requirement within this section (e.g., is it a retrofit installation or a new build?).
Section : Alignment and plastering preparation
Section B is the reference section which is to be used in conjunction with Section A. Please
ensure the correct alignment and plastering method for a retrofit installation or a new build is
followed. Reminders on each page throughout Section A will guide the installer to the correct
reference page.
Section : Testing
This section advises you on the correct procedures for speaker testing, both before and after
plastering.
Section : Finishing
This section covers plastering and decorating once your speaker has been installed and aligned
correctly. It may again be necessary to refer to Section B in order to apply the correct
plastering method.
A
B
C
D
03

Installation overview
Section
Section
Preparing the wall / ceiling
and fixing the product
Alignment and plastering preparation
in retrofit applications
Cavity
installation with fixing
blocks
Typically a new build
or full refurbishment
Start at page 05
Patch plastered
For walls/ceilings
that have already
been plastered
Page 13
Feathered skim
For walls/ceilings
that have already
been plastered
Page 14
Full wet skim
For walls/ceilings
that have already been
plaster finished
Page 15
Drywall
patch plastered
For new drywall
walls/ceilings that
will be taped
and jointed
Page 16
Drywall
feathered skim
For new drywall
walls/ceilings that
will be taped
and jointed
Page 17
Solid structure
installation
with backbox
New builds or full refurbs
Start at page 10
Cavity installation
with backbox
For new builds or full refurbishment
where sound transmission
needs to be reduced
Start at page 08
A
B
Section Testing
page 18
C
Section Finishing
page 19
D
04
A1
B1 B4
A2
B2 B5
A3
B3

Cavity installation
Preparing the wall/ceiling and xing the product
Typically a new build or full refurbishment /
Uses mounting blocks (sold separately)
01
02
Locate joist work
When you have chosen your speaker
locations, before cutting a hole in the
plasterboard it is important that you locate
the position of the joists/studs. Ensure the
spacing between them is at least 351mm
(133/4”) for a portrait orientated speaker.
Create 455mm x 350mm aperture
(455mmx205mm for HF panel)
Using a sharp knife or pad saw, cut an
aperture with dimensions 455mm x
350mm (18” x 133/4”) in your plasterboard
wall or ceiling.
Ensure aperture is created between
supporting joists or stud work.
We strongly advise that joists are not
cut to make space for the product. Any
activity of this sort may well influence the
structural integrity of your property.
The spacing between HF and LF panels
should be 80mm MIN to 200mm MAX.
Important: Double check the sizes of the
apertures are correct because this is
important further on into the installation
process.
(minimum)
cut a small
hole in plasterboard
to check stud location
01
02
sharp knife
pad saw
05
Cut-out Template
The supplied templates may
be useful in marking the cut
lines
A1
351mm

Cavity installation with xing blocks
continued...
03
04
Install speaker cable and insert insulation
Ensure all speaker cables are pulled
through to the speaker location with plenty
of slack. This will make it easier to connect
the cable to the speaker later on in the
installation process.
It is recommended to add sound absorbing
mineral wool or natural fibre inside the
cavity to reduce sound transmission
behind the speaker and limit cavity
resonances. This is essential in ceiling
locations where the material will also
prevent debris falling onto the rear of the
speaker over time.
The sound absorbing material can rest
against the back of the speaker but not so
much as to put pressure on the panel.
Ensure the speaker cable is laid behind the
material and can not rest against the
rear of the panel.
Attach mounting blocks (x4 per speaker)
Position a fixing block under the
plasterboard at each corner of the
aperture. Fasten the thicker section of
the fixing blocks to the underside of the
plasterboard using two drywall screws
secured through the front face of the
plasterboard.
NB: ensure there is no gap between the
fixing block and the sawn edge of the
plasterboard aperture.
Important: The fixing blocks are designed
for 12.5mm (1/2”) plasterboard (1/2” and
5/8” in North American markets).
Please contact your supplier if you require
fixings for an alternative plasterboard
thickness.
03
04
drywall screws
06 A1

Cavity installation continued...
05
06
Connect the Evolution Series speaker
Connect the speaker cable to the speaker
using a high quality crimping tool.
Your Evolution Series speaker is fitted with
blue butt splice crimp connectors which
are suitable for speaker cable thicknesses
of 1.5mm - 2.6mm (16 - 14AWG). This type
of connector ensures a permanent
“shake-proof” connection is created inside
your wall cavity.
Secure the speaker to the fixing blocks
Important: Ensure there is an all round
gap of 2mm between the speaker and the
plasterboard. If necessary, increase the
aperture size before mounting the speaker.
Using drywall screws, fix the four corner
points of the speaker to the fixing blocks.
Pilot holes are not necessary as drywall
screws will easily self-tap into the fixing
block.
Ensure the front face of the speaker rests
in a position flush with the front of the
plasterboard and that it is firmly held in
position.
Continue on to Section C
(page 18 - testing)
Reference pages for correct retrofit alignment and plastering method: 13, 14 + 15
Reference pages for correct drywall alignment and plastering method: 16 + 17
05
06
Top View
Plasterboard
Stud
Fixing block
2mm
screw through
here
07
22
A1

For new builds or full refurbishment where sound transmission
needs to be reduced or fire rating is required.
01
02
Cavity installation with backboxCV
Locate cable and position backbox
Choose speaker locations and create
apertures by following steps 01 + 02 on
page 05. Use the cut-out templates as a
guide.
Next, pull the speaker cable through the
rubber grommet in the end of each
backboxCV and ensure speaker cables are
pulled through with a manageable length
available.
Apply each BackboxCV through each
hole at an angle until the end cheeks rest
against the back side of the plasterboard.
Use the fold out tabs at either end of the
backbox to help support it in a vertical
position before securing it to the
plasterboard.
A 75mm/3” cavity depth is required to fit a
BackboxCV. If a fire rating is required, fit
an Amina Firehood 200/345 first before
fitting the BackboxCV200/ 345
Fix backbox
Using a minimum of 8 drywall screws (4 at
each end) fix each backboxCV by screwing
through the plasterboard and self tapping
into the flat end cheek areas at each
end of the backboxCV. When positioned
correctly, the backbox’s speaker mounting
lip with soft foam surface should be visible
along all four sides of the aperture.
Connect the speaker by following step 05
on page 07.
Side View
Using the
foldout tabs...
08
Plasterboard
Fixing screw
Mounting
Lip
Backbox
Side View
Front View Fixing screw
01
02
A2
It is recommended to add sound absorbing
mineral wool or natural fibre inside the
surrounding cavities to further reduce sound
transmission to adjoining spaces.
Fill with
insulation
Fill with
insulation

Cavity installation with backboxCV
continued...
05 Connect the speaker
Follow step 05 on page 07
Secure the speaker
Position the cable away from the rear of
the loudspeaker. With the speaker resting
on the backboxCV mounting lip, use
screws provided to secure the speaker
onto the backboxCV by self-tapping into
the mounting lip, through the pilot holes
provided at each corner.
Ensure the speaker face is flush with
the front of the plasterboard and that
everything is firmly held in position. Shims
may be necessary. (See section B)
Amina backboxes (BackboxCV200 and
BackboxCV345) are designed for 12.5mm
(1/2”) plasterboard.
Shims can be supplied to adapt the
backbox for different plasterboard
thicknesses.
Contact your supplier when ordering.
Continue on to Section C
(page 18 - testing)
Reference pages for correct retrofit alignment and plastering method: 13, 14 + 15
Reference pages for correct drywall alignment and plastering method: 16 + 17
Side View
12.5mm
05
screw through
here
09
Ensure cable
is not resting
on back of
speaker
A2
Important: The BackboxCV must be fixed to the plasterboard only. Never attach directly to the
studwork or rear supporting structure, as this could cause future cracking around the speaker
as the building moves.

02
Solid wall installation with
BackboxSW
For new builds or full refurbs
01
02
Create aperture in brickwork/ concrete
Using the combination of an angle grinder
and a jackhammer drill, create a cavity of
460mm x 355mm (181/2” x 14”) within the
brickwork. (460mm x 210mm for the HF
panel)
Before installing the backbox you will need
to know the thickness of render that will
be applied to the wall/ceiling prior to the
finish plaster skim.
Subtract that thickness from 50mm (2”) to
calculate the minimum cavity depth you
will need to create.
Create channel for cable
Using an angle grinder or hammer and
chisel, create a channel that runs into this
cavity, this will allow the speaker cable to
be pulled into a suitable position within the
cavity.
We recommend the cable is run in a
suitable conduit to protect it.
Leave enough cable slack to allow
connection to the speaker when it is held
away from the cavity.
01
10 A3

04
Solid wall installation with backbox
continued...
03
04
Install backbox
Make a small hole in one of the rubber
grommets and pull the speaker cable
through it and into the backboxSW. There
are four slots in the base of the backboxSW
and using suitable screws (not supplied),
fix the backboxSW to the brickwork within
the cavity. Ensure the front edge of the
backboxSW aligns flush with the front face
of the surface which will have the final 2mm
skim coat of plaster applied.
We recommend shims are fitted behind the
backboxSW to achieve a level solid fixing. It
is recommended to add expanding foam
around the sides and rear to prevent
resonance and also to add mineral wool or
natural fibre (max 1”) to the inside of the
BackboxSW.
NB: If there is a layer of render to be applied
or already applied to the brickwork, be sure
to align the front edge of the backboxSW
to the front edge of the render (As shown in
the lower section of the image)
Connect speaker
Connect the speaker cable to the speaker
using a high quality crimping tool.
Your Evolution Series speaker is fitted with
blue butt splice crimp connectors which are
suitable for speaker cable thicknesses of
1.5mm2- 2.5mm2 (16 - 14AWG). This type of
connector ensures a permanent “shake-
proof” connection is created inside your
wall cavity.
rendered wall
no render
03
Mineral Wool
Expanding foam
Shims
11
A3

12
Solid wall installation with Backbox
continued...
05 Secure the speaker
Ensure the speaker cable is laid behind the
mineral wool or natural fibre and cannot
rest against the speaker itself.
Remove the backing paper from the six
adhesive pads on the backboxSW
mounting tabs, carefully position the
speaker onto the support tabs and apply
moderate pressure.
There should be an equal perimeter gap
between the backbox and the edge of
the speaker.
Use the flange head screws (supplied with
the backboxSW) to fix the corners of the
speaker to the four corner support tabs.
If the correct steps are taken to align the
backboxSW with the front face of the
render, the loudspeaker, when screwed in
place, will also sit flush with the front face
of the render.
Do not adjust the screws in any way, make
sure they are tightly secured in place and
the whole assembly is firm.
Continue on to Section C
(page 18 - testing)
Reference page for correct retrofit alignment and plastering method: 13, 14 + 15
Top View
05
Solid wall installation with backbox
continued...
1 2
Secure the speaker
Ensure the speaker cable is laid behind the
mineral wool and cannot rest against the
speaker itself.
Remove the backing paper from the 6
adhesive pads on the backbox mounting
tabs, carefully position the speaker onto the
support tabs and apply moderate pressure.
There should be an equal perimeter gap
between the backbox and the edge of
the speaker.
Use the flange head screws (supplied with
the backbox) to fix the corners of the
speaker to the four corner support tabs.
If the correct steps are taken to align the
backbox with the front face of the render, the
loudspeaker, when screwed in place, will also
sit flush with the front face of the render.
Do not adjust the screws in any way, make
sure they are tightly screwed in place and
the whole assembly is firm.
Continue on to Section C (page 18 - testing)
05
Reference page for correct retrofit alignment and plastering method: 13, 14 + 15
screw through
here
3
Shim
Brickwork/concrete
Expanding
foam
Render
Mineral
wool
A3

Top View
05
Solid wall installation with backbox
continued...
1 2
Secure the speaker
Ensure the speaker cable is laid behind the
mineral wool and cannot rest against the
speaker itself.
Remove the backing paper from the 6
adhesive pads on the backbox mounting
tabs, carefully position the speaker onto the
support tabs and apply moderate pressure.
There should be an equal perimeter gap
between the backbox and the edge of
the speaker.
Use the flange head screws (supplied with
the backbox) to fix the corners of the
speaker to the four corner support tabs.
If the correct steps are taken to align the
backbox with the front face of the render, the
loudspeaker, when screwed in place, will also
sit flush with the front face of the render.
Do not adjust the screws in any way, make
sure they are tightly screwed in place and
the whole assembly is firm.
Continue on to Section C (page 18 - testing)
05
Reference page for correct retrofit alignment and plastering method: 13, 14 + 15
screw through
here
3
Shim
Brickwork/concrete
Expanding
foam
Render
Retrofit / pre-skimmed surfaces
Patch plastered nish
Alignment and plastering preparation
1 3
Speaker alignment required for plastering
After removing a 30-50mm (3/16 - 2”) wide
section of existing finishing plaster
surrounding the cutout, the front face of the
speaker should be flush with the paper face
of the plasterboard or render.
To patch plaster:
Skim across the speaker front and blend with
the existing finished plaster.
Amina recommend British Gypsum Easi-fill®
which allows a smooth accurate finish using
fine sandpaper or a wet sponge.
For walls /ceilings that have already been
plaster finished.
sand down to
create taper
existing plaster
remove existing
plaster from
plasterboard
around perimeter
of hole
1
30-50mm
(2”)
shims
Continue to section
plasterboard
stud wall or
ceiling
solid wall
plasterboard
render
Retrot / pre-skimmed plasterboard
Patch plastered nish
Alignment and plastering preparation
For walls /ceilings that have already been plaster
finished.
Speaker alignment required for plastering
After removing a 30-50mm (approx 2”) wide
section of existing plaster surrounding the cut
out, the front face of the speaker should be
flush with the paper face of the plasterboard.
To patch plaster:
Skim across the speaker front and blend with
the existing finished plaster.
Amina recommend British Gypsum Easi-fill®
which allows a smooth accurate finish using
fine sandpaper or a wet sponge.
13
Retrofit / pre-skimmed surfaces
Patch plastered nish
Alignment and plastering preparation
1 3
Speaker alignment required for plastering
After removing a 30-50mm (3/16 - 2”) wide
section of existing finishing plaster
surrounding the cutout, the front face of the
speaker should be flush with the paper face
of the plasterboard or render.
To patch plaster:
Skim across the speaker front and blend with
the existing finished plaster.
Amina recommend British Gypsum Easi-fill®
which allows a smooth accurate finish using
fine sandpaper or a wet sponge.
For walls /ceilings that have already been
plaster finished.
sand down to
create taper
existing plaster
remove existing
plaster from
plasterboard
around perimeter
of hole
1
30-50mm
(2”)
shims
Continue to section
plasterboard
stud wall or
ceiling
solid wall
plasterboard
render
Continue to section C
B1

14
Retrot / pre-skimmed plasterboard
Feathered skim nish
For walls /ceilings that have already been plaster
finished.
Speaker alignment required for plastering
Using a 2-3mm shim set (contact your Amina
supplier) between the back of the speaker and
the mounting surface of the backbox (or fixing
blocks), the front face of the speaker should be
flush with the front face of the existing painted/
plastered wall/ceiling
To feather finish:
Allow a much larger area around the speaker
(approx. 1m2(10 feet2)) to be skimmed. This
1-2mm (5/64”) thick skim is then feathered
outward at the edges and blended into the
existing wall/ceiling finish.
Amina recommend British Gypsum Easi-fill®.
Continue to section
Retrofit / pre-skimmed surfaces
Feathered skim finish
1 4
Speaker alignment required for plastering
Using a 2-3mm shim set (contact your Amina
supplier) applied between the back of the
speaker and the mounting surface of the
backbox (or fixing blocks), the front face of
the speaker should be flush with the front
face of the existing painted/plastered
wall/ceiling.
To feather finish:
Allow a much larger area around the speaker
(approx. 1m2 (39”)) to be skimmed. This
1-2mm (5/64”) thick skim is then feathered
outward at the edges and blended into the
existing wall/ceiling finish.
Amina recommend British Gypsum Easi-fill®.
existing plaster
shim
existing render
plasterboard
speaker face
flush with
existing plaster
existing plaster
For walls /ceilings that have already been
plaster finished.
2
Continue to section
plasterboard
stud wall or
ceiling
solid wall
C
B2
Retrofit / pre-skimmed surfaces
Feathered skim finish
1 4
Speaker alignment required for plastering
Using a 2-3mm shim set (contact your Amina
supplier) applied between the back of the
speaker and the mounting surface of the
backbox (or fixing blocks), the front face of
the speaker should be flush with the front
face of the existing painted/plastered
wall/ceiling.
To feather finish:
Allow a much larger area around the speaker
(approx. 1m
2
(39”)) to be skimmed. This
1-2mm (5/64”) thick skim is then feathered
outward at the edges and blended into the
existing wall/ceiling finish.
Amina recommend British Gypsum Easi-fill®.
existing plaster
shim
existing render
plasterboard
speaker face
flush with
existing plaster
existing plaster
For walls /ceilings that have already been
plaster finished.
2
Continue to section
plasterboard
stud wall or
ceiling
solid wall

Retrot / pre-skimmed surfaces
Full wet skim nish
For walls /ceilings that have already been plaster
finished.
Speaker alignment required for plastering
Using a 2-3mm shim set (contact your Amina
supplier) applied between the back of the
speaker and the mounting surface of the
backbox (or fixing blocks), the front face of
the speaker should be flush with the front
face of the existing painted/plastered
wall/ceiling.
To full wet skim finish:
The speaker will be skim coated along with
the rest of the wall or ceiling.
15
Retrofit / pre-skimmed surfaces
Full wet skim finish
1 5
To full wet skim finish:
The speaker will be skim coated along with
the rest of the wall or ceiling.
For walls /ceilings that have already been
plaster finished.
3
existing plaster
shim
existing render
existing plaster
plasterboard
speaker face
flush with
existing plaster
Speaker alignment required for plastering
Using a 2-3mm shim set (contact your Amina
supplier) applied between the back of the
speaker and the mounting surface of the
backbox (or fixing blocks), the front face of
the speaker should be flush with the front
face of the existing painted/plastered
wall/ceiling.
Continue to section
plasterboard
stud wall or
ceiling
solid wall
Continue to section C
B3
Retrofit / pre-skimmed surfaces
Feathered skim finish
1 4
Speaker alignment required for plastering
Using a 2-3mm shim set (contact your Amina
supplier) applied between the back of the
speaker and the mounting surface of the
backbox (or fixing blocks), the front face of
the speaker should be flush with the front
face of the existing painted/plastered
wall/ceiling.
To feather finish:
Allow a much larger area around the speaker
(approx. 1m
2
(39”)) to be skimmed. This
1-2mm (5/64”) thick skim is then feathered
outward at the edges and blended into the
existing wall/ceiling finish.
Amina recommend British Gypsum Easi-fill®.
existing plaster
shim
existing render
plasterboard
speaker face
flush with
existing plaster
existing plaster
For walls /ceilings that have already been
plaster finished.
2
Continue to section
plasterboard
stud wall or
ceiling
solid wall

Continue to section
Retrot drywall
Patch plastered nish
For new drywall walls /ceilings that will be taped
and jointed.
(typically in North America but becoming
common elsewhere)
Speaker alignment required for plastering
Using shims if required, the front face of the
speaker should be located 2mm (5/64”) behind
the face of the wall/ceiling.
To patch plaster:
Apply a 2mm skim across the speaker front
and blend with the drywall.
Amina recommend British Gypsum Easi-fill®
which allows a smooth accurate finish using
fine sandpaper or a wet sponge.
16
Retrofit drywall
Patch plaster nish
1 6
Speaker alignment required for plastering
Using shims if required, the front face of the
speaker should be located 2mm (5/64”)
behind the face of the wall/ceiling.
raw drywall
surface
shims (if required)
remove a section
of drywall around
the cutout
30-50mm
2”
For drywall walls /ceilings that will be taped
and joined.
(typically in North America but becoming
common elsewhere)
4
To patch plaster:
Apply a 2mm skim across the speaker front
and blend with the drywall.
Amina recommend British Gypsum Easi-fill®
which allows a smooth accurate finish using
fine sandpaper or a wet sponge.
Continue to section
C
B4
Retrofit / pre-skimmed surfaces
Patch plastered nish
Alignment and plastering preparation
1 3
Speaker alignment required for plastering
After removing a 30-50mm (3/16 - 2”) wide
section of existing finishing plaster
surrounding the cutout, the front face of the
speaker should be flush with the paper face
of the plasterboard or render.
To patch plaster:
Skim across the speaker front and blend with
the existing finished plaster.
Amina recommend British Gypsum Easi-fill®
which allows a smooth accurate finish using
fine sandpaper or a wet sponge.
For walls /ceilings that have already been
plaster finished.
sand down to
create taper
existing plaster
remove existing
plaster from
plasterboard
around perimeter
of hole
1
30-50mm
(2”)
shims
Continue to section
plasterboard
stud wall or
ceiling
solid wall
plasterboard
render
Table of contents
Other Amina Speakers manuals

Amina
Amina Evolution AIW350E User manual

Amina
Amina MOBIUS 7 User manual

Amina
Amina AIW2X User manual

Amina
Amina AIW750E User manual

Amina
Amina AIWX Wood User manual

Amina
Amina ACPT554E Manual

Amina
Amina iQ1 User manual

Amina
Amina Evolution AIW150E User manual

Amina
Amina AIW1X Manual

Amina
Amina MOBIUS 7 User manual