Ammann AVP 1240 H User manual

Safety regulations
Operating instructions
AVP 1240 H
AVP 1250
AVP 1850 H
AVP 1850 1B20


These instructions include:
–Safety regulations
–Operating instructions
–Maintenance instructions
These instructions have been prepared for operation on the
construction site and for the maintenance motorer.
These instructions are intended to simplify operation of the ma-
chine and to avoid malfunctions through improper operation.
Observing the maintenance instructions will increase the relia-
bility and service life of the machine when used on the con-
struction site and reduce repair costs and downtimes.
Always keep these instructions at the place of use of the
machine.
Only operate the machine as instructed and follow these in-
structions.
Observe the safety regulations as well as the guidelines of
the civil motorering trade association „Safety rules for the
operation of road rollers and compactors“ and the pertinent
regulations for the prevention of accidents.
Ammann Verdichtung GmbH is not liable for the function of
themachine when used in an improper manner and for other than
the intended purpose.
Operating errors, improper maintenance and the use of incor-
rect operating materials are not covered by the warranty.
The above information does not extend the warranty and lia- bility
conditions of business of Ammann Verdichtung GmbH.
Please enter (data on machine type plate)
Mach.-type :______________________
Mach.-No. :______________________
Engine-type :______________________
Engine-No. :______________________
Ammann Verdichtung GmbH
Josef-Dietzgen-Straße 36 • D-53773 Hennef / Postfach 11 63 • D-53758 Hennef
FAX 02242/8802-59 • FAX 02242/8802-89 (Service)
MOTORENFABRIK HATZ KG
D-94099 RUHSTORF
GmbH
+CO
TYP KENNZ.
MOTOR/FABRIK. NO. ABE/AUSF.
MIN1NH PV Cm³
MADE IN GERMANY
Service weight (kg)
Serial No.
Fabr. No.
Power output (kW)
AMMANN Verdichtung GmbH
D-53773 Hennef Made in Germany
Constr. year
Foreword

This AMMANN machine has been built according to the
state of the art in compliance with the pertinent rules.
Nevertheless, these machines can still constitute a hazard
to persons and property if:
–not used for the intended purpose,
–not operated by suitably qualified and instructed personnel,
–modified or converted in an improper manner,
–the pertinent safety regulations are not observed
For this reason, any person entrusted with the operation,
maintenance or repair of the machine is obliged to read and
follow the operating instructions and particulary to observe
the safety regulations. If necessary, this must be confirmed
by the signature of the company using the machine.
Furthermore, the following must be made known and
observed:
–pertinent regulations for the prevention of accidents,
–generally recognised safety rules,
–country-specific regulations
Normal use
This machine is only intended for all compaction work in the
fields of civil engineering and road construction.
All ground materials such as sand, gravel, sludge, crushed
stone, asphalt and composite sett paving can be compacted.
Improper use
The machine can constitute hazards if not used by instructed
personnel or for other than the intended purpose.Not be used on
hard concrete, hardened bitouminous surfacing or frozen soil.
Who is allowed to operate the machine?
Only suitably qualified, instructed and authorised persons over
18 years of age may operate the machine. Maintenance and
repairs, particularly on the hydraulic system, require special
knowledge and must be undertaken only by qualified personnel.
Conversions and modifications to the machine
Unauthorised modifications and conversion of the machine are
not permitted for safety reasons.
Spare parts and special equipment not delivered by us are also
not approved by us. The installation and/or the use of such parts
can also have a detrimental effect on the operating safety.
The manufacturer disclaims all liability for any damage resulting
from the use of non-original parts or special equipment.
Safety information in the operating and maintenance
instructions
The following signs and designations are used in the manual to
designate instructions of particular importance.
Important
Refers to special information on how to use the machine most
efficiently.
Attention
Refers to special information and/or orders and prohibi-
tions directed towards preventing damage.
Danger
Refers to orders and prohibitions designed to prevent injury
or extensive damage.
Transporting the machine
Only load and transport the machine as specified in the operating
instructions.
Only use suitable means of transport and lifting gear with suf-
ficient bearing capacity!
Attach suitable slinging means to the points of attachment pro-
vided.
Only use sturdy loading ramps with sufficient bearing capacity.
The ramp inclination must be flatter than the gradient climbing
ability of the machine.
Secure the machine to prevent it from tilting or slipping.
It is highly dangerous to walk or stand under suspended loads.
Secure the machine on transport vehicles to prevent it from rol-
ling, slipping and tilting.
Starting the machine
Prior to starting
Familiarise yourself with the operating and control elements and
the mode of operation of the machine and the working environ-
ment. This includes, e.g. obstacles in the working area, bearing
capacity of the ground and the necessary safety provisions.
Use personal protective equipment (safety footwear, hearing
protectors, etc.).
Check to ensure that all safety devices are firmly in place.
Do not start the machine if instruments or control devices are
faulty.
Starting
For machines with handstart, only use the safety cranks tested
by the manufacturer, and precisely follow the operating
instructions of the engine manufacturer.
To crank-start diesel engines, note the correct position to the
engine and the correct hand position on the crank.
The handcrank must be turned with maximum force until the
engine starts, otherwise the crank can rebound.
Precisely follow the starting and stopping procedures specified in
the operating instructions and observe indicator lights.
Only start and operate machines with an electrical starter from
the instrument panel.
Starting and operation of the machine in potentially explosives
atmospheres is forbidden!
Starting with battery jump leads.
Connect positive to positive and negative to negative (earthing
lead). Always connect the earthing lead last and disconnect first!
Incorrect connection will cause serious damage to the electrical
system.
Starting and operation of the machine in potentially
explosives atmospheres is forbidden!
Starting in enclosed spaces, tunnels, mines or deep ditches
Engine exhaust fumes are highly dangerous!
For this reason, when operating the machine in enclosed
spaces, tunnels, mines or deep ditches, it is important to ensure
that there is sufficient air to breath (see UVV „Construction work“,
VBG 37, paragraphs 40 and 41).
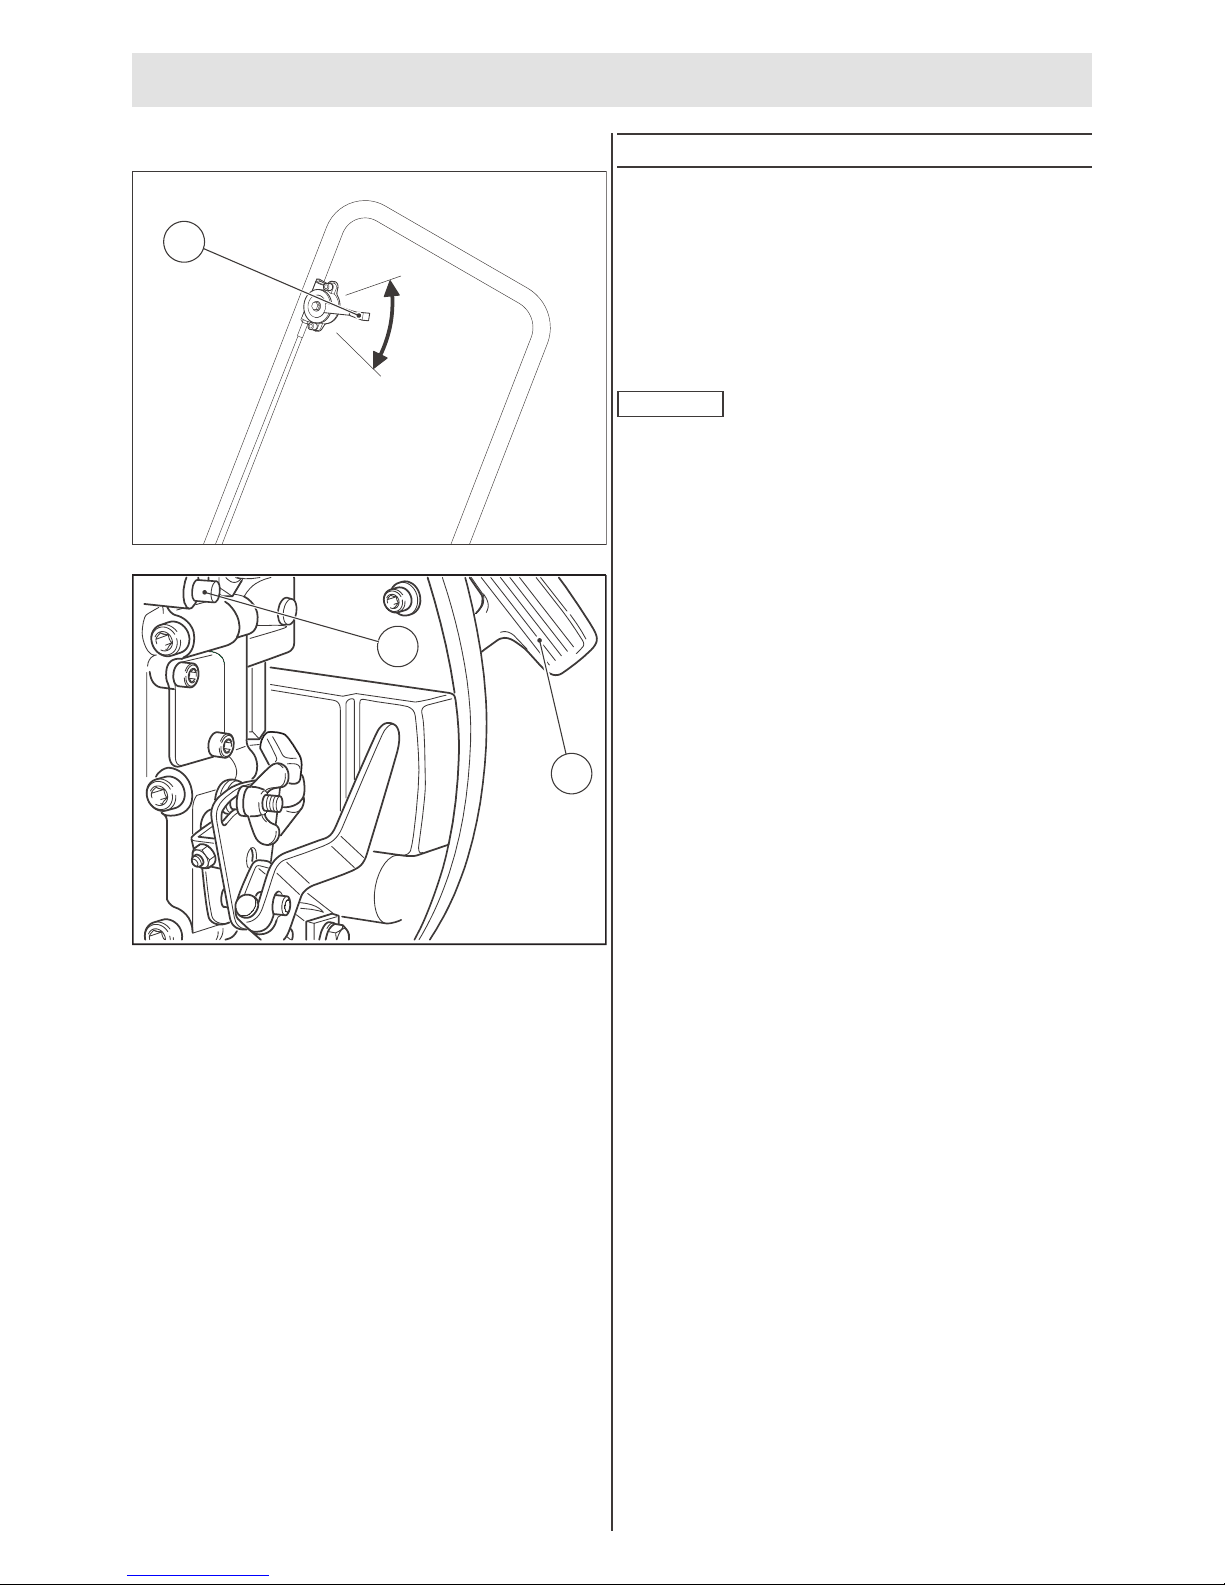
Machine control
Operating devices which adjust themselves automatically when
released in normal use, must not be locked.
Check protective devices and brakes for proper functioning prior
to operation.
When reversing, particularly on the edges and banks of ditches,
as well as in front of obstacles, the machine operator cannot fall
or be crushed.
Always keep a safe distance away from the edges and banks of
ditches and refrain from any actions which could cause the
machine to topple over!
1. Safety regulations
20

Always control the machine, so that hand injuries through hard
objects are avoided!
Always ascend slopes carefully in a direct path.
Reverse up steep slopes to prevent the machine from toppling
over on to the machine operator.
If faults on the safety devices or other faults detrimental to the
safe operation of the machine are noticed, operation of the
machine must be stopped immediately and the faults remedied.
When undertaking compaction work in the vicinity of buildings or
above pipelines and similar, check the effect of the vibrations on
the buildings and pipes and stop compaction work if necessary.
Parking the machine
Park the machine on a firm and level surface.
Shutdown the drive and secure it to prevent accidental move-
ment and unauthorised use. If available, close the fuel valve. Do
not place or store equipment with integrated moving gear on the
chassis. The moving gear is intended only for transportation pur-
poses.
Filling petrol
Only fill petrol with the engine shutdown.
No open fire, do not smoke.
Do not spill any fuel, collect discharging fuel in a suitable contai-
ner, prevent fuel from seeping into the soil.
Ensure that the filler cap is tight.
Leaky fuel tanks constitute an explosion hazard and must there-
fore be replaced immediately.
Maintenance and repairs
Observe the maintenance, inspection and adjustments and
intervals specified in the operating instructions, as well as the
information for part replacement.
Maintenance work must be undertaken only by qualified and
authorised persons.
Maintenance and repairs must only be undertaken with the drive
stationary.
Only carry out maintenance and repairs when the machine is
parked on a firm and even surface and is secured to prevent it
from rolling.
When changing larger assemblies and individual components,
only use suitable and perfectly functioning hoisting and lifting
gear with suitable bearing capacity. Attach and secure parts to
lifting gear carefully!
Spare parts must comply with the technical requirements of the
manufacturer. Therefore only use original spare parts.
Before working on hydraulic lines, these must previously be
rendered pressureless. Hydraulic oil discharging under pres-
sure can cause serious injuries.
Work on hydraulic devices must be undertaken only by persons
with a special knowledge of hydraulics and the necessary ex-
perience!
Do not adjust pressure relief valves.
Drain hydraulic oil at operating temperature—caution risk of
scalding!
Collect discharging hydraulic oil and dispose of the same in an
environmentally-friendly manner.
Do not start the engine with hydraulic oil drained!
After completing all work (with the system still pressureless),
inspect all connections and bolted connections for leaks.
Inspect all hoses and bolted connections for leaks at regular
intervals and externally visible damage! Rectify any damage
immediately.
Replace externally damaged hydraulic hoselines at regular
intervals (depending on time used), even when no safety-rele-
vant faults are visible.
Inspect the electrical equipment of the machine at regular
intervals. Faults such as loose connections, worn or scorched
cables must be immediately.
Properly refit and inspect all protective devices after main-
tenance and repairs.
Testing
Road rollers, trench rollers and vibrating plates must be tested
for safety by an expert depending on the particular application
and operating conditions as required, however at least once a
year.
1. Safety regulations
21

AVP 1240 H AVP 1250 AVP 1850 H AVP 1850 1B20
1. Dimensions
Length L 540 mm 523 mm 615 mm
Length L1 340 mm 353 mm 398 mm
Height H 980 mm 1110 mm
Height H1 510 mm 520 mm 615 mm
Height H2 880 mm 950 mm
Working width 400 mm 500 mm 500 mm
2. Weights
Operating weight 75 kg 100 kg 117 kg
3. Drive
Motor-type Honda GX 120 Honda GX 160 Hatz 1B20
Type of construction 1-cyl-4-stroke gasoline 1 cyl-4-stroke diesel
Power 2.6 kW (3.6 hp) 3.7 kW (5.0 hp) 3.1 kW (4.2 hp)
by speed 3600 1/min 3200 1/min 3000 1/min
shift in of centrifugal clutch 2000 1/min
Cooling Air
Fuel capacity 2.5 l3.6 l3.0 l
Fuel consumption 0.8 l/h 1.1 l/h 0.9 l/h
max. sloping position 20°
max. grade ability 30 %
Drive via centrifugal clutch and V-belt
H1
H
H2
L
L1
2. Technical Data
22

AVP 1240 H AVP 1250 AVP 1850 H AVP 1850 1B20
4. Speed
Speed max. 20 m/min
5. Vibration
Vibration force 12 kN 18 kN
Vibration frequency 98 Hz 85 Hz
6. Working surface
Working surface 0.14 m² 0.18 m² 0.20 m²
7. Spec. surface pressure
Spec. surface pressure 8.6 N/cm² 7.2 N/cm² 9.0 N/cm²
8. Optional equipment
Water tank 10 l
Water tank 5 l
Undercarriage
Vibration damped towbar
X
—
X
X
X
—
X
X
X
—
X
X
—
X
X
X
9. Noise and Vibration data
The following listed noise and vibration data according to the EC machine directive in the version (91/368/EEC) was determined
at the rated speed of the drive motor with vibration with the machine placed on a resilient base.
Values can deviate in normal use depending on the conditions prevailing at the place of use.
9.1 Noise data
The noise emission specified in appendix 1, subclause 1.7.4.f of the EC machine directive for:
the sound pressure level at the
operator place is LPA 91 dB 93 dB 94 dB
Measured sound power level LWA,m 103 dB 105 dB 106 dB
Guaranted sound power level LWA,g 108 dB
The noise levels were measured according to ISO 3744 for the sound power level (LWA) and ISO 6081 for the sound pressure level
(LPA) at the operator workplace.
9.2 Vibration data (basic unit / vibration damped towbar)
Hand-arm vibration values according to appendix 1, sub-clause 3.6.3.a of the EC machine directive:
The weighted effective value of
acceleration, determined according
to ISO 8662, part 1, is
5.3 / 1.2 m/s² 5.8 / 2.4 m/s²
*Since the permissible noise rating level of 89 dB(A) can be exceeded with this machine, the operator must wear suitable
hearing protection.
2. Technical Data
23

3.1 Description
The AVP 1240 / 1250 / 1850 is a vibration plate which operates
according to the trailer vibratory system and moves only in one
direction.
The engine drives the vibrator through a centrifugal clutch and a
V-belt.
The equipment is used for compacting sand, gravel (possibly
also coarse gravel), cohesive soils, lean concrete, medium- and
finegrained asphalt-coated gravel and also composite stone
paving.
Danger
Do not operate on hard concrete or set bitumen toppings.
3.1.1 Equipment overview
1 Towbar
2 Engine
3 V-belt pulley with centrifugal clutch
4 Vibrator
5 Base plate
6 Water sprinkler*
7 Vulkollan plate*
8 Bogie*
*Optional equipment
3.2 Before operation
Danger
–Wear personal sound of protection equipment. - Loss of
hearing.
–Observe the
•safety conditions
•operation instructions and maintenance instructions.
–Read the engine operating instructions. Observe the
importants on safety, operation and maintenance
contained in them.
–Stand the machine on an even surface and check
•the engine oil level
•the fuel supply
•that screw connections are secure
•the condition of the engine and the machine.
–Top up any missing lubrication in accordance with the
lubrication table.
3. Operation
24

3.3 Engine operation (Honda)
3.3.1 Starting the engine
Important
To prevent engine damage through oil deficiency, the engine is
provided with a low oil warning system. If the oil level is too low,
the engine switches off automatically (the engine switch remains
in the «ON»-position).
–Move fuel tap (1) to «ON».
–Move choke lever (2) to «CLOSE».
–Adjust engine speed control lever (3) to full load.
–Move engine switch (4) to «ON».
–Pull starter handle (5) slightly until resistance is felt, then pull
out sharply.
Attention
–Do not allow starter handle to rebound against the
engine. Guide starter cable back by hand to reset
position.
–Do not operate choke lever (2) if engine is warm or at high
outside temperature.
If the engine starts:
–Adjust engine speed control lever (3) to idle position.
–Allow the engine to warm up for 1 ... 2 minutes.
–As the engine warms up, gradually move the choke lever (2)
to the «OPEN»-position.
3.3.2 Switching off the engine
–Adjust engine speed control lever (3) to idle position.
–Turn engine switch (4) to «OFF».
–Move fuel tap (1) to «OFF».
Important
In an emergency situation, set the engine switch (4) to «OFF» in
order to switch off the engine.
3.4 Engine operation (Hatz)
3.4.1 Starting the engine
–Adjust engine speed control lever (1) to full load „II“.
–Slowly pull out handle (2) with rope, until detectable
resistance can be felt.
–Allow the rope to run back in, to enable you to utilise the whole
length of rope for the starting procedure.
–Take hold of the handle (2) with both hands.
–Pull the starting rope with increasing speed, until the motor
starts up.
–Allow engine to warm up for 1 ... 2 minutes when idling.
Important
If the motor does not ignite after several unsuccessful attemps at
starting, move the speed control lever back into stop position and
pull the starting rope through slowly, 5 times. Then repeat the
starting procedure.
3. Operation
25
min
max
1
B1799302
3
2
B1799303

3.4.2 Switching off the engine
–Adjust engine speed control lever (1) to idle position.
–Press motor stop button (3), until the motor stops running.
–Release the stop button (stop button must return to its initial
position).
3.5 Operation
–The vibration plate can be operated as soon as the engine
reacts to brief acceleration.
–Move engine speed control lever to full load.
–The vibration plate is steered by moving the towbar to the
side. The towbar can also be moved over to the other side
when working in confined areas.
–The vibration plate can only be stopped by moving the engine
speed control lever to the idle position.
Attention
Operate vibration plate only at full throttle and during brief
rest periods, always move vibration plate to idle speed
otherwise the centrifugal clutch will slip and be damaged!
min
max
1
B1799302
3
2
B1799303
3. Operation
26

4.1 Bogie
Use the bogie enables the vibration plate to be easily transported
over short distances.
–Press towbar (2) down as far as the stop.
–Move locking pin (3) into opening (4) on the towbar.
–Detach bogie from fixture (5) and place on the ground.
–Tilt vibration plate with towbar locked onto its front edge. The
bogie swings down below the plate ( see illustration).
–Tilt vibration plate back with the towbar until the plate is
positioned horizontally on the bogie. The equipment can now
be moved.
After transporting, adopt the reverse procedure and attach
bogie.
4.0 Loading and transportation
Danger
–Only use sufficiently strong and secure loading ramps
when loading.
–Check the contact points (frame, lifting rings) before use
for damage and wear. Immediately replace damaged
parts.
–Secure the machine against rolling or slipping off and
against tipping over.
–Ensure that no persons will be endangered. – When
loading, lashing down and lifting the machine always use
the provided lifting points.
–Persons are in danger, if they
•go near swinging loads or
•stand under swinging loads
–After loading lock the tow bar.
After being loaded on to the means of transportation, the
machine should be lashed in place (3).
Use the centre-of-gravity suspension point (2) in order to lift the
machine.
4. Transportation
33
27

5.2 Maintenance schedule (Honda = l/ Hatz = s)
Intervals
daily 20 h 50 h 100 h 250 h 500 h as
required
Works
Clean machine ls
Check engine oil level1) ls
Change engine oil1) À<ls
Clean engine oil filter1) <s
Check air filter1) ls
Change air filter element1) sls
Change fuel filter1) s
Check, adj. the valve clearance1) À<ls
Exciter: Check oil level ls
Exciter: Change oil2) À<ls
Check rubber buffer ls
Check V-belt ls
Retightened screw connections ls
À<èfirst time
1)Observe the engine manual
2)or annually
5.1 General notes
Careful maintenance:
ðincreased service life
ðincreased function
ðreduced downtimes
ðincreased reliability
ðreduced repair costs
–Observe the safety regulations!
–Maintenance works should only be carried out when the
engine is shut off.
–The engine and machine should be cleaned thorougly
before carrying out maintenance work.
–Park the machine on a flat surface and secure it against
rolling away and slipping.
–Ensure that operating materials and replaced parts are
disposed of safely and in an environmentally - friendly
way.
–It is essential that short-circuits be prevented in cables
carrying current.
–When cleaning the machine with a high-pressure water
jet, do not spray the electrical components directly.
–After washing the components, blow-dry them with
compressed air in order to prevent surface leakage
current and corrosion.
5. Maintenance
28

5.3 Lubrication schedule
Lubrication point Quantity [l]Change intervals
[op. hrs.] Lubricant Order No.
1. Engine
AVP 1240 H
0,6 100* Engine oil
API SG-CE
SAE 10W40
806 01 100
AVP 1250
AVP 1850 H
AVP 1850 1B20 0,9 250*
2. Exciter
AVP 1240 H 0,6
250**
or annually
Engine oil
API SG-CE
SAE 10W40
806 01 100
AVP 1250 0,25
AVP 1850 H
0,753)
AVP 1850 1B20
1)first time after 20 h
2)first time after 100 h
3)to mach.-no. 51100: 1,00 l
5.4 Alternative lubricant schedule
5. Maintenance
HD-C 10W40
TLL 10W40*
DEUTZ OEL
ARAL
BP
ESSO
FINA
SHELL
TOTAL
GO-SP Spez. Hydro-Öl W32
H-EP 32 BA** Dexron II D
Multi Turboral Fluid HGS —— Dexron II D
Dexron II D
Dexron II D
Finamatic II D
Donax TA
Donax TX
Dexron II D
Vanellus Multigr.
Vanellus FE*
XD 3+LDX
CDX Torque Fluid 56 Univis N 32
Kappa FE
Kappa Turbo DI Transfluid AS Hydran TSX 32
Biohydran TMP 32**
Engine Oil DG 1040 Donax TD Tellus TD
Rubia XT
Rubia FE* —— ——
Hydromatic TF-SD Energol EHPM 32
*
**
semi-synthetic light-duty oils
biological multi-purpose hydraulic-oils;
biological hydraulic-oilsThe miscibility and compatibility with mineral oil based hydraulic oils and should be examined in the
individual case.The residual mineral oil content should be reduced acc. to VDMA specification 24 569.
Motor oil
API SG-CE
SAE 10W40
Gear oil in acc.
with JDM J 20 A
Special hydro-oil
ISO-VG 32 ATF oil
Fuchs DEA
Titan ATF 3000
Titan Unic MC Titan Hydra Renolin ZAF 520
Plantohyd 32 S**
29

5.5 Maintenance work (Honda-engine)
Attention
Only the maintenance work which has to be performed daily
is included in this operating manual. Please refer to the
engine operating manual and to the maintenance
instructions and intervals listed therein.
5.5.1 Filling up with fuel
Danger
–Fill fuel tank only when engine is switched off
–No open fire.
–No smoking.
–Fill fuel tank never in enclosed areas.
–Clean the area around the fuel filling socket.
–Open the cap and
–check the fuel level visually.
–If necessary, fill up with fuel1)
1)unleaded automotive gasoline
5.5.2 Checking the engine oil level
–Park the machine horizontally.
–Clean the area around the fuel filler cap.
–Open the fuel filler cap.
–Check the oil level and
–refill up to the edge of the fuel filler cap if necessary.
–Check the seal on the dipstick and replace if necessary.
–Close the fuel filler cap.
–Allow the engine to run for approximately 1 min. and check oil
level again with engine switched off.
5.5.3 Cleaning the air filter element
Attention
–Never run the engine without the air cleaner. — Rapid
engine wear will result.
–Do not allow dust to enter into carburator.
–Remove the filter cover (1) and
–take out the filter element (2+3).
–Check the filter element, replace if damaged.
For slight clogging:
–Clean the filter element (2) by tapping lightly or
–blow it from inside to the outside with dry compressed air.
For heavy clogging:
–Wash the filter element (3) in a non-flammable cleaning
solution and allow to dry thorougly.
Danger
–Never use petrol or cleaning solutions with a low flash
point for cleaning the filter element!
–Do not smoke in the working area; avoid open fire and
sparks – fire and explosion hazard!
–Hazard of eyehurts – use safety goggles!
–Soak the filter element (3) with clean motor oil, squeeze out
excess oil.
–Replace the filter element (2+3).
–Fit the cover (1) and fasten.
Important
If the intake air has a high dust content, it may be necessary to
clean the air filter several times daily.
5. Maintenance
max. 5 bar
1
2
3
30

5.6 Maintenance work (HATZ-engine)
Attention
Only the maintenance work which has to be performed daily
is included in this operating manual. Please refer to the
engine operating manual and to the maintenance in-
structions and intervals listed therein.
5.6.1 Filling up with fuel
Danger
–Fill fuel tank only when engine is switched off.
–No naked flames.
–No smoking.
–Fill fuel tank never in enclosed areas.
–Clean the area around the fuel filling socket.
–Open the cap and
–check the fuel level visually.
–If necessary, fill up with fuel1).
1)All diesel oils which satisfy the following specifications are
suitable:
EN 590 or DIN 51601-DK or BS 2869 A1/A2 or
ASTM D 975-1D/2D
5.6.2 Checking the engine oil level
–Position the vibration plate so that the motor is in vertically
upright position.
–Clean around the dipstick area.
–Pull out dipstick (1) and wipe clean.
–Push dipstick back in with twisting movement by hand, then
pull out again with similar twisting movement.
–Read off the oil level on the dipstick, and if necessary top to
the “maximum” mark.
5.6.3 Checking Cooling air-/combustion air-intake
Check intake opening for combustion air and cooling air intakes.
Remove coarse ostructions such as leaves, stones and earth.
5.6.4 Cleaning the dry air filter
The maintenance intervals for the filter cartridge depend on the
amount of dust. A blocked filter is apparent from a lack of
performance and/or black smoke.
–Unscrew lid of air filter (1).
–Remove filter cartridge(2).
–Check the filter element for damage to the filter paper and
check sealing surfaces. Change damaged filter elements.
–Clean filter housing and cover.
Attention
Make sure that no dirt or foreign parts enter into the suction
intake.
–Replace filter element or clean appropriate:
If there is any dry pollution:
Blow out the filter cartridge with dry air under pressure (max. 5
bar) from the inside outwards, until no more dust comes out.
Danger
Hazard of eyehurts – use safety goggles!
If there is damp or oily pollution:
Replace the filter cartridge.
5. Maintenance
31
1
max
Oil
SAE 10W40
API SG-CE
max. 5 bar
2
1

5.7 Maintenance work on the machine
5.7.1 Cleaning
Clean the machine thoroughly daily.
Attention
–After cleaning, check all cables, hoses, pipes and
screwed fittings for leaks, loose connections, chafe
marks and other damage.
–Any faults which are detected should be rectified
immediately.
–Do not use any flammable or aggressive substances for
cleaning purposes.
5.7.2 Torque information
The tightness categories relate to bolts with untreatet, unlibri-
cated surface.
The figures result in 90% exploitation of the limit of elasticity for a
friction coefficient µges=0.14.
Use a torque wrench to check that the tightening torques are
observed.
The figures indicated do not apply if lubricant MoS2 is used.
Hinweis
Self tighted nuts have to be replaced after every disassambly.
5.7.3 Screw connections
With vibration equipment, it is important to check the screwed
connections periodically to ensure that they are screwed tight.
Observe tightening torques.
5.7.4 Checking rubber buffer
Check the rubber buffer for cracks and fractures and for a tight fit;
replace immediately if damaged.
5.7.5 Checking V-belt
–Remove V-belt guard.
–Check V-belt for tension and condition.
–Slacken the nuts of the rubber buffers on the outside.
–Push the engine frame back.
x = ca. 10 mm (ca. 0.4 in)
Important
It is important to ensure that the frame is also actually pushed on
the rubber buffer contact surfaces and not just that the rubber
elements are stretched and then spring back. If necessary, apply
light blows with a hammer to knock the rubber buffers forward.
–Both buffers should be equally pre-tensioned.
–Tighten nuts.
–Crank the drive manually and recheck tension and correct if
necessary.
Danger
Do not start the engine without V-belt guard. Danger of
injuries.
–Replace V-belt guard.
Important
Check the tension of the V-belt after 25 op. hrs. again. Adjust the
tension if necessary.
5. Maintenance
32
M4
M5
M6
M8
M10
M12
M14
M16
M18
M20
M22
M24
32
6
10
25
49
85
135
210
300
425
580
730
4
7
18
36
62
99
154
221
313
427
538
4,4
8,7
15
36
72
125
200
310
430
610
830
1050
3
6
11
26
53
92
147
228
317
449
612
774
5
10
18
43
84
145
235
365
500
710
970
1220
4
7
13
31
61
106
173
269
368
523
715
899
8.8
Nm
ø
Nm Nm
ft lb ft lb ft lb
10.9 12.9
x

5.7.6 Exciter: Oil level / Oil change
Important
Change the oil when its warm.
–Unscrew oil measuring plug (1) and oil drain plug (2).
Attention
–Collect oil which flows out and dispose of oil without
harm to the environment.
–Take care when draining hot oil: risk of scalding.
–Check seals.
After the old oil has been drained:
–Screw in oil drain plug (2).
–Pour in fresh oil; oil quantity and quality, see lubrication
schedule.
–If the oil level is correct, the oil film will extend up to the middle
of the marking when oil measuring plug (1) is screwed in.
–Screw in oil measuring plug (1).
5. Maintenance
33

This manual suits for next models
3
Table of contents
Other Ammann Power Tools manuals
Popular Power Tools manuals by other brands

Makita
Makita HM1802 instruction manual

Staubli
Staubli MA224 operating instructions

Pattfield Ergo Tools
Pattfield Ergo Tools PE-AGS 3,6 Li Safety instructions

Lapple
Lapple FIBRO FIBROTOR EM.NC Series Assembly and operation manual

Ryobi
Ryobi 3302H Operation manual

wurth
wurth STP 28-A operating instructions