manuals.online logo
Brands
  1. Home
  2. •
  3. Brands
  4. •
  5. AmScope
  6. •
  7. Microscope
  8. •
  9. AmScope SM-2 Series User manual

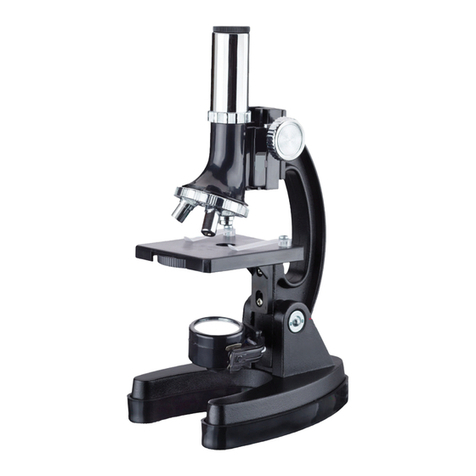
AmScope SM-2 Series User manual

SM
-
2
Series
1
User’s Manual
SM
-
2
Series
T
abl
e
o
f
Contents
2
Before Use........................................................................................................... 3
Introduction.............................................................................................3
Safety Precautions ..................................................................................4
Parts............................................................................................................... 5
SM-2B/T.............................................................................................. 5
Definition of Parts ............................................................................... 6
Getting Started ...........................................................................................8
Assembly.................................................................................................8
Operation .................................................................................................10
Setting Up................................................................................................10
Focusing ............................................................................................... 10
Using the Trinocular Port ..................................................................11
Attaching a Camera ...........................................................................11
Replacing the lamps and fuses...........................................................12
Adjusting Focusing Tension ............................................................12
Maintenance/Precautions .................................................................... 13
Specifications..............................................................................................14
Specifications....................................................................................... 14
Optional Accessories........................................................................... 15
Technical Terms & Concepts ..........................................................16
Troubleshooting .......................................................................................17
Common Issues (Optical)..................................................................17
Common Issues (Mechanical)...........................................................18
SM
-
2
Series
Before
Use
3
Introduction
Congratulations on the purchase of your new AmScope microscope!
This manual is designed for the SM-2 series microscopes (SM-2B, SM-2T, and all their variants).
The two base models of this series differ in that the -B models are binocular (two eyepiece ocular
tubes), while the -T models are trinocular (two eyepiece ocular tubes with a third port on top for
a microscope camera).
Please take a few minutes to familiarize yourself with the features and functions of your new microscope.
If you’d like more information on microscopes, parts, or accessories, please visit our website at:
www.amscope.com
We highly recommend you study this manual thoroughly before operating the microscope and
that you keep it on hand for future reference.
If you have additional questions or need assistance, please send us an email at:
info@amscope.com
SM
-
2
Series
Before
Use
4
Safety Precautions
1.
As the microscope is a precision instrument, always handle it with care, avoiding impact
or abrupt movement during transportation. Do not shake the package.
2.
Do not place the microscope in direct sunlight or in high heat. Keep it indoors in a dry
and clean place with temperatures between 32-100 degrees F (0-40 degrees C), and in
maximum relative humidity of 85%.
3.
Avoid touching the lenses on the objectives and the eyepieces so that oil and dirt from
your fingerprints do not obstruct your view.
4.
Before turning the power on, make sure that the power supply voltage is consistent with
the voltage of your microscope (for units with built in illumination).
SM
-
2
Series
Parts
5
SM-2B/T
Eyepieces
Trinocular Port (SM-2T Only)
Interpupillary Adjusters
Trinocular Shutter Control
(SM-2T Only) Pillar Stand
Magnification Knob
Objective Focusing Knob
Focusing Rack
Top Light Source
StageClips
Top Light Dimmer
Base Light Dimmer
SM
-
2
Series
Parts
6
Definition of Parts
AdjustableTrinocularPort
Threaded port with adjustable length of attachment of digital or video camera
Boom Stand
Stand for the microscope that allows the head to be moved in physical space in various directions
Continuous Zoom
A microscope head with a knob to change magnification through a range
Dimmer
Controls the amount of light that escapes from the illumination source
Diopter
Allows the focus to be perfected for both eyes, independent of each other
Fixed Power
Microscope head whose objectives are pre-set at certain levels and changed by rotating the objective
Focusing Knob
sed to move the microscope head vertically to bring the sample into focus
GooseneckIlluminator
Illuminator independent of the unit that allows movement of one or two necks for controlled lighting
Head Lock Screw
Screws the microscope head into place
Magnification Knob
Changes the magnification of the lenses on a continuous zoom microscope
Microscope Head
Contains the objective lens, eyepiece ocular tubes, and prisms used to magnify
Ocular Tube
Tube designed to hold the eyepieces or camera in place
SM
-
2
Series
Parts
7
Ring Light
An illuminator that mounts directly onto the objective to emit even light on the sample below
Simul-FocalMicroscopeHead
Head containing a focus adjustment for a trinocular port camera to simultaneously to match the eyepieces
Table Stand
A stand which sits on the table and holds the head directly above the sample without moving
SM
-
2
Series
Getting
Started
8
Assembly
SM
-
2
Series
Getting
Started
9
1.
First, take the styrofoam container out of the cardboard carton and lay it on its side, paying attention
to which
side is labeled up. Remove the tape and open the container carefully so as to avoid dropping
and damaging the
optical items. Check carefully to ensure that all parts and accessories are intact.
2.
Check the packing list to ensure that you’re received all items. Please note that this can vary
depending on
which model you’ve purchased, and is generally listed on www.amscope.com at the
items’ details page for your
specific model.
3.
Remove the microscope body from the box and remove the plastic protective covering. The body of the
microscope is composed of the base that comes with your unit, the focusing rack, and the head lock
screw.
4.
For –PL model, insert the illumination device①in the bracket
and tighten the lock screw②. Insert plug into the socket③of the
pillar stand.
5.
After mounting the focusing rack to the base (if not already
attached in shipping), slide the objective of the
microscope into
the hole and secure with included head lock screw.
6.
For the -T models, screw the photo port onto the top of the
microscope head (trinocular C-mount port).
7.
Remove the eyetube caps and drop the desired eyepieces into the eyepiece ocular tubes. Be sure
to avoid
touching the lens to ensure no artifacts appear in your image.
8.
Remove the cap from the objective lens.
9.
Plug in the microscope and turn it on if a light source is included (or refer to your specific light
source instructions for mounting/turning on if an external source). If no light emerges from the
light source, adjust the
dimmer knob near the power switch.
10.
If viewing an opaque sample, use a top light source, however while using a translucent sample,
either light
source can be used.
SM
-
2
Series
Getting
Started
10
Setting Up
1.
Once you have placed your sample on the table or base below the objective, center the sample as best
as possible.
A slide is neither needed nor required for a stereo microscope, although they can be used if
desired. If using a slide,
use the stage clips to hold it in place.
2.
With both eyes open, look into the eyepieces. Adjust the
interpupillary distance by holding the eyepiece tubes
and rotating
the eyepiece tubes either towards or away from each other until
only one circle of light is seen by both
eyes.
3.
Adjust the magnification knob to the lowest setting (0.7) and
move the microscope’s focusing knobs (on the
focusing rack) to
adjust the height of the unit until at approximately 4 inches
(101mm) away from the sample. If
not clear after adjusting,
please be sure that you have not installed any additional Barlow
lenses onto the objective.
4.
Center the object in the field of view once you have achieved focus.
Focusing
1.
A stereo microscope’s focus differs from a compound microscope. Magnification and focal distance
(working
distance) are inversely related to each other. The more magnified one is, the lower the
distance between the objective and the sample to achieve focus.
2.
When first using the microscope, remove all Barlow lenses and set the magnification knob (on the
microscope
head) to the minimum setting (0.7x).
3.
Begin focusing the microscope by moving the knob until the head is about 4 inches (101mm)
away from the
sample. This should bring the microscope in focus at 7x.
4.
If you’d like to use greater magnification than the minimum setting, you will need to move the
microscope head closer to the sample as well as adjust the magnification knob to a higher setting. The
more magnified, the closer you need to be.
5.
If you’ve achieved the maximum magnification (45x and 3/16 of an inch or 4.76mm) on the
microscope, you can
use other accessories to either further increase or further decrease the
magnification, called Barlow lenses. These
lenses screw onto the objective to either amplify or reduce
the total magnification.

SM
-
2
Series
Getting
Started
11
The SM microscope has two options available--the 0.5x and the 2.0x. The 0.5x will cut magnification in
half down
to a minimum of 3.5x (and double working distance to approximately 8 inches or
203mm), while the 2.0x will
double your magnification (but half the working distance, down to 3/32
of an inch or 2.4mm).
Using the Trinocular Port
The AmScope -T model is uniquely designed so that you can view the image through the eyepieces
and the
trinocular port without removing the camera or using your eyepiece.
This feature allows the images through the microscope’s eyepieces, and those displayed on your
computer screen or television be viewed at the same time (although unless using 20x eyepieces to
match your camera, the image
may differ in magnification). You do not need an adapter to attach
your AmScope camera to the trinocular port, however you may need one if you have a non-AmScope
camera. Our photo port is a 23mm size.
If using a simul-focal microscope head (one with a focusing adjustment on the third port), then you
can use the
middle portion to focus the camera. This allows the camera to be in focus even if the
magnifications between the
eyepieces and the camera are different. The SM-1T models do not come
standard with a simul-focal feature.
You can alternate the binocular observation and video capture by pushing or pulling the pole.
-
Push the pole in completely:
o
Binocular observation
-
Pull the pole out completely:
o
Open the shutter on the trinocular port to get video
capture.
Attaching a Camera
1.
If your microscope has a C-mount, you can simply screw the
camera onto the trinocular port.
2.
If your camera has a 23mm mounting size, remove the C-mount cap (if present) from the top of the
trinocular
port by loosening the screw. Then, drop the camera with reduction lens directly into the
trinocular port. It should slide in without issue.
3.
To focus through the trinocular port (simul-focal models only), simply turn middle portion of the
tube. Other-
wise, you will need to focus it individually using the microscope’s focusing mechanisms.
Pole
SM
-
2
Series
Getting
Started
12
Replacing the lamp and the fuses
1.
Before replacing the lamp or fuses, please turn off the power and
pull out the power cord.
2.
To replace the lamp bulb, press down the stage plate at up center
point and take out the stage plate.
3.
Pull out the lamp bulb from the jack. Replace with a new bulb and
place back the stage plate.
4.
To replace the fuses, unscrew the fuse tube and replace with a new
one.
Adjusting Focusing Tension
1.
To adjust the tension of the focusing knobs, grab both sides of the focusing knob and twist them opposite
of
each other.
2.
To decrease tension, rotate in the opposite direction. Typically, adding tension is done by rotating the right
knob clockwise and the left counterclockwise, so the opposite would hold true if releasing tension (if it is
too hard to adjust the focal height, for example).
Note: If your focusing rack/head is slipping down, you need to increase the tension.
SM
-
2
Series
Getting
Started
13
Maintenance/Precautions
-
All glass surfaces must be kept clean. Fine dust on the optical surface should be blown off using a hand blower or
gently wiped off with a soft lens paper tissue/nonabrasive lint free cloth.
-
Carefully wipe off oil or fingerprints on the lens surfaces using tissue moistened with a small amount of lens
cleaner (we recommend Sparkle brand optical cleaner).
-
Do not use Sparkle to clean other elements of the microscope. Use a neutral detergent on any plastic or painted
surfaces.
-
Do not assemble or disassemble the microscope’s electrical components yourself without advisement from one of
our technicians. Doing so will void your warranty unless by advisement of one of our technicians to do so.
-
After use, cover the microscope with the provided dust cover.
-
Keep your AmScope microscope in a dry, clean location in order to prevent rust or other damages.
SM
-
2
Series
Specifications
14
SM-2 Series Specifications
•Head: 45 degrees inclined 360 degree swiveling trinocular
•Eyepieces: 30mm super widefield high-eyepoint WF10X/20
•Objective: 0.7-4.5X
•Zoom Range: 6.5:1
•Maximum Field of View: 1-1/4" (31.75mm)
•Minimum Field of View: 3/16" (4.75mm)
•Working Distance: 4" (100mm)
•Diopter Adjustment: +/-5dp
•Interpupillary Distance: 2-3/16" - 2-15/16"(55-75mm)
•Frosted Glass Plate: 3-3/4" (95mm) in diameter
•White/Black Plastic Plate: 3-3/4" (95mm) in diameter
•Incident (Top) Illumination: 12V/15W halogen bulb
•Transmitted (Bottom) Illumination: 12V/15W halogen bulb
•Power Supply: 110V/60Hz (220V/50Hz version available)
•Accessories: dust cover, eye-guards and clips
SM
-
2
Series
Specifications
15
Optional Accessories
Parts Description Model # Purpose
Eyepieces 20x EP20X30 For obtaining higher magnification powers
25x EP25X30 For obtaining higher magnification powers
10x w/ Pointer EP10X30P For easier identifying of objects
10x w/ Reticle EP10X30R For measuring objects
Barlow (Auxiliary
Lens)
0.5X SM05 For halfing the magnification (and doubling work-
ing distance)
2.0X SM20 For doubling the magnification (and halfing the
working distance)
Camera CMOSDigital MU035 (350k)
MU130 (1.3mp)
MU300 (3mp)
MU500 (5mp)
MU800 (8mp)
MU900 (9mp)
MU1000 (10mp)
To capture images, video, or view live display on a
computer (PC/Mac OS X)
Calibration Micrometer MR400 To calibrate the camera software for on screen
measurements
CCD Digital (VGA, Trinocular
Only)
CCD-MT To view live display on a computer monitor (VGA)
CCD TV/Video (Trinocular
Only)
CCD-NP To view live display on a television (RCA)
Stands
Single Arm SAW Single arm boom stand for larger samples
Double Arm DAW Double arm boom stand for larger samples
Ball Bearing
BBB Ball bearing boom stand for ease of motion
Articulating Arm w/ Clamp ASC Articulating arm for maximum freedom of move-
ment with clamp for maximum work space area
Articulating Arm w/ Stand ASB Articulating arm for maximum freedom of move-
ment with table stand for flexibility
Super Large Flat Stand TS100-FR Flat stand and focusing rack for X-Y table use or
dissection
Dual LED Pillar Stand TS130-LED Top and bottom lit table stand with pillar design
Dual LED Track Stand TS130R-LED Top and bottom lit table stand with track design
SM
-
2
Series
T
echnica
l
Parameters
16
Technical Terms & Concepts
TotalMagnification
Total magnification of a microscope is calculated by the magnification of the objective multiplied by the
magnification of the eyepieces.
-Ex: (10x Eyepieces) x (4x Objective) = 40x Total Magnification
Field of View
Linear field of view of the eyepiece divided by the magnification of the objective
Numerical Aperture (N.A)
Calculated by n Sin α (max), the Numerical Aperture (N.A) is an important parameter that marks the
features of the objective and condenser’s image quality and resolution. The “n” is a refractive index of the medium
(air
or immersion cedar oil) between the objective lens and the specimen. The “α” is 1/2 of the angle between the
aperture
on the objective and path of light. The larger the N.A, the higher the resolution of the objective (and better
quality of
the image) is.
Object to Primary Image Distance
The distance between the object plane and the primary image plane. The conjugate distance is fixed.
Mechanical Tube Length
The distance between the objective shoulder and the ocular shoulder
Infinity
Infinity is an optic lens system that allows the entire field of view to be in focus at the same time, allowing for
higher quality images to be displayed through the microscope. The focal distance is set to infinity between the objective
and the eyepiece prism, also allowing filters to be inserted into the system more easily due to the parallel path of light,
rather than focusing on a specific point.
SM
-
2
Series
T
roubleshooting
17
Common Issues (Optical)
Symptom
Cause
Remedy
OPTICAL ISSUES
Obstructions are
observed in the field
of view
Stains, dust, or dirt has accumulated on the speci-
men
Clean the slide or use a new specimen if sample is
destroyed
Stains, dust, or dirt have accumulated on the
lenses
Clean the objective and eyepiece lenses
UnclearImage
Stain or dust has accumulated on the lens in the
inlet of the head
Clean the lens with lens cleaner or a nonabrasive
lint free cloth, as well as spray with compressed air
The microscope head is not in the right position
to be focused
Adjust the height of the microscope with the focus-
ing knob on the focusing rack until image appears
in focus.
Note:
Higher magnification will require
the head to move closer, while lower will require
more distance between the sample and the lens.
One side of the field
of view is dark or the
image moves while
focusing
The specimen is not fixed Secure the slide to the stage with clips or another
manner so that the sample does not move
The field of view is not
bright enough
The light source is not present A light source must be used with this model micro-
scope to view a sample (ring light, built in illumina-
tor, or gooseneck illuminator)
The light source is too dim The light source used is not bright enough, or is set
to too low of an intensity setting. Adjust setting to a
higher or change light sources
Stains, dust, or dirt has accumulated on the con-
denser, objective, eyepieces, or base lens
Thoroughly clean tall lenses with lens cleaner or a
lint free nonabrasive cloth
SM
-
2
Series
T
roubleshooting
18
Common Issues (Mechanical)
Symptom Cause Remedy
MECHANICALISSUES
Focus knob does not turn The tension knob is too tight Loosen it by adjusting the tension by grabbing both knobs on the
focusing rack and twisting them in opposite directions.
Stage declines by itself The tension knob is too lose Loosen it by adjusting the tension by grabbing both knobs on the
focusing rack and twisting them in opposite directions.
The focusing knob won’t
raise/lower the head
The focusing rack has reached the max travel distance in either
direction
Move the focusing rack higher or lower on the pillar if using a
stand with a pillar

Other AmScope Microscope manuals

AmScope 150 Series User manual

AmScope

AmScope 150 Series User manual

AmScope IN300 Series User manual

AmScope

AmScope IN300 Series User manual

AmScope B270 User manual

AmScope

AmScope B270 User manual

AmScope M100 Series User manual

AmScope

AmScope M100 Series User manual

AmScope SE400-LED Series User manual

AmScope

AmScope SE400-LED Series User manual

AmScope DM745-HDM9-3MP User manual

AmScope

AmScope DM745-HDM9-3MP User manual

AmScope SM-6 Series User manual

AmScope

AmScope SM-6 Series User manual

AmScope PM240 Series User manual

AmScope

AmScope PM240 Series User manual

AmScope HHD2100HD-P User manual

AmScope

AmScope HHD2100HD-P User manual

AmScope ZM-4 Series User manual

AmScope

AmScope ZM-4 Series User manual

AmScope B110C User manual

AmScope

AmScope B110C User manual

AmScope B100 Technical manual

AmScope

AmScope B100 Technical manual

AmScope M160 Series User manual

AmScope

AmScope M160 Series User manual

AmScope ZM-1 Series User manual

AmScope

AmScope ZM-1 Series User manual

AmScope SM745 User manual

AmScope

AmScope SM745 User manual

AmScope 490 Series User manual

AmScope

AmScope 490 Series User manual

AmScope TCS-100 User manual

AmScope

AmScope TCS-100 User manual

AmScope 330 Series User manual

AmScope

AmScope 330 Series User manual

AmScope M620 Series User manual

AmScope

AmScope M620 Series User manual

AmScope DM750-2MP User manual

AmScope

AmScope DM750-2MP User manual

AmScope HHD510-W User manual

AmScope

AmScope HHD510-W User manual

AmScope AFDM1080 User manual

AmScope

AmScope AFDM1080 User manual

AmScope T680A Series User manual

AmScope

AmScope T680A Series User manual

AmScope DM745-HDM11 User manual

AmScope

AmScope DM745-HDM11 User manual

Popular Microscope manuals by other brands

KERN Optics OBL-14 User instructions

KERN Optics

KERN Optics OBL-14 User instructions

BestScope BS-2025M instruction manual

BestScope

BestScope BS-2025M instruction manual

american optical AO Series Reference manual

american optical

american optical AO Series Reference manual

Bresser Biorit TP instruction manual

Bresser

Bresser Biorit TP instruction manual

Celestron 44302-A instruction manual

Celestron

Celestron 44302-A instruction manual

VistaVision 82026-630 operating manual

VistaVision

VistaVision 82026-630 operating manual

Zeiss Axiovert 25 C operating manual

Zeiss

Zeiss Axiovert 25 C operating manual

ViTiny UM06-CSZ064C user guide

ViTiny

ViTiny UM06-CSZ064C user guide

Celestron 44310 instruction manual

Celestron

Celestron 44310 instruction manual

3B SCIENTIFIC PHYSICS 1012403 instruction manual

3B SCIENTIFIC PHYSICS

3B SCIENTIFIC PHYSICS 1012403 instruction manual

Leica BF200 instruction manual

Leica

Leica BF200 instruction manual

MshOt MI-BGU-LED-TS100 user manual

MshOt

MshOt MI-BGU-LED-TS100 user manual

Thames & Kosmos Nature Discovery Kit Experiment manual

Thames & Kosmos

Thames & Kosmos Nature Discovery Kit Experiment manual

3B SCIENTIFIC PHYSICS M 100 1005401 instruction manual

3B SCIENTIFIC PHYSICS

3B SCIENTIFIC PHYSICS M 100 1005401 instruction manual

Celestron 44104 instruction manual

Celestron

Celestron 44104 instruction manual

Motic Swiftline M30TZ-SM99CL use and care manual

Motic

Motic Swiftline M30TZ-SM99CL use and care manual

STEINDORFF NYMCS-603 user manual

STEINDORFF

STEINDORFF NYMCS-603 user manual

Accu-Scope EXC-350 Series manual

Accu-Scope

Accu-Scope EXC-350 Series manual

manuals.online logo
manuals.online logoBrands
  • About & Mission
  • Contact us
  • Privacy Policy
  • Terms and Conditions

Copyright 2025 Manuals.Online. All Rights Reserved.