AMTI Products Slice 123 User manual

SLICE® Cutting Machine
Operating Instructions
Copyright 1998-2016 page 1 of 35
By
OPERATING
INSTRUCTIONS
MODEL 123
READ CAREFULLY
BEFORE OPERATING YOUR
MACHINE
A Safety Note:
Your good manufacturing practices should insure that a written safety program is in place, which
includes the assessment of all processes that take place in house, for potential risks.
The employer response to this assessment is to establish specific instructions for the safe use of all
machines, safe use of certain chemicals, etc. in your work place.
For instance, any user of electrical machinery, SLICE® included, must be instructed that never,
under any circumstances, should a machine be left on while attempting to clear a jam, if it should
occur.
This written rule, along with other directives, should be translated into either a training document
that is signed or work instruction that is also signed and dated by all operators and that ideally
remains with the equipment as a reminder of safe operation.

SLICE® Cutting Machine
Operating Instructions
Copyright 1998-2016 page 2 of 35
Published by:
AMTI PRODUCTS
Phone 847.588.7090
Email info@amtiproducts.com
Website www.amtiproducts.com
The reproduction of these instructions or parts thereof, in whatever form, is
prohibited without the express, written permission of the publisher.
AMTI reserves the right to make technical changes in the system depicted and
indicated in these instructions if such changes are necessary to improve the
machine.

SLICE® Cutting Machine
Operating Instructions
Copyright 1998-2016 page 3 of 35
Index
1.0 Product Description............................................................................................... page 4
2.0 Safety ..................................................................................................................... page 6
3.0 The Operating Instructions.................................................................................... page 7
4.0 Machine Overview .................................................................................................. page 10
5.0 Set Up...................................................................................................................... page 13
6.0 Cut Material To Length Without Using A Program .............................................. page 14
7.0 Cut Material To Length Using A Program (A Preprogrammed Batch)................ page 16
8.0 How To Run An Existing Program.......................................................................... page 17
9.0 How To Set Up And Run A Batch Sequence ......................................................... page 17
10.0 Batch Sequence Pause Feature ........................................................................... page 18
11.0 Reprogramming The Unit ...................................................................................... page 18
12.0 Contact Information................................................................................................ page 22
13.0 Maintenance Section.............................................................................................. page 23
14.0 Electrical Drawings ................................................................................................ page 25
15.0 Spare Parts……………………………………………………………………………….. page 28
16.0 Trouble Shooting..................................................................................................... page 29
17.0 CE Declaration Of Conformity................................................................................ page 35

SLICE® Cutting Machine
Operating Instructions
Copyright 1998-2016 page 4 of 35
1.1 Product Description
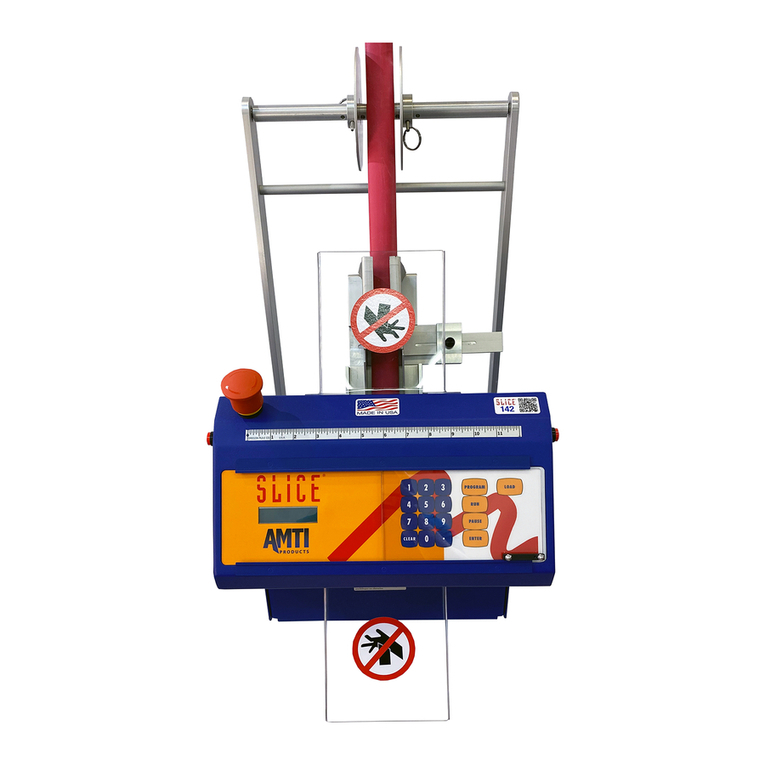
The SLICE® 123 is an automatic cutting machine intended to cut various
materials to length within the scope of the technical data. It is for industrial use.
1.2 System Description
1. Die size: 3” X 1/4” opening
2. “Stock Jam or Not Feeding” indicator
3. Standard SLICE® Keyboard
4. SLICE® electronics and power supply
5. Drive wheel and tracking wheel to enhance pulling action

SLICE® Cutting Machine
Operating Instructions
Copyright 1998-2016 page 5 of 35
1.3 FUNCTION AND OPERATION
1. Operates as other models in the SLICE® series
1.4 PERFORMANCE SPECIFICATIONS
1.
Cuts up to 12 gauge standard wire and varieties of hollow tubing that fits
within its input aperture of 3/16” height by 1” width
2.
Adjustable feed rate from 5” per second to 30” per second
3.
5,200 4” cuts per hour, 3,400 10” cuts per hour
4.
Machine discrimination 0.5mm repeatability and accuracy is greatly
dependent upon material and material feeding conditions. Best accuracy to be
expected is ± 1 mm
1.5 POWER REQUIREMENTS
1. Electric 115/230 volts at 50/60 hertz
1.6 OPERATING CONDITIONS
Temperature 10˚ to 35˚ C
1.7 SYSTEM SIZE
Length: 16” Width: 12” Overall Height: 12”
1.8 UNIT WEIGHT
25 pounds
Aluminum & hardened tool steel construction
1.9 MAX SOUND LEVELS
74 DB
1.10 MATERIALS
The SLICE® 123 will cut most materials that will fit within die size of 1/4”
diameter x 3” wide. Material needs to be under 1/4” diameter or thick as it comes
off the roll. Examples of material it will process:
1. Standard wire up to 14 GA
2. Rubber tubing or hose under 1/4” diameter thick
3. Flat heat shrink up to 3” wide or 1/4” in diameter thick
4. Many other materials, please consult with sales representative or engineering

SLICE® Cutting Machine
Operating Instructions
Copyright 1998-2016 page 6 of 35
2.0 Safety
Always observe the following safety rules:
1. These sets of documentation are integral parts of the machines and
devices they were written for and must be heeded.
2. Always turn off power and disconnect the air lines before investigating
jams or internal issues.
3. Never place fingers, hands, or tools into the machine while it is plugged in.
4. Prior to starting the machine, check to see that all safety features are
attached and properly operating. The safety requirements are met only if the
safety features are operating properly.
5. Machine safety is only achieved when the materials being processed (wire,
tubing, etc.) are those specified in the technical data. Make sure the improper
use of materials is prevented!
6. Do not cut flammable, explosive, wet, etc. materials.
7. Do not operate outside standard environment requirements and use power
supply as recommended.
8. Only duly authorized and trained persons familiar with the safety features of
the machine are allowed to maintain and repair the machine. The machine can
be dangerous if operated improperly by untrained persons.
9. Machine safety is achieved only for operators. Persons working on the
machine must always take care that no other persons are endangered by the
input of a command.
10. If you have reason to believe the machine can no longer be operated
safely, you must take the system out of operation and safeguard it against
being unintentionally switched back on.
11. Observe the notes in these instructions as well as locally valid rules of
safety and accident prevention.

SLICE® Cutting Machine
Operating Instructions
Copyright 1998-2016 page 7 of 35
3.1 The Operating Instructions
These operating instructions are valid for the SLICE 123 and are available in
English and Spanish. Other languages are available upon request.
The instructions contain complete information on the controls, handling,
maintenance, and setting procedures as well as all technical data. They also
include a list of accessories. The sets of documentation for the accessories are
delivered along with each accessory.
Be careful not to mislay these sets of documentation when unpacking and setting
up accessories.
The operating instructions are an integral part of the SLICE 123 Keep them within
reach so you have access to the information you need at all times.
Pay very close attention to the safety notes and directions. If you need additional
sets of documentation, please contact AMTI for more details.

SLICE® Cutting Machine
Operating Instructions
Copyright 1998-2016 page 8 of 35
3.2 Machine Identification
On the back of the machine you will find a nameplate with the following
information: Company Contact
Machine Type
Machine Serial
Number Voltage
Version
Power Input

SLICE® Cutting Machine
Operating Instructions
Copyright 1998-2016 page 9 of 35
3.3 Personal Qualifications And Training
3.3.1 Personnel Qualifications
Machine Operator
The machine operator must be sufficiently familiar with the machine to be
able to operate it and its accessories and peripheral devices in production on
his/her own without difficulty. This requires that the operator be educated in
the technology involved and be knowledgeable of the software for operating
the machine.
Service Technician
The service technician should have an extensive knowledge of the machine.
Apart from machine operations, he/she must be able to locate errors and take
suitable steps to remedy them. A service technician must be able to maintain the
machine correctly so as to increase its service life and availability. His/her
mastery of the software should enable the machine to be used to the maximum
effect in production.
For this work, the service technician must have wire processing experience.
He/ she must also have completed training in mechanics or electronics and
have a sound knowledge of the machine.
3.3.2 Training
All personnel that are using SLICE® equipment should be trained on its proper
use and safety needed when operating this equipment.

SLICE® Cutting Machine
Operating Instructions
Copyright 1998-2016 page 10 of 35
4.0 Machine Overview (front)
1. Function Buttons
2. Keypad
3. LCD Readout
3 2 1

SLICE® Cutting Machine
Operating Instructions
Copyright 1998-2016 page 11 of 35
4. 1 Machine Overview (back)
1. Fuses
2. Power Cord Receptacle
3. On/Off Switch
4. Nameplate
4 3 2 1

SLICE® Cutting Machine
Operating Instructions
Copyright 1998-2016 page 12 of 35
4.2 Operations
Control Unit
1. “PROGRAM” - This button is used to pull up an existing program or create
new program. Press this button twice then press “ENTER” to reveal machine
menu on LED readout.
2. “LOAD” - This button is used to load/index new material.
3. “RUN” - This button is used to run desired path input (quantity/length) or
program.
4. “PAUSE” - This button is used to pause machine during cutting cycle.
5. “ENTER” - This button is used to enter data.
6. “CLEAR” - This button is used to clear data entry.
4 3 1 2
6 5

SLICE® Cutting Machine
Operating Instructions
Copyright 1998-2016 page 13 of 35
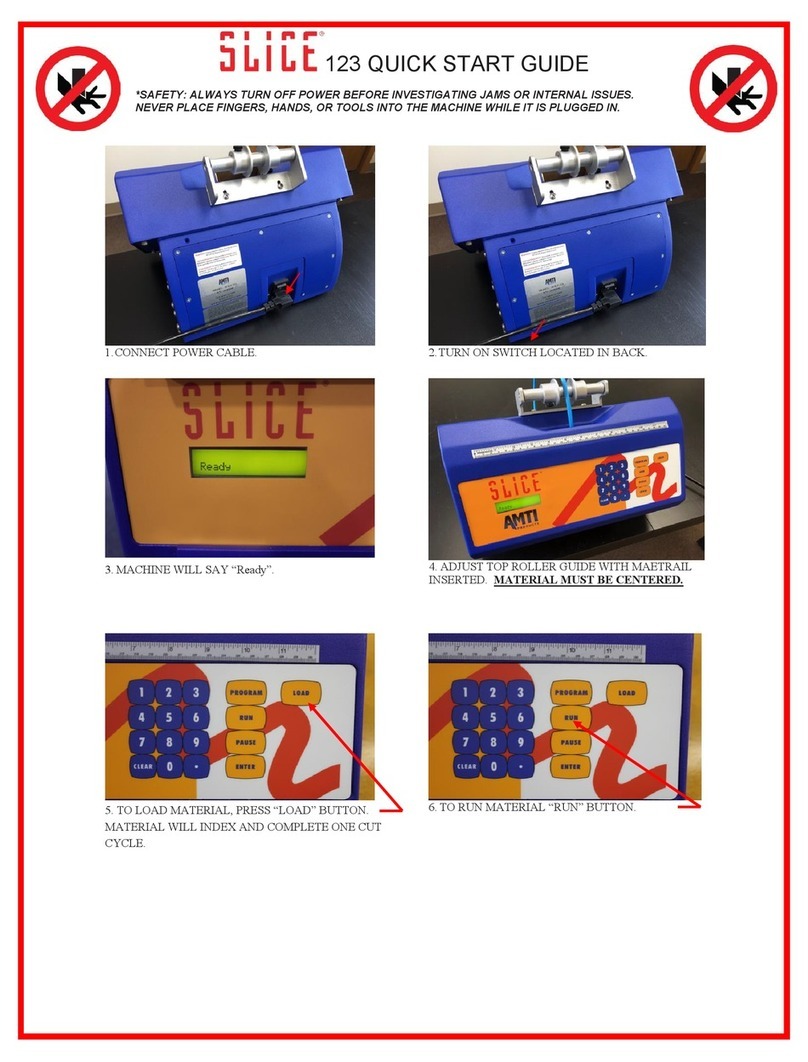
5.1 Set Up
Place your SLICE® machine on a clean, flat, sturdy work surface.
Plug machine into a standard 110V outlet, unless your machine is designed
for 220V; then act accordingly. Position the machine’s front edge even with the
edge of the worktable on which it’s placed.
Turn on the switch at the back of the unit. Look at the display under the name
SLICE®. It will read “ready.”
ON/OFF SWITCH READY
5.2 Load The Product:
1. Load the product you’re cutting by centering the material in the opening aperture.
Opening Aperture
Note: Machine calibration may not be accurate for different types of tubing.
Minimum tension or no tension at all should be used for flexible tubing that
will stretch.

SLICE® Cutting Machine
Operating Instructions
Copyright 1998-2016 page 14 of 35
2. Simply push the material into the opening in the back of the machine. Hold it
firmly in place and push “LOAD”.
“LOAD”
With larger diameter wires and tubing it may be necessary to press firmly
on the material. Make an angle cut at the end of these materials to facilitate
easy loading.
3. The motor will shut down and the cutter will activate cutting off a small
length of material. It is now in the “start” position.
6.0 Cut Material To Length Without Using A Program
1. Press “RUN”. The unit will ask for Length (Length=). Enter the desired length.
The machine has arrived factory preset for length in inches. Enter inches with 2
decimal places. If you want to use the metric system, see Number 11.0 -
Reprogramming The Unit.
RUN LENGTH PROMPT

SLICE® Cutting Machine
Operating Instructions
Copyright 1998-2016 page 15 of 35
2. After entering the length desired, press “ENTER”. The unit will request the
number of pieces to be cut (Count=). Enter the number of pieces required and
press “ENTER”. Verify that what you have entered is correct. The material exits
from the bottom portion of the front of the machine, so make certain that the
machine sits on the edge of
table to avoid jams.
ENTER COUNT PROMPT
Note: Follow each complete numerical entry by pressing “ENTER”.
3. Place a container under the unit’s chute, to capture processed
material.
4. To begin the cut sequence: press “RUN”.

SLICE® Cutting Machine
Operating Instructions
Copyright 1998-2016 page 16 of 35
7.0 Cut Product To Length Using A Program (A Preprogrammed
Batch)
Enter a program by pressing “PROGRAM”. Enter the desired program
number (1-99). Press “ENTER”, then hit “RUN” to activate cutting cycle.
“PROGRAM” “ENTER” “RUN”
Note: when a program is on the LCD screen, it may be run repeatedly by simply
pushing “RUN”. To remove this program and enter a new one, push “CLEAR”.
Enter the length and count as requested by the unit.
Example: Length = 12.56 “ENTER” Count = 25 “ENTER”
Then press “RUN”

SLICE® Cutting Machine
Operating Instructions
Copyright 1998-2016 page 17 of 35
8.0 How To Run An Existing Program
Press “PROGRAM”. Enter the program number (1-99) followed by “ENTER”.
The data stored in that program will be displayed. If this is the correct program,
accept it by pressing “ENTER” once more.
Place a container under the chute and press “RUN” .
If you choose a number that has already been programmed, the existing
program’s length and count will be displayed. If you would like to reuse this
program number for new data, just press “CLEAR”.
Note: Keeping a written log next to the machine that indicates your program
numbers and a description of the lengths and counts for each program is
recommended.
9.0 How To Set Up And Run A Batch Sequence File
Program numbers 100 to 139 are set up as “batch sequence file” programs. A
batch sequence file program contains up to ten standard programs (numbers 1-
99). To enter a batch sequence file program, press “PROGRAM”. Enter the
desired batch sequence file number (100 to 139). Press “ENTER”. If that
number has already been programmed, the program numbers will appear
on the LCD screen.
If you would like to run this batch sequence file, press “ENTER” to accept it then
press “RUN”. If that number has not been used before the machine will prompt
you for the batch program numbers. Enter each batch program number to be run
followed by “ENTER”. Pressing “ENTER” without entering a program number
ends the entry mode. Pressing “RUN” will now run the batch sequence file.
If there is already a batch sequence program entered and you wish to reuse the
number press “CLEAR”. The screen will be cleared and you may now enter the
series of individual batch program numbers for your batch sequence file.
Example of
appearance:
01,05,10,15,21
03,56,67,12,17
If one of the batch programs has not been previously entered, the machine will
shut down the batch sequence.

SLICE® Cutting Machine
Operating Instructions
Copyright 1998-2016 page 18 of 35
10.0 Batch Sequence Pause Feature
Since a batch sequence program may contain as many as ten (10) different
batches, the machine will stop in between each batch.
If the feature is not selected, the machine will run out all batches into the same
container. This may be useful when all the tubing or wire required is bagged or
boxed for a workstation or is shipped in “kit” format.
11.0 Reprogramming The Unit (THE MENU)
Press “PROGRAM” twice. Press “ENTER“.
PRESS ”PROGRAM” TWICE “ENTER”
Select from the rotating menu shown on the display:
1. Calibrate
2. Inches/Metric (Change from English to Metric or vise-versa)
3. Set Feed Rate (Adjustable material feed rate from 5”- 30” per second)
4. Display total (Displays total pieces cut by the unit)
5. Batch Pause (Sets Batch Pause Feature)
6. Exit

SLICE® Cutting Machine
Operating Instructions
Copyright 1998-2016 page 19 of 35
Press the appropriate numerical key to transfer to the desired
programming. Or if you do not wish to make a change, once you have
pressed one of these numbers, simply press the “CLEAR” button.
11.1 Calibration (displays as no. 1)
The unit comes calibrated from the factory. However, certain types and sizes of
wire may interact with the driving and measuring wheels in a different manner.
The unit will cut all types of wire consistently. However, the length setting may
vary with different types of wire. This may be corrected when the length is set up
by adjusting the input length of that wire. If the wire you are using is all the
same and is consistently less
or more than the settings of length you have entered, it may be corrected here in
the calibration setting. When the “1” key is pressed to enter the calibration mode,
the calibration number will be displayed:
9950 represents a decrease of the length by 0.5%
9900 represents a decrease of the length by 1.0%
1005 represents an increase of the length by 0.5%
1010 represents an increase of the length by 1.0%
SLICE® calibration works from 9000 (0.900) to 1100 (1.100). Unusual materials
may require greater than 10% correction factors. It is suggested that the length
setting be used to obtain the correct length for these materials.
Enter the correction factor you have calculated and press “ENTER”.
Note: the machine calibration will not be accurate for different types of tubing.
Calibration should be done only using wire or flat ribbon cable.

SLICE® Cutting Machine
Operating Instructions
Copyright 1998-2016 page 20 of 35
11.1 Calibration Continued
The issue of calibration is a complex one. Different insulating materials may
have different slip rates. As such, a machine calibrated to run one type of wire
and insulation may be calibrated for a different type of wire and insulation. Heat
shrink tubing, and various types of flexible tubing are susceptible to stretching. It
is best to calibrate the machine to the product that you use the most. When other
products are run, run a few samples and adjust the length setting until the
desired length is achieved. On wire the repeatability will be the same. On flexible
tubing repeatability will depend on the payout system employed for the tubing so
as not to cause stretching while feeding into the unit.
11.2 The Effect of Machine Discrimination on Calibration
Each step of the drive motor represents a move in length of 0.5 mm or .0197”. In
order for a calibration correction to have an effect, the change must be at least
.02”. For example: a correction of 1% at 12” represents 0.12” or approximately
six (6) steps of the drive motor. This same calibration at 1” represents only 0.01”
and may not affect the length of the material.
11.3 Inches/Metric (displays as no. 2)
The display will ask you to select “1” for inches and “2” for metric. You may return
to either setting, depending on your measuring needs. When entering a batch
program, the program will save in the units of measurement currently specified. It
will run in these units even if the units have been changed.
11.4 Set Feed Rate (displays as no. 3)
(Adjustable material feed rate from 5”- 30” per second)
To change motor speed on adjustable models, press new speed desired.
Example: 10 followed by “ENTER” to adjust the motor speed to 10” per
second. Speed may be adjusted between 5” and 30” per second on standard
models.
11.5 Display Total (displays as no. 4)
(Display Total Pieces) Simply displays the total pieces of product that have been
cut by the machine since manufacture.
11.6 Batch Pause (displays as no. 5)
Allows the batch sequence pause feature to be turned on or off.
Other manuals for Slice 123
1
Table of contents
Other AMTI Products Cutter manuals
Popular Cutter manuals by other brands

EGAmaster
EGAmaster ROSCAMATIC 100-4 operating instructions

Lumberjack
Lumberjack TC180 Safety and operating manual

Powerline
Powerline PL2620 Installation, operating and maintenance instructions

Rayco
Rayco RG80 2019 parts manual

Alfain
Alfain PEGAS 160 PLASMA operating manual

US Cutter
US Cutter LaserPoint user manual