manuals.online logo
Brands
  1. Home
  2. •
  3. Brands
  4. •
  5. AMX
  6. •
  7. Server
  8. •
  9. AMX MAX-MMS400M User manual

AMX MAX-MMS400M User manual

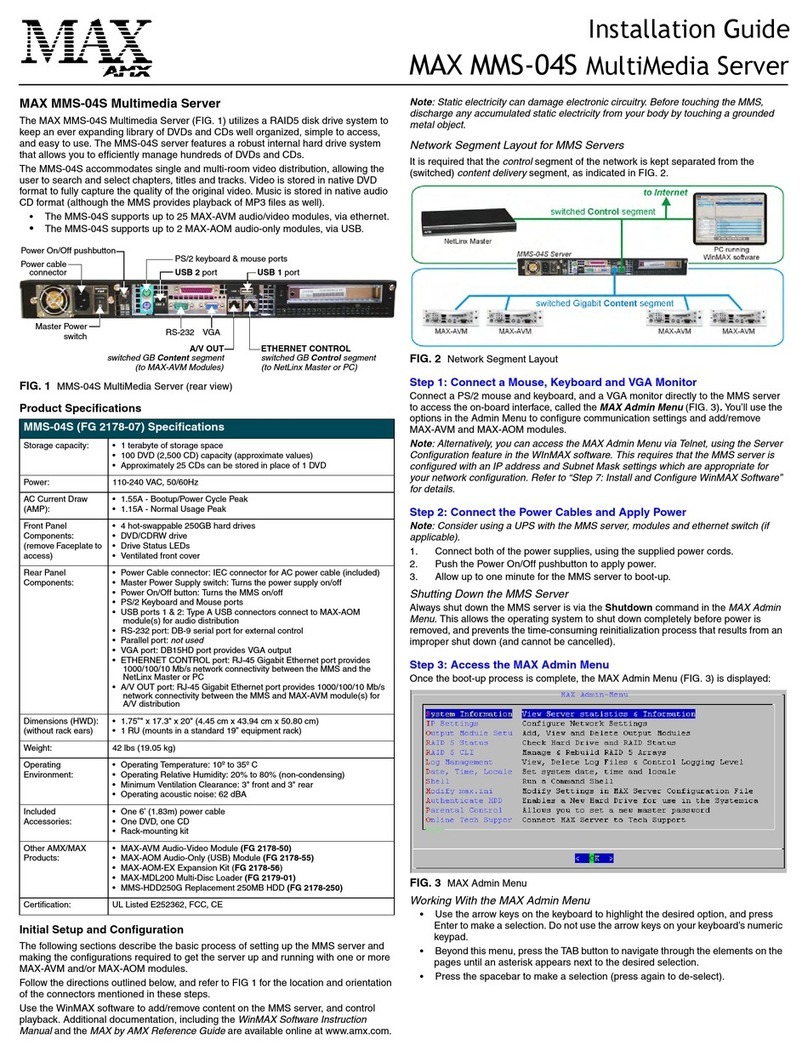
Installation Guide
MAX-MMS400M MultiMedia Server
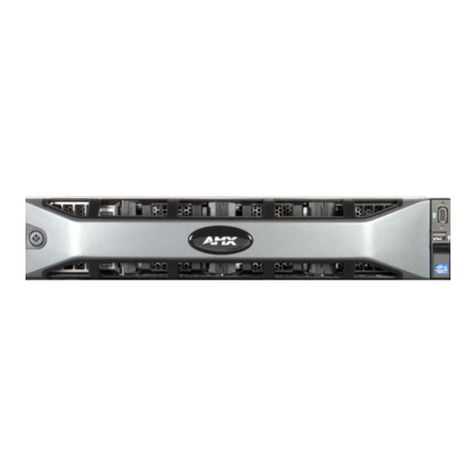
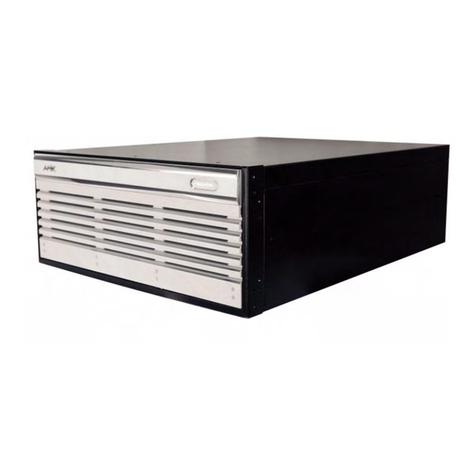
MAX-MMS400M Multimedia Server
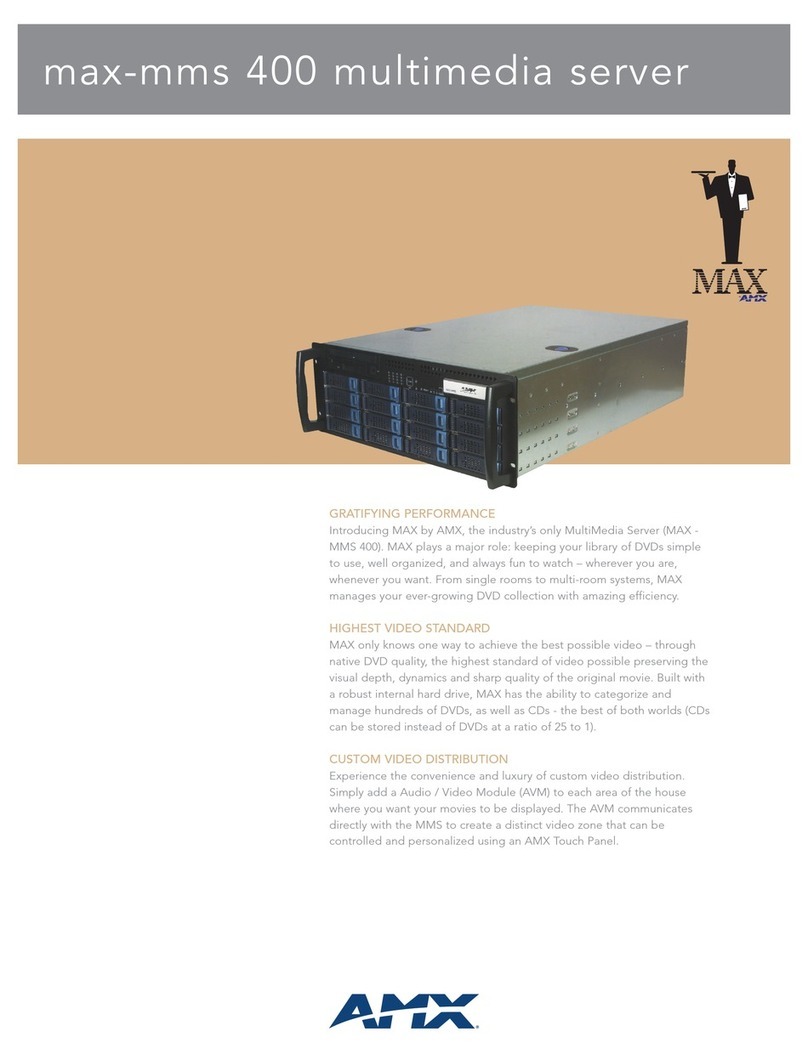
The MAX-MSS400M Multimedia Server (FIG. 1) utilizes the RAID5 disk drive system
to keep an ever expanding library of DVDs and CDs well organized, simple to access,
and easy to use. Video is stored in native DVD quality, which captures the depth,
dynamics and sharpness of the original video. The MAX-MMS400M features a robust
internal hard drive system with Terabytes of space and allows you to efficiently
manage hundreds of DVDs/CDs, accommodate single and multi-room video
distribution, as well as search and select chapters, titles and tracks. The MAX-
MMS400M communicates via Ethernet to up to eight MAX-AVM Audio Visual Modules.
The MAX-MMS Multimedia Servers are available in six storage capacities (125, 200,
300, 350, 400 or 900 DVDs); 25 CDs can be stored in place of 1 DVD.
Refer to the MAX-MMS125/200/300/350 and MAX-MMS900M Installation Guides
(both available on www.amx.com) for details on the 125/200/300/350- and 900-disc
MultiMedia Servers.
Note: Multiple MAX-MMS units can be joined together for more capacity or more
zones. Contact AMX Technical Support for details.
Product Specifications
Connecting the MAX-MMS to Your PC via WinMAX
Use the WinMAX software application (available for download from www.amx.com) to
establish initial communications with the MMS server. You should install the WinMAX
application before connecting the MMS server to your PC.
Downloading WinMAX from www.amx.com
The WinMAX software application can be downloaded from www.amx.com as a self-
extracting executable. As part of the installation process, it automatically searches for
and replaces older versions of WinMAX. To download WinMAX:
1. Go to www.amx.com and log in. You must be logged in as a dealer to download
AMX applications.
2. Go to Dealers > Tech Center > Downloadable Files > Application Files.
3. Scroll down in the list to select WinMAX.
4. Read the AMX License Agreement and click I Accept to continue.
5. In the File Download dialog:
• Click Save to save the WinMAX installation .EXE file to a local drive (or LAN).
• Click Open to begin the installation immediately.
Once installed, by default the program resides in your Programs directory.
Note: For WinMAX to be viewed properly, the resolution of your PC must be set to
1024 x 768.
Connecting the MMS to your PC
1. If its not already installed, load the WinMAX application on your PC.
If you intend to connect to the MMS via a LAN connection, verify that the PC is
communicating properly with the network.
2. Use an RJ-45 twisted pair cable to connect the Ethernet port on the MMS400M
to the LAN that your PC is on. Alternatively, you can connect the PC directly to
the MMS’s Ethernet port using an Ethernet crossover cable.
Note: Optionally, at this point you can connect one or more MAX-AVM Audio
Video Modules to the MMS400M via the Gigabit Ethernet connector Refer to the
FIG. 1 MAX-MMS400M MultiMedia Server (front and rear views)
MAX-MMS400M Specifications
Storage capacity • 400 DVD (10,000 CD) capacity (FG2178-05)
Power: • 115 VAC/700W
Audio Specifications: • Frequency Response: 20Hz to 20kHz
• Dynamic Range: 110dB
• Signal-to-Noise Ratio: 110dB
• D to A Conversion: AKM Semiconductor, 24-bit, 128X oversampling
Front Panel
Components:
• DVD/CDRW tray
• 3.5” Floppy disk drive
• Hard Drive LEDs: Bank of 16 LEDs indicate activity on the storage drives
• USB ports/LEDs: not used.
• Fan LED (red): lights to indicate failure of cooling fan(s)
• Bootup Disc LED (yellow): lights to indicate activity on the bootup drive
• Power LED (green): lights to indicate that the unit is on
• Reset button
•Powerbutton
Power cable
connectors
Mouse port
Keyboard port
VGA (DB-15) port
RS-232
10/100 Ethernet
Gigabit Ethernet
(to MAX-AVM or
Power Switches
Note: All components that do not have a callout description
Gigabit Ethernet hub)
DVD/CDRW tray
Power LED (green)
Bootup Disc LED (yellow)
Fan LED (red) Power button
Storage Disc Drives
Hard drive activity LEDs
(front)
(rear)
in this illustration are unused (see the MAX-MMS400M Specifications table).
Reset button
MAX-MMS400M Specifications (Cont.)
Rear Panel
Components:
• 2 Power Cable connectors: IEC connectors for AC power cables.
• 3 Power Switches
• PS/2 Keyboard and Mouse ports (for troubleshooting only).
• RS-232 port: 9-pin (DB-9) serial port.
• Parallel port: not used.
• Video connector: DB15HD port provides VGA output (for troubleshooting
only).
• 10/100 Ethernet port: RJ-45 Ethernet port provides 10/100 network
connectivity between the MAX-MMS400M and the NetLinx Master or
PC.
• USB ports: not used.
• Mic In/Line Out/Line In: not used.
• RJ45 Gigabit Ethernet port: connects to MAX-AVM Audio Video Modules
to send media through a Gigabit Ethernet hub (not included).
Dimensions (HWD): • 6 7/8" x 18 7/8" x 27 5/8" (17.46 cm x 47.94 cm x 70.16 cm)
• 4 RUs (mounts in a standard 19” equipment rack)
Weight: 90 lbs (40.82 kg)
Operating Temp: 0°C (32°F) - 50°C (122°F)
Rel. Humidity: 5% - 95% non-condensing
Included
Accessories:
• 2 Power Cables
• 6’ (1.83m) Ethernet Crossover Cable
Optional
Accessories: • MAX-AVM Audio/Video Module (FG2178-50)
FIG. 2 Connecting the MAX-MMS400M to your PC
1
Connect the Ethernet port to your PC
(either directly or through a LAN connection)
Plug in the power cables
2
Switch power supplies on
3
To MAX-AVM (Audio Video Module)
Multiple AVM’s require a Gigabit
Ethernet Hub (see Fig. 3)
Switch power on (Power switch is on front panel)
4
AMX Corporation reserves the right to alter specifications without notice at any time.
For full warranty information, refer to the AMX Instruction Manual(s) associated with your Product(s).
065-004-2779 3/04 ©2004
AMX Corporation. All rights reserved. The AMX logo is a trademark of AMX Corporation.
3000 RESEARCH DRIVE, RICHARDSON, TX 75082 • 800.222.0193 • fax 469.624.7153 • technical support 800.932.6993 • www.amx.com
93-2178-05 REV: D
MAX-AVM Audio Video Module Installation Guide (available on www.amx.com)
for additional details on the MAX-AVM.
3. Connect the two supplied power cables.
4. Turn on all three power switches, then turn on the power switch on the front
panel and allow up to one minute for the MMS400M to boot up.
Establishing Communication via WinMAX
Once the MMS server has booted up, launch the WinMAX software on your PC.
When the WinMAX application is launched, the first thing that happens is that the
program attempts to establish communication with the MMS server.
The default IP address of the server is 192.168.1.30. If this hasn’t been changed, the
WinMAX program should launch successfully.
If You Don’t Connect
If you receive an error when you launch WinMAX indicating that you have not
connected to the MMS server, click OK to close any error messages that occur, and
WinMAX will launch. In this situation, the application opens to the System
Information tab by default, where you will specify the IP Address of the MMS server:
1. Type 192.168.1.30 into the field labeled Server’s IP Address or URL.
2. Click on the disk icon next to the text-entry field to save this configuration. The
blank fields should fill in momentarily, indicating that the MMS server has been
recognized.
Using the WinMAX Software
WinMAX is a software program provided by AMX to enable control of MAX-MMS
(and MAX-IMS) servers from any Windows PC. The PC must be connected to the
Server directly or via a network. Multiple PCs running WinMAX may control the
Server simultaneously. It is recommended that WinMAX be used to establish initial
communications with the Server.
When used with the MAX-MMS, the WinMAX application is divided into 4 distinct
sections each with its own screen. Each screen is accessible by clicking on the
appropriate tab at the top of the screen. The 4 tabs are Music, Movies, Record and
System Information:
Note: Refer to the MAX-MMS Integrated Music Server Instruction Manual (available
online from www.amx.com) for detailed instructions on using WinMAX to record,
load, manage and play movies and music.
Troubleshooting Ethernet Communications Problems
•The Link (L) LED next to the Ethernet port should be on (FIG. 3). If not, check
your cables and connectors.
• If you are connecting to the MMS server via a direct connection with a PC
(using a crossover Ethernet cable), be sure that the IP Address of the Network
card in your PC is in the same range as the MMS server, but not the same as
the MMS server. For example a network card setting of 192.168.1.31 will work
with the default MMS IP address of 192.168.1.30.
• If you are connecting to the server via a PC network, be sure that the IP
address and Subnet Mask settings are appropriate for your network configura-
tion. Consult your network administrator for help with this.
Automatic Updates
The MAX-MMS will receive periodic updates for the System Software and internal
CD Information Database. The IP Settings (Gateway and Primary DNS) in the
WinMAX Server Configuration screen must be set correctly. To prepare your MMS
server for automatic updates:
1. Connect your PC to the Internet and open the WinMAX software.
2. Go to an MS-DOS Command Prompt on your PC and type ipconfig /all then
press Enter. Note the Default Gateway and first DNS Server settings.
3. In the System Information tab, click the Server Configuration button to access
the Server Configuration dialog.
4. Copy the Default Gateway and first DNS Server settings (from step 2) into the
Gateway and Primary DNS fields in the IP Settings section of the Server Con-
figuration dialog.
5. Press Save Configuration. The server is now ready for auto-updates.
MAX-AVM Audio/Video Modules
The MAX-AVM communicates with the MAX-MMS (via a Gigabit Ethernet hub) to
create a distinct video zone that can be controlled and personalized. Each MMS
server can support up to eight MAX-AVMs.
Note: Refer to the MAX-AVM Audio/Video Module Installation Guide (available on
www.amx.com) for additional details on the AVM.
Connecting the MAX-AVM(s) to the MAX-MMS400M
For maximum performance, a Gigabit Ethernet Hub is required to connect the
MAX-AVM(s) to the MAX-MMS server. Each hub supports multiple MAX-AVMs
(up to eight per MMS server), as indicated in FIG. 4.
Note: Refer to the MAX-AVM Audio Video Module Installation Guide (available on
www.amx.com) for additional details on the AVM Module.
Installing the MAX-AVM Serial Number In the MMS Server
MAX-AVMs utilize the system software loaded in the MAX-MMS MultiMedia Server
to boot. In order for the MAX-AVM(s) in the system to be recognized by the MMS
server, they must each be added to the system. Use the Server Configuration
options in WinMAX to add AVMs to the MMS server:
1. Open the System Information tab in WinMAX, and click on the
Server Configuration button to access the Server Configuration menu.
2. Select AVM Setup from the menu to access the AVM Setup submenu.
3. Select Add AVM.
4. Enter the serial number of the MAX-AVM you are adding to the system in the
text box. The serial number is printed on a decal located on the underside of
each MAX-AVM enclosure.
•SelectView from the Admin menu to view a list of all MAX-AVMs already in the
system.
•SelectRemove to remove an existing AVM from the system.
Music: The Music tab provides music search and playback facilities as well as custom
play-list management and music database management functionality.
Movies: The Movies tab provides movie search and play functionality including the ability
to manage keywords.
Record: The Record screen provides access to the built-in drive for adding media to your
collection and burning your own custom CD’s.
System
Information:
The System Information screen provides a quick view of system health and sta-
tus. Access to the System Configuration options plus a number of troubleshooting
tools are available through this section as well.
FIG. 3 Ethernet port LEDs
A - Activity LED
lights when receiving
Ethernet data packets
L - Link LED
AL
lights (full-on) when the
Ethernet cables are
connected and terminated
correctly
FIG. 4 Example installation using multiple MAX-AVMs
MAX-MMS400M
MAX-AVM MAX-AVM
MAX-AVM
MAX-AVM
MAX-AVM
Gigabit
10/100
Gigabit
Ethernet
Hub
MAX-AVM
MAX-AVM
MAX-AVM
10/100 10/100
10/100
10/100
10/100
10/100
10/100
10/100
to PC
Server
Other AMX Server manuals

AMX AXR-NWS User manual

AMX

AMX AXR-NWS User manual

AMX MAX-HT-04T User manual

AMX

AMX MAX-HT-04T User manual

AMX DTV VISION2 INTEGRATION - DIAGRAM Parts list manual

AMX

AMX DTV VISION2 INTEGRATION - DIAGRAM Parts list manual

AMX MAX-HT12 User manual

AMX

AMX MAX-HT12 User manual

AMX Multimedia Server MAX MMS-01S User manual
AMX

AMX Multimedia Server MAX MMS-01S User manual

AMX AXC-S Guide

AMX

AMX AXC-S Guide

AMX Vision2 TDS User manual

AMX

AMX Vision2 TDS User manual

AMX MAX-HT04 User manual

AMX

AMX MAX-HT04 User manual

AMX AXR-NWS User guide

AMX

AMX AXR-NWS User guide

AMX AVB-APWEB User manual

AMX

AMX AVB-APWEB User manual

AMX MAX-HT04 User manual

AMX

AMX MAX-HT04 User manual

AMX V2-MASTER-0300 User manual

AMX

AMX V2-MASTER-0300 User manual

AMX NXC-HS Guide

AMX

AMX NXC-HS Guide

AMX MAX-MDL200M MULTI DISC LOADER User manual

AMX

AMX MAX-MDL200M MULTI DISC LOADER User manual

AMX Vision 2 Parts list manual

AMX

AMX Vision 2 Parts list manual

AMX MAX-MMS-01S User manual

AMX

AMX MAX-MMS-01S User manual

AMX MAX-HT04 User manual

AMX

AMX MAX-HT04 User manual

AMX LiveMedia IS-PLAYER-200LM User manual

AMX

AMX LiveMedia IS-PLAYER-200LM User manual

AMX MAX-BSM User manual

AMX

AMX MAX-BSM User manual

AMX MAX-HT12 User manual

AMX

AMX MAX-HT12 User manual

AMX MAX-IMS Series User manual

AMX

AMX MAX-IMS Series User manual

AMX MAX-AOM User manual

AMX

AMX MAX-AOM User manual

AMX AVB-APWEB User manual

AMX

AMX AVB-APWEB User manual

AMX AXF-S AXCESS SERVER CARDFRAME (WITH AXC-S... User manual

AMX

AMX AXF-S AXCESS SERVER CARDFRAME (WITH AXC-S... User manual

Popular Server manuals by other brands

HP ProLiant DL585 Generation 2 specification

HP

HP ProLiant DL585 Generation 2 specification

HP NetServer LH 3r manual

HP

HP NetServer LH 3r manual

Lenovo ThinkServer RD240 Instrucciones de instalación del bastidor

Lenovo

Lenovo ThinkServer RD240 Instrucciones de instalación del bastidor

IBM System i manual

IBM

IBM System i manual

Supermicro SuperStorage Server 2028R-NR48N user manual

Supermicro

Supermicro SuperStorage Server 2028R-NR48N user manual

TAG SV-2003-X2 Operation manual

TAG

TAG SV-2003-X2 Operation manual

Supero SuperServer 7042S-i user manual

Supero

Supero SuperServer 7042S-i user manual

TYAN GT62F-B5630 Service engineer's manual

TYAN

TYAN GT62F-B5630 Service engineer's manual

Advantech ARK-1122 user manual

Advantech

Advantech ARK-1122 user manual

NEC Express5800/T110g-S Configuration guide

NEC

NEC Express5800/T110g-S Configuration guide

Dell External OEMR XL R720XD Technical guide

Dell

Dell External OEMR XL R720XD Technical guide

Nortel Broadcast Server user guide

Nortel

Nortel Broadcast Server user guide

Fujitsu PRIMERGY TX200 S5 operating manual

Fujitsu

Fujitsu PRIMERGY TX200 S5 operating manual

Inspur Tiansuo TS860 user manual

Inspur

Inspur Tiansuo TS860 user manual

Lenovo ThinkServer TD200 Installation and user guide

Lenovo

Lenovo ThinkServer TD200 Installation and user guide

Fujitsu PRIMERGY TX200 S6 Options guide

Fujitsu

Fujitsu PRIMERGY TX200 S6 Options guide

HP ProLiant M800 User and maintenance guide

HP

HP ProLiant M800 User and maintenance guide

Zycoo IAS-L100 manual

Zycoo

Zycoo IAS-L100 manual

manuals.online logo
manuals.online logoBrands
  • About & Mission
  • Contact us
  • Privacy Policy
  • Terms and Conditions

Copyright 2025 Manuals.Online. All Rights Reserved.