Antelope ORION 32+ GEN4 User manual


CONTENTS
BEFORE YOU BEGIN 4
System Requirements 6
PRODUCT ACTIVATION 7
Configuring for Windows 10 10
Configuring for macOS (10.14 and later) 11
FRONT PANEL EXPLAINED 12
REAR PANEL EXPLAINED 17
CONTROL PANEL APPLICATION 24
Introduction 24
Mouse & Keyboard Shortcuts 25
Main View 1 25
'S/PDIF' View 28
'ADAT' View 29
'METERS' View 29
'MONITORS' View 30
'SESSION' View 30
'INFO' View 33
Main View 2 33
'ROUTING' view 34
'MIXER' view 36
AuraVerb 37
'SURROUND' view 41
'TRIMS' view 53
THUNDERBOLT™3FUNCTIONALITY 53
Daisy Chaining 53
Device Charging 54
Backwards Compatibility 54

BEFORE YOU BEGIN
Congratulations on your purchase! We would like to turn your attention to the following:
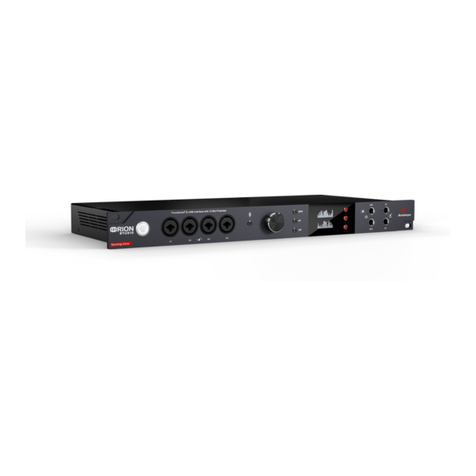
Orion 32+ Gen4 is a multi-channel audio interface and high-end AD/DA converter for
professional recording studios and high-profile production facilities. For over a decade now
the Orion 32 line of interfaces has been revolutionizing the world of professional audio. The
latest revision of this iconic 1RU studio centerpiece steps up the game by taking the best
of its predecessors and adjusting it to the ever-growing needs and standards of the
industry. Orion 32+ Gen4 incorporates the latest Antelope Audio tech, drastically boosting
the unit’s potential.
Along with the comprehensive I/O, the Orion 32+ Gen4 features high-resolution conversion
and 64-bit AFC™ clocking so your recording system can sound better than ever.
Experience a new level of detail in your recordings and enjoy a wider soundstage for an
exceptional stereo image in audio playback.
The 1U box fits perfectly in high-end audio installations that need to transfer audio over
long distance or are simply short on rack space but need to track all audio simultaneously.
The versatile interface fuses multiple devices into one by combining an AD/DA converter,
patch bay, audio interface and a monitor controller.
Important!
The PC/Mac Control Panel application is the ultimate “mediator” between the Orion 32+
Gen4 and your DAW of choice. To take complete advantage of the unit’s capabilities, you
are meant to handle tasks like level adjustments, signal routing, signal processing, mixing,
and metering from its intuitive, single-window environment. The resulting audio is routed
into your DAW for recording in formats of your choice, such as multi-track, stem, and two-
channel stereo.
Thus, we encourage you to familiarize yourself with the 'Control Panel Application'
chapter before you begin working with the Orion 32+ Gen4. Should you ever find yourself
struggling, do not hesitate to contact our Customer Support team over phone, live chat,
and our ticket system. You can also visit Antelope Audio on YouTube and explore our video
tutorials or join the Antelope Audio Users Facebook group and ask for advice. The
Knowledge Base is also a valuable source of information.
We hope you will enjoy working with the Orion 32+ Gen4.
Best wishes,
Team Antelope

System Requirements
Mac:
•Apple Mac 2012 or newer with Thunderbolt™ port
•Minimum: Mac OS X 10.12 Sierra. Recommended: Mac OS X 11.02 Big Sur
•Available storage space (Minimum 4 GB)
•Memory (RAM): 4 GB minimum (8 GB or more recommended)
Windows:
•PC computer with certified Thunderbolt™ connectivity
•Windows 10 (64-bit) with latest Microsoft Updates
•Available storage space (Minimum 4 GB)
•Memory (RAM): 4 GB minimum (8 GB or more recommended)
•CPU: Intel Core i3™ or AMD FX (Higher recommended)
Additional Information:
•Stable Internet connection is required to download and update your Antelope Audio
software
•The device does not come with a Thunderbolt cable included

PRODUCT ACTIVATION
This Orion 32+ Gen4 product activation is a mandatory process required to be completed
on the first run of the interface. It is needed to validate your product warranty and to gain
access to our special software packages and exclusive product offers.
Please note that the mandatory device activation procedure requires an active Internet
connection on your computer. Activating an Antelope Audio device offline is not possible.
1. Connect the provided power supply to the power connector on the Orion 32+ Gen4's
rear panel. Connect the power plug to an AC/DC mains outlet.
Note: The switching power supply automatically accommodates mains electricity in any
country. Always use the provided power supply to prevent accidental damage.
2. Connect the Orion 32+ Gen4 to your Windows or Mac computer using a USB-C cable or
a Thunderbolt™ 3 cable (not included).
Note: Legacy Thunderbolt™ 2 connections are possible using third-party adapters and
corresponding cables.
Notes:
●The USB or Thunderbolt™ connection is required to have the Orion 32+ Gen4
recognized by the Antelope Launcher and Control Panel applications at all times.
3.Open your internet browser and navigate to https://antelopeaudio.com/login/
4. Login to the Antelope Audio user area with your e-mail and password. If you don't have
an account, visit https://antelopeaudio.com/sign-up/ to create one.
5.Click on the 'Activate New Device' button.

6. Click on ‘Orion 32+ Gen4' from the device list.
7.Download and install the Antelope Launcher application for Windows or macOS.
8.Open the Antelope Launcher application and click on the 'Login' button. Enter the
e-mail and password you used to login into the Antelope Audio user area and click 'Login'.
9.Click on 'Activate' to open the Device Management Wizard.
Note: If the Orion 32+ Gen4 does not appear in the 'Devices' tab, click on 'Not seeing your
device?' and follow the on-screen instructions.
10.In the Device Management Wizard, choose 'Enable additional features” if you prefer to
configure functionality add-ons as well (available later) and click 'Continue'.
11. Upon successful activation, the final window will read ‘You have successfully activated
your device. Software is required to be installed and up to date for the device to be used.'

Click 'Software Installation' to go through the rest of the setup process or ‘Install Later’ if
you prefer to postpone this step. It is available later via the launcher’s Manage Device
menu.
The following warning message advises to power off or unplug any devices connected to
the Orion 32+ Gen4 to avoid any potential damage during the firmware installation
process. Click ‘Continue’ when ready and go through the instructions that follow.

After the installation is complete, you can proceed with the instructions for your operating
system and configure the Orion 32+ Gen4 for use with your Windows or macOS computer.
Note: The Orion 32+ Gen4 will be listed in the 'My Hardware' page of the Antelope Audio
user area with its serial number and activation date.
Configuring for Windows 10
When using a USB connection under Windows, here is how you can configure operating
system playback using Windows Audio.
1. Enter the ‘Sound’ options window from the Windows Control Panel; or right-click
the speaker icon in the system tray and choose ‘Open Sound settings’.
2. Under the Playback and Recording tabs, 4 stereo channel pairs are available for
playback and recording, corresponding to the first 8 DAW Out and In channels in
the interface’s signal routing matrix. These can be used for playing and recording
audio with applications using Windows Audio as opposed to the ASIO driver.
3. Make sure the Orion 32+ Gen4 Playback channels 1/2 are selected as the default
playback device for seamless playback experience. Same is valid for the Recording
tab.
Notes

•Please note that Windows Audio is not yet supported over a Thunderbolt
connection, only ASIO. We recommend using the VB-Audio VoiceMeeter Virtual
Audio Mixer as an ASIO to Windows Audio bridge.
Tips
●If you are experiencing interruptions or failure when using your DAW and trying to
playback audio from your OS at the same time, make sure that the device sample
rate matches the one of your DAW session.
Further Reading
●Antelope Audio Knowledge Base - Windows 10 Optimization
Configuring for macOS (10.14 and later)
The security settings in macOS (10.14 and later) may result in no input signal reaching your
DAW, despite having everything set up correctly.
These steps apply when you are using the Orion 32+ Gen4 in a DAW for the first time:
1.Launch your DAW and choose Orion 32+ Gen4 as the input device. The following dialog
box will appear (if using Ableton Live 10 Suite, for example):
2.Click 'OK' and your DAW should function normally.

However, if the events above did not occur for some reason, or you are using multiple
DAWs, you must do a manual tweak for each in 'Security & Privacy' settings:
1. Click the 'Apple' symbol and choose 'System Preferences'. Head to the 'Security &
Privacy' settings menu.
2. Click the 'Privacy' tab. In the column on the left, choose ‘Microphone’. Make sure there's
acheckmark next to any DAW you want to use.
Note: You may have to click the padlock symbol in the bottom left corner and enter your
password to make changes.
FRONT PANEL EXPLAINED
The Orion 32+ Gen4 front panel features the following items (left to right):
Internal clock indicator

Lights up when the Orion 32+ Gen4 is locked to its internal clock signal generator.
External clocking lock indicator
Lights up when the Orion 32+ Gen4 is locked to an external clock signal source.
Atomic clock indicator
Lights up when the Orion 32+ Gen4 is locked to an external Antelope Audio 10M/10MX
Atomic Clock.
Display L (left), display R (right), and controls
The Orion 32+ Gen4's dual color display screens, stepped jog wheel, and function keys
provide an alternative to the PC/Mac Control Panel application for many aspects of the
interface's functionality.
By default, Display L (left) shows the following information:
•Clock (Sync) source – Internal clock, External clock, S/PDIF, ADAT (2x, 4x), MADI
•Lock indicator – lights up when the Orion 32+ Gen4 is locked.
•Peak meters for up to 32 audio channels from an audio source of your choice.
By default, Display R (right) shows the following information:
•Current device sample rate – 32kHz to 192kHz.
•USB or Thunderbolt indicator – shows what computer connectivity protocol is
currently being used, when such is successfully connected.
•Peak meters for up to 32 audio channels from an audio source of your choice.

The jog wheel has the following functionality by default:
•Turn clockwise or counterclockwise to adjust the volume of the physical line or
monitor outputs, or the volume of the Surround monitoring tab’s main output (in
dB). Press and hold down the jog wheel with the Surround output selected, to
switch between 1dB and 0.1dB increments.
•Press the jog wheel to mute or un-mute the line or monitor outputs.
•Menu navigation. When inside a menu, turn the jog wheel to choose menu entries.
Press the jog wheel to confirm.
The left function key has the following functionality:
•When Display L shows peak meters for an audio source with more than 16 audio
channels, press the left function key to switch between peak meters for audio
channels 1 – 16, 17 – 32, etc.
•When you are adjusting output volume by turning the jog wheel, press the left
function key to switch between the line, monitor and surround outputs.
•Press and hold the left function key to enter Menu 1, shown on Display L. Turn the
jog wheel to select an entry. Press the jog wheel to confirm. Press the left function
key again to exit the menu.
Menu 1 has the following key functionalities and settings:
•Sync Source – choose the current sync (clock) source. The following choices are
available: Internal clock, External clock, ADAT (2x, 4x), MADI, S/PDIF.
•Sample Rate – choose the current device sample rate. The following choices are
available: 32kHz, 44.1kHz, 48.0kHz, 88.2kHz, 96.0kHz, 176.4kHz, 192kHz. Make sure
your choice matches the DAW and operating system sample rates.
•Peak Meter – choose the audio source for the peak meters shown on Display L. Up
to 32 peak meters are available for metering source. When Display L shows peak
meters for an audio source with more than 16 audio channels, press the left
function key to switch between peak meters 1 – 16, 17 – 32, etc. The following
choices are available: Line In, DAW Out, MADI1 In, MADI2 In, ADAT In, S/PDIF In,
Surround Out, Mix 1 Out, Mix 2 Out, Mix 3 Out, Mix 4 Out, Line Out, Monitor, DAW In,
MADI1 Out, MADI2 Out, ADAT Out, S/PDIF Out, Surround In, Mix 1 In, Mix 2 In, Mix 3
In, Mix 4 In.

•S/PDIF Gain – Allows digital gain adjustment of the left and right S/PDIF input
channels. Press down the volume knob to enable selection between the left and
right channels, press down again to confirm the selection.
•ADAT Gain – Allows digital gain adjustment of the ADAT input channels. Press
down the volume knob to enable selection between all available channels, press
down again to confirm the selection.
•MADI S-MUX – toggle S-MUX for the MADI digital inputs and outputs.
•USB channels – Switch between 24 and 32 channels of I/O via a USB 2.0
connection.
The right function key has the following functionality:
•Press and hold the right function key to enter Menu 2, shown on Display R. Turn the
jog wheel to select an entry. Press the jog wheel to confirm. Press the right
function key again to exit the menu.
Menu 2 has the following key functionalities and settings:
•Peak Meter - choose the audio source for the peak meters shown on Display R. Up
to 32 peak meters are available for metering source. When Display R shows peak
meters for an audio source with more than 16 audio channels, press the right
function key to switch between peak meters 1 – 16, 17 – 32, etc. The following
choices are available: Line In, DAW Out, MADI1 In, MADI2 In, ADAT In, S/PDIF In,
Surround Out, Mix 1 Out, Mix 2 Out, Mix 3 Out, Mix 4 Out, Line Out, Monitor, DAW In,
MADI1 Out, MADI2 Out, ADAT Out, S/PDIF Out, Surround In, Mix 1 In, Mix 2 In, Mix 3
In, Mix 4 In.
•Routing – Enters the standalone routing matrix menu. Select between signal
destinations on the left display by scrolling with the jog wheel. Once you reach the
desired destination/output, press down the jog wheel to either select a single or all
channels of that destination. Confirm by pressing the jog wheel again. The selection
will move to the right display, allowing you to pick a signal source in a similar
fashion. You can route either multiple or signal channels at a time. This menu is
useful for routing signals without a computer connection and the interface’s
software control panel.
•Brightness – adjust the illumination of display screens L and R by turning the jog
control.

•Presets 4 – 5 – here, you can recall presets 4 – 5 as stored in the Control Panel
application. Presets 1, 2 and 3 are recalled from Preset keys 1, 2 and 3 on the Orion
32+ Gen4's front panel.
•Presets Save – Used to save all current device settings to one of the 5 hardware
preset slots. Also available in the software control panel.
•Monitor Trim – choose an audio signal trim value for the monitor outputs (12dBu -
24dBu). By default, this option is set to 24dBu. Trim can be used to compensate
for the perceived volume differences between two or more sets of speakers so that
they produce the same perceived volume level.
•Line Out Trim - choose an audio signal trim value for the line outputs (12dBu -
24dBu). By default, this option is set to 24dBu.
•Line In Trim - choose an audio signal trim value for the line inputs (12dBu - 24dBu).
By default, this option is set to 24dBu.
•DC Coupled IN – switch between enabled and disabled DC Coupled line inputs.
•DC Coupled OUT – switch between enabled and disabled DC Coupled line outputs.
•Factory Reset – return the unit to factory settings. Note that Presets 1 – 5 will be
lost.
•Scr Save Time – choose how long it takes for the screensaver to appear on display
screens L and R. We recommend choosing the shortest duration you are
comfortable with to prolong the display screens' life.
•Device Info – display the unit's serial, hardware revision and software revision
numbers on Display R.
•Device Diagnosis – display diagnostics information for the unit.
Preset keys 1, 2 and 3
Press one of the three preset keys to recall the corresponding hardware preset. Presets 4
and 5 are recalled from Menu 2 or the Control Panel application.

On/standby button
When the unit is on, press the button to enter standby mode. Press again to resume.
REAR PANEL EXPLAINED
Power Connector
For use with the provided power supply only.
Thunderbolt™ 3 / USB 2.0 Computer Connection
Thunderbolt™ 3 / USB 2.0 Type-C port providing PC/Mac connection. Legacy
Thunderbolt™ 2 also supported via a Thunderbolt™ 3 to 2 adapter.
Thunderbolt™ Specs:
Interface Connection:
Thunderbolt™ 3 (Type-C) Port, I/O
I/O Channel Count
128 Channels
Daisy-chain
Supported

Supported sample rates
44.1 kHz—192 kHz, 24-bit PCM
USB Specs:
Interface Connection:
USB 2.0 (Type-C) Port, I/O
I/O Channel Count
32 Channels (24ch mode available)
Supported sample rates
44.1 kHz—192 kHz, 24-bit PCM
External Clock Inputs
1x Word Clock input and 1x Atomic Clock input on BNC connectors for synchronizing to
external clock sources.
Word Clock Inputs
Word Clock Input
1 x Input @ 75 Ohms 3Vpp on
BNC
10M Atomic Reference Input
1 x Input @ 75 Ohms 1Vpp on
BNC
Supported sample rates
44.1 kHz—192 kHz, 24-bit PCM
Word Clock Outputs

2xWord Clock outputs on BNC connectors for synchronizing external equipment to the
Orion 32+ Gen4.
Word Clock Output Specs
Word Clock Output
2x Output @ 75 Ohms 3Vpp on
BNC
S/PDIF Connections
S/PDIF I/O on RCA connectors.
S/PDIF Specs:
Interface Connection:
2 x RCA Connectors
SPDIF SRC
Not supported
I/O Channel Count
2 Channels
Supported sample rates
44.1 kHz—192 kHz, 24-bit PCM
MADI Connections

MADI I/O carrying digital audio over fiber optic cables with SC-Plugs on both ends.
Standard MADI audio limits apply per connector:
MADI Specs:
Interface Connection:
4 x Optical SC Connectors
MADI Mode
Dual Wire, Optical
SMUX
Supported
MADI Protocol
AES10-2003
I/O Channel Count
128 Channels @44.1/48.0 kHz
64 Channels @88.2/96.0 kHz
32 Channels @176.0/192.0 kHz
Supported sample rates
44.1 kHz—192 kHz, 24-bit PCM
ADAT Connections
ADAT input and output carrying up to 8 I/O audio channels over optic cables.
ADAT Specs:
Interface Connection:
2 x Optical Connectors
SMUX
Supported
I/O Channel Count
8 Channels @44.1/48 kHz
Table of contents
Other Antelope Recording Equipment manuals

Antelope
Antelope ORION STUDIO Synergy Core User manual

Antelope
Antelope R4S User manual

Antelope
Antelope Isochrone Trinity User manual

Antelope
Antelope ORION STUDIO Synergy Core User manual

Antelope
Antelope Orion 32+ User manual

Antelope
Antelope Isochrone Trinity User manual

Antelope
Antelope Galaxy 32 Synergy Core User manual

Antelope
Antelope Goliath HD Gen. 3 User manual

Antelope
Antelope Discrete 8 User manual

Antelope
Antelope zenstudio+ User manual