iii
Introduction
Thank you for purchasing an MPX series magnetostrictive level sensor from APG. We appreciate your
business and your trust. Please take a few minutes to familiarize yourself with your MPX and this manual.
The MPX level sensor provides highly accurate and repeatable level readings in a wide variety of liquid level
measurement applications. It is certied for installation in hazardous areas in the US and Canada by CSA
for Class I, Division 1 & 2 and Class I, Zones 1 & 2 environments. The MPX-R’s large, buoyant, and robust
oats allow it to be used in harsh applications where fouling or buildup might otherwise be of concern.
The smaller, lighter weight oats of the MPX-E allow it to be used in applications where space is limited.
The MPX-E Chemical has a chemical resistant coating, allowing for use in corrosive, acidic, and marine
environments.
Reading your label
Every APG instrument comes with a label that includes the instrument’s model number, part number,
and serial number. Please ensure that the part number on your label matches your order. The following
electrical ratings and approvals are also listed on the label. Please refer to the Certicate of Compliance at
the back of this manual for further details.
Electrical ratings
Rated 12 - 24 VDC, 4-20 mA, or 80 mA
Class I, Division 1 & 2, Groups C, and D T4 (Ta 85°C)
Ex d IIB T4 (Ta 85°C)
Ex nA IIB T4 (Ta 85°C)
Class I, Zone 1; AEx d IIB T4 (Ta 85°C)
Class I, Zone 2; AEx na IIB T4 (Ta 85°C)
Non-Incendive Wiring Requirements: Vmax Ui= 28VDC, Imax Ii = 200ma, Ci = 0nF, Li = 0μH
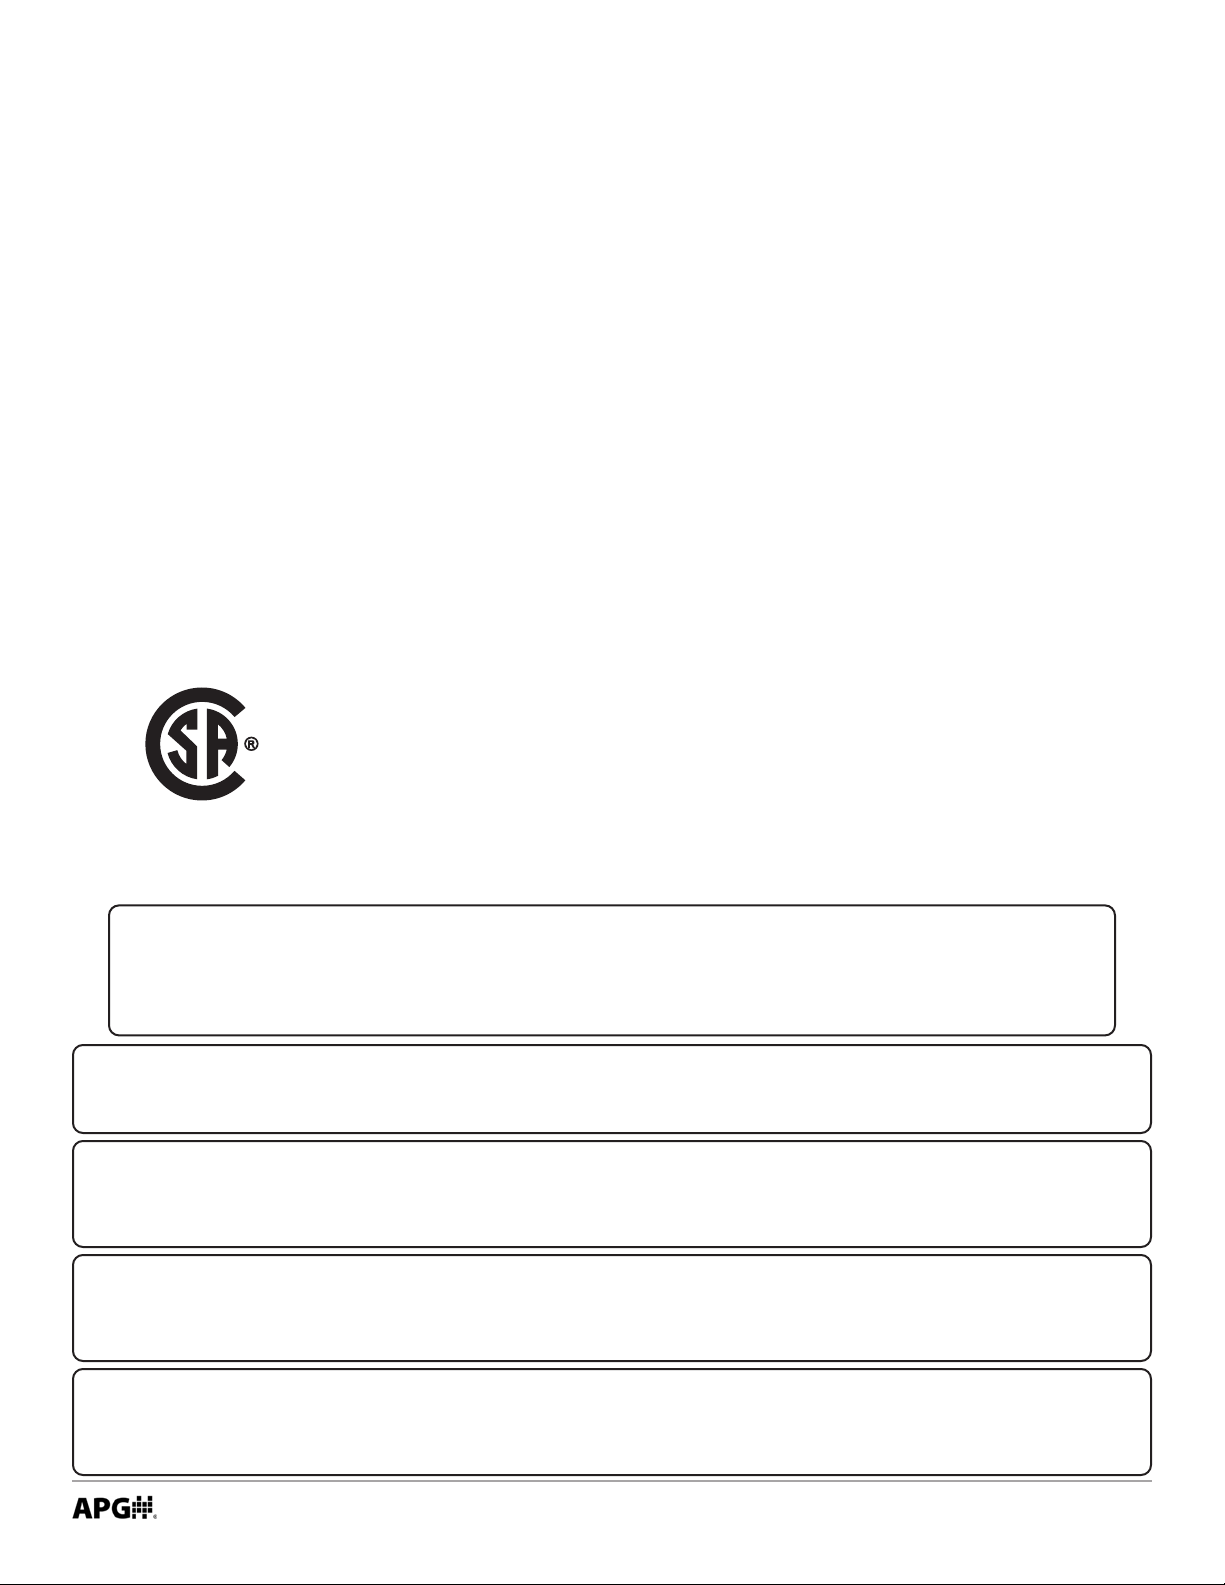
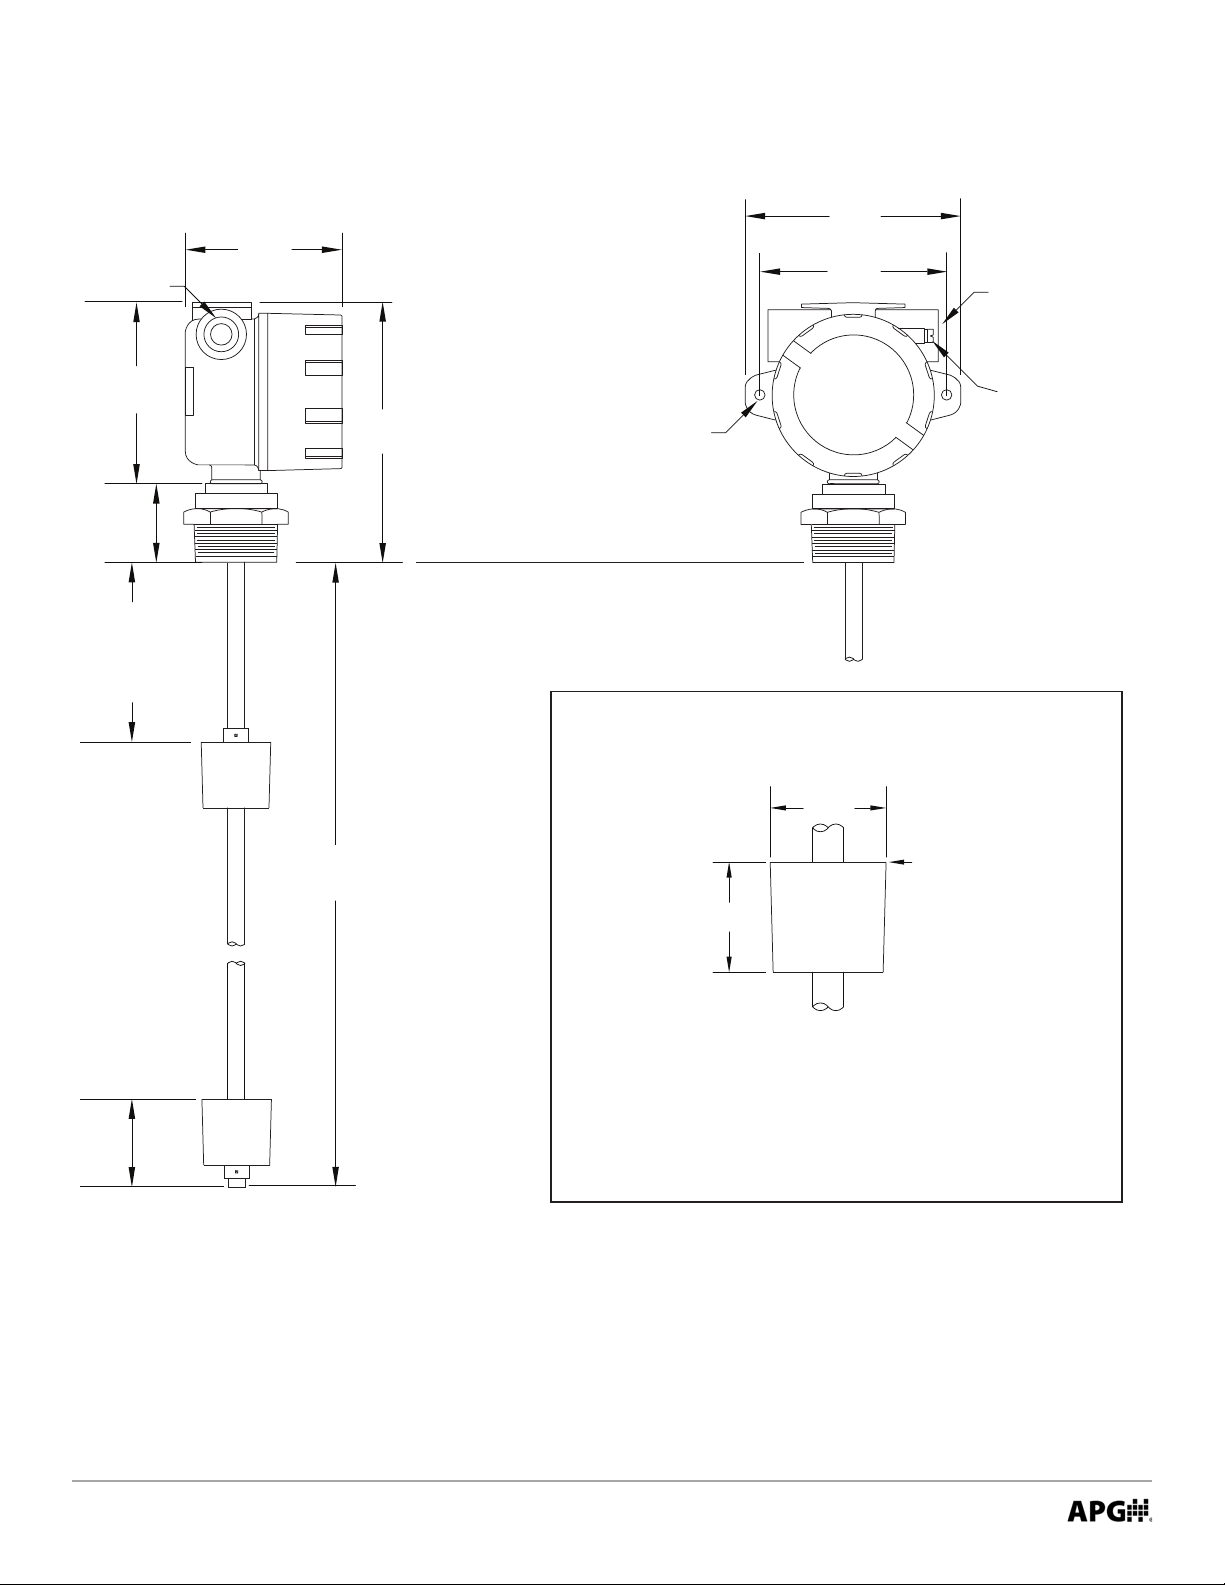
IMPORTANT: MPX level sensor MUST be installed according to drawing 9003468 on
page 32 to meet listed approvals. For Class I, Division 1 and Class I, Zone 1 approvals,
seal required within 18 inches of the enclosure. Faulty installation will invalidate all safety
approvals and ratings.
DANGER: WARNING -- EXPLOSION HAZARD -- SUBSTITUTION OF COMPONENTS MAY IMPAIR SUITABILITY
FOR CLASS I, DIVISION 2;
AVERTISSEMENT -- RISQUE D’EXPLOSION -- LA SUBSTITIOND E COMPOSANTSP EUTR ENDRE CE MATERIEL
INACCEPTABLE POUR LES EMPLACEMENTS DE CLASSE I, DIVISION 2.
DANGER: WARNING -- EXPLOSION HAZARD -- DO NOT DISCONNECT EQUIPMENT UNLESS POWER HAS
BEEN SWITCHED OFF OR THE AREA IS KNOWN TO BE NON-HAZARDOUS;
AVERTISSEMENT -- RISQUE D’EXPLOSION -- AVANT DE DECONNECTER L’EQUIPEMENT, COUPER LE COURANT
OU S’ASSURER QUE L’EMPLACEMENT EST DESIGNE NON DANGEREUX.
DANGER: OPEN CIRCUIT BEFORE REMOVING COVER or KEEP COVER TIGHT WHILE CIRCUITS ARE ALIVE;
AVERTISSEMENT -- OUVRIR LE CIRCUIT AVANT D’ENLEVER LE COUVERCLE, or GARDER LE COUVERCLE BIEN
FERME TANT QUE LES CIRCUITS SONT SOUS TENSION.
US
C
DANGER: WARNING -- POTENTIAL ELECTROSTATIC CHARGING HAZARD - CLEAN ONLY WITH A DAMP
CLOTH;
AVERTISSEMENT -- DANGER DE CHARGE ELECTROSTATIQUE POTENTIEL - NETTOYER SEULEMENT AVEC UN
CHIFFON HUMIDE.