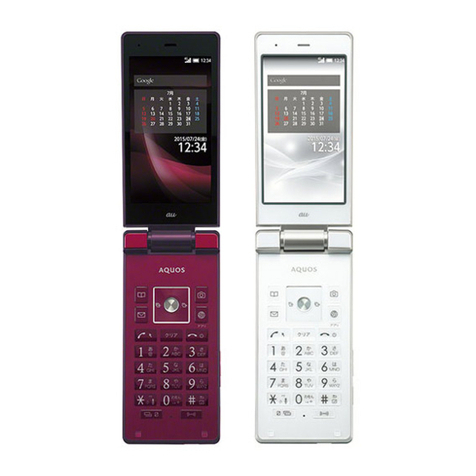
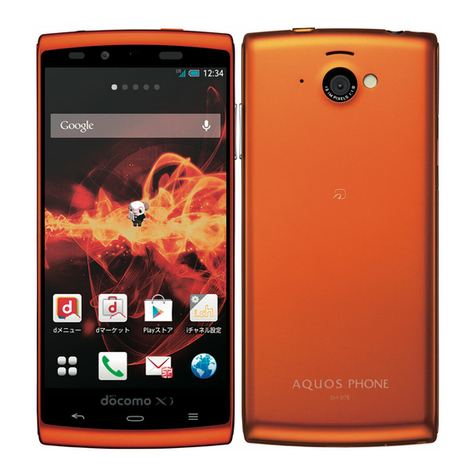
Aquos Keitai 2 User manual

AQUOS ケータイ2
User Guide


1
AQUOS ケータイ2
AQUOS ケータイ2
User Guide Contents
Introduction
About the User Guide........................................................ 3
Getting Started
Package Contents............................................................... 6
Parts & Functions.............................................................. 6
USIM Card Installation....................................................... 9
Internal Storage/SD Card................................................ 11
Inserting/Removing Battery.............................................15
Charging Battery.............................................................. 16
Power On/Off................................................................... 18
Display............................................................................... 19
Display-Top (Status Bar) Indicators............................... 20
Checking Handset Status & Notifications (Notifications
Window)............................................................................. 21
Sub-display........................................................................ 22
Security Codes.................................................................. 23
USIM PIN............................................................................24
Importing Files from Other Mobiles............................... 25
Basic Operations
Basic Operations with this Handset...............................32
Key Operation................................................................... 32
Touch Cruiser EX Operation............................................ 33
Main Menu......................................................................... 34
Accessing Functions......................................................... 35
Using Manner Mode.......................................................... 38
Using Airplane Mode.........................................................38
Other Basic Operations....................................................39
Operations in Common
Customizing Fonts............................................................ 42
Wallpaper........................................................................... 43
Customizing Ringtone, Vibration, and Other Response
Settings............................................................................. 44
Text Entry.........................................................................47
Address Book.................................................................... 48
Phone
Calling................................................................................ 52
Placing International Calls...............................................57
Restricting Calling Destinations..................................... 58
Barring Incoming Calls..................................................... 60
Optional Services..............................................................62
Global Services..................................................................66
Changing Call Settings.....................................................69
Messaging
Types of Mail....................................................................72
Customizing Handset Address......................................... 72
Sending S! Mail................................................................. 73
Sending SMS...................................................................... 76
Checking/Replying to Mail (S! Mail/SMS)........................77
Messaging Window Layout...............................................79
Changing Mail Settings.................................................... 84
Using PC Mail....................................................................87

2
Internet Services
Browser..............................................................................92
Browser Operations..........................................................94
Saving Frequently Visited Sites......................................96
TV
TV.....................................................................................100
Watching TV................................................................... 101
Data Broadcast (Japanese)............................................ 102
Camera/Image Editing
Capturing Photos/Recording Videos............................. 104
Music/Videos
Music Files...................................................................... 110
Viewing Videos............................................................... 111
Handling Files
Handling Files (Data Folder)..........................................114
Connectivity & File Backup
Using Infrared Transmission..........................................118
Using Bluetooth®............................................................ 119
Connecting by Wi-Fi.......................................................120
Using the Tethering Function....................................... 124
Backup..............................................................................125
Using Data Transfer...................................................... 125
Settings in Common
Wallpaper & Display Settings........................................132
Sound/Notification Settings......................................... 134
Security Settings............................................................135
Energy Saving and Battery Settings.............................137
Data Transfer/Reset Settings.......................................138
Network Settings........................................................... 140
Data Communication Settings....................................... 141
Automatic Data Communication/Synchronization
Settings........................................................................... 144
Location Services Settings............................................ 145
Other Settings................................................................145
Appendix
Updating Software......................................................... 156
Troubleshooting.............................................................. 157
Specifications..................................................................158
Warranty & After-Sales Service................................... 160
Customer Service............................................................161
Safety Precautions
Safety Precautions.........................................................164
Important Product Information.....................................172
Handset & Hardware Care............................................. 174
Bluetooth® Function.......................................................175
Wi-Fi (Wireless LAN)...................................................... 176
General Notes................................................................. 176
Radio Wave Exposure and Specific Absorption Rate (SAR)
Information..................................................................... 178
Water, Dust, & Shock Resistance................................. 180

3
Introduction AQUOS ケータイ2
Introduction
About the User Guide
Thank-you for purchasing this product.
Before You Begin
Read "Safety Precautions" thoroughly beforehand for proper
usage.
Accessible services may be limited by contract conditions.
Guide Usage Notes
In the User Guide, most operation descriptions are based on
handset at time of purchase.
Unless noted otherwise, descriptions are from Standby.
"Confirmation" refers to a window that appears after
operation, such as authentication prompt window, selection
window or caution window.
Some operation descriptions may be omitted.
Screenshots & Key Labels
Screenshots in the User Guide may differ in appearance with
actual Display. Key labels in the User Guide are simplified for
description purposes and differ with actual Display.
Other Notations
In the User Guide, the product is referred to as "handset."
microSD™/microSDHC™ Card is referred to as "SD Card."
"601SH" here refers to this mobile phone "AQUOS ケータイ
(Keitai) 2."

4

Getting Started
Package Contents............................................................... 6
Parts & Functions.............................................................. 6
USIM Card Installation....................................................... 9
Internal Storage/SD Card................................................ 11
Inserting/Removing Battery.............................................15
Charging Battery.............................................................. 16
Power On/Off................................................................... 18
Display............................................................................... 19
Display-Top (Status Bar) Indicators............................... 20
Checking Handset Status & Notifications (Notifications
Window)............................................................................. 21
Sub-display........................................................................ 22
Security Codes.................................................................. 23
USIM PIN............................................................................24
Importing Files from Other Mobiles............................... 25

6
Package Contents
Package Contents
・Handset (AQUOS ケータイ(Keitai) 2)
・Battery (SHBGC1)
・クイックスタート (Japanese)
・お願いとご注意 (Japanese)
・Warranty
Parts & Functions
Handset Parts
Name Description
Earpiece/
Speaker
Hear other party's voice as well as audio
such as music, video and TV through this.
Display Screens appear here.
Air Vent Upkeeps handset performance. Avoid
placing stickers.
Touch Area With Touch Cruiser EX activated, operate
as touchpad.
Mic Talk to other party through this and use
to record audio.
External
Device Port
Connect AC Charger or Micro USB Cable
here.

7
Getting Started AQUOS ケータイ2
Name Description
Notification
Lamp
Illuminates while charging or for incoming
calls/messages and notifications.
Sub-display Clock and Notification Indicators for new
calls, mail, etc. appear.
Strap Hole Attach a strap.
Charging
Terminals
(for Desktop
Holder)
Connect to Desktop Holder during
charging.
Internal
Communications
Antennas
Used for calling, Internetting, etc. Avoid
covering with stickers or fingers.
Camera Shoot photos or videos.
Infrared
Port Use for infrared transmission.
Back Cover Remove to access USIM Card, SD Card, and
Battery.
Handset Opens and Closes
Handset Closed
Be sure to close handset before carrying with you.
Handset Opened
Open handset to operate keys or call.
Earpiece/Speaker Cautions
Do not hold Earpiece close to ear other than when calling
or playing back messages. Earpiece is also handset Speaker,
and sudden ringtones, alarm, can affect hearing. After
switching to the speakerphone during a call or after ending
a call, sound will gradually increase to the set volume to
prevent a large volume of sound from the speaker at your
ear.

8
Handset Keys
Key (Key
Name) Description
(Multi
Selector (up)) Show item selection cursor in Standby.
(Multi
Selector
(left))
Show outgoing call history.
(Mail
Key)
Open mail menu. Long Press to open S!
Mail composition window.
(Favorites/文
字Key)
Show Favorites list.
(Multi
Selector
(down))
Open Address Book.
(Start
Key) Open dial window.
-
(Dial
Keys)
Enter numbers.
( Key)
Enter . Long Press to toggle app
activation restriction on/off.
(Center
Key) Open Main Menu.
(Multi
Selector
(right))
Show incoming call history.
(Browser Key)
Open homepage. Long Press to open
browser menu.
(Side Key) Long Press to activate Kantan Hasshin.
(Camera/TV
Key)
Activate Camera. Long Press to activate
TV.
(Clear/Back
Key)
Show Answer Phone message list. Long
Press to set Answer Phone.
(Power/End
Key)
Show/hide content in Standby. Long
Press to power on/off, reboot, or access
Airplane mode and other settings.
(#
Key)
Enter #. Long Press to activate/cancel
Manner mode.
/
/
(Quick start
key)
Activate a preregistered function. Long
Press to view history, to
toggle Relax View on/off, and to
toggle Wi-Fi on/off.
Multi Selector
In this User Guide, Multi Selector operations are indicated
as follows:
・Press or :
・Press or :
・Press , , , or :
Buttons When Handset Closed
Button Description
Quick Open
Button Press to open handset.
(Side Key)
Light Sub-display or stop emopa
announcement. Long Press to toggle
Manner mode.
Quick Open Button
Press to open handset. Handset can also be opened without
button.
・Operate while holding in hand. Do not open close to face,
another person, or object. Spring-operated; be careful
not to drop handset when it opens.
・Handset may not fully open with Quick Open Button
depending on how handset held.
・Use hand to close handset. If handset does not close,
open fully and close handset again.

9
Getting Started AQUOS ケータイ2
USIM Card Installation
USIM Card is an IC card containing customer and
authentication information, including handset number.
Handling USIM Card
・See instructions included with USIM Card for handling.
・Avoid applying labels. May damage USIM Card.
・USIM is replaceable (at cost) in case of loss/damage.
・Wipe clean with a dry, soft cloth.
・Always keep the IC chip (metal) clean.
IC chip (metal)
USIM Card Usage Notes
Observe the following when using USIM Card.
・Always follow emergency procedures to suspend service if
your USIM Card or handset (USIM Card inserted) is lost/
stolen. For details, contact Customer Service.
・Customer is responsible for any damage caused by
inserting USIM Card in an other-brand IC card reader, etc.
SoftBank Corp. is not responsible in such case.
・It is recommended that you back up information that is
saved on USIM Card. SoftBank Corp. is not responsible for
damages from saved information that is lost.
・Always power off handset before inserting/removing
USIM Card.
・Note that USIM Card specifications and performance may
change without notice.
・Return USIM Card to SoftBank Corp. when canceling
subscription.
・USIM Card is the property of SoftBank Corp.
・Returned USIM Cards are recycled for environmental
purposes.
Inserting USIM Card
Always power off beforehand.
Remove Back Cover
・Holding Back Cover at its center ( ), pull by notch (○) in
direction shown ( ).
・If difficult to remove, start at notch and slide finger
around handset to gradually make gap with Back Cover.
Remove Battery
・Lift Battery in direction shown by tab (○).
Open USIM Card Slot Cover
・Unlock USIM Card Slot Cover ( ) and lift ( ).
・Slide Cover in direction shown until it clicks.
Insert USIM Card
・Check orientation of USIM Card (notch/IC chip), and slide in
direction shown to insert in Cover.

10
Close USIM Card Slot Cover
・Close USIM Card Slot Cover ( ) and slide to lock ( ).
・Slide Cover in direction shown until it clicks.
・Caution: Lock firmly.
If unlocked, bumping may cause USIM Card to become
dislodged and cause handset to restart.
Insert Battery
・Align front of Battery and slide in direction shown.
Replace Back Cover
・Fit on handset, press firmly where circled (○) ensuring no
gaps.
Removing USIM Card
Always power off beforehand.
Remove Back Cover
・Holding Back Cover at its center ( ), pull by notch (○) in
direction shown ( ).
・If difficult to remove, start at notch and slide finger
around handset to gradually make gap with Back Cover.
Remove Battery
・Lift Battery in direction shown by tab (○).
Open USIM Card Slot Cover
・Unlock USIM Card Slot Cover ( ) and lift ( ).
・Slide Cover in direction shown until it clicks.
Remove USIM Card
・Be careful not to lose USIM Card.

11
Getting Started AQUOS ケータイ2
Close USIM Card Slot Cover
・Close USIM Card Slot Cover ( ) and slide to lock ( ).
・Slide Cover in direction shown until it clicks.
Insert Battery
・Align front of Battery and slide in direction shown.
Replace Back Cover
・Fit on handset, press firmly where circled (○) ensuring no
gaps.
SIM Unlocking
Handset supports SIM unlocking. After SIM-unlocking handset,
other companies' SIM cards can also be used on handset.
・When using another company's SIM card on handset,
accessible services/functions, etc. may be limited. SoftBank
Corp. makes no guarantees whatsoever regarding the proper
operation of handset.
・For details on SIM unlocking, see SoftBank Website.
Internal Storage/SD Card
Handset supports SD Card up to 32 GB. Some SD Cards may
not operate properly.
System data and functions as well as shot photos and videos
can be saved to internal storage.
Internal Storage/SD Card Cautions
Content Saved to Internal Storage/SD Card
Files
Content in internal storage/SD Card may be lost/altered
due to accidents, malfunctions, repairs, handset upgrade/
replacement, or other handling. Back up important content
regularly. SoftBank Corp. is not liable for any damages
resulting from loss/alteration of content.
・Do not forcefully install or remove SD Card.
・Do not touch terminals with hands or metal.
・Never power off while files are being accessed.
・Be careful that data does not become erased or
overwritten.
microSDHC Cards
Handset supports SDHC SD cards (microSDHC cards).
microSDHC cards can only be used with SDHC devices.
Save Location
By default, files, including photos and videos shot with
handset, are saved in internal storage.
SD Card Precaution
Keep SD Card away from infants; may cause choking if
swallowed.
Inserting SD Card
Always power off beforehand.
Remove Back Cover
・Holding Back Cover at its center ( ), pull by notch (〇) in
direction shown ( ).
・If difficult to remove, start at notch and slide finger
around handset to gradually make gap with Back Cover.

12
Remove Battery
・Lift Battery in direction shown by tab (〇).
Open SD Card Slot Cover
・Unlock SD Card Slot Cover ( ) and lift ( ).
・Slide Cover in direction shown until it clicks.
Insert SD Card
・Check orientation of SD Card, and slide in direction shown
to insert in Cover.
Close SD Card Slot Cover
・Close SD Card Slot Cover ( ) and slide to lock ( ).
・Slide Cover in direction shown until it clicks.
Insert Battery
・Align front of Battery and slide in direction shown.
Replace Back Cover
・Fit on handset, press firmly where circled (○) ensuring no
gaps.

13
Getting Started AQUOS ケータイ2
Removing SD Card
Always power off beforehand.
Remove Back Cover
・Holding Back Cover at its center ( ), pull by notch (〇) in
direction shown ( ).
・If difficult to remove, start at notch and slide finger
around handset to gradually make gap with Back Cover.
Remove Battery
・Lift Battery in direction shown by tab (〇).
Open SD Card Slot Cover
・Unlock SD Card Slot Cover ( ) and lift ( ).
・Slide Cover in direction shown until it clicks.
Remove SD Card
・Gently pull straight out.
Close SD Card Slot Cover
・Close SD Card Slot Cover ( ) and slide to lock ( ).
・Slide Cover in direction shown until it clicks.
Insert Battery
・Align front of Battery and slide in direction shown.
Replace Back Cover
・Fit on handset, press firmly where circled (○) ensuring no
gaps.

14
Formatting SD Card
When using a new SD Card for the first time, always format
(initialize) it on handset.
・Formatting deletes all SD Card files. Format SD Card with
caution.
・When formatting, keep handset charged or charge it
adequately beforehand.
・Insert SD Card beforehand. See "Inserting SD Card" for
details.
Settings Other settings
Storage
Erase microSD
Erase SD card
Enter Operation Password
・If Operation Password is unset, follow onscreen prompts.
Erase everything
All SD Card files are deleted.

15
Getting Started AQUOS ケータイ2
Inserting/Removing Battery
About Battery
Handset uses a lithium-ion battery.
Recycling
Lithium-ion batteries are recyclable precious resources.
Batteries can be taken to a nearby shop where the Mobile
Recycle Network mark is displayed.
Battery Cautions
Storage
To help maintain performance and life of Battery, do not
store in the following conditions (battery level should be
at approximately 40% for optimal storage).
・Full (immediately after charging is complete)
・Exhausted (too low to power on handset)
Battery Bulging
Depending on usage, bulges may appear near end of battery
life; this does not affect safety.
Replacement
Battery is a consumable item; it needs to be replaced if
operating time shortens noticeably even after charging.
Inserting
Remove Back Cover
・Holding Back Cover at its center ( ), pull by notch (○) in
direction shown ( ).
・If difficult to remove, start at notch and slide finger
around handset to gradually make gap with Back Cover.
Insert Battery
・Align front of Battery and slide in direction shown.
Replace Back Cover
・Fit on handset, press firmly where circled (○) ensuring no
gaps.

16
Removing
Always power off beforehand.
Remove Back Cover
・Holding Back Cover at its center ( ), pull by notch (○) in
direction shown ( ).
・If difficult to remove, start at notch and slide finger
around handset to gradually make gap with Back Cover.
Remove Battery
・Lift Battery in direction shown by tab (○).
Replace Back Cover
・Fit on handset, press firmly where circled (○) ensuring no
gaps.
Charging Battery
Charge Battery inserted in handset.
Notification Lamp
Notification Lamp illuminates red while charging;
illuminates green when charge is almost full.
・If Notification Lamp is blinking, charging is not working
properly (Battery abnormality or end of service life).
Make sure that you are using AC Charger and products
specified by SoftBank Corp. If you are using specified
products only, contact a SoftBank Shop or SoftBank
Customer Support, General Information.
Charging Cautions
Water Resistance
Micro USB Cable (optional accessory), and Desktop Holder
(optional accessory) are not waterproof. Never connect
Micro USB plug while handset or AC Charger is wet.
Handset is water resistant; however, if Micro USB plug
is inserted while it is wet, liquid (tap water, beverage,
sea water, pet urine, etc.) or a foreign object adhered to
handset or Micro USB plug may cause overheating, burnout,
fire, malfunction, burns, etc. due to electric shock, short-
circuiting, etc.
Handling Cables
Do not pull, bend, or twist cables; may damage the cables.
Charging Abroad
SoftBank Corp. is not liable for problems resulting from
charging handset abroad.
Charging with Desktop Holder
Charge using Desktop Holder [SHEGC1] and AC Charger (with
Micro USB Quick Charge™ 2.0 capability) [ZSDBA4]1 or AC
Charger (Micro USB 1.0A) [ZSDBA6]2, sold separately.
Charging with AC Charger (with Micro USB Quick Charge™ 2.0
capability) [ZSDBA4] is described as an example.
1 SoftBank SELECTION AC Charger for smartphones with
Qualcomm® Quick Charge™ 2.0 capability [SB-AC12-HDQC]
2 SoftBank SELECTION Micro USB recharging AC Charger 1.0A
for smartphones [SB-AC13-HDMU]
・See instructions included with Desktop Holder SHEGC1.
・Never connect Micro USB plug while handset, Desktop
Holder, or AC Charger is wet.

17
Getting Started AQUOS ケータイ2
Insert Micro USB plug of AC Charger in Desktop Holder
・Insert Micro USB plug in correct orientation; otherwise,
Desktop Holder port may be damaged. Check contours and
orientation of Micro USB plug, then insert it with tabs (○)
facing down.
Extend blades and plug AC Charger into AC outlet
Place handset in Desktop Holder
Charging starts and Notification Lamp illuminates.
・Push down handset until it clicks into place.
・Battery is charged when Notification Lamp goes out.
After charging, remove handset from Desktop Holder, and then
unplug AC Charger and retract blades
Remove AC Charger from Desktop Holder
AC Charger
Use AC Charger (with Micro USB Quick Charge™ 2.0 capability)
[ZSDBA4]1 or AC Charger (Micro USB 1.0A) [ZSDBA6]2, sold
separately.
Charging with AC Charger (with Micro USB Quick Charge™ 2.0
capability) [ZSDBA4] is described as an example.
1 SoftBank SELECTION AC Charger for smartphones with
Qualcomm® Quick Charge™ 2.0 capability [SB-AC12-HDQC]
2 SoftBank SELECTION Micro USB recharging AC Charger 1.0A
for smartphones [SB-AC13-HDMU]
・See instructions included with your AC Charger.
・Never connect Micro USB plug while handset or AC Charger
is wet.
Insert Micro USB plug of AC Charger into External Device Port
・Insert Micro USB plug in correct orientation; otherwise,
External Device Port may be damaged. Check contours and
orientation of Micro USB plug, then insert it with tabs (○)
facing down.
Extend blades and plug AC Charger into AC outlet
Charging starts and Notification Lamp illuminates.
・Battery is charged when Notification Lamp goes out.
After charging, remove Micro USB plug from External Device
Port, then unplug AC Charger and retract blades

18
Charging by PC
Connect handset to a PC with Micro USB Cable (SHDDL1;
optional accessory).
・Make sure that PC is turned on.
・Handset may not charge or charge slowly depending on
connection/PC status.
・Never connect Micro USB plug while handset or Micro USB
Cable is wet.
Insert Micro USB plug of Micro USB Cable into External Device
Port
・Insert Micro USB plug in correct orientation; otherwise,
External Device Port may be damaged. Check contours and
orientation of Micro USB plug, then insert it with tabs (○)
facing down.
Insert USB plug of Micro USB Cable into PC USB port
Charging starts and Notification Lamp illuminates.
・Battery is charged when Notification Lamp goes out.
After charging, remove Micro USB Cable from handset and PC
Power On/Off
Power On
Long Press until SoftBank logo appears
Handset powers on, and Standby appears after a while.
・If confirmation appears, follow onscreen prompts.
Power Off
(Long Press)
Power off
Handset shuts down.
Table of contents
Other Aquos Cell Phone manuals

Aquos
Aquos K SHF32 User manual

Aquos
Aquos sense5G Quick start guide

Aquos
Aquos SHV39 Quick start guide

Aquos
Aquos Ever SH-04G User manual

Aquos
Aquos SHV39 Installation guide

Aquos
Aquos IS13SH Installation guide

Aquos
Aquos SHOT SH010 User manual

Aquos
Aquos R2 SHV42 Installation guide

Aquos
Aquos R3 User manual

Aquos
Aquos xx3 mini User manual

Aquos
Aquos Keitai 3 User manual

Aquos
Aquos sense5G SHG03 User manual

Aquos
Aquos SH-07E User manual

Aquos
Aquos SHG06 User manual

Aquos
Aquos xx3 mini User manual

Aquos
Aquos R8 pro User manual

Aquos
Aquos Sense3 basic User manual

Aquos
Aquos R compact User manual

Aquos
Aquos SHF33 Installation guide

Aquos
Aquos zero2 User manual