■Back/Top and Bottom
J
Wi-Fi®/Bluetooth®antennas
K
Standard out camera lens
L
Mobile light
M
& mark
Hold it over a reader/writer when using Osaifu-Keitai®/NFC.
N
Internal antenna
O
Video out camera lens (Dramatic wide camera)
P
GPS/Internal antennas
Q
Wi-Fi®antenna
R
Sub microphone
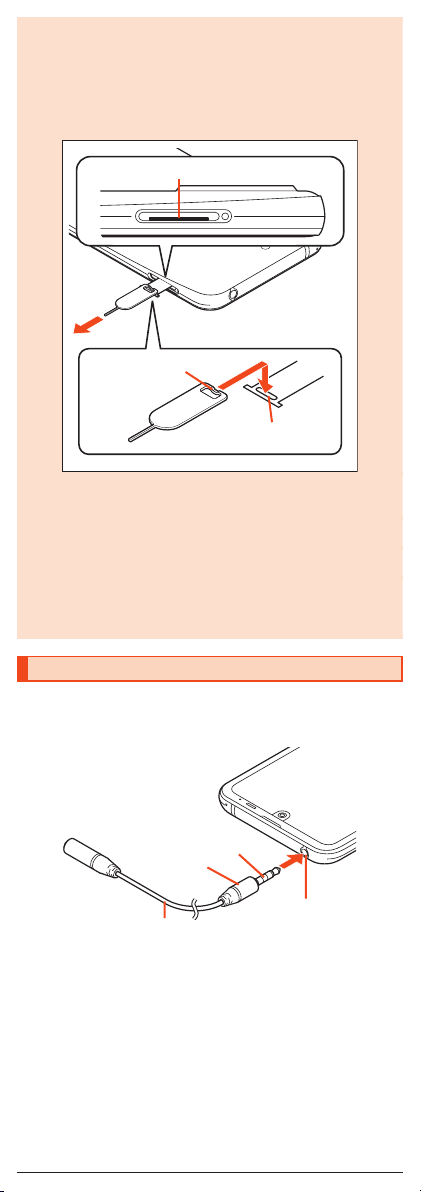
S
Earphone/Microphone jack
When you use (watch/record) TV, connect SHARP TV antenna cable 02 to
the earphone/microphone jack of the product (zP.6).
T
Speaker
U
External connection jack
Use when connecting ROBOQUL (sold separately), TypeC Common AC
Adapter 01/02 (sold separately), USB Type-C cable (commercially
available), USB cable for peripherals (commercially available), etc. to the
product.
When you connect ROBOQUL (sold separately), TypeC Common AC
Adapter 01/02 (sold separately), USB Type-C cable (commercially
available), etc. to the product, the geomagnetic sensor of the product is
affected by the magnetism of connected devices and it may not function
properly. When you use functions and applications using the geomagnetic
sensor, remove the cable.
V
Mouthpiece (Microphone)
◎The back cover of the product cannot be removed. Removing it forcibly
may cause damage or a fault.
◎The battery is built into the product, and cannot be removed by the
customer. To force the power off, refer to “Turning the Power Off Forcibly”
(zP.12).
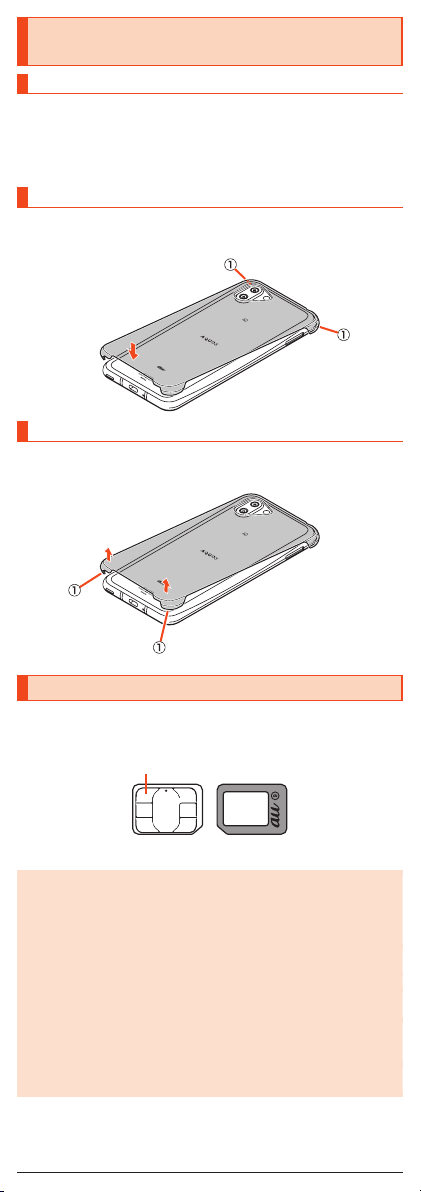
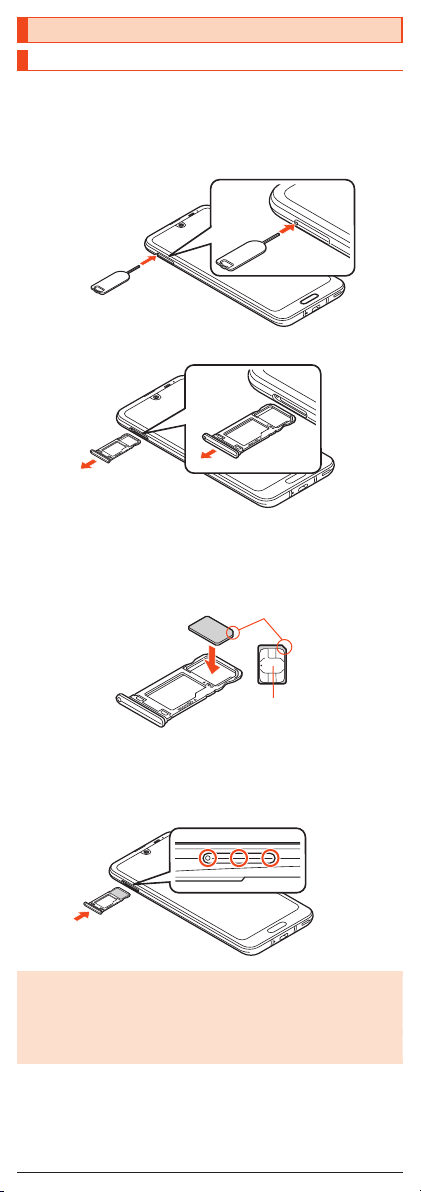
au IC Card/microSD memory card tray
◎Note that pulling or applying excessive force on an au IC Card/microSD
memory card tray may cause damage.
Earpiece (receiver), proximity sensor/light sensor, sub microphone,
speaker, mouthpiece (microphone)
◎Placing stickers, etc. over the proximity sensor/light sensor may prevent
the product from operating properly.
◎Covering the earpiece (receiver), sub microphone, speaker or
mouthpiece (microphone) with stickers, fingers, etc. may hinder product
performance.
Wi-Fi®/Bluetooth®antennas, internal antenna, GPS/Internal antennas,
Wi-Fi®antennas
◎Antennas are built into the product. Do not cover with hand during calls
or data communication. Doing so may affect call/communication quality.
Earphone/Microphone jack
◎An earphone/microphone with the switch or depending on the type of the
earphone/microphone, it may not be available with the product.
IMEI plate
◎A plate with the sticker which the IMEI number (International Mobile
Equipment Identifier), CE mark, etc. are printed is stowed near the au IC
Card/microSD memory card tray. Except when the IMEI number is
required such as requesting servicing or repairs, do not pull out the plate
or remove the sticker.
5