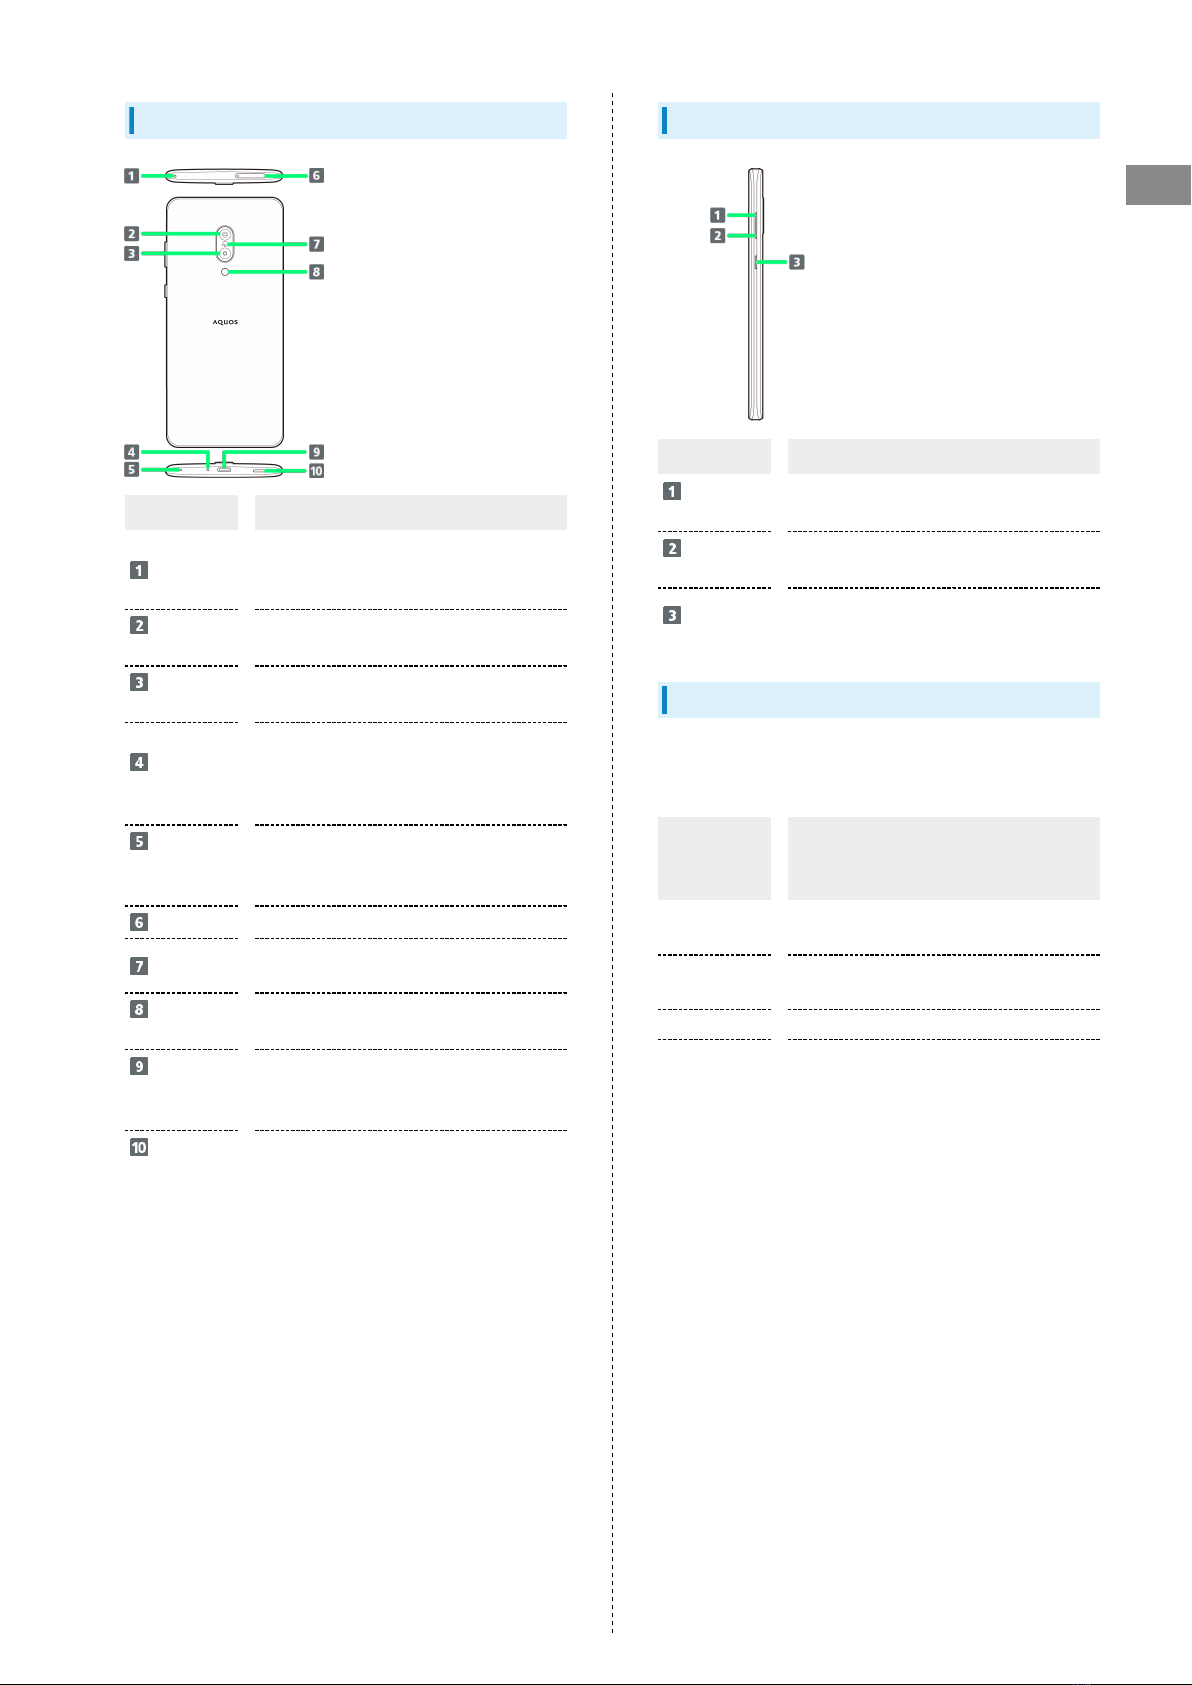
8
SIM Card
SIM Card is an IC card containing phone number and other
customer information.
Handling SIM Card
Check the following regarding SIM Card handling.
IC (gold) chip
・For SIM Card handling, see SoftBank Website.
https://www.softbank.jp/mobile/support/protect/usim/
(Japanese)
・Avoid applying labels. May damage SIM Card.
・SIM is replaceable (at cost) in case of loss/damage.
・Wipe clean with a dry, soft cloth.
・Always keep the IC (gold) chip clean.
SIM Card Cautions
Observe the following when using SIM Card.
・Within Japan, SIM Card must be installed to make
emergency calls (110, 119, 118).
・Always follow emergency procedures to suspend service
if your SIM Card or handset (SIM Card inserted) is lost/
stolen. For details, contact Customer Service.
・Customer is responsible for any damage caused by
inserting SIM Card in an other-brand IC card reader, etc.
SoftBank Corp. is not responsible in such case.
・It is recommended that you back up information that is
saved on SIM Card. SoftBank Corp. is not responsible for
damages from saved information that is lost.
・Always power off handset before inserting/removing SIM
Card.
・Note that SIM Card specifications and performance may
change without notice.
・Return SIM Card to SoftBank Corp. when canceling
subscription.
・SIM Card is the property of SoftBank Corp.
・Returned SIM Cards are recycled for environmental
purposes.
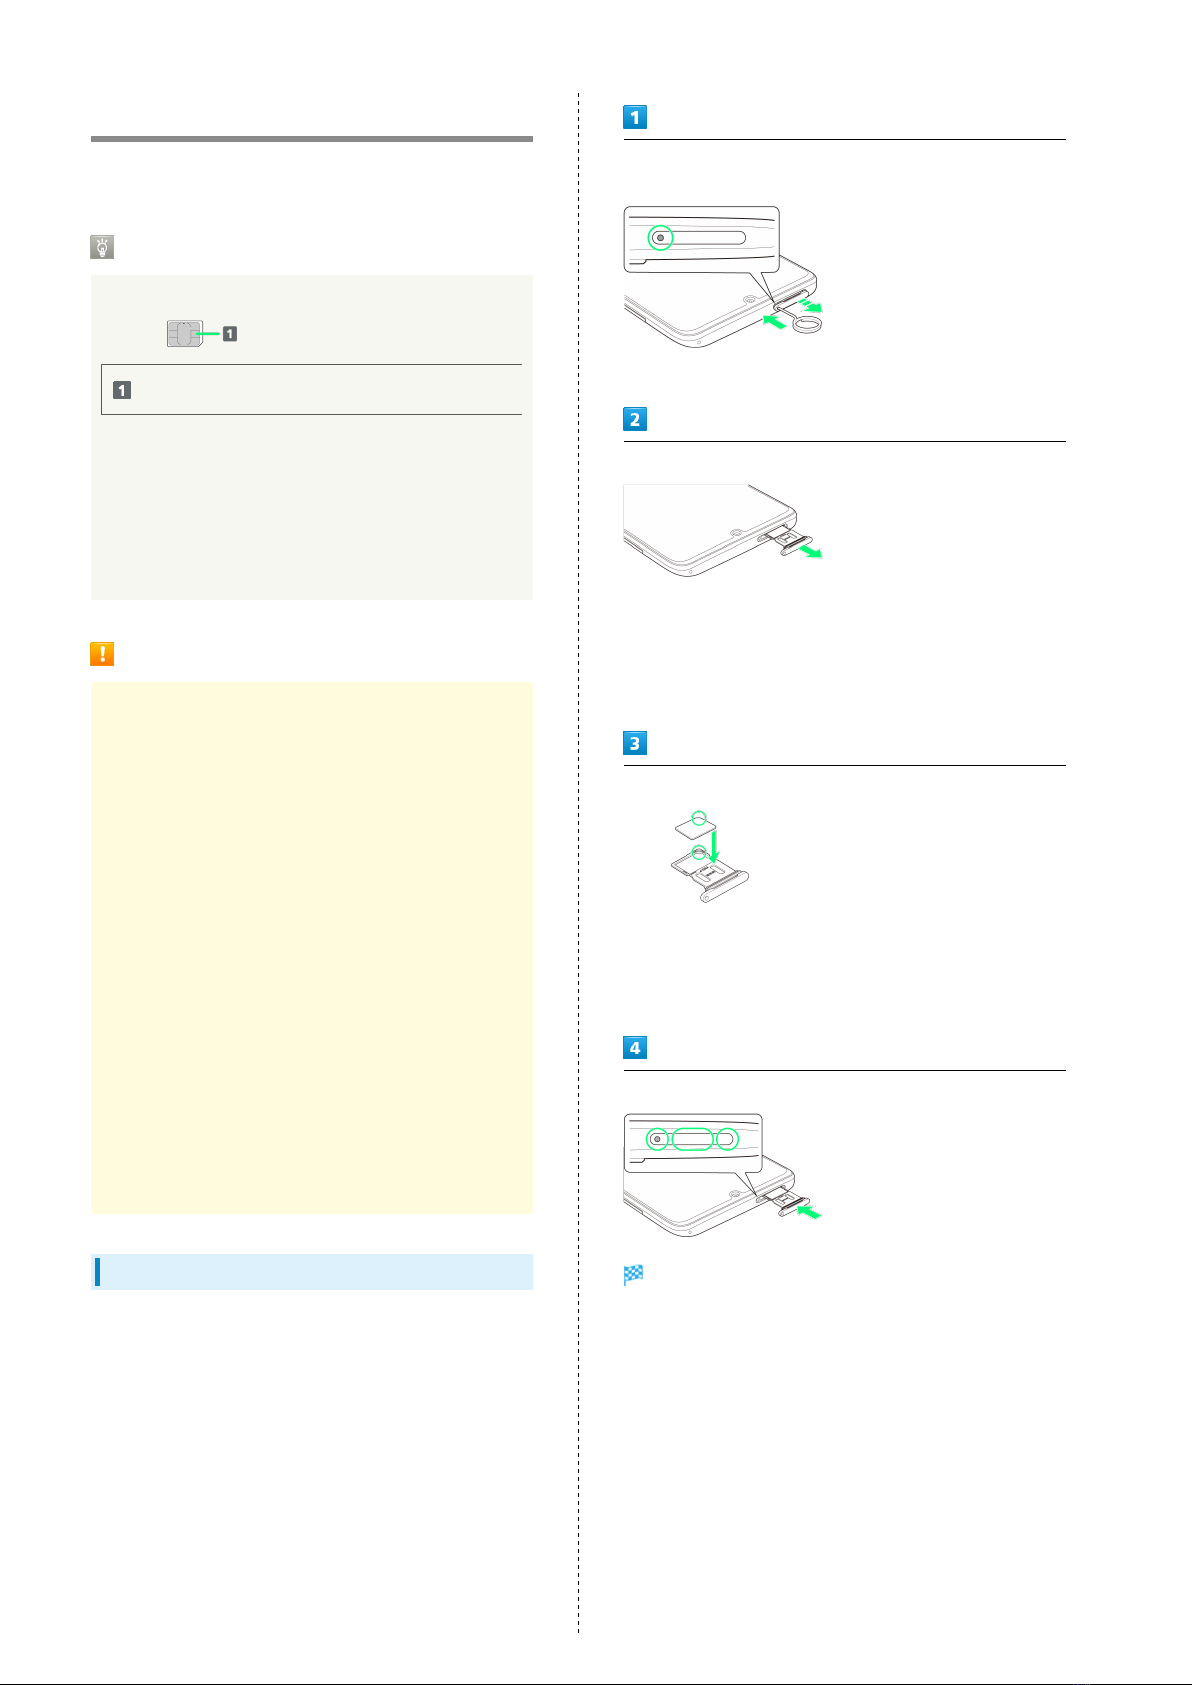
Inserting SIM Card
Always power off beforehand.
・Set SIM Card in Card Tray beforehand. Do not insert SIM
Card without setting it in Card Tray.
With Display upward, insert SIM Removal Tool in removal hole
in Card Tray
・Press firmly and straight until Card Tray ejects.
Pull out Card Tray
・With Display upward, pull out Card Tray. Pulling out Card
Tray with Display downward or handset held upright can
allow SIM Card to fall from Card Tray and become misplaced.
・Do not pull Card Tray forcefully or at an angle; damage may
result. Gently pull Card Tray out horizontally.
Set SIM Card in Card Tray
・Place gently, noting orientation of SIM Card (notch/IC (gold)
chip facing down).
・Make sure SIM Card is in Card Tray. Inserting Card Tray with
SIM Card on its edge may cause damage.
Insert Card Tray in SIM Card Slot
SIM Card is inserted.
・Do not insert Card Tray upside down.
・Insert gently all the way horizontally in direction shown.
・Push Card Tray firmly where circled (○) so that there is no
gap between handset and Card Tray.
・To maintain water and dust resistance, use handset with
Card Tray completely closed.