1
AQUOS R8 pro
AQUOS R8 pro
User Guide Contents
Introduction
About the User Guide........................................................ 3
Getting Started
Package Contents............................................................... 6
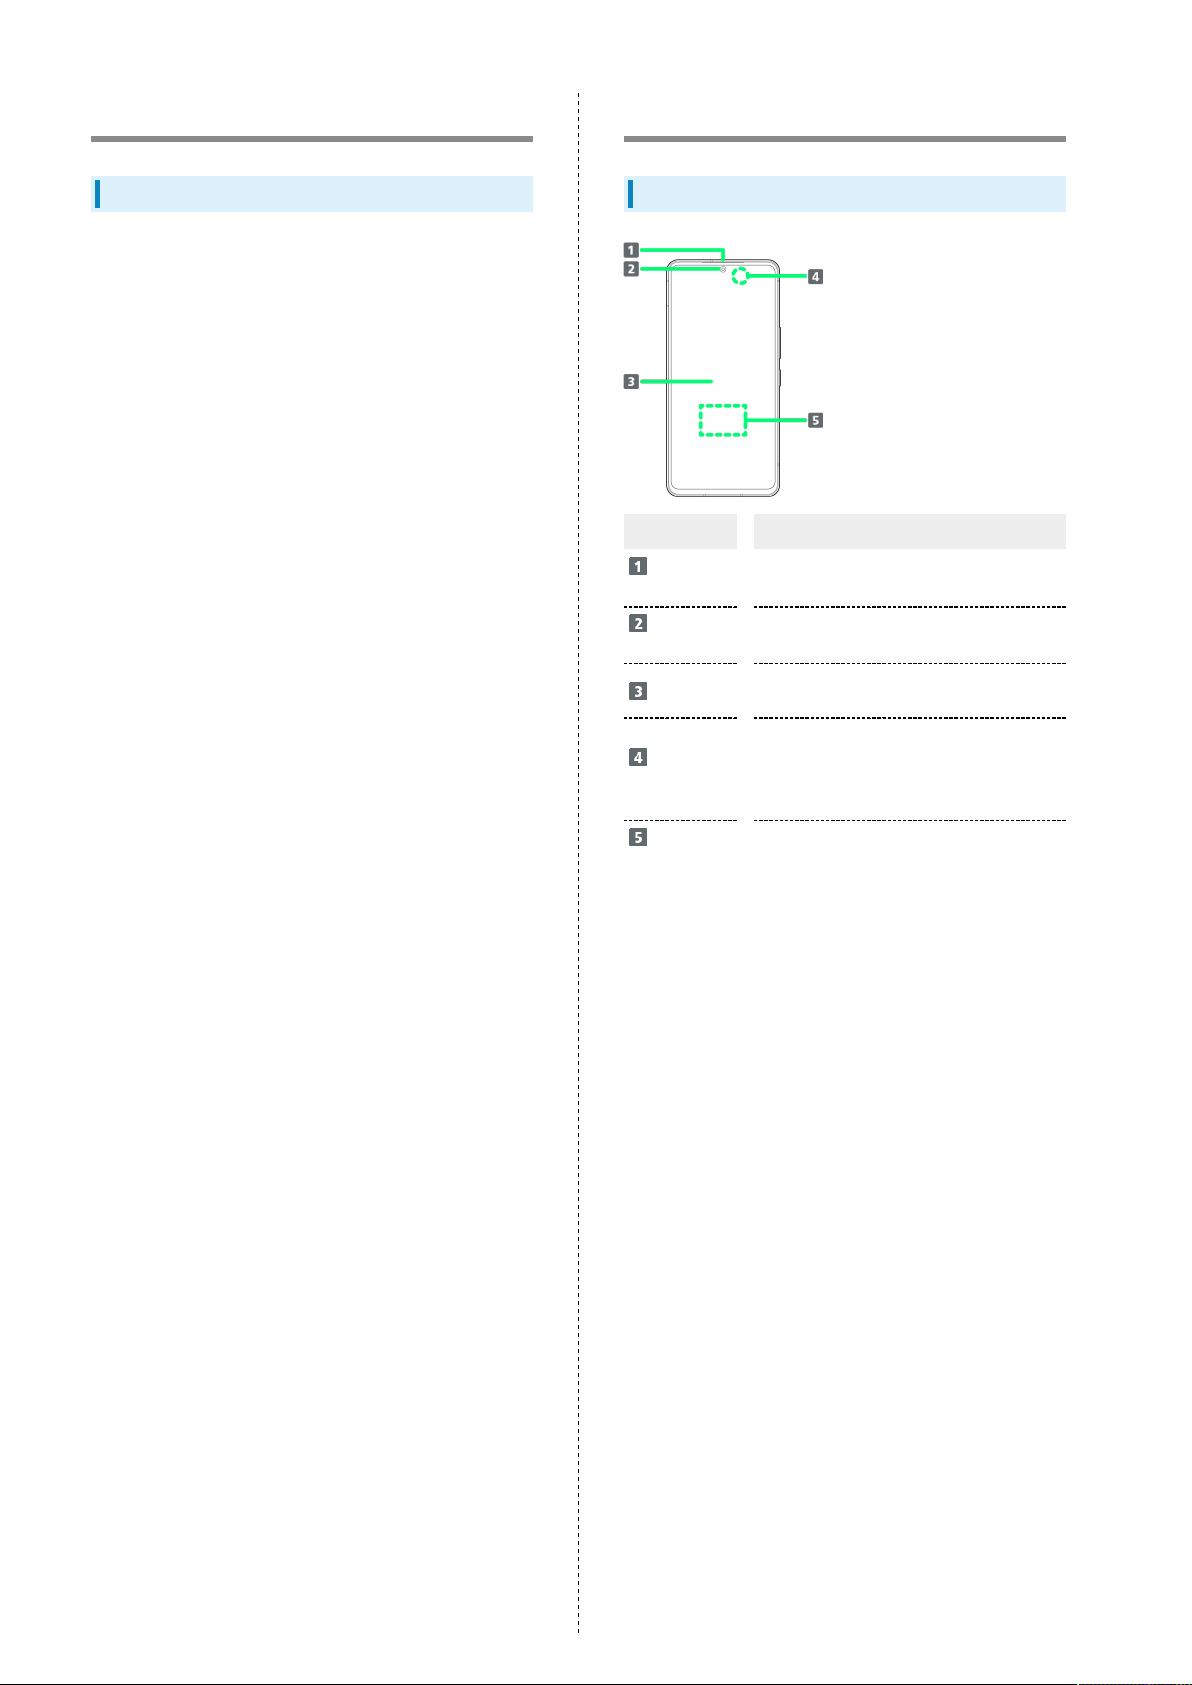
Parts & Functions.............................................................. 6
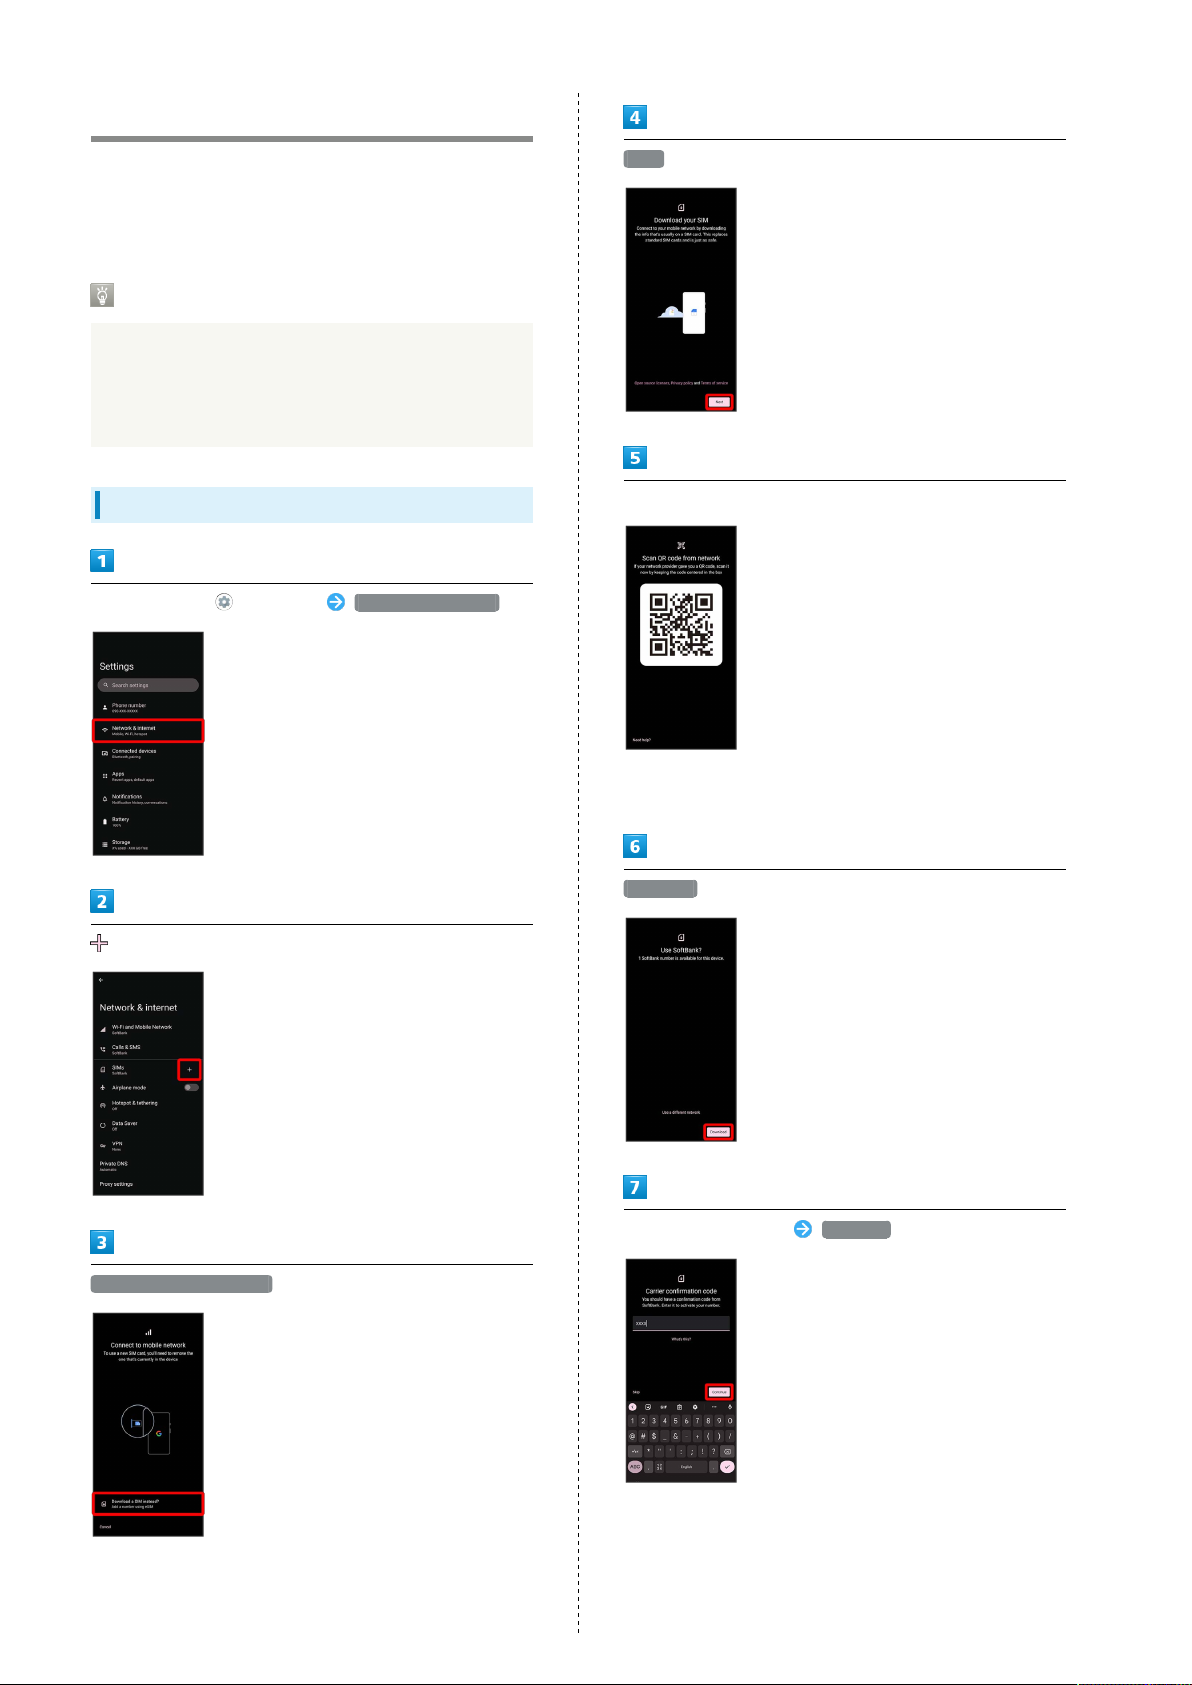
eSIM......................................................................................8
SIM Card............................................................................ 11
Internal Storage and SD Card......................................... 14
Charging Handset..............................................................19
Power On/Off................................................................... 21
Making Initial Settings.................................................... 22
Google Account................................................................. 25
Unlocking Screen...............................................................27
Basic Operations
Basic Operations...............................................................30
Using Touchscreen............................................................ 31
Using Manner Mode.......................................................... 32
Using Airplane Mode.........................................................34
Text Entry.........................................................................35
Using Fingerprint Authentication Function....................36
Updating the System........................................................39
Handset Interface
Handset Screens............................................................... 42
Icons at Display Top (Status Bar)...................................50
Checking Notifications (Notifications Window).............52
Checking Notifications (Quick Settings Window).......... 54
Phone
Placing/Answering Calls...................................................58
Optional Services..............................................................63
Handset Phone Number.................................................... 70
Address Book.................................................................... 71
Messaging
Sending Messages (+メッセージ (+Message))................ 76
Using Gmail....................................................................... 77
Internet
Using the Internet (Chrome)............................................82
Camera
Capturing Photos/Videos................................................. 88
Viewing & Managing Photos/Videos (Photos)................ 93
Application Basics
Confirmation when First Activating Applications......... 98
Applications.....................................................................102
Adding/Deleting Applications........................................ 104
Wi-Fi/Bluetooth®
Connecting by Wi-Fi.......................................................110