Arcteq AQ-101S User manual

A -101S
Arc flash protection device
Instruction manual


Table of contents
1 Document inf1 Document informaormationtion .................................................................................................................................................................................................................................... 55
2 A2 Abbrbbreeviaviationstions .............................................................................................................................................................................................................................................................. 77
3 General3 General................................................................................................................................................................................................................................................................................ 88
4 De4 Devicevice ffeaeatturureses ........................................................................................................................................................................................................................................................ 99
5 Connections5 Connections.............................................................................................................................................................................................................................................................. 1010
5.1 Simpli_ed block diagram ...................................................................................................... 10
5.2 Inputs .................................................................................................................................. 12
5.2.1 Arc sensor channels.................................................................................................. 12
5.2.2 inary inputs ............................................................................................................. 12
5.3 Outputs ............................................................................................................................... 13
5.3.1 inary outputs ........................................................................................................... 13
5.3.2 Trip relays.................................................................................................................. 13
5.3.3 System failure relay.................................................................................................... 14
5.4 Auxiliary voltage................................................................................................................... 14
6 Ar6 Arc sensorsc sensors................................................................................................................................................................................................................................................................ 1515
6.1 Arc light point sensor AQ-01................................................................................................ 15
6.2 Arc light and pressure point sensor AQ-02........................................................................... 16
6.3 Sensor dependencies .......................................................................................................... 16
6.4 Connecting sensors............................................................................................................. 17
6.4.1 Point sensors............................................................................................................. 17
7 Opera7 Operation and con_gtion and con_guraurationtion .............................................................................................................................................................................................................. 1818
7.1 DIP switch settings .............................................................................................................. 18
7.1.1 Scheme selection ...................................................................................................... 19
7.1.2 Available logic schemes............................................................................................. 19
7.2 Push button (SET) ............................................................................................................... 26
7.2.1 System setup (auto-con_guration) ............................................................................. 27
7.2.2 Reset......................................................................................................................... 27
7.2.3 Input connection check ............................................................................................. 27
7.3 Circuit breaker failure protection .......................................................................................... 28
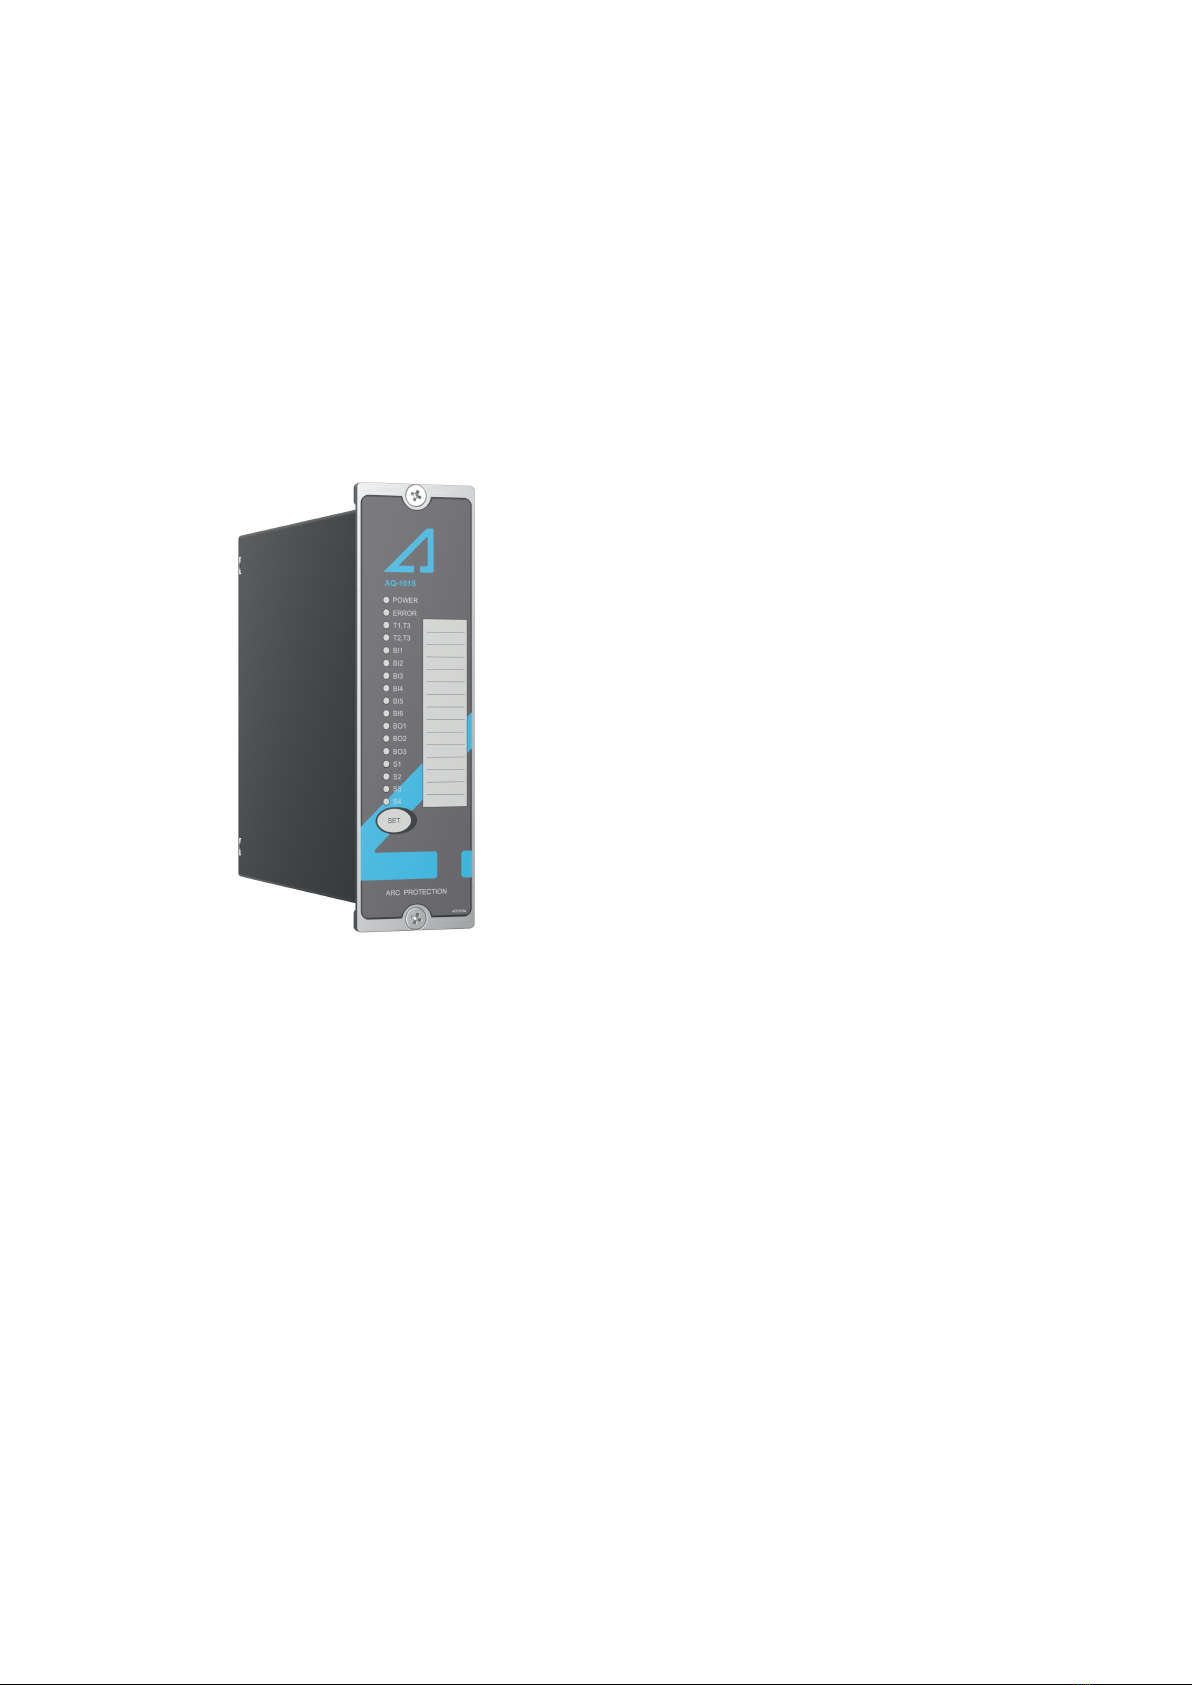
7.4 LED indicator functions........................................................................................................ 28
7.5 LED operations guide .......................................................................................................... 28
7.6 Non-volatile memory............................................................................................................ 29
8 S8 Syyststem self-superem self-supervisionvision............................................................................................................................................................................................................................ 3030
9 Applic9 Applicaation examplestion examples .................................................................................................................................................................................................................................. 3131
9.1 Double busbar application with overcurrent and arc light conditions (LV and MV).................31
10 W10 Wiring exampleiring example.................................................................................................................................................................................................................................................. 3232
11 D11 Dimensions and installaimensions and installationtion ............................................................................................................................................................................................................ 3333
12 T12 Testingesting .......................................................................................................................................................................................................................................................................... 3535
12.1 Testing the light-only mode ................................................................................................ 35
12.2 Testing the light and current mode ..................................................................................... 35
12.3 Testing the C FP function.................................................................................................. 36
12.4 Testing the operation time.................................................................................................. 36
12.5 Test plan example .............................................................................................................. 36
13 T13 Trroubleshoooubleshootingting................................................................................................................................................................................................................................................ 3838
14 T14 Technicechnical daal datata.................................................................................................................................................................................................................................................... 3939
14.1 Mounting and installation ................................................................................................... 39
14.2 Operating times ................................................................................................................. 39
14.3 Auxiliary voltage................................................................................................................. 39
14.4 inary inputs...................................................................................................................... 39
14.5 Trip relays .......................................................................................................................... 40
14.6 inary output(s) ................................................................................................................. 40
14.7 System failure relay............................................................................................................ 40
14.8 Point sensors..................................................................................................................... 40
14.9 Disturbance tests............................................................................................................... 41
14.10 Voltage tests.................................................................................................................... 42
AA -101S-101S
Instruction manual
Version: 2.02
© Arcteq Relays Ltd
IM00007
1

14.11 Mechanical tests.............................................................................................................. 42
14.12 Environmental conditions ................................................................................................. 42
14.13 Casing............................................................................................................................. 42
15 Or15 Ordering infdering informaormationtion ................................................................................................................................................................................................................................ 4343
16 Contact and r16 Contact and reeffererence infence informaormationtion........................................................................................................................................................................................ 4444
AA -101S-101S
Instruction manual
Version: 2.02
2© Arcteq Relays Ltd
IM00007

Disclaimer
Please read these instructions carefully before using the equipment or taking any other actions with
respect to the equipment. Only trained and quali_ed persons are allowed to perform installation,
operation, service or maintenance of the equipment. Such quali_ed persons have the responsibility to
take all appropriate measures, including e.g. use of authentication, encryption, anti-virus programs,
safe switching programs etc. necessary to ensure a safe and secure environment and usability of the
equipment. The warranty granted to the equipment remains in force only provided that the instructions
contained in this document have been strictly complied with.
Nothing contained in this document shall increase the liability or extend the warranty obligations of the
manufacturer Arcteq Relays Ltd. The manufacturer expressly disclaims any and all liability for any
damages and/or losses caused due to a failure to comply with the instructions contained herein or
caused by persons who do not ful_l the aforementioned requirements. Furthermore, the manufacturer
shall not be liable for possible errors in this document.
Please note that you must always comply with applicable local legislation and regulations. The
manufacturer gives no warranties that the content of this document is in all respects in line with local
laws and regulations and assumes no liability for such possible deviations.
You are advised to notify the manufacturer in case you become aware of any errors in this document or
of defects in the equipment.
The manufacturer reserves the right to update or amend this document at any time.
AA -101S-101S
Instruction manual
Version: 2.02
© Arcteq Relays Ltd
IM00007
3

Copyright
Copyright © Arcteq Relays Ltd. 2023. All rights reserved.
AA -101S-101S
Instruction manual
Version: 2.02
4© Arcteq Relays Ltd
IM00007

1 Document information
Table. 1 - 1. History of Revision 1.
RReevisionvision 1.001.00
Date April 2012
Changes - The _rst revision of the manual.
RReevisionvision 1.011.01
Date July 2012
Changes
- Scheme select DIP switch settings chapter updated.
- System self-supervision chapter revised.
- Ordering code for AQ-101S revised.
- Point sensor max. wiring length updated to up to 200 meters.
RReevisionvision 1.021.02
Date March 2014
Changes - Scheme 6, 7, 9, 10, 11 internal logic segments added.
Table. 1 - 2. History of Revision 2.
RReevisionvision 2.002.00
Date October 2020
Changes
- Content completely rewritten to improve grammar and readibility.
- The "Available logic schemes" chapter updated.
- The AQ-02 point sensor chapter added to the "Arc sensors" chapter, and AQ-02's technical
data added to the "Technical data" chapter.
- The sensor–unit type dependency list updated.
- The "Connecting sensors" chapter added.
- All technical data checked and updated where necessary.
- Ordering information updated.
- Images updated where necessary.
RReevisionvision 2.012.01
Date November 2021
Changes
- Cut-out installation image added.
- Dimension measurements updated in images and technical data.
- Wiring diagram, simpli_ed block diagram, DIP switch diagram & application image updated.
- Push button image added.
- Connections image updated.
- The test plan example updated.
- All table layouts uni_ed in "Technical data".
- The IP classi_cation of point sensors updated.
- The AWG value updated.
- "Disturbance tests" table reformatted.
- Order code images updated.
- The number for Arcteq's technical support added to the reference information.
RReevisionvision 2.022.02
Date January 2023
AA -101S-101S
Instruction manual
Version: 2.02
© Arcteq Relays Ltd
IM00007
5

Changes
- Updated the Arcteq logo on the cover.
- Updated the distance between the flash and the sensor in the "Testing the operation time"
chapter.
- Uni_ed terminology used througout the manual (e.g. unit and device means the same thing.
Now all AQ 100 series relays are called "devices").
- Improved many existing drawings.
- Rearranged topics into a more logical order.
- Added connection drawings to input and output descriptions under "Connections" chapter.
- Added hyperlinks to chapters. (e.g. "See Device features chapter for more information")
- Listed more features in Device features chapter.
- Added information about binary output pulse messages.
- Many tables have been simpli_ed and made easier to read.
- Scheme matrixes and simpli_ed logic diagrams have been made more detailed in "Available
schemes" chapter.
AA -101S-101S
Instruction manual
Version: 2.02
6© Arcteq Relays Ltd
IM00007

2 Abbreviations
AQD – arc quenching device
I – binary input
O – binary output
C – circuit breaker
C FP – circuit breaker failure protection
CT – current transformer
EPROM – erasable, programmable read-only memory
HSO – high-speed output
LED – light emitting diode
LV – low-voltage
MV – medium-voltage
NC – normally closed
NO – normally open
PC – printed circuit board
RF – radio frequency
Rx – receiver
SAS – standard arc scheme
SF – system failure
Tx – transceiver
μP - microprocessor
AA -101S-101S
Instruction manual
Version: 2.02
© Arcteq Relays Ltd
IM00007
7

3 General
The AQ-101S is a sophisticated microprocessor-based arc flash protection device with point sensor
channels. The device is designed to minimize the damage caused by an arc fault. This is
done by tripping the circuit breaker which supplies current to the fault when sensors detect arc light.
The device includes a complete system self-supervision functionality which provides the highest level of
dependability as it continuously monitors all internal system functions as well as all external
connections.
Figure. 3 - 1. Arc protection device AQ-101S.
The AQ-101S is designed according to the latest protection relay standards and is therefore suitable
for installations in rough environments. These include utilities and power plants (both traditional and
renewable), various heavy industry applications (off-shore, marine, oil, gas, mining, steel, etc.) as well
as commercial and institutional electrical systems. AQ-101S is suitable for MV and LV switchgears as
well as for motor control center applications in both new and retro_tted installations.
AA -101S-101S
Instruction manual
Version: 2.02
8© Arcteq Relays Ltd
IM00007

4 Device features
AQ-101S is an arc flash protection device which it can be applied to a variety of applications that
require a large amount of data communication. It can be used on its own as a stand-alone device, or it
can be a part of a more complex arc protection system by using binary inputs and outputs to connect
multiple AQ 100 series devices together.
The following list presents the main features of the device:
• 92…265 V AC/DC auxiliary power supply oror 18…72 V DC auxiliary power supply (optional)
• four (4) arc flash point sensor channels, max. three (3) point sensors per channel
• six (6) binary inputs with nominal operation voltage of 24, 110, or 220 V DC
• three (3) trip relay outputs
• three (3) binary outputs (with internal 24 V DC power supply)
• one (1) system failure output (change-over)
• seventeen (17) indication LEDs
• eight (8) DIP switches for logic con_guration
• one (1) push button.
AA -101S-101S
Instruction manual
Version: 2.02
© Arcteq Relays Ltd
IM00007
9

5 Connections
The _gure below depicts the connections of AQ-101S. Please note that the SF relay is in the de-
energized position.
Figure. 5 - 2. Rear terminals of AQ-101S.
5.1 Simpli=ed block diagram
The _gure below presents the main components of the AQ-101S device.
AA -101S-101S
Instruction manual
Version: 2.02
10 © Arcteq Relays Ltd
IM00007

Figure. 5.1 - 3. Simpli_ed block diagram of AQ-101S.
AA -101S-101S
Instruction manual
Version: 2.02
© Arcteq Relays Ltd
IM00007
11

5.2 Inputs
5.2.1 Arc sensor channels
Figure. 5.2.1 - 4. Arc point sensor connections
AQ-101S has four (4) arc point sensor channels: S1, S2, S3 and S4. You can connect a maximum of
three (3) arc point sensors to each channel.
When the arc protection system has been set up, point sensor connections are constantly monitored.
In case of sensor fault or disconnection, the device will go into Error mode. See System self-
supervision chapter for more information.
For more information on sensors, please refer to the Arc sensors chapter as well as to the AQ-0x
instruction booklet which can be found on Arcteq's website (https://www.arcteq._/downloads/).
5.2.2 Binary inputs
Figure. 5.2.2 - 5. inary input connections
AQ-101S contains six (6) binary inputs.
Typically, I1 and I2 are reserved for the signal information concerning breaker position. In most
applications I3 is responsible for receiving overcurrent signal from an AQ-110 device. I4, I5 and
I6 can be used for receiving a trip signal or an arc light signal. For more information, please refer to
the DIP switch settings chapter.
Please note that when AQ-101S receives an overcurrent signal from a non-AQ 100 series device, the
actual operating time depends on the operating time of the that device. Therefore, the total operating
time cannot be speci_ed the technical data.
The binary inputs are activated when a connected DC signal reaches the speci_ed nominal voltage
level of the corresponding input. There are three (3) different nominal voltage levels available: 24, 110,
or 220 VDC. The nominal voltage value must be chosen and speci_ed when ordering the device. The
actual activation of the binary input occurs at a lower voltage than the speci_ed nominal voltage value
(see Techical Datachapter).
AA -101S-101S
Instruction manual
Version: 2.02
12 © Arcteq Relays Ltd
IM00007

AQ 100 series devices monitor health of wiring between binary inputs and binary outputs. If binary
input loses connection to any of the con_gured binary outputs, the device will go into Error mode. See
System self-supervision chapter for more information.
5.3 Outputs
5.3.1 Binary outputs
Figure. 5.3.1 - 6. inary output connections
AQ-101S has three (3) binary outputs: O1, O2 and O3. AQ 100 series binary outputs have an
internal 24 VDC power supply. inary outputs are used for sending overcurrent, light detection, master
trip and other signals to other AQ 100 series devices in the same system. The binary output function
can be con_gured with the DIP switches. For more information on the con_guration, please refer to the
DIP switch settings chapter.
AQ 100 series device's binary outputs send out sequences of pulses that are unique for each device.
inary inputs of the receiving AQ 100 series devices use these pulse messages to identify connected
binary outputs. See System self-supervisionchapter for more information.
NONOTE!TE!
Please note that the binary ouputs are polarity-sensitive.
5.3.2 Trip relays
Figure. 5.3.2 - 7. Trip relay connections
This device has three (3) normally open trip relay outputs. Trip relays T1 and T2 are used for tripping
circuit breakers. T3 is a common trip relay that operates whenever T1 or T2 operates. It can be used
either for tripping one additional disconnecting device, or as a trip alarm in a (local or remote)
monitoring and alarming system.
T3 is always a latching relay. Trip relays T1 and T2 can be set as latching relays by setting DIP switch
SW1:6 ("Latching / Non-latching") to "Latching" position.
AA -101S-101S
Instruction manual
Version: 2.02
© Arcteq Relays Ltd
IM00007
13

5.3.3 System failure relay
Figure. 5.3.3 - 8. System failure relay connection (de-energized position)
The system failure (SF) relay is of the change-over type (NO/NC) and it is energized when the device is
in a healthy condition and powered on. Whenever the device detects a system error or the auxiliary
power supply is disconnected, the SF relay changes its state. The state stays this way until the device
returns to a healthy condition. See the System self-supervision chapter for more information.
5.4 Auxiliary voltage
Figure. 5.4 - 9. Auxiliary power supply connection
The auxiliary power supply voltage is 92….265 V AC/DC. Alternatively, the optional auxiliary power
supply can be of 18…72 V DC. This choice must be speci_ed when ordering.
AA -101S-101S
Instruction manual
Version: 2.02
14 © Arcteq Relays Ltd
IM00007

6 Arc sensors
The AQ 100 series provides arc light point sensors and arc light _ber optic loop sensors. These
sensors can be used with different devices and different switchgear types according to speci_c
application requirements.
Arc light point sensors are typically installed in metal-clad compartments, and they provide a quick and
accurate location of the faulted area. Arc light _ber loop sensors typically cover a wider protected area
with one _ber, when there is no need to pinpoint the exact location for a fault.
6.1 Arc light point sensor A -01
AQ-01 is an arc light point sensor with a light-sensitive photodiode element activated by arc light. The
AQ-01 sensors should be mounted in the switchgear cubicles in such a way that the light-sensitive part
covers the protected area as completely as possible. While multiple sensors can be installed, in most
cases one sensor per closed metal-clad compartment is suf_cient. In open spaces (such as a busbar
section) the sensors should be mounted no more than two meters apart.
The default light intensity threshold for an AQ-01 sensor is 8,000 lux. Depending on the demand of the
application, light point sensors can be ordered with 25,000 lux or 50,000 lux thresholds. Its detection
radius is 180 degrees.
Figure. 6.1 - 10. The AQ-01 light sensor.
An AQ-01 is installed either inside or outside the compartment wall. When mounting inside the wall, the
sensor is placed on the wall with the colored side against the wall and then _xed to the wall with two
screws. When mounting outside the wall the sensor is placed on the wall with the grey side against the
wall and the eye is pushed into the drilled compartment hole and then _xed to the wall with two screws
from the back of the sensor. No external mounting plates are needed regardless of the mounting type;
however, mounting brackets can be used if so desired.
Up to three (3) sensors can be connected in series (with the exception of AQ-103 which can take only
one point sensor per channel). Installing a connection cable is simple as each end of the sensor has a
detachable cover over the cable connectors. Please remember to reattach the cover once the wires
have been installed.
NONOTE!TE!
The AQ-01 point sensor does nonott come with a connection cable!
AA -101S-101S
Instruction manual
Version: 2.02
© Arcteq Relays Ltd
IM00007
15

6.2 Arc light and pressure point sensor A -02
AQ-02 is an arc light and pressure point sensor that comes with arc light detection and ambient
pressure detection. AQ-02 point sensor activates when both light and pressure are detected. The
AQ-02 sensors should be mounted in the switchgear cubicles in such a way that the light-sensitive part
covers the protected area as completely as possible. While multiple sensors can be installed, in most
cases one sensor per closed metal-clad compartment is suf_cient. The AQ-02 sensors ccannoannott be
installed in open spaces.
The default light intensity threshold for an AQ-02 sensor is 8,000 lux. Depending on the demand of the
application, AQ-02 can also be ordered with 25,000 lux or 50,000 lux thresholds. Its detection radius is
180 degrees. The pressure threshold is _xed at 0.2 bar above ambient pressure.
Figure. 6.2 - 11. AQ-02 arc light and pressure point sensor.
An AQ-02 can only be installed inside the compartment wall as not to block pressure detection located
next to "the eye". The sensor is placed on the wall (with the colored side against the wall), and then
_xed to the wall with two screws. No external mounting plates are needed regardless of the mounting
type; however, mounting brackets can be used if so desired.
Up to three (3) sensors can be connected in series (with the exception of AQ-103 which can take only
one point sensor per channel). Installing a connection cable is simple as each end of the sensor has a
detachable cover over the cable connectors. Please remember to reattach the cover once the wires
have been installed.
NONOTE!TE!
The AQ-02 point sensor does nonott come with a connection cable!
6.3 Sensor dependencies
Compatibility of arc sensor types depend on the hardware available in the AQ 100 series device. The
table below describes those dependencies.
Table. 6.3 - 3. Sensor dependencies.
PPoint sensorsoint sensors
(A(A -01 & A-01 & A -02)-02)
FFiber loopsiber loops
(A(A -06, A-06, A -07 & A-07 & A -08)-08)
AAQQ-101-101 Yes Order option
AAQQ-101D-101D Yes Order option
AAQQ-101S-101S Yes No
AAQQ-102-102 No Yes
AAQQ-103-103 Yes Order option
AAQQ-110P-110P Yes Order option
AA -101S-101S
Instruction manual
Version: 2.02
16 © Arcteq Relays Ltd
IM00007

PPoint sensorsoint sensors
(A(A -01 & A-01 & A -02)-02)
FFiber loopsiber loops
(A(A -06, A-06, A -07 & A-07 & A -08)-08)
AAQQ-110F-110F No Yes
6.4 Connecting sensors
6.4.1 Point sensors
Figure. 6.4.1 - 12. Wiring diagram of point sensors.
1. Open the sensor covers and detach the connectors.
2. Attach the cable to the connector and to the arc protection device.
3. Reattach the connectors to the sensor.
4. Run the auto-con_guration procedure. See System setup for more details.
AA -101S-101S
Instruction manual
Version: 2.02
© Arcteq Relays Ltd
IM00007
17

7 Operation and con=guration
7.1 DIP switch settings
The DIP switches are used to easily con_gure various tripping logics and other functionalities for the
device. The DIP switches are located at the back of the device. The _gure below presents the DIP
switch numbering, and the table below that gives a detailed description of the settings.
Protection logic can be de_ned by selecting a logic scheme with DIP switches 1 to 4. The scheme
selection is based on binary arithmetic. Logic schemes are described in the next chapter.
Tripping can be set with DIP switches 7 and 8 to require either just arc light or both arc light and
overcurrent simultaneously. Adding overcurrent criteria ensures the device trips when an arc fault
occurs but not when a strong natural light source hits the light sensor (e.g. sunlight). Overcurrent signal
comes from an external device (mainly AQ-110P or AQ-110F) and is connected to a binary input.
If the selected scheme uses C FP (circuit breaker failure protection) its time delay (100 ms or 150 ms)
can be set with DIP switch 5. C FP logic depends on the chosen logic scheme. See Circuit breaker
failure protection chapter for more information.
Figure. 7.1 - 13. DIP switch diagram.
Table. 7.1 - 4. DIP switch settings.
SwitSwitchch FFunction selectionunction selection ON (leON (left position)ft position) OFF (OFF (rigright position)ht position)
8 L> oror L> + I>
The tripping criterion for the S2, S3,
S4 (point sensor) and S5 (_ber loop)
channels. Tripping on light
only (L>).
Light detection only trips if
overcurrent is also detected at the
same time (L> + I>).
7 S1: L> oror L> + I> The tripping criterion for the S1 point
sensor channel.
6Latching oror Non-
latching
Enables or disables latching of T1 and
T2 trip relays.
T1 and T2 operate
as latching relays. T1 and T2 latching is disabled.
5100 ms oror 150
ms The setting for the C FP time. The C FP time is
set to 100 ms. The C FP time is set to 150 ms.
4–1 Scheme
selection Scheme selection.
Please refer to the
Scheme
selection chapter.
Switch 1: 1
Switch 2: 2
Switch 3: 4
Switch 4: 8
Please refer to the Scheme
selection chapter.
Switch 1: 0
Switch 2: 0
Switch 3: 0
Switch 4: 0
AA -101S-101S
Instruction manual
Version: 2.02
18 © Arcteq Relays Ltd
IM00007
Other manuals for AQ-101S
1
Table of contents
Other Arcteq Protection Device manuals

Arcteq
Arcteq AQ F205 User manual

Arcteq
Arcteq AQ-F255 User manual

Arcteq
Arcteq AQ-F215 User manual

Arcteq
Arcteq AQ 100 User manual

Arcteq
Arcteq AQ-F213 User manual

Arcteq
Arcteq AQ-S254 User manual

Arcteq
Arcteq AQ F205 User manual

Arcteq
Arcteq AQ-102LV User manual

Arcteq
Arcteq AQ-M210 User manual

Arcteq
Arcteq AQ 200 Series User manual

Arcteq
Arcteq AQ-M257 User manual

Arcteq
Arcteq AQ-T256 User manual

Arcteq
Arcteq AQ-V251 User manual

Arcteq
Arcteq AQ-C213 User manual

Arcteq
Arcteq AQ-V211 User manual

Arcteq
Arcteq AQ-G3 7 Series User manual

Arcteq
Arcteq AQ-101LV User manual

Arcteq
Arcteq AQ 110 Series User manual

Arcteq
Arcteq AQ-T256 User manual

Arcteq
Arcteq AQ F3 0 Series User manual