ARDES AR1S15 User manual

AR1S15
ISTRUZIONI D’USO
SANDWICH MAKER
Attenzione : leggere attentamente le avvertenze
contenute nel seguente libretto in quanto forniscono
importanti indicazioni riguardanti la sicurezza di
installazione, d’uso e di manutenzione.
Istruzioni importanti da conservare per ulteriori
consultazioni.
Questo apparecchio può essere utilizzato da bambini
dagli 8 anni in su e da persone con ridotte capacità
siche, sensoriali o mentali o con mancanza di esperienza
o conoscenza se a loro è stata assicurata un’adeguata
sorveglianza oppure se hanno ricevuto istruzioni circa
l’uso in sicurezza dell’apparecchio e hanno compreso
i pericoli correlati. I bambini non devono giocare con
l’apparecchio. Le operazioni di pulizia e di manutenzione
non devono essere eettuate da bambini a meno che
non abbiano più di 8 anni e siano sorvegliati.
Mantenere l’apparecchio e il suo cavo fuori dalla portata
dei bambini con meno di 8 anni.
L’apparecchio non deve essere fatto funzionare per
mezzo di un temporizzatore esterno o con un sistema di
comando a distanza separato.
Le superci sono soggette a diventare calde durante
l’uso.
Per la pulizia dell’apparecchio, fare riferimento al
paragrafo MANUTENZIONE.
Se il cavo di alimentazione dovesse essere danneggiato,
deve essere sostituito solamente presso i centri di
assistenza autorizzati dal costruttore.
Non alimentare l’apparecchio se le piastre non sono
montate correttamente.

Avvertenze IT
Conservare la garanzia, lo scontrino scale e il libretto istruzioni per ogni ulteriore consultazione.
Dopo aver tolto l’imballaggio assicurarsi dell’integrità dell’apparecchio e in caso di visibili danneggiamenti non
utilizzarlo e rivolgersi a personale professionalmente qualicato.
Non lasciare parti dell’imballo alla portata dei bambini, né utilizzarlo come gioco: è un apparecchio elettrico e
come tale va considerato.
Prima di collegare l’apparecchio, assicurarsi che la tensione presente nella presa di corrente, corrisponda a
quella indicata nei dati di targa.
La sicurezza elettrica di questo apparecchio è assicurata solamente quando lo stesso è collegato ad un ecace
impianto di messa a terra.
Nel caso in cui la spina e la presa non siano compatibili, far sostituire la presa con un tipo adatto da personale
professionalmente qualicato.
Non utilizzare adattatori o prolunghe che non siano rispondenti alle vigenti normative di sicurezza o che superino
i limiti delle portate in valore della corrente.
Staccare l’apparecchio dalla rete di alimentazione quando non è utilizzato e assicurarsi che sia spento.
Non tirare il cavo di alimentazione o l’apparecchio stesso per staccare la spina dalla presa di corrente.
L’uso di un qualsiasi apparecchio elettrico comporta l’osservanza di alcune regole fondamentali, in particolare:
- Non toccare l’apparecchio con mani bagnate o umide.
- Non utilizzare l’apparecchio a piedi nudi.
- Non lasciare l’apparecchio esposto ad agenti atmosferici (pioggia, sole).
- Non sottoporlo ad urti.
Nel caso vi sia un guasto o un funzionamento anomalo dell’apparecchio staccare immediatamente la spina, non
manometterlo e rivolgersi ad un centro assistenza autorizzato.
Nel qualcaso si decida di non utilizzare più questo tipo di apparecchio, è opportuno renderlo inoperante,
tagliando il cavo di alimentazione, ovviamente dopo averlo disinserito dalla presa di corrente.
L’apparecchio è stato costruito e concepito per funzionare in ambienti domestici secondo quanto indicato nelle
istruzioni ; pertanto ogni altro uso è da considerarsi improprio e quindi pericoloso.
Non usare l’apparecchio all’aperto.
Per motivi di sicurezza l’apparecchio non può essere smontato.
Durante l’uso tenere l’apparecchio su di una supercie piana e stabile.
Non appoggiare l’apparecchio su superci inadatte e non resistenti al calore.
Per evitare contatti accidentali con parti calde da parte dei bambini, utilizzare l’apparecchio su piani di appoggio
alti almeno 85 cm. dal suolo.
Lasciare libero lo spazio attorno a tutte le altre superci dell’apparecchio e non sovrapporre oggetti.
Tenere il cavo lontano da fonti di calore.
Non posizionare l’apparecchio sopra o sotto ad altri forni, forni a micronde o vicino a fornelli a gas.
Non movimentare l’apparecchio quando funziona, quando è caldo e quando è collegato all’alimentazione.
2
Informazioni tecniche IT
1 - Aggancio apertura/chiusura piastre
2 - Spia termostato
3 - Spia di accensione
4 - Pulsante sgancio piastre (interno)
Dati tecnici : vedere etichetta sull’apparecchio
Istruzioni d’uso IT
Primo utilizzo
Prima di utilizzare l’apparecchio per la prima volta far funzionare l’apparecchio a vuoto ( per circa 3 minuti, no
a quando la luce verde si spegne) in locale ben aerato per eliminare odori e fumi dovuti ad eventuali residui di
lavorazione sulle parti interne dell’apparecchio.
Disinserire la spina dalla presa di corrente e lasciare rareddare l’apparecchio.
Nota: quando si utilizza questo apparecchio per la prima volta, si potrebbe notare del fumo. Questo è normale
a causa del riscaldamento iniziale dei componenti interni.
Pulire le piastre come specicato nel paragrafo MANUTENZIONE.
PANINO TOSTATO
Spalmare leggermente le piastre di cottura con un pò di burro o olio da cucina.
Inserire la spina di rete nella presa di corrente. La spia di alimentazione rossa si illumina.
Preparare il pane e riempire il panino mentre l’apparecchio si sta pre-riscaldando.
Attendere nché la luce verde si illumina. L’apparecchio ha raggiunto la temperatura corretta per l’uso.
1
2
3
4

3
Manutenzione IT
Posare le fette di pane con il lato sulla piastra inferiore di cottura, mettere il vostro riempimento e coprire con
le seconde fette di pane. Per un risultato ottimale, i riempimenti dovrebbero essere posizionati bene all’interno
delle fette di pane.
Abbassare accuratamente la piastra di cottura superiore sul pane no a che l’appareccchio non sia ben serrato.
Aprire l’apparecchio dopo 3-5 minuti e controllare se il panino tostato sia sucientemente ‘marrone’. Il tempo di
cottura richiesto per ottenere i panini croccanti dipende dal tipo di pane, dalla ripieno e dal tuo gusto personale.
Utilizzare un utensile non metallico (ad es. spatola di legno) per rimuovere il panino tostato. Non utilizzare
utensili da cucina taglienti o abrasivi.
Scollegare l’apparecchio dalla presa di corrente.
Nota: Durante la cottura, la spia verde si accende e si spegne per mantenere l’apparecchio alla temperatura
corretta.
WAFFLE
Inserire la spina di rete nella presa di corrente. La spia di alimentazione rossa si illumina.
Preparare il composto come indicato nel paragrafo “RICETTA WAFFLE”. Preriscaldare l’apparecchio prima di
utilizzarlo.
Attendere nché la luce verde si illumina. L’apparecchio ha raggiunto la temperatura corretta per l’uso.
Versare il composto, abbassare accuratamente la piastra di cottura superiore no a che l’apparecchio non sia
ben serrato.
Il tempo di cottura dipende dalle varianti nella ricetta dei wae.
Aprire lentamente il coperchio e controllare la cottura dopo 3-5 minuti; una volta terminata utilizzare un utensile
non metallico (ad es. spatola di legno) per rimuovere l’alimento. Non utilizzare utensili da cucina taglienti o
abrasivi.
Se si desidera cucinare un’altra porzione, chiudere il coperchio e lasciare pre-riscaldare l’apparecchio.
Quando la luce verde si illumina, è possibile versare il composto del wae successivo.
Dopo l’uso scollegare l’apparecchio dalla presa di corrente.
Nota: Durante la cottura, la spia verde si accende e si spegne per mantenere l’apparecchio alla temperatura
corretta.
Ricetta WAFFLE
INGREDIENTI (per circa 10 wae)
2 uova - 80 gr di zucchero - 180 gr di farina - 50 gr di burro - 180 ml di latte - ½ cucchiaino di lievito.
Un cucchiaino di estratto di vaniglia
Preparazione
Separate i tuorli dagli albumi e poi montate a neve gli albumi con lo sbattitore elettrico.
In una ciotola, sbattete i due tuorli con lo zucchero e l’estratto di vaniglia. Aggiungete anche il burro fuso e
mescolate il tutto.
Aggiungete anche la farina e il lievito e, continuando a mescolare, versate a lo anche il latte.
A questo punto, aggiungete anche gli albumi montati a neve.
Fate riposare il composto ottenuto per qualche minuto e intanto fate scaldare la piastra.
Versate a poco il composto nella piastra e fate cuocere per circa 5 minuti.
RIMOZIONE DELLE PIASTRE
Scollegare sempre l’apparecchio e lasciarlo rareddare prima di rimuovere le piastre di cottura.
Individuare i pulsanti di rilascio della piastra (4) sulla parte anteriore dell’apparecchio. Premere il pulsante e la
piastra si aprirà leggermente dalla base. Aerrare la piastra con due mani, estrarla da sotto le stae di metallo
e sollevarla dalla base. Premere sull’altro pulsante di rilascio della piastra per rimuovere l’altra piastra di cottura
nel modo corretto.
MONTAGGIO DELLE PIASTRE
Piastra inferiore - inserire la piastra nelle guide posizionate nella parte posteriore; premere la parte anteriore
della piastra no allo scatto.
Piastra superiore - inserire la piastra nelle guide posizionate nella parte inferiore; premere la parte superiore
della piastra no allo scatto.
Disinserire la spina dalla presa di corrente prima di eettuare qualsiasi operazione di pulizia e manutenzione.
Pulire l’apparecchio solamente quando è freddo.
Rimuovere i residui alimentari dalle piastre.
Rimuovere le piastre dall’apparecchio come indicato nel paragrafo RIMOZIONE DELLE PIASTRE.
Lavare le piastre con detersivo per stoviglie; non utilizzare pagliette o altri mezzi abrasivi che potrebbero
danneggiare il rivestimento antiaderente.
Non lavare in lavastoviglie.
Dopo la pulizia, solo quando sono completamente asciutte, rimontare le piastre.
La pulizia esterna dell’apparecchio, deve essere eettuata con un panno morbido e leggermente umido.
Non utilizzare sostanze, liquidi o panni eccessivamente bagnati, perché eventuali inltrazioni potrebbero
danneggiare l’apparecchio irreparabilmente.
NON IMMERGERE MAI L’APPARECCHIO IN ACQUA.

4
Attention : read this booklet carefully it contains
important instructions for a safe installation, use
and maintenance.
Important instructions to be kept for future reference.
This unit can be used by children aged 8 and above and
individuals with reduced physical, sensory or mental
capacity, or lack of experience or knowledge, if they are
provided with adequate supervision or have received
instructions regarding the use of safety equipment and
that they understand the risks related.
Children must not play with the unit. Cleaning and
maintenanceshouldnotbecarriedoutbychildrenyounger
than 8 years of age. Children must be supervised.
Keep the equipment and its cable out of reach of children
younger than 8 years of age.
The appliance must never be operated by means of an
external timer or with a separate remote control system.
The surfaces are subject to heating up during use.
To clean the appliance, refer to the MAINTENANCE
chapter.
If the power cable gets damaged, it has to be replaced
only at a service centre approved by the manufacturer
in order to avoid a hazard.
Do not turn the device on if the plates are not correctly
assembled.
AR1S15
INSTRUCTIONS FOR USE
SANDWICH MAKER

5
Warnings EN
After removing the packaging, check the appliance for any signs of damage. In case of visible damage, do not
use it and contact a qualied technician.
Do not leave parts of the packaging within the reach of children.
This appliance is not a children’s toy: it is an electrical device and must be treated with the necessary caution.
Before connecting the appliance, make sure that the power supply voltage matches the indication on the data
plate.
Electrical safety of this appliance is assured only if it has been connected to an eective earthing system.
If the plug and socket are not compatible, the socket has to be replaced with a suitable type by skilled persons.
Do not use adapters or extension cables which do not meet current safety standards or that exceed the current
carrying capacity limits.
Unplug the appliance from the mains when not in use.
Do not tug on the power cable or on the appliance itself to remove the plug from the socket.
The use of any electrical appliance requires that a number of basic rules are observed, namely:
- Never touch the appliance with wet or humid hands.
- Do not use the appliance when barefoot.
- Do not leave the appliance exposed to weathering (rain, sunlight).
- Do not subject it to rough handling.
In case of failure, disconnect it at once. Do not attempt to repair it, but take it to a service centre approved by
the manufacturer.
If you decide you do not want to use this appliance any longer, disable it by cutting the power cable of course,
after disconnecting it from the socket.
In case of a breakdown or malfunctioning of the appliance, disconnect it at once. Do not attempt to repair it, but
take it to a service centre approved by the manufacturer.
The appliance was created and designed for use in domestic environments as indicated in the instructions. Any
other use is therefore considered improper and thus dangerous.
Do not use the appliance out of doors.
For safety reasons, the appliance should never be opened.
During use, rest the appliance on a at surface.
To prevent children from accidentally touching hot components, use the appliance on surfaces that are at least
85 cm high.
Leave space around all other surfaces of the appliance and do not cover with other objects.
Do not place the cord near sources of heat.
Do not place the appliance above or below other ovens, microwave ovens or close to gas stoves.
Technical informations
1 - Plates opening/closing latch
2 - Thermostat light
3 - Power light
4 - Plate release button (inside)
Technical data indicated on the appliance.
EN
EN
Instructions for use
1
2
3
4
First use
Before using the device for the rst time, operate it while empty (for about 2 minutes, until the green light turns
o) in a well-ventilated area to eliminate any odours and fumes due to possible residual traces from production
on the internal parts of the device.
Remove the plug from the power outlet and let the device cool down.
NB: when the device is used for the rst time, some smoke may be visible.
This is normal due to the initial heating of the internal components.
Clean the plates as specied in the MAINTENANCE section.

6
EN
Maintenance
TOASTED SANDWICH
Lightly coat the heating plates with a little butter or cooking oil.
Insert the plug into the mains socket. The red power light will come on.
Prepare the bread and ll the sandwich while the appliance is pre-heating.
Wait until the green light come on. The appliance has reached the correct temperature for use.
Firstly place the slices of bread on the lower heating plate. Place your lling on these and cover with the second
slices of bread.
For an optimal result, the lling should be contained within the edges of the bread slices.
Carefully lower the upper heating plate onto the bread until the appliance is fully clamped shut.
Open the appliance after 3-5 minutes and check whether the toasted sandwich is suciently ‘golden’. The
cooking time required to obtain crispy sandwiches depends on the type of bread, the lling and on your personal
taste.
Use a non-metallic tool (e.g. a wooden spatula) to remove the toasted sandwich. Do not use sharp or abrasive
kitchen tools.
Disconnect the appliance from the mains socket.
Note: During cooking, the green light turns on and o to keep the device at the correct temperature.
WAFFLE
Insert the mains plug into the wall socket. The red power light will come on.
Prepare the batter as indicated in the “WAFFLES RECIPE” paragraph. Preheat the appliance before using it.
Wait until the green light come on. The appliance has reached the correct temperature for use.
Pour the batter, carefully lower the upper cooking plate until the appliance is closed tightly.
The cooking time depends on the variations in the waes recipe.
Slowly open the cover and check the cooking after 3-5 minutes; once each wae is cooked, use a non-metallic
utensil (for example, wooden spatula) to remove it. Do not use sharp or abrasive kitchen utensils.
If you want to cook another portion, close the lid and let the appliance heat up.
When the green light come on, you can pour the batter for the next wae.
After use, disconnect the appliance from the socket.
Note: During the cooking process, the green indicator light turns on and then o to maintain the appliance at the
correct temperature.
Receipe
INGREDIENTS (for about 10 waes)
2 eggs - 80 g sugar - 180 g our - 40 g butter - 180 ml milk - ½ teaspoon baking powder - 1 teaspoon vanilla
extract
PREPARATION
Separate the yolks from the whites and then beat the egg whites to sti peaks with an electric beater.
In a bowl, beat the two egg yolks with the sugar and vanilla extract. Add the melted butter to the yolks and stir.
Add the our and the baking powder and, continuing to stir, slowly pour in the milk.
At this point, also add the sti egg whites.
Let the batter rest for a few minutes and meanwhile allow the plate to heat up.
Pour some of the batter in the plate and cook for about 5 minutes.
REMOVING THE PLATES
Always disconnect the device from the power supply and let it cool down before removing the cooking plates.
Locate the plate release buttons (4) on the front of the device.
Press the button and the plate will detach slightly from the base.
Grasp the plate with two hands, pull it out from under the metal brackets and lift it o the base.
Press the other plate release button to correctly remove the second cooking plate.
ASSEMBLING THE PLATES
Lower plate - insert the plate in the guides located on the rear, press the front of the plate until you hear it click.
Upper plate - insert the plate in the guides located on the lower part, press the upper part of the plate until you
hear it click.
Disconnect the plug from the socket and let the appliance cool down well before cleaning it.
In order to clean the appliance, use a soft or slight damp cloth.
To clean, open the appliance and remove food residues from the plates.
Remove the any traces of food from the plates.
Remove the plates from the device as indicated in the section REMOVING THE PLATES.
Clean the plates with washing-up liquid. Do not use scourers or other abrasive pads which may damage the
non-stick coating.
Do not wash in the dishwasher.
After cleaning and only when completely dry, re-assemble the plates.
Do not use very wet substances, liquids or cloths to prevent water from entering into the appliance and irreparably
damaging it.
NEVER IMMERSE THE APPLIANCE INTO THE WATER.

7
Attention : lire soigneusement les avertissements
contenus dans le mode d’emploi qui fournit des
indications importantes concernant la securité de
l’installation, d’usage et d’entretien.
Instructions importantes à conserver pour tout autre
consultation.
Cet appareil peut être utilisé par les enfants de plus de
8 ans et par les personnes aux capacités physiques,
sensorielles ou mentales réduites ou n’ayant pas
susamment d’expérience ou de connaissance à
condition que ces derniers soient surveillés ou bien
qu’ils aient reçus des instructions sur l’utilisation en
toute sécurité de l’appareilet qu’ils aient compris les
dangers liés à l’utilisation de l’appareil.Les enfants ne
doivent pas jouer avec l’appareil. Les opérations de
nettoyage et d’entretien ne doivent pas être eectuées
par des enfants de moins de 8 ans sans surveillance.
Maintenir l’appareil et le câble hors de la portée des
enfants de moins de 8 ans.
L’appareil ne doit être mis en fonction ni avec un
temporisateur extérieur ni avec un système de
commande à distance séparé.
Les surfaces peuvent devenir tres chiude pendant
l’utilisation.
Pour le nettoyage de l’appareil, se référer au paragraphe
ENTRETIEN.
Si le câble d’alimentation est endommagé, adressez-
vous aux Services Aprés-Vente autorisés par le
constructeur.
N’alimentez pas l’appareil si les plaques ne sont pas
correctement montées.
AR1S15
MODE D’EMPLOI
SANDWICH MAKER

8
FR
Avvertissements
Conservez la garantie, le ticket de caisse et le mode d’emploi pour tout autre consultation.
Après le déballage, vériez l’intégrité de l’appareil. En cas de dommage, n’utilisez pas l’appareil et appelez
subitement le personnel qualié.
Ne laissez jamais les parties de l’emballage auprès des enfants, ne les utilisez pas en tant que jouets: il s’agit
d’un appareil électrique, il ne doit pas être utilisé autrement.
Avant de brancher l’appareil, vériez si la tension de la prise de courant correspond à celle qui est indiquée sur
la plaque.
La sécurité électrique de cet appareil n’est assurée que s’il est branché à une installation de mise à la terre
ecace.
Si la che et la prise ne sont pas compatibles, faites remplacer la prise avec un type adéquat par un personnel
qualié. N’utilisez pas adaptateurs ou rallonges non conformes aux normes de sécurité ou qui dépassent les
limites des débits en valeur du courant.
Il est conseillé de dérouler complètement le câble d’alimentation dans toute sa longueur, en évitant ainsi des
éventuelles surchaues.
Débranchez l’appareil du secteur si vous ne l’utilisez.
Ne tirez pas le câble d’alimentation ou l’appareil pour extraire la che dela prise de courant.
L’utilisation de tout les appareils électriques demande le respect de quelques règles fondamentales, en
particulier:
- Ne pas toucher l’appareil avec les mains mouillées ou humides.
- Ne pas utiliser l’appareil pieds-nus.
- Ne pas soumettre l’appareil aux agents atmosphériques (pluie, soleil).
- Éviter tout type de choc.
Dans le cas de défaut ou de mauvais fonctionnement, débranchez immédiatement l’appareil qui risque d’être
endommagé davantage, et adressez-vous au Service Après-Vente autorisé.
Si vous décidez de ne pas utiliser l’appareil, il est nécessaire de le rendre inopérant en coupant le câble
d’alimentation après l’avoir débranché.
L’appareil a été conçu et réalisé pour fonctionner dans des environnements domestiques et conformément
aux instructions fournies. Par conséquent, tout autre utilisation doit être considérée comme incorrecte et donc
dangereuse.
Pour des raisons de sécurité, n’ouvrez pas l’appareil.
Pendant l’utilisation, l’apareil doit être appuyé sur une surface plate.
Pour empêcher aux enfants de toucher accidentellement les composants chauds, utilisez l’apareil sur des
surfaces qui sont hauts au moins 85 cm.
Laisser libre l’espace autour de toutes les autres surfaces de l’appareil et ne pas superposer d’objets.
Maintenir le câble à distance de toute source de chaleur.
Ne pas poser l’appareil au-dessus ou en dessous d’autres fours, de fours à micro-ondes ou près de cuisinières
à gaz.
Ne pas déplacer l’appareil durant son fonctionnement, lorsqu’il est chaud et lorsqu’il est raccordé à l’alimentation.
Informations techniques
1 - Crochet ouverture/fermeture plaques
2 - Voyant thermostat
3 - Voyant allumage
4 - Bouton de dégagement de la plaque (intérieur)
Dates tecniques indiqués sur l’appareil
FR
FR
Mode d’Emploi
Première utilisation
Avant d’utiliser l’appareil pour la première fois, faites-le fonctionner à vide (pendant environ 3 minutes, jusqu’à
ce que le voyant vert s’éteigne) dans une pièce bien ventilée an d’éliminer les odeurs et les vapeurs dues aux
résidus de traitement sur les parties internes de l’appareil.
Débranchez la che de la prise secteur et laissez refroidir l’appareil.
Remarque : lors de la première utilisation de cet appareil, vous remarquerez peut-être de la fumée.
Ceci est normal en raison du chauage initial des composants internes.
Nettoyez les plaques selon les instructions de la section ENTRETIEN.
1
2
3
4

9
FR
Entretien
SANDWICH GRILLÉ
Étaler légèrement les plaques de cuisson avec un peu de beurre ou d’huile .
Insérez la che dans la prise. Le voyant lumineux rouge s’allume.
Préparez le pain et remplissez le sandwich pendant le préchauage de l’appareil.
Attendez que le voyant vert s’allume. L’appareil a atteint la bonne température d’utilisation.
Posez les tranches de pain avec le côté sur la plaque de cuisson inférieure, placez votre garniture et couvrez
avec les secondes tranches de pain. Pour avoir des résultats optimaux, les garnitures doivent être bien placées
entre les tranches de pain.
Abaissez délicatement la plaque de cuisson supérieure sur le pain jusqu’à ce que l’appareil soit correctement
serré.
Ouvrez l’appareil au bout de 3 à 5 minutes et vériez si le sandwich grillé est susamment “brun”. Le temps
de cuisson nécessaire pour obtenir des sandwichs croquants dépend du type de pain, de la garniture et de vos
goûts personnels.
Utilisez un outil non métallique (par exemple, une spatule en bois) pour enlever le sandwich grillé. N’utilisez pas
d’ustensiles de cuisine coupants ou abrasifs.
Débranchez l’appareil de la prise de courant.
Remarque: pendant la cuisson, le voyant vert s’allume et s’éteint pour maintenir l’appareil à la bonne température.
WAFFLE
Branchez la che de réseau dans la prise de courant. Le témoin d’alimentation rouge s’allume.
Préparez la préparation comme indiqué au paragraphe “RECETTE WAFFLE” Réchauez l’appareil avant de
l’utiliser.
Attendez que la lumière verte s’allume. L’appareil a atteint la température correcte d’utilisation.
Versez la préparation, abaissez la plaque de cuisson supérieure jusqu’à ce que l’appareil soit bien serré.
Le temps de cuisson dépend des variantes dans la recette des wae,
Ouvrez lentement le couvercle et contrôlez la cuisson après 3-5 minutes ; une fois la cuisson terminée, utilisez
un ustensile non métallique (par ex. une spatule en bois) pour retirer les aliments. N’utilisez pas d’ustensiles de
cuisine tranchants ou abrasifs.
Si vous désirez cuire une autre portion, fermez le couvercle et laissez l’appareil se réchauer.
Quand la lumière verte s’allume, il est possible de verser la préparation du prochain wae.
Après l’usage, débranchez l’appareil de la prise de courant.
Note: Durant la cuisson, le témoin vert s’allume et s’éteint pour maintenir l’appareil à la température correcte.
Recette.
INGRÉDIENTS (pour environ 10 wae)
2 œufs - 80 g de sucre - 180 g de farine - 50 g de beurre - 180 ml de lait - ½ cuillère à café de levure
Une cuillère à café d’extrait de vanille
PRÉPARATION
Séparez les jaunes d’œuf aux blancs, puis montez en neige les blancs avec le fouet électrique.
Dans une tasse, battez les deux jaunes d’œuf avec le sucre et l’extrait de vanille. Ajoutez aussi le beurre fondu
et mélangez le tout.
Ajoutez la farine et la levure et, en continuant de mélanger, versez le lait par let.
Ajoutez alors les blancs montés en neige.
Laissez reposer la préparation pendant quelques minutes pendant que vous réchauez la plaque.
Versez un peu de préparation sur la plaque et faites cuire pendant 5 minutes environ.
RETRAIT DES PLAQUES
Débranchez toujours l’appareil et laissez-le refroidir avant de retirer les plaques de cuisson.
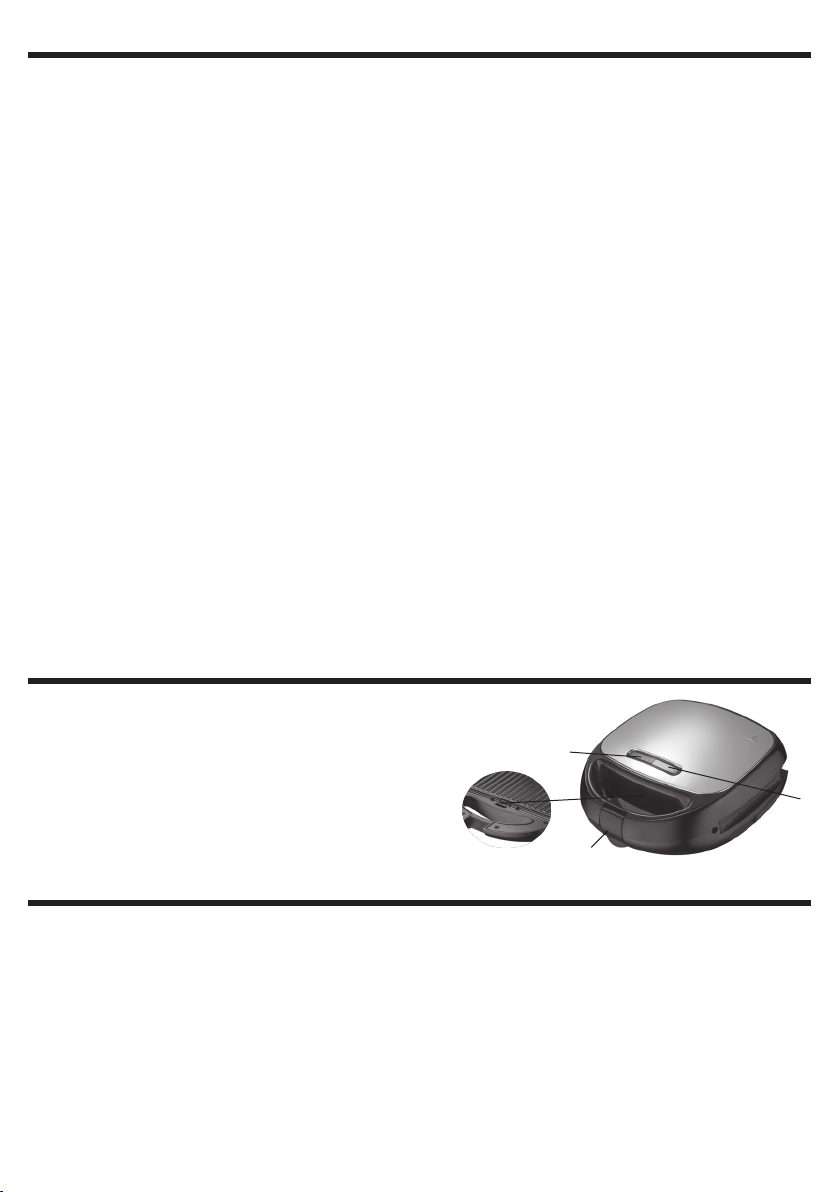
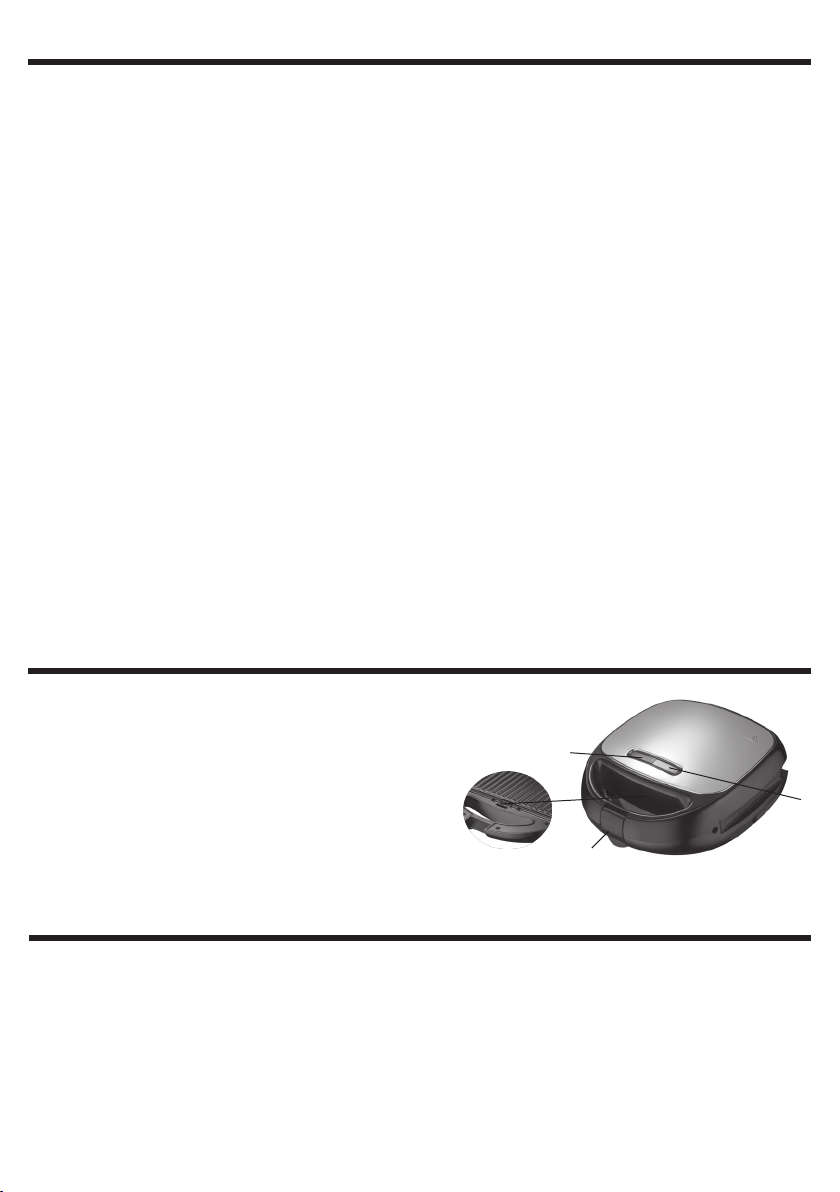
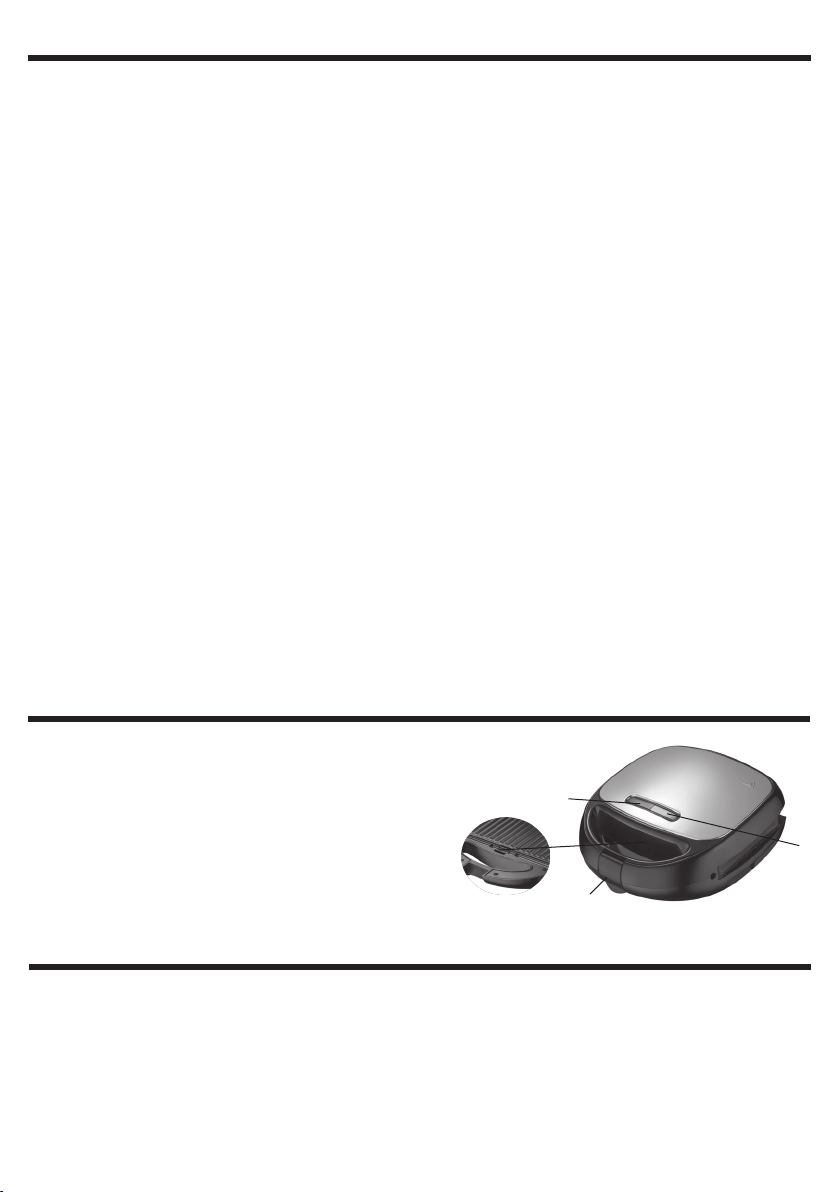
Repérez les boutons de déverrouillage de la plaque (4) à l’avant de l’appareil.
Appuyez sur le bouton et la plaque s’ouvrira légèrement à partir de la base.
Saisissez la plaque à deux mains, retirez-la de dessous les supports métalliques et soulevez-la de la base.
Appuyez sur le bouton de dégagement de l’autre plaque pour retirer cette dernière correctement.
MONTAGE DES PLAQUES
Plaque inférieure - insérez la plaque dans les guides situés à l’arrière ; appuyez sur le devant de la plaque
jusqu’à ce que vous entendiez un déclic.
Plaque supérieure - insérez la plaque dans les guides situés dans la partie inférieure ; appuyez sur le haut de
la plaque jusqu’à ce que vous entendiez un déclic.
Débranchez l’appareil et laissez refroidir avant d’eectuer toute opération de nettoyage.
Pour le nettoyage de l’appareil, utilisez un chion légèrement humide.
Éliminez les résidus alimentaires des plaques.
Retirez les plaques de l’appareil comme décrit au paragraphe « RETRAIT DES PLAQUES ».
Lavez les plaques avec du produit vaisselle ; n’utilisez pas de laine d’acier ni d’autres produits abrasifs
susceptibles d’endommager le revêtement antiadhésif.
Ne pas laver au lave-vaisselle.
Après le nettoyage, réassemblez les plaques (voir ASSEMBLAGE DES PLAQUES) et le plateau, une fois
celles-ci parfaitement sèches.
N’IMMERGEZ JAMAIS L’APPAREIL DANS L’EAU.

Achtung : lesen sie die in diesem heftchen stehenden
anweisungen sorgfältig.
Sie geben ihnen nützliche hinweise hinsichtlich
der sicherheit des gerätes, der anwendung und der
instandhaltung.Wichtigehinweisebitteaufbewahren
für späteres nachlesen.
Dieses gerät kann sowohl von kindern ab 8 jahren alsauch
von körperlich, sensorisch oder geistig eingeschränkten
personen bzw. Von personen ohne erfahrung oder
ohne wissen genutzt werden, wenn sie von einer
geschulten person beaufsichtigt werden oder wenn sie
anweisungen zum sicheren einsatz des gerätes erhalten
haben und wenn sie die entsprechenden gefahren
verstanden haben. Kinder dürfen mit dem gerät nicht
spielen. Reinigungs- und wartungsarbeiten dürfen nur
von kindern durchgeführt werden, wenn diese älter als
8 jahre sind und während der arbeiten beaufsichtigt
werden.Gerät und kabel müssen ausser reichweite für
kinder unter 8 jahren platziert werden.
Die oberächen erhitzen sich während des
gebrauchs.
Für die Reinigung des Geräts, siehe Abschnitt WARTUNG
Das gerät darf nicht mittels einer externen zeitschaltuhr
oder einem separaten fernsteuersystem betrieben
werden.
Sollte das Netzkabel beschädigt sein, so darf es nur in
vom Hersteller dazu ermächtigten Service-Centern bzw.
Service-Werkstätten ausgetauscht werden.
Schließen Sie das Gerät nicht an das Stromnetz an,
wenn die Platten nicht richtig montiert sind.
AR1S15
BEDIENUNGSANLEITUNG
SANDWICHMAKER
10

DE
Anmerkungen
Garantiebescheinigung, skalische Quittung und Bedienungsanleitung für jede spätere Konsultation bitte
aufbewahren.
Nach Entfernen der Verpackung vergewissere man sich der Integrität des Gerätes und sollte man bei dieser
Überprüfung sichtbare Beschädigungen festestellen, das Gerät nicht benutzen und sich direkt an qualiziertes
Fachpersonal wenden.
Keinerlei Verpackungsteile für Kinder zugänglich zurücklassen, das Gerät auch nicht als ein Spielzeug
verwenden: es ist ein Elektrogerät und als solches zu behandeln.
Bevor man das Gerät an die Netzspannung anschließt, stelle man sicher daß die an der Steckdose liegende
Spannung auch derjenigen des Typenschildes des Gerätes entspricht.
Die Sicherheit dieses Gerätes ist nur dann gewährleistet wenn das Gerät auch an eine leistungsfähige
Erdungsanlage angeschlossen ist.
Sollten Stecker und Steckdose nicht kompatibel sein, so lasse man die Steckdose durch eine passende
Steckdose ersetzen. Diese Arbeit ist von einem qualizierten Fachmann durchzuführen. Keine Adapter oder
Verlängerungsschnuren verwenden die nicht den Forderungen der gegenwärtig geltenden Sicherheitsnormen
genügen oder die die Stromgrenzwerte überschreiten.
Trennen Sie das Gerät vom Stromnetz, wenn es nicht verwendet wird.
Am Netzkabel oder am Gerät selbst nicht ziehen um Stecker aus der Steckdose herauszuziehen.
Der Gebrauch irgendeines Elektrogerätes erfordert immer die Beachtung einiger grundlegenden Regeln und
zwar insbesondere:
- Man darf niemals das Gerät mit nassen oder feuchten Händen berühren.
- Das Gerät niemals barfuß benutzen.
- Das Gerät nicht den Witterungseinüssen ausgesetzt lassen (Regen, Sonnenstrahlung).
- Gerät nicht Schlag-oder Stoßbeanspruchungen aussetzen.
Es ist zu empfehlen, das Netzkabel für seine ganze Länge abzuwickeln um somit eventuelle Überhitzungen zu
vermeiden.
Sollte man sich dafür entscheiden diesen Gerätetyp nicht mehr zu benutzen, so ist es angebracht das Gerät
unbenutzbar zu machen durch Abschneiden des Netzkabels, natürlich nach dessen Abtrennung von der
Steckdose.
Bei Erscheinen einer Störung bzw. einem nicht einwandfreien Betrieb des Gerätes hat man sofort den Stecker
zu ziehen, keinerlei Eingri am Gerät vorzunehmen und sich an eine zugelassene Service-Werkstatt zu wenden.
Das Gerät wurde für die Verwendung in häuslicher Umgebung entworfen und gebaut, gemäß den Angaben in
der Anleitung; deshalb gilt jede andere Verwendung als unsachgemäß und daher gefährlich.
Aus Sicherheitsgründen darf das Gerät nicht geönet werden.
Während des Gebrauches ist das Gerät auf einer ebenen Fläche zu halten.
Zur Vermeidung von unbeabsichtigten Berührungen mit heißen Teilen seitens Kindern sollte das Gerät auf
Grundplatten gesetzt werden deren Abstand vom Boden mindestens 85 cm betragen muß.
Den Raum um alle anderen Oberächen des Gerätes freihalten und keine Gegenstände übereinanderlegen.
Halten Sie das Kabel von Wärmequellen fern.
Stellen Sie das Gerät nicht auf oder unter andere Backöfen, Mikrowellenöfen oder in die Nähe von Gasherden.
Das Gerät nicht bewegen, wenn es in Betrieb ist, wenn es heiß ist und wenn es an die Stromversorgung
angeschlossen ist.
DE
Technische informationen
1 - Kopplung Önen/Schließen der Platten
2 - Thermostat-Anzeige
3 - Kontrolleuchte der Zündung
4 - Plattenfreigabetaste (innen)
Technischen Daten auf dem Gerät geleigt.
11
DE
Gebrauchsanweisung
Erste Anwendung
Bevor Sie das Gerät zum ersten Mal in Betrieb nehmen, betreiben Sie es in einem gut belüfteten Raum leer (etwa
2 Minuten lang, bis das grüne Licht erlischt), um Gerüche und Dämpfe aufgrund von Verarbeitungsrückständen
an den Innenteilen des Geräts zu beseitigen.
Ziehen Sie den Stecker aus der Steckdose und lassen Sie das Gerät abkühlen.
Hinweis: bei der ersten Verwendung dieses Geräts kann es zu Rauchentwicklung kommen.
Dies ist aufgrund der ersten Erwärmung der inneren Bauteile normal.
Reinigen Sie die Platten wie im Abschnitt WARTUNG angegeben.
1
2
3
4

12
DE
Wartung
Vor dem Reinigen des Gerätes hat man immer das Netzkabel aus der Steckdose herauszuziehen und Gerät
völlig abkühlen lassen. Zum Reinigen des Gerätes einen weichen und leicht feuchten Lappen benutzen.
Befreien Sie die Platten von Speiseresten.
Entfernen Sie die Platten aus dem Gerät, wie im Abschnitt ENTFERNEN DER PLATTEN angegeben.
Reinigen Sie die Platten mit Spülmittel; verwenden Sie keine Stahlwolle oder andere scheuernde Utensilien, die
die Antihaftbeschichtung beschädigen könnten.
Nicht im Geschirrspüler reinigen.
Montieren Sie die Platten nach der Reinigung erst dann wieder, wenn sie komplett trocken sind.
Verwenden Sie keine nassen Stoe, Flüssigkeiten oder sehr nasse Tücher, da eventuell eindringendes Wasser
das Gerät irreparabel beschädigen kann.
NIEMALS DAS GERÄT IN WASSER TAUCHEN.
GETOASTETES SANDWICH
Die Röstplatten leicht mit Butter oder Speiseöl einfetten.
Den Stecker in die Steckdose stecken. Die rote Betriebsleuchte leuchtet auf.
Das Brot vorbereiten und belegen, während das Gerät vorgeheizt wird.
Warten, bis das grüne Licht leuchtet auf. Das Gerät hat die richtige Betriebstemperatur erreicht.
Die erste Brotscheiben auf die untere Röstplatte legen, belegen und mit der zweiten Brotscheibe abdecken.
Für ein optimales Ergebnis, muss der Belag gut zwischen den Brotscheiben positiert werden.
Die obere Röstplatte sorgsam auf das Brot absenken, bis das Gerät gut geschlossen ist.
Das Gerät nach 3-5 Minuten önen und kontrollieren, ob das Sandwich “braun” genug ist. Die erforderliche Röstzeit
für ein knuspriges Sandwich hängt von der Brotsorte, vom Belag und von ihrem eigenen Geschmack ab.
Ein nicht metallisches Werkzeug benutzen (z.Bsp. Holzspatel), um das getoastete Sandwich zu entfernen. Keine
scharfen oder scheuernden Küchenutensilien verwenden.
Das Gerät von der Stromversorgung trennen.
Anm.: Während dem Toasten geht das grüne Licht an und erlischt, um das Gerät auf der richtigen Temperatur zu
halten.
WAFFELEISEN
Stecken Sie den Stecker in die Stromsteckdose. Die rote Betriebsleuchte leuchtet auf.
Bereiten Sie den Teig nach den Anleitungen im Abschnitt “WAFFELREZEPT” zu. Heizen Sie das Gerät vor dem
Gebrauch vor.
Warten Sie, bis das grüne Lämpchen leuchtet auf. Das Gerät hat die korrekte Gebrauchstemperatur erreicht.
Gießen Sie den Teig auf die untere Platte und klappen Sie die oberer Platte herunter, bis das Gerät dicht verschlossen
ist.
Die Backzeit hängt von dem Waelteigrezept ab.
Önen Sie nach 3-5 Minuten langsam den Deckel und kontrollieren Sie den Garpunkt. Sobald die Wael fertig
ist, nehmen Sie ein nicht metallenes Kochutensil (z. B. einen Holzpfannenheber), um die Wael herauszuholen.
Verwenden Sie keine scharfen oder scheuernden Kochutensilien.
Wenn Sie eine weitere Waelportion backen möchten, schließen Sie den Deckel und lassen Sie das Gerät vorheizen.
Wenn das grüne Lämpchen leuchtet auf, kann man den Teig für die nächste Wael auf die Platte gießen.
Nach dem Gebrauch des Geräts den Stecker aus der Netzsteckdose ziehen.
Hinweis: Während des Backens schaltet sich das grüne Lämpchen ein und aus, damit das Gerät die korrekte
Temperatur behält.
Rezept.
ZUTATEN (für ungefähr 10 Waeln)
2 Eier - 80 g Zucker - 180 g Mehl - 50 g Butter - 180 ml Milch - 1/2 Teelöfel Backpulver - Ein Teelöel Vanilleextrakt
ZUBEREITUNG
Trennen Sie das Eigelb vom Eiweiß und schlagen Sie das Eiweiß mit einem elektrischen Rührgerät zu Schnee auf.
Verrühren Sie in einer Schüssel die beiden Eigelbe mit dem Zucker und dem Vanilleextrakt . Geben Sie die
geschmolzene Butter hinzu und verrühren alles zu einer cremigen Masse.
Geben Sie unter Rühren nach und nach das Mehl mit dem Backpulver und anschließend die Milch dazu.
Zum Schluss rühren Sie den Eischnee darunter.
Lassen Sie den Teig einige Minuten lang ruhen, während die Platte heiß wird.
Gießen Sie langsam etwas Teig auf die Platte und lassen Sie die Wael für ungefähr 5 Minuten backen.
ENTFERNEN DER PLATTEN
Ziehen Sie immer den Netzstecker und lassen Sie das Gerät abkühlen, bevor Sie die Kochplatten entfernen.
Suchen Sie die Tasten zum Lösen der Platte (4) an der Vorderseite des Geräts.
Drücken Sie die Taste und die Platte löst sich leicht von der Basis.
Nehmen Sie die Platte mit zwei Händen, ziehen Sie sie unter den Metallbügeln heraus und heben Sie sie von der
Basis.
Drücken Sie die Loslösetaste der anderen Platte, um diese korrekt zu entfernen.
MONTAGE DER PLATTEN
Untere Platte - führen Sie die Platte in die Schienen des hinteren Bereichs ein; drücken Sie gegen die Vorderseite der
Platte, bis sie einrastet.
Obere Platte - führen Sie die Platte in die Schienen des unteren Bereichs ein; drücken Sie gegen die Oberseite der
Platte, bis sie einrastet.

13
Atencion : leer atentamente las advertencias contenidas
en el presente folleto,ya que contienen importantes
indicaciones acerca de laseguridad de instalación, uso
y mantenimiento.
Instrucciones importantes que hay que conservar para
sucesivas consultas.
Este aparato puede ser utilizado por niños de 8 años en
adelante y por personas con las capacidades físicas,
sensoriales o mentales disminuidas o con falta de
experiencia o conocimiento siempre y cuando se haya
asegurado su adecuada vigilancia o hayan recibido
instrucciones acerca del uso seguro del aparato y hayan
comprendido los correspondientes peligros. Los niños
no deben jugar con el aparato. Las operaciones de
limpieza y mantenimiento no deben ser efectuadas por
niños a menos que no tengan más de 8 años y estén
vigilados.
Mantener el aparato y su cable fuera del alcance de los
niños menores de 8 años.
Las supercies pueden calentarse durante el uso.
El aparato no debe ser puesto en funcionamiento
mediante un temporizador externo o con un sistema de
mando a distancia separado.
Para la limpieza del aparato, hacer referencia al párrafo
MANTENIMIENTO.
Si se rompe el cable de alimentación, debe ser
substituido exclusivamente por los centros de asistencia
autorizados por el fabricante.
No suministrar energía al aparato si las placas no están
montadas correctamente.
AR1S15
FOLLETO DE INSTRUCCIONES
SANDWICHERA

14
ES
Advertencias
Conservar la garantía, el recibo y el presente folleto de instrucciones para sucesivas consultas.
Después de haber sacado el embalaje asegurarse de la integridad del aparato y en caso de visibles daños no
utilizarlo y contactar con el establecimiento distribuidor.
No dejar partes del embalaje al alcance de los niños. El aparato no se debe utilizar como un juguete; es un
aparato eléctrico y así debe ser considerado.
Antes de conectar el aparato asegurarse de que la tensión presente en la toma de corriente corresponda a la
indicada en las características nominales.
La seguridad eléctrica de este aparato se garantiza solamente cuando está conectado con una ecaz puesta
a tierra.
En el caso de que la toma y el enchufe no sean compatibles, hacer reemplazar la toma por personal calicado
con una del tipo adecuado.
No utilizar adaptadores o extensiones que no correspondan a las vigentes normativas de seguridad o que
superen los límites de carga de la corriente.
Se aconseja desenrollar completamente el cable de alimentación en toda su longitud evitando de este modo
eventuales recalentamientos.
Desconectar el aparato de la red de alimentación cuando no se utilice.
No tirar el cable de alimentación o el mismo aparato para desconectar el enchufe de la toma de corriente.
El uso de cualquier aparato eléctrico requiere el respeto de algunas reglas fundamentales, en particular:
- No tocar el aparato con las manos mojadas o húmedas.
- No dejar el aparato expuesto a la acción de agentes atmosféricos (lluvia, sol).
- No someterlo a choques.
En caso de que se produjera un desperfecto o un funcionamiento anómalo del aparato desconectar
inmediatamente el enchufe, no abrir el aparato y contactar con el establecimiento distribuidor.
En caso de que no se desee utilizar más este tipo de aparato, es necesario inactivarlo cortando el cable de
alimentación naturalmente después de haber desconectado la toma de corriente.
El aparato se ha fabricado y concebido para funcionar en ambientes domésticos de acuerdo con lo indicado en
las instrucciones, así pues, cualquier otro uso debe considerarse impropio y, por tanto, peligroso.
Por motivos de seguridad, no es posible abrir el aparato.
Durante el uso colocar el aparato en una supercie plana.
Para evitar que los niñios toquen accidentalmente partes calientes, utilice el aparato en supercies que son por
lo menos 85 cm altos.
Dejar libre el espacio alrededor de las demás supercies del aparato y no sobreponer objetos.
Mantener el cable lejos de fuentes de calor.
No ubicar el aparato encima o debajo de otros hornos convencionales, microondas o cerca de quemadores a
gas.
No movilizar el aparato cuando funciona, cuando está caliente y cuando está conectado a la alimentación.
ES
Características técnicas
1 - Enganche apertura/cierre placas
2 - Indicador termostato
3 - Indicador de encendido
4 - 4 - Botón de liberación de la placa (interior)
Datos de placa sobre el aparato.
ES
Istrucciones de uso
Primer uso
Antes de utilizar el aparato por primera vez, hacer funcionar el aparato vacío (durante unos 2 minutos, hasta
que se apague la luz verde) en un lugar bien ventilado para eliminar los olores y humos debidos a cualquier
residuo de elaboración en las partes internas del aparato.
Desconectar el enchufe de la toma de corriente y dejar que el aparato se enfríe.
Nota: cuando se utiliza esta unidad por primera vez, puede que note humo.
Esto es normal debido al calentamiento inicial de los componentes internos.
Limpiar las placas como se especica en el párrafo MANTENIMIENTO.
BOCADILLO TOSTADO
Extienda una ligera capa de mantequilla o de aceite de cocina por la placa de cocción.
Introduzca la clavija en la toma de corriente. El indicador de alimentación rojo se ilumina.
Prepare el pan y llene el bocadillo mientras el aparato se calienta.
1
2
3
4

15
ES
Mantenimiento
Este aparato no precisa especiales operaciones de mantenimiento.Antes de limpiar el aparato desconectarlo
de la toma de corriente y dejarlo enfriar completamente.
Para limpiar el aparato utilizar un paño suave y ligeramente humedecido.
Retirar los residuos alimenticios de las placas.
Retirar las placas del aparato como se indica en la sección EXTRACCIÓN DE LAS PLACAS.
Lavar los platos con detergente para platos; no utilizar almohadillas de lana u otros medios abrasivos que
puedan dañar el revestimiento antiadherente.
No lavar en el lavavajillas.
Después de la limpieza, sólo cuando estén completamente secas, volver a colocar las placas.
No utilizar sustancias, líquidos o paños excesivamente mojados ya que las posibles inltraciones podrían dañar
el aparato de modo irreparable.
NO SUMERGIR JAMAS EL APARATO EN EL AGUA.
Espere a que se ilumina la luz verde. El aparato ha alcanzado la temperatura correcta para el uso.
Ponga las rodajas de pan sobre la placa inferior de cocción, añada el relleno y tape con la segunda rodaja de
pan.
Para obtener un resultado óptimo, el relleno debe colocarse bien en el interior de las rodajas de pan.
Baje cuidadosamente la placa de cocción superior hacia el pan, hasta que el aparato quede bien apretado.
Abra el aparato al cabo de 3-5 minutos y verique si el bocadillo tostado está sucientemente «marrón». El
tiempo de cocción necesario para obtener unos bocadillos crujientes depende del tipo de pan, del relleno y del
gusto personal.
Use un utensilio no metálico (por ejemplo, una espátula de madera) para sacar el bocadillo tostado. No use
utensilios de cocina cortantes ni abrasivos.
Desenchufe el aparato.
Nota: Durante la cocción, el indicador verde se enciende y se apaga para mantener el aparato a la temperatura
correcta.
WAFFLE
Introduzca la clavija de red en la toma de corriente. El indicador luminoso de alimentación rojo se ilumina.
Prepare la mezcla como está indicado en el párrafo “RECETAS WAFFLE”. Precaliente el aparato antes de
utilizarlo.
Espere hasta que la luz verde se ilumina. El aparato ha alcanzado la temperatura correcta para el uso.
Vierta la mezcla, baje cuidadosamente la placa de cocción superior hasta que el aparato no esté bien cerrado.
El tiempo de cocción depende de las variantes en la receta de los wae.
Abra lentamente la tapa y controle la cocción después de 3-5 minutos; una vez terminada utilice un utensilio
no metálico (por ej. espátula de madera) para remover el alimento. No utilice utensilios de cocina cortantes o
abrasivos.
Si se desea cocinar otra porción, cierre la tapa y deje precalentar el aparato.
Cuando la luz verde se ilumina, es posible verter la mezcla del wae sucesivo.
Después del uso, desconecte el aparato de la toma de corriente.
Nota: Durante la cocción, el indicador luminoso verde se enciende y se apaga para mantener el aparato en la
temperatura correcta.
Receta.
INGREDIENTES (para aproximadamente 10 waes)
2 huevos - 80 gr de azúcar - 180 gr de harina - 50 gr de mantequilla - 180 ml de leche - ½ cucharadita de
levadura.
Una cucharadita de extracto de vainilla
PREPARACIÓN
Separe las yemas de las claras y montar a punto de nieve las claras con el batidor eléctrico.
En un bol, batir las dos yemas con el azúcar y el extracto de vainilla. Agregue también la mantequilla derretida
y mezcle todo.
Agregue también la harina y la levadura y, continuado a mezclar, vierta en hilo también la leche.
A este punto, agregue también las claras montadas a punto de nieve.
Deje reposar la mezcla obtenida por algunos minutos y mientras tantos caliente la placa.
Vierta poco a poco la mezcla en la placa y haga cocer por aproximadamente 5 minutos.
EXTRACCIÓN DE LAS PLACAS
Desconectar siempre el aparato y dejarlo que se enfríe antes de retirar las placas de cocción.
Localizar los botones de desbloqueo de la placa (4) en la parte delantera del aparato.
Presionar el botón y la placa se abrirá ligeramente desde la base.
Agarrar la placa con las dos manos, tirar de ella para sacarla de abajo de los soportes metálicos y levantarla
de la base.
Presionar el otro botón de liberación de la placa para retirar la otra placa de cocción correctamente.
MONTAJE DE LAS PLACAS
Placa inferior - introducir la placa en las guías colocadas en la parte posterior; presionar la parte frontal de la
placa hasta que haga clic.
Placa superior - introducir la placa en las guías colocadas en la parte inferior; presionar la parte superior de la
placa hasta que haga clic.

16
Fygyelem : olvassa el gyelmesen a mellékelt
használati útmutatót a készülék biztonságos
használatához és a megfelelő karbantartás érdekében
ez az útmutató fontos információkattartalmaz kérjük
őrizze meg.
Ezt a készüléket nem használhatják 8 évesnél atalabb
gyermekek, korlátozott zikai, mentális vagy érzékelési
képességű személyek, továbbá olyan személyek, akik
nem rendelkeznek tapasztalattal vagy kellő ismerettel
a használat kapcsán, hacsak nincsenek megfelelő
felügyelet alatt, vagy nem kaptak tájékoztatást a
biztonságos használattal kapcsolatban, és meg nem
értették a vonatkozó veszélyeket.Gyermekek nem
játszhatnak a készülékkel. A karbantartást és a tisztítást
nem végezhetik gyermekek, kivéve, ha a gyermekek
betöltötték 8. Életévüket és felügyelet alatt vannak.
Tartsa a készüléket és a tápkábelt 8 évesnél
atalabb gyermekek által nem elérhető helyen.
A készüléket nem szabad külső időzítővel és külön
távirányítóval használni.
A felületek használat során felmelegedhetnek.
A készülék tisztításához hivatkozzon a KARBANTARTÁS
c. szakaszra.
Ha a hálózati csatlakozó megsérült annak cseréje, csak
szakember általa megfelelő szervizben lehetséges.
Ne kapcsolja be a készüléket, ha a főzőlapok nincsenek
helyesen beszerelve.
AR1S15
HASZNÁLATI UTMUTATÓ
SZENDVICS-SÜTŐ

HU
Figyelmeztetés
A vásárláskor kapott számlát, a jótállást és a használati útmutatót őrizze meg esetleges későbbi felhasználásra.
A csomagolás eltávolítása után győződjön meg arról, hogy a készüléken nem található sérülés.
Látható sérülés esetén,ne használja azt, minden esetben forduljon szakemberhez.
A csomagolás egyes részeit ne hagyja kisgyermek számára elérhető helyen.
A készülék nem gyerekjáték, elektromos berendezés, ezért fontos a biztonsági előírások betartása.
A csatlakoztatás előtt győződjön meg arról, hogy a hálózati feszültség megegyezik-e a készülék adattábláján
található adatokkal.
Ha a hálózati csatlakozó nem megfelelő, ezt csak hozzáértő,képzett szakember által lehet kicserélni. Ne
használjonolyan adaptert vagy hosszabbító kábelt, amely nem felel meg a biztonsági el őírásoknak vagy nem
rendelkezik a készülék áramellátáshoz szükséges kapacitással.
A készülék esetleges meghibásodása esetén, elsőként húzza ki a dugót a csatlakozó aljzatból. Ne próbálja
megjavítani a készüléket, minden esetben forduljon a gyártó által megjelölt szervizhez.
Ha a megfelelő és rendeltetészerű használat ellenére a készülék meghibásodna soha ne próbálja megjavítani,
minden esetben forduljon a gyártó által megjelölt szervizhez, ahol megfelelő szakembereket talál a hiba miel
őbbi szakszeru kijavítására.
Az elektromos készülékekre vonatkozóan vannak bizonyos általános szabályok, melyek betartása minden
esetben kötelező:
- Soha ne érintse a készüléket vízes vagy nedves kézzel!
- Ne tegye ki a készüléket széls őséges id őjárásnak! (erős napsütés, eső).
- Ne tegye ki a berendezést erős ütésnek vagy más durva zikai behatásoknak!
Amennyiben meghibásodást tapasztal, ne próbálja megjavítani a készüléket, minden esetben forduljon
szakemberhez a gyártó által megjelölt szervizben.
Ha a készüléket már soha többet nem használja, húzza ki a dugót az elektromos hálózatból, majd vágja le a
csatlakozó kábelt.
Húzza ki a kábelt a teljes hosszában a túlmelegedés elkerülése érdekében.
A készüléket az utasításokban jelöltek értelmében háztartási környezetben történő használatra tervezték és
gyártották ; ezért minden ettől eltérő használat helytelennek, és veszélyesnek minősül.
Ne használja a készüléket kültéren.
Ne helyezze a készüléket egyenetlen vagy nem hőálló felületre.
A készülék forró részei a gyermekek számára veszélyesek, ezért az esetleges sérülések elkerülése érdekében,
helyezze el úgy azt, hogy az a padlótól legalább 85 cm magasságban legyen.
A készülék egyéb felületei körül hagyja szabadon a területet és ne tegyen rá tárgyakat.
Tartsa távol a kábelt.
Ne helyezze a készüléket vagy más mikrohullámú sütők kemencék gáz tűzhelyek közelében.
Ne mozgassa a készüléket üzemelés közben, amikor meleg és amikor hálózatra van kapcsolva.
Műszaki adatok HU
1 - Lemez nyitó/záró akasztó
2 - Termosztát jelzőfény
3 - Bekapcsolást jelző fény
4 - Lemezkioldó gomb (belül)
A műszaki adatok a készüléken vannak feltüntetve.
17
Használati utmutató HU
Első használat
A készülék első alkalommal történő használata előtt üzemeltesse a készüléket üresen (lb. 2 percig, amíg a
zöld fény fel nem gyullad), jól szellőző helyiségben, a készülék belső részeire lerakódott, a megmunkálásból
származó esetleges maradványok által okozott szagok és füstök eltávolítása érdekében.
Húzza ki a villásdugót a fali csatlakozóból és hagyja a készüléket kihűlni.
Megj.: a készülék első alkalommal történő használatakor füstöt lehet észlelni.
Ez egy normális jelenség, melyet a belső részek kezdeti felmelegedése okoz.
Tisztítsa meg a főzőlapokat a KARBANTARTÁS szakaszban leírtakat követve.
MELEGSZENDVICS
A főzőlemezeket enyhén kenje meg olajjal vagy vajjal.
Illessze a villásdugót a fali csatlakozóba. A piros áramellátást jelző fény jelzőfény felgyulladnak.
Készítse elő a kenyeret és töltse meg, miközben a készülék előmelegszik.
Várjon, amíg a zöld jelzőfény felgyulladnak. A készülék elérte a működéséhez szükséges hőmérsékletet.
Fektesse a kenyérszeleteket az alsó főzőlemezre, helyezze rá a tölteléket és fedje le a második szelet kenyérrel.
Az optimális eredmény érdekében a tölteléket a kenyérszeletek belsejébe kell helyezni.
1
2
3
4

18
HU
Karbantartás
Óvatosan engedje a felső főzőlemezt a kenyérre, amíg a készülék megfelelően nem záródik.
3-5 perc elteltével nyissa ki a készüléket és ellenőrizze, hogy a kenyér elég “barna-e”. A ropogós kenyér
elkészítéséhez szükséges idő a kenyér típusától, a tölteléktől és az egyéni ízléstől függ,
Ne fém eszközt használjon (pl. fakanalat) a melegszendvics kivételéhez. Ne használjon éles vagy karcolást
okozó konyhai eszközöket.
Húzza ki a készüléket a fali konnektorból.
Megj.: Sütés közben a zöld jelzőfény felgyullad és kialszik, hogy a készüléket mindig a megfelelő hőmérsékleten
tartsa.
GOFRI
Dugja a hálózati villásdugót a fali csatlakozóaljzatba. A piros áramellátást jelző fény jelzőfény felgyulladnak.
Készítse el a keveréket a “GOFRI KÉSZÍTÉSE” c. szakaszban leírtak szerint. Használat előtt melegítse elő a
készüléket.
Várjon, amíg a zöld jelzőfény felgyulladnak. A készülék elérte a használathoz szükséges hőmérsékletet.
Öntse a keveréket, óvatosan engedje le a felső rácsot, amíg a készülék nincs jól lezárva.
A sütési idő a gofri recept variációktól függ.
Lassan nyissa ki a fedelet és 3-5 perc elteltével ellenőrizze a sütési fokot; miután a gofri kész, használjon
egy nem fém szerszámot (pl. falapátot) az étel eltávolításához. Ne használjon éles vagy karcoló konyhai
szerszámokat.
Ha szeretne egy újabb adag gofrit készíteni, zárja le a fedelet és hagyja előmelegedni a készüléket.
Amikor a zöld jelzőfény felgyulladnak, be lehet önteni a következő gofri készítéséhez szükséges keveréket.
Használat után áramtalanítsa a készüléket.
Megj.: Sütés közben a zöld jelzőfény felgyullad és kialszik annak érdekében, hogy a készüléket a helyes
hőmérsékleten tartsa.
Recept.
ÖSSZETEVŐK (kb. 10 gofrihoz)
2 tojás - 80 gr cukor - 180 gr liszt - 50 gr vaj - 180 ml tej - ½ kanál élesztő
Egy kanál vanília-kivonat
ELKÉSZÍTÉS
Válassza szét a tojássárgát a fehérjétől és egy elektromos keverővel verje kemény habbá a tojásfehérjéket.
Egy tálban keverje össze a 2 tojássárgát a cukorral és a vanília-kivonattal. Adja hozzá a felolvasztott vajat és
keverje össze.
Adja hozzá a lisztet és az élesztőt, és folyamatosan keverje, majd lassan öntse hozzá a tejet.
Ekkor adja hozzá a habbá vert tojásfehérjéket.
Hagyja pihenni a keveréket néhány percig, közben melegítse fel a sütőt.
Öntsön egy kis mennyiségű keveréket a sütőrácsra és hagyja kb. 5 percig sülni.
A FŐZŐLAPOK ELTÁVOLÍTÁSA
Mindig válassza le a készüléket a hálózatról és várja meg, amíg kihűl, mielőtt leveszi a főzőlapokat.
Keresse meg a főzőlap (4) kioldó gombjait a készülék elülső részén.
Nyomja le a gombot és a főzőlap kissé kinyílik az alapról.
Mindkét kezével fogja meg a főzőlapot, emelje le az alatta lévő fém kengyelekről és emelje le az alapról.
Nyomja meg a főzőlap másik kioldó gombját annak érdekében, hogy a másik főzőlapot megfelelően tudja
eltávolítani.
A FŐZŐLAPOK BESZERELÉSE
Alsó főzőlap - illessze a főzőlapot a hátsó részen elhelyezett vezetősínekbe; nyomja le a főzőlap elülső részét
kattanásig.
Felső főzőlap - illessze a főzőlapot az elülső részen elhelyezett vezetősínekbe; nyomja le a főzőlap felső részét
kattanásig.
Húzza ki a készülék cstalakozó zsinórját a csatlakozó aljzatból és hagyja a készüléket kihűlni mielőtt elkezdené
tisztítani.
A tisztításhoz használjon puha vagy enyhén nedves kendőt.
Távolítsa el a főzőlapokról az ételmaradványokat.
Vegye ki a főzőlapokat a készülékből, a FŐZŐLAPOK ELTÁVOLÍTÁSA szakaszban leírtak szerint.
Mossa el a főzőlapokat mosogatószerrel; ne használjon dörzsszivacsot vagy más súroló eszközt, mert azok
felsérthetik a tapadásgátló bevonatot.
Ne mossa mosogatógépben.
Tisztítás után, amikor teljesen megszáradtak, szerelje vissza a főzőlapokat.
Ne használjon semmilyen folyadékot, vizes, nedves ruhát, megakadályozandó, hogy a készülékbe folyadék
kerüljön és visszafordíthatatlanul megrongálja azt.
SOHA NE MERÍTSE A KÉSZÜLÉKET VÍZBE.

19
Upozornění: pozorně si přečtěte varování, která jsou
uvedena v následující příručce, protože poskytují
důležité pokyny týkající se bezpečnosti, instalace,
použití a údržby.
Důležité pokyny, které je třeba uschovat z důvodu
dalších konzultací.
Toto zařízení mohou používat děti od 8 let a osoby
se sníženými fyzickými, smyslovými nebo duševnými
schopnostmi nebo osoby bez zkušeností nebo znalostí,
když jim byl zajištěn vhodný dozor nebo když dostaly
pokyny ohledně bezpečného použití zařízení a pochopily
související nebezpečí. Děti si nesmí hrát se zařízením.
Úkony čištění a údržby nesmí provádět děti, s výjimkou
případu, kdy je jim více než 8 let a jsou pod dozorem.
Udržujte zařízení a jeho kabel mimo dosah dětí, kterým
je méně než 8 let.
Povrchy se stávají teplými během použití.
Pro čištění spotřebiče nahlédněte do oddílu ÚDRŽBA.
Zařízení nesmí být nastaveno pro fungování s externím
časovým spínačem nebo s odděleným systémem
dálkového ovládání.
Při poškození napájecího kabelu je třeba nechat provést
jeho výměnu v servisních střediscích autorizovaných
výrobcem.
Nenapájejte spotřebič, pokud desky nejsou správně
namontovány.
AR1S15
NÁVOD K POUŽITÍ
SENDVIČOVAČ

Uschovejte si záruku, účtenku a příručku pro jakékoli další nahlédnutí.
Po vyjmutí zařízení z obalu se ujistěte o jeho neporušenosti a v případě viditelných poškození jej nepoužívejte
a obraťte se na odborně kvalikovaný personál.
Nenechávejte části obalu v dosahu dětí ani obal nepoužívejte jako hru: jedná se o elektrické zařízení a je třeba
s ním podle toho zacházet.
Před připojením zařízení se ujistěte, že napětí, které se nachází v proudové zásuvce, odpovídá tomu, které je
uvedeno na identikačním štítku.
V případě, že zástrčka a zásuvka nejsou vzájemně kompatibilní, nechte vyměnit zásuvku za jinou zásuvku
vhodného druhu odborně kvalikovaným personálem. Nepoužívejte adaptéry nebo prodlužovací kabely, které
neodpovídají platným bezpečnostním předpisům nebo které překračují mezní hodnoty proudového odběru.
Když se zařízení nepoužívá, odpojte jej od elektrické sítě.
Pro vytažení zástrčky ze zásuvky netahejte za napájecí kabel ani za samotné zařízení.
Použití jakéhokoli elektrického zařízení vyžaduje dodržení několika základních pravidel, konkrétně:
- Nedotýkejte se zařízení mokrýma nebo vlhkýma rukama.
- Toto zařízení nesmí být používáno (včetně úkonů čištění a údržby) dětmi nebo osobami se sníženými fyzickými,
smyslovými nebo duševními schopnostmi nebo osobami bez zkušeností a znalostí.
Děti musí být pod dozorem, abyste se ujistili, že si nehrají se zařízením.
- Nepoužívejte zařízení s bosýma nohama.
- Nenechávejte zařízení vystaveno působení atmosférických vlivů (déšť, sůl).
- Nevystavujte jej nárazům.
V případě výskytu poruchy nebo poruchové činnosti zařízení okamžitě odpojte zástrčku, neprovádějte na něm
neoprávněné zásahy a obraťte se na autorizované servisní středisko.
V případě, že se rozhodnete tento druh zařízení již nepoužívat, je vhodné jej uvést do nepoužitelného stavu
odstřižením napájecího kabelu, samozřejmě po vytažení zástrčky ze zásuvky elektrické sítě.
Při poškození napájecího kabelu je třeba nechat provést jeho výměnu v servisních střediscích autorizovaných
výrobcem.
Zařízení bylo vyrobeno a vyprojektováno, aby fungovalo v domácím prostředí podle toho, co je uvedeno v
návodu; proto jakékoli jiné použití je považováno za nevhodné a tedy nebezpečné.
Nepoužívejte zařízení venku.
Z bezpečnostních důvodů se zařízení nesmí otevírat.
Nepokládejte zařízení na nevhodné povrchy, které nejsou odolné vůči teplu.
Během používání udržujte zařízení na rovném povrchu.
Nepokládejte zařízení na nevhodné povrchy a povrchy, které neodolávají teplu.
Abyste zabránili náhodným kontaktům dětí s teplými částmi, používejte zařízení na opěrných deskách ve výšce
alespoň 85 cm od podlahy.
Nechte volný prostor kolem všech ostatních povrchů spotřebiče a nepokládejte na něj žádné předměty.
Uchovávejte kabel daleko od zdrojů tepla.
Neumisťujte zařízení nad nebo pod jiné pece, mikrovlnné trouby nebo blízko plynových vařičů.
Nemanipulujte se spotřebičem, když je v provozu, když je horký a když je zapojený do elektrické sítě.
CZ
Varování
Technické informace CZ
1 - Spojení otevření/uzavření desek
2 - Kontrolka termostatu
3 - Kontrolka zapnutí
4 - Tlačítko pro uvolnění desky (uvnitř)
Technické parametry: viz štítek na zařízení.
20
Pokyny pro použití CZ
První použití
Před prvním použitím nechte spotřebič fungovat naprázdno (asi 2 minuty, dokud nezhasne zelené světlo)
v dobře větrané místnosti, aby se odstranily zápach a výpary způsobené zbytky ze zpracování na vnitřních
částech spotřebiče.
Odpojte zástrčku ze zásuvky a nechte spotřebič vychladnout.
Poznámka: při prvním použití tohoto spotřebiče si můžete všimnout kouře.
Jedná se o běžný jev vzhledem k počátečnímu zahřívání vnitřních součástí.
Desky vyčistěte podle pokynů v odstavci ÚDRŽBA.
1
2
3
4
Other manuals for AR1S15
1
Table of contents
Languages:
Other ARDES Kitchen Appliance manuals

ARDES
ARDES AR1K05 User manual

ARDES
ARDES ARPIZ02 User manual

ARDES
ARDES AR1K20 SOUS VIDE User manual

ARDES
ARDES AR1K01G User manual

ARDES
ARDES ARSET01 User manual

ARDES
ARDES AR7V04 User manual

ARDES
ARDES AR7440 User manual

ARDES
ARDES AR1S10 User manual

ARDES
ARDES AR1K15 User manual

ARDES
ARDES ARPIZ02 User manual