manuals.online logo
Brands
  1. Home
  2. •
  3. Brands
  4. •
  5. Argos
  6. •
  7. Indoor Furnishing
  8. •
  9. Argos Scandinavia 4 door robe w/ 2+4 drws. User manual

Argos Scandinavia 4 door robe w/ 2+4 drws. User manual

Page 1 of 25
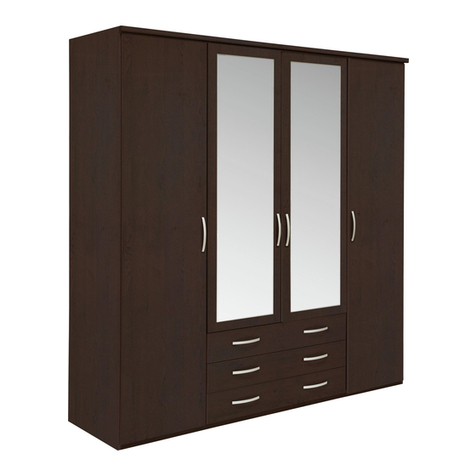
Scandinavia
4 door robe w/ 2+4 drws.
Scandinavia 4 door robe w/ 2+4 drws.
1404mm
1799mm
530mm
Please sort out all parts before you begin to assemble the item.
This to make sure you always use the correct part.
Fittings contained in the Box.
Tools Needed.
A22 pcs. Cam B24 pcs. Cam C42 pcs. Bolt - ø6,5 x 24/11mm
G40 pcs. Screw - ø3,5 x 12mm
D50 pcs. Nail - 1,2 x 20mm
P2 pcs. Hanging Rail - ø16 x 636mm
R2 pcs. Joining strip - 1335mm
K12 pcs.
0
10
20
30
40
50
60
70
80
90
100
110
120
130
140
150
160
170
180
190
200
210
220
230
240
250
260
270
MM
L4 pcs. Hanging rail cup
Knob
ø40 x 30mm
J36 pcs. Screw - ø3,5 x 35mm
M4 pcs. Magnet
N8 pcs.
Q8 pcs. Cross plate
Cup hinge
S1 pcs. Nail guide
E2 pcs. Bolt - ø6mm
Fittings A, B, C, D, E, G, H and J are shown in their actual dimensions.
ø15 x 12mm ø12 x 10,5mm
Hazard Warning !
Keep small
components out of
the reach of children.
T2 pcs. Mini block
H8 pcs. Screw - ø3,5 x 25mm
Page 2 of 25 Scandinavia 4 door robe w/ 2+4 drws.
Wooden parts contained in the box.
1
1 pcs.
Side, left 2
1 pcs.
Side, right
3
1 pcs.
Divider, large 4
2 pcs.
Door, right
12
4 pcs.
Back
6
1 pcs.
Top
7
2 pcs.
Plinth
8
2 pcs.
Bottom
9
2 pcs.
Divider, small
11
4 pcs.
Drawerfront, small
10
2 pcs.
Drawerfront, large
14
6 pcs.
Drawer side, left 13
6 pcs.
Drawerside, right
15
4 pcs.
Drawerback, small 16
2 pcs.
Drawer back, large
17
4 pcs.
Drawerbottom, small 18
2 pcs.
Drawerbottom, large
Page 3 of 25 Scandinavia 4 door robe w/ 2+4 drws.
5
2 pcs.
Door, left
1785x498mm
1660x494mm
1344x316mm
1710x327mm
1404 x 530mm
1294 x 55mm
640 x 480mm
153 x 380mm
636 x 157mm
309 x 157mm
342 x 107mm
281 x 92mm
608 x 92mm
291 x 339mm 618 x 339mm
1785x498mm
342 x 107mm
1344x316mm
No.3 "Shield Anchor" Wall Plug
Heavy Loads
For use with heavier loads such as TV
& HiFi Speakers and Satellite Dishes etc.
No.4 "Cavity Fixing" Wall Plug
For use with plaster board partitions or
hollow wooden doors.
No.5 "Cavity Fixing - Heavy Duty"
Wall Plug
For use when fitting or supporting heavy
loads such as shelving, wall cabinets,
coat racks.
IMPORTANT:
When drilling into walls always check that there are no
hidden wires or pipes etc. Make sure that the screws and
wall plugs being used are suitable for supporting your unit.
Consult a qualified tradesperson if you are unsure.
HINTS:
1) General Rule Always use a larger screw and wall plug if you are not sure.
2) Ensure you use the recommended drill bit to match the wall plug and hole size.
3) Ensure you drill the hole horizontally, do not force the drill or enlarge the hole.
4) Take extra care when drilling high walls, ceilings and ceramic tiles. Ensure the plug is fitting below the ceramic
tile to avoid splitting or cracking.
5) Ensure wall plugs are well fitted and are a tight fit in the drilled hole.
Types Of Walls
You can use one of the following types
of wall plug if your walls are made of
brick, breeze block, concrete, stone,
wood or plaster board.
No.1 "Standard" Wall Plug
General Wall Materials
These come in various sizes and are made
from plastic or sometimes wood fiber.
No.2 "General Purpose" Wall Plug
Aerated / Breeze Block
Generally aerated blocks should not be
used to support heavy loads, use a
specialist fitting in this case.
For light loads, a General Purpose Plug
can be used.
No.6 "Hammer Fixing" Wall Plug
For use with walls stuck with plaster
board. The hammer fixing allows it to
be fixed to the wall rather than the plaster
board. Always check the fixing is secure
to the retaining wall.
CARE & MAINTENANCE
SAFETY
Always check the fitting and
location to ensure your safety in
and around the home.
FITTING
From time to time check the fitting
to ensure the wall plugs or screws
do not become loose.
Wall Mounting & Fixings
A Guide to
Page 4 of 25 Scandinavia 4door robe w/ 2+4 drws
Page 5 of 25 Scandinavia 4 door robe w/ 2+4 drws.
Key diagram.
Function of cam & bolt.
Step 2:
Push the wooden panel
with the attached bolt onto
the other wooden panel.
Step 4:
Tighten: Turn the cam to
the right.
Step 1:
Fix the bolt to the
wooden panel.
Step 3:
Place the cam into the
hole, arrow pointing
towards the bolt.
134
2
6
1
2
3
4
12
8
8
9
9
10
11
17
18
16
15
14
13 14
13
12
12
12
5
x 4
x 2
x 2
7
7
x 2
1. Mounting the cross plates to the sides.
Q
4 Pcs.
Q
Q
Q
Q
Page 6 of 25 Scandinavia 4 door robe w/ 2+4 drws.
Fig. 1.1
H
8 pcs.
H
H
H
H
Front
1
Side, left
2
Side, right
Front
Front
Fix the cross plates "Q"
to the sides "1" and "2"
using screws "H" into
the holes indicated.
It is important that the
cross plates is placed
exactly as shown.
The short end of the
cross plates must point
towards the front edge
of the sides.
See fig. 1.1
Short end
2. Mounting the hanging rail cups to the sides.
G
G
G
4 pcs.
L
2 pcs.
3. Mounting the bolts to the sides.
Fig. 2.1
C
8 pcs.
C
C
C
C
Page 7 of 25 Scandinavia 4 door robe w/ 2+4 drws.
Fix the hanging rail
cups "L" onto the
sides "1" and "2"
using screws "G" into
the pre-drilled holes.
See fig. 2.1
L
L
C
C
Screw the bolts "C" into
the holes indicated on
the sides "1" and "2".
C
2
Side, right
1
Side, left
2
Side, right
1
Side, left
Fig. 4a.1
4a. Mounting the cross plates to the large divider.
4b. Mounting the cross plates to the large divider.
3
Divider, large
3
Divider, large
Q
Q
Q
Page 8 of 25 Scandinavia 4 door robe w/ 2+4 drws.
Q
2 pcs.
Q
G
4 pcs.
G
G
G
G
Fix the cross plates "Q"
to the left hand side of
the large divider "3"
using screws "G" into
the holes indicated.
It is important that the
cross plates is placed
exactly as shown.
The short end of the
cross plates must point
towards the front edge
of the sides.
See fig. 4a.1
Fix the cross plates "Q"
to the right hand side of
the large divider "3"
using screws "G" into the
holes indicated.
It is important that the
cross plates is placed
exactly as shown.
The short end of the
cross plates must point
towards the front edge of
the sides.
See fig. 4a.1
Chamfer
= Front
See fig. 7a.1
Front
Front
Short end
5a. Mounting the hanging rail cup to the large divider.
5b. Mounting the hanging rail cup to the large divider.
3
Divider, large
3
Divider, large
G
2 pcs.
L
1 pcs.
L
L
G
G
Fig. 5a.1
6. Mounting the bolts to the top.
C
6 pcs.
C
Page 9 of 25 Scandinavia 4 door robe w/ 2+4 drws.
C
C
C
C
C
6
Top
Fix the hanging rail
cup "L" to the left
hand side of the
large divider"3"
using screws "G"
into the pre-drilled
holes.
See fig. 5a.1
Fix the hanging rail cup
"L" to the right hand
side of the large
divider"3" using screws
"G" into the pre-drilled
holes.
See fig. 5a.1
Screw the bolts "C" into
the holes indicated on the
top "6".
Fig. 9.1
8. Mounting the bolts to the bottoms.
9. Assembling the small dividers to the bottoms.
A
C
8
2 pcs.
Bottom
8
2 pcs.
Bottom
A
4 pcs.
C
4 pcs.
10. Adding the mini blocks to the plinths.
7
2 pcs.
Plinth
T
2 pcs.
7. Mounting the magnets to the top.
6
Top
Page 10 of 25 Scandinavia 4 door robe w/ 2+4 drws.
Fig. 7.1
G
8 pcs.
G
M
G
GG
M
M
M
C
Screw the bolts "C" into the
holes indicated on the
bottom "8".
Press the small divider "9"
onto the bottom "8".
See page 4 - "Function of
cam & bolt".
Place the cams "A" into the
holes indicated, arrows
pointing towards the
bottom/bolt.
Tighten:
Turn the cam "A" to the right.
Chamfer = Front
9
2 pcs.
Divider, small
Knock the mini blocks "T"
into the holes indicated on
the plinths "7".
M
4 pcs.
Front edge
Fix the magnets "M" to the
top "6" using screws "G"
into the pre-drilled holes.
It is important that the
magnetic part points
towards the front edge of
the top. See fig. 7.1
A
A
8
Bottom
8
Bottom
3
Divider, large
A
2 pcs.
11B. Assembling the bottoms to the large divider.
Page 11 of 25 Scandinavia 4 door robe w/ 2+4 drws.
11A. Assembling the bottoms to the large divider.
E
E
E
2 pcs.
A
2 Pcs.
3
Divider, large
9
Divider, small
9
Divider, small
Press the bottom "8"
onto the large
divider "3".
See page 4 -
"Function of cam &
bolt".
Place the cams "A"
into the holes
indicated, arrows
pointing towards the
divider/bolt.
Tighten:
Turn the cam "A" to
the right
Note the
placement
of the drawer
runners.
Push the bolts "E"
through the holes
indicated on the large
divider "3".
It is important that the
bolts is turned exactly
as shown.
Press the bottom "8"
onto the left hand side
of the large divider "3".
See page 4 - "Function
of cam & bolt"
Place the cams "A" into
the holes indicated,
arrows pointing
towards the
divider/bolt.
Tighten:
Turn the cam to the
right.
Long end
Short end
12. Assembling the right hand side to the bottom.
A
2 pcs.
Page 12 of 25 Scandinavia 4 door robe w/ 2+4 drws.
13. Adding the plinths to the side and the large divider.
Fig. 13.1
A
2 pcs.
A
T
7
3
Press the side "2" onto the
bottom "8".
See page 4 - "Function of
cam & bolt".
Place the cams "A" into the
holes indicated, arrows
pointing towards the
side/bolt.
Tighten:
Turn the cam "A" to the
right.
2
Side, right
8
Bottom
2
Side, right
A
7
Plinth
Press the plinths "7" onto the
side "2".
The dowels at the end of the
large divider "3" should fit
into the holes on the plinths.
See page 4 - "Function of
cam and bolt".
Place the cams "A" into the
holes indicated, arrows
pointing towards the
side/bolt.
Tighten:
Turn the cam "A" to the right.
Fix the miniblocks "T" onto
the divider. See fig. 13.1
14. Assembling the left hand side to the carcass.
A
4 Pcs.
A
Page 13 of 25 Scandinavia 4 door robe w/ 2+4 drws.
Press the side "1" onto
the bottom "8" and the
plinths "7".
See page 4 - "Function
of cam & bolt".
Place the cams "A" into
the holes indicated,
arrows pointing
towards the side/bolt.
Tighten:
Turn the cam "A" to the
right.
1
Side, left
7
Plinth
8
Bottom
15. Assembling the top to the carcass.
A
6 pcs.
A
A
A
A
Fig. 15.1
Fig. 15.2
Page 14 of 25 Scandinavia 4 door robe w/ 2+4 drws.
Lower the top "6" onto
the divider "3" and the
sides "1" and "2".
See page 4 - "Function
of cam and bolt".
Place the cams "A" into
the holes indicated,
arrows pointing towards
the top/bolt.
Tighten:
Turn the cam "A" to the
right.
Rabbet = Back
Rabbet = Back
16. Adding the back to the carcass.
12
Back
D
30 pcs.
Page 15 of 25 Scandinavia 4 door robe w/ 2+4 drws.
12
Back
Fig. 16.3 Fig. 16.4
90a
Fig. 16.1
6
2
12
Fig. 16.2
D
D
D
D
D
D
D
D
D
2
15
15
6
6
Top
2
Side, right
S
S
Place the back "12" into
the rabbet of the top "6"
and the side "2".
Ensure there is NO GAP
between the side and the
back, NOR between the
top and the back.
Fasten the back with
nails "D" along the top.
Use the nail guide "S" -
see fig. 16.3
The angle between the
top and the side must be
90 degrees. Fig. 16.1
To accomplish this,
ensure there is NO GAP
between the side and the
back.
Fasten the back along
the side and the bottom.
Use the nail guide as
shown in fig. 16.3
Repeat the procedure
placing the back to the
other side.
Rabbet = Back
Rabbet = Back
17. Adding the back and the joining strip to the carcass.
12
Back
D
30 pcs.
Fig. 17.1
Page 16 of 25 Scandinavia 4 door robe w/ 2+4 drws.
12
Back
12
12
6
D
12
12
D
D
D
D
D
D
DD
Place the joining strip
"R" onto the back.
See Fig. 17.1
Place the back into the
rabbet of the top "6".
Fasten the back along
the top. Use the nail
guide - see page 14, fig.
16.2
Fasten the
back along
the side and
the bottom.
Use the nail
guide - see
page 14,
fig. 16.3
R
2 pcs.
Joining strip
18. Mounting the drawer sides to the small drawer back.
19. Sliding the drawer bottom into the drawer frame.
20. Mounting the bolts to the small drawer front.
J
J
J
C
C
C
16 pcs.
J
16 pcs.
Page 17 of 25 Scandinavia 4 door robe w/ 2+4 drws.
C
Fig. 18.1
Fix the drawer sides
"13" and "14" to the
small drawer back "15"
using screws "J".
The grooves of the
drawer sides and back
should be turned
exactly as shown.
See fig. 18.1
Slide the small drawer
bottom "17" into the
grooves of the the
drawer frame.
11
4 pcs.
15
4 pcs.
13
4 pcs.
14
4 pcs.
17
4 pcs.
Screw the bolts "C"
into the holes
indicated on the small
drawer front "11".
21. Adding the small drawer front to the drawer frame.
22. Mounting the knobs to the small drawer front.
K
4 pcs.
J
4 pcs.
B
12 pcs.
B
B
13
14
Page 18 of 25 Scandinavia 4 door robe w/ 2+4 drws.
Press the drawer front
"11" onto the drawer
sides "13" and "14".
See page 4 "Function of
cam and bolt".
Place the cams "B" into
the holes indicated,
arrows pointing towards
the drawer front / bolts.
Tighten:
Turn the cam to the
right.
Fix the knobs "K" to the
drawer front using
screws "J".
11
4 pcs.
Drawer front, small
23. Mounting the drawer sides to the large drawer back.
24. Sliding the drawer bottom into the drawer frame.
25. Mounting the bolts to the large drawer front.
J
J
J
C
C
C
8 pcs.
J
8 pcs.
Page 19 of 25 Scandinavia 4 door robe w/ 2+4 drws.
C
Fig. 23.1
Fix the drawer sides
"13" and "14" to the
large drawer back "16"
using screws "J".
The grooves of the
drawer sides and
back should
be turned
exactly as
shown.
See fig. 23.1.
Slide the large drawer
bottom "18" into the
grooves of the the
drawer frame.
10
2 pcs.
16
2 pcs.
13
2 pcs.
14
2 pcs.
18
2 pcs.
Screw the bolts "C"
into the holes
indicated on the large
drawer front "10".
26. Adding the large drawer front to the drawer frame.
27. Mounting the knobs to the large drawer front.
K
4 pcs.
J
4 pcs.
B
8 pcs.
B
B
13
14
Page 20 of 25 Scandinavia 4 door robe w/ 2+4 drws.
K
J
10
Press the drawer front
"10" onto the drawer
sides "13" and "14".
See page 4 "Function of
cam & bolt".
Place the cams "B" into
the holes indicated,
arrows pointing towards
the drawer front / bolts.
Tighten:
Turn the cam
to the right.
Fix the knobs "K" to the
large drawer front
using screws "J".
10
2 pcs.
Drawer front, large

Other Argos Indoor Furnishing manuals

Argos 435/6152 User manual

Argos

Argos 435/6152 User manual

Argos Retro Pedestal 343/7395 User manual

Argos

Argos Retro Pedestal 343/7395 User manual

Argos Eden 414/1594 User manual

Argos

Argos Eden 414/1594 User manual

Argos 618/2915 User manual

Argos

Argos 618/2915 User manual

Argos Thornbury 343759 User manual

Argos

Argos Thornbury 343759 User manual

Argos hygena 147976413 User manual

Argos

Argos hygena 147976413 User manual

Argos Gabe User manual

Argos

Argos Gabe User manual

Argos 609/2256 User manual

Argos

Argos 609/2256 User manual

Argos 457/2156 Manual

Argos

Argos 457/2156 Manual

Argos Knightsbridge 259/3034 User manual

Argos

Argos Knightsbridge 259/3034 User manual

Argos New Penton User manual

Argos

Argos New Penton User manual

Argos New Sywell 5 Drawer Chest User manual

Argos

Argos New Sywell 5 Drawer Chest User manual

Argos 322/8645 User manual

Argos

Argos 322/8645 User manual

Argos Dalton 228/5713 User manual

Argos

Argos Dalton 228/5713 User manual

Argos Islington Installation guide

Argos

Argos Islington Installation guide

Argos Asha User manual

Argos

Argos Asha User manual

Argos Montana 412/4621 User manual

Argos

Argos Montana 412/4621 User manual

Argos HOME WYTON DINING CHAIR  620/6585 User manual

Argos

Argos HOME WYTON DINING CHAIR 620/6585 User manual

Argos Habitat PATSY CLIC CLAC 3337574 User manual

Argos

Argos Habitat PATSY CLIC CLAC 3337574 User manual

Argos Aston Chair User manual

Argos

Argos Aston Chair User manual

Argos Cotbed 737/8443 User manual

Argos

Argos Cotbed 737/8443 User manual

Argos Lucas 247/3965 User manual

Argos

Argos Lucas 247/3965 User manual

Argos Harrington User manual

Argos

Argos Harrington User manual

Argos Oslo Oak Table 603/3071 User manual

Argos

Argos Oslo Oak Table 603/3071 User manual

Popular Indoor Furnishing manuals by other brands

Flair Furnishings CK 6280 Assembly instructions

Flair Furnishings

Flair Furnishings CK 6280 Assembly instructions

Tecnos 22611701 Assembly instructions

Tecnos

Tecnos 22611701 Assembly instructions

JWA FORFAR 69252 Assembly instruction

JWA

JWA FORFAR 69252 Assembly instruction

IKEA EKTORP CHAIR FRAME Assembly instructions

IKEA

IKEA EKTORP CHAIR FRAME Assembly instructions

Asgard VANGARD instructions

Asgard

Asgard VANGARD instructions

VITRA Alcove Plume Contract Assembly instructions

VITRA

VITRA Alcove Plume Contract Assembly instructions

The Great Indoors the great indoors 50G-543-341 owner's manual

The Great Indoors

The Great Indoors the great indoors 50G-543-341 owner's manual

Next BRONX 286268 Assembly instructions

Next

Next BRONX 286268 Assembly instructions

sieper LEONE HIGHBOARD installation instructions

sieper

sieper LEONE HIGHBOARD installation instructions

EefaCo.Store 88 5531 21 quick start guide

EefaCo.Store

EefaCo.Store 88 5531 21 quick start guide

Coaster 401006 Assembly instructions

Coaster

Coaster 401006 Assembly instructions

KI Tattoo Low Cupboard Assembly instructions

KI

KI Tattoo Low Cupboard Assembly instructions

zieta 3+ CHAIR quick start guide

zieta

zieta 3+ CHAIR quick start guide

Demco Reef installation instructions

Demco

Demco Reef installation instructions

Ropox ErgoGrouptable user manual

Ropox

Ropox ErgoGrouptable user manual

Lifely Nobu Series Assembly instruction

Lifely

Lifely Nobu Series Assembly instruction

Forte KYAK211 Assembling Instruction

Forte

Forte KYAK211 Assembling Instruction

Hillsdale Furniture TAYLOR 791-5213-0406 quick start guide

Hillsdale Furniture

Hillsdale Furniture TAYLOR 791-5213-0406 quick start guide

manuals.online logo
manuals.online logoBrands
  • About & Mission
  • Contact us
  • Privacy Policy
  • Terms and Conditions

Copyright 2025 Manuals.Online. All Rights Reserved.