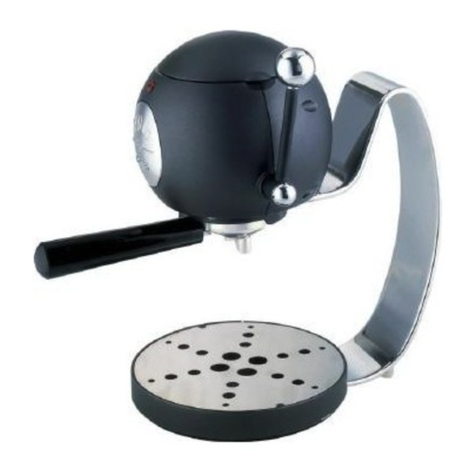
ARIETE Mokita User manual

NUMEROVERDE
800-215834
SERVIZIO CONSUMATORI
Via Toscana, 57 a-b - Località Macrolotto
59100 Prato PO - Italy
E-Mail: [email protected]
Internet: www.ariete.net
COD. 4065100200 Rev. 1 del 11/10/2004
MOD. 1348
825440

2
7
4
9
8
3
1
5
6
Fig. 1 Fig. 2
Fig. 3 Fig. 4
Fig. 5 Fig. 6
Fig. 7
10

1
I
AVVERTENZE IMPORTANTI
•Leggere attentamente le istruzioni prima dell’uso
•Non usare la macchina senza acqua in caldaia.
•Il cavo di alimentazione non deve venire in contatto con superfici calde della macchina.
•Non mettere l’apparecchio sopra o vicino a fonti di calore.
•Togliere la spina dalla presa prima di ogni intervento di pulizia o di manutenzione.
•Prima di collegare l’apparecchio alla rete di alimentazione controllare che la tensione indicata sulla tar-
ghetta posta al di sotto della macchina corrisponda a quella della rete locale.
•L’uso di prolunghe elettriche non autorizzate dal fabbricante dell’apparecchio può pro-
vocare danni e incidenti.
•Non dirigere mai il getto di vapore o acqua calda verso parti del corpo; manipolare con
precauzione il tubo vapore/acqua calda: pericolo ustioni!
•In caso di guasti, difetti o sospetto difetto dopo una caduta, staccare subito la spina dalla presa di cor-
rente. Non mettere mai in funzione l’apparecchio difettoso. LE RIPARAZIONI POSSONO ESSERE
EFFETTUATE ESCLUSIVAMENTE DAI CENTRI DI ASSISTENZA AUTORIZZATI. Si declina ogni
responsabilità per eventuali danni provocati da interventi di riparazione eseguiti in modo non corretto.
• Non lasciare la macchina a temperatura ambiente inferiore a 0°C, in quanto, il residuo d’acqua nella cal-
daia potrebbe ghiacciare e provocare dei danni.
•Non lasciare l’apparecchio esposto ad agenti atmosferici (pioggia, sole, ecc...).
•Gli elementi dell’imballaggio non devono essere lasciati alla portata dei bambini in quanto potenziali
fonti di pericolo.
• Prima di procedere all’operazione di riempimento della caldaia, scollegare l’apparecchio dalla presa di
corrente.
• L’apparecchio è destinato solo ad uso domestico e non deve essere adibito ad uso commerciale o indu-
striale.
• Non lasciare mai la macchina in funzione alla portata dei bambini o incapaci.
• Se il cavo di alimentazione è danneggiato, esso deve essere sostituito dal costruttore o
dal suo servizio Assistenza Tecnica o comunque da una persona con qualifica similare in
modo da prevenire ogni rischio.
• Non toccare l’aggancio del portafiltro e la lancia di vapore quando l’apparecchio è in fun-
zione, in quanto potrebbero causare delle scottature.
•Non utilizzare acqua gassata (addizionata con anidride carbonica).
•Dopo aver ovviamente staccato la spina di alimentazione e dopo che le parti calde si saranno freddate,
l’apparecchio dovrà essere pulito esclusivamente con un panno non abrasivo appena inumidito, aggiun-
gendo poche gocce di detergenti neutri non aggressivi (non usare mai solventi che danneggiano la ver-
niciatura); NON IMMERGE RE L’APPARECCHIO IN ACQUA O ALTRI LIQUIDI.
• Questo apparecchio è conforme alla direttiva 89/336 CEE relativa alla compatibilità elettromagnetica.
•Allorché si decida di smaltire come rifiuto questo apparecchio, si raccomanda di renderlo inop erante
tagliandone il cavo di alimentazione. Si raccomanda inoltre di rendere inno cue quelle parti dell'appa-
recchio suscettibili di costi tuire un pericolo, specialmente per i bambini che potrebbero servirsi del-
2
I
l'apparecchio per i propri giochi.
• Mai rimuovere il portafiltro durante l’operazione di infusione o se il bollitore è in pressione.
• Non allentare o rimuovere il coperchio della caldaia quando la macchina è in funzione. Attendere fino a
quando il ciclo di preparazione sia completato e l’intera quantità di acqua e vapore completamente uti-
lizzata.
• La caraffa è intesa esclusivamente per l’uso con la presente macchina. Non deve mai essere utilizzata su
fornelli o qualunque tipo di ripiano da cottura.
• Non posare la caraffa calda su superfici fredde o bagnate.
• Non utilizzare la caraffa nel caso in cui presenti crettature od il manico non sia sufficientemente rigido.
• Non pulire la caraffa con solventi, lana di vetro o qualunque altro materiale abrasivo.
• Non toccare il coperchio della caldaia (1) durante il funzionamento. Prima di rimuovere il coperchio,
spegnere la macchina e lasciarla raffreddare per almeno due o tre minuti; quindi depressurizzare (vedi
sezione “DEPRESSURIZZAZIONE”).
ATTENZIONE:per evitare incidenti, non rimuovere mai il tappo della caldaia o il portafiltro dalla
macchina, finchè la pressione in caldaia non sia stata completamente sfogata.
•CONSERVARE QUESTE ISTRUZIONI
Le macchine da caffè ARIETE sono ideali per chi sa gustarsi i piaceri della vita, a cominciare da un buon
caffè. Il vostro apparecchio, adeguatamente utilizzato, produrrà sempre un caffè intenso, scuro e delizioso.
Basterà seguire attentamente le istruzioni ed assicurarsi di utilizzare sempre miscele per caffè moka di
recente produzione e ben tostate.
Per gli amanti del cappuccino, inoltre, il dispositivo vapore permetterà di ottenere in pochi secondi una
schiuma ricca e densa, proprio come quella del bar.
Buon caffè a tutti con Mokita di Ariete!
DESCRIZIONE DEI COMPONENTI
FASI PRELIMINARI PER L’USO
Inserire il filtro (4) all’interno dell’apposito portafiltro (5) e posizionare quest’ultimo sulla macchina. Allo
scopo di eliminare qualunque possibile residuo di fabbricazione presente all’interno dell’apparecchio, si
raccomanda di attivare la macchina (seguendo le indicazioni riportate nella sezione “COME PREPARARE
UN CAFFE’“ almeno una o due volte utilizzando esclusivamente acqua, vale a dire, senza riempire il filtro
di caffè. Lavare accuratamente tutti i componenti rimovibili, sciacquare bene ed asciugare con cura.
1-Coperchio caldaia
2-Manopola di comando
3-Dispositivo vapore
4-Filtro caffè
5-Portafiltro
6-Caraffa in vetro con coperchio
7-Griglia estraibile raccogligocce
8-Spia rossa
9- - Misurino
10-Prodotto decalcificante

3
I
COME PREPARARE UN CAFFE’
Posizionarel’apparecchioinprossimitàdiunpresadicorrenteesfilateilcavodialimentazionenellamisu-
ra sufficiente a raggiungere la presa.
Inserire il filtro (4) nell’apposito portafiltro (5). Riempire il filtro con caffè macinato. Il filtro mostra due tac-
chealsuointerno,chesi riferiscono adueo quattro tazzine.Premereleggermente il caffènelfiltro e rimuo-
vere ogni traccia accumulatasi ai bordi.
Non esercitare una pressione eccessiva sul caffè all’interno del filtro.
Non riempire il filtro con una quantità di caffè superiore a quella indicata dalla tacca relativa alle quattro
tazzine. Ciò potrebbe provocare intasature e trabocchi.
Perinserireil portafiltro, allineate la freccia presente sulla maniglia del portafiltro, con quella riportata sulla
partesinistradellamacchina(Fig. 1). Sollevare il portafiltro per innestarlo sull’aggancio di infusione e ruo-
tarlo,con fermezza, verso destra fino a battuta. La freccia sul portafiltrodovrebbe trovarsi all’estrema destra
dell’arco di serraggio.
Qualora questa non sia perlomeno nel centro dell’arco, non attivate la macchina, per evita-
re il rischio che l’incrementare della pressione che si sviluppa durante il processo di infusione possa far
sganciare il portafiltro mal inserito.
Allentare il coperchio della caldaia ruotandolo in senso antiorario, e riempire la caldaia con acqua fredda
utilizzando l’apposita brocca in vetro, dosando l’acqua in base alle tacche di riferimento
riportate sulla caraffa di vetro (Fig. 2).
2 tazze di acqua = 2 tazzine di caffè;
3 tazze di acqua = 2 tazzine di caffè più vapore per cappuccino;
4 tazze di acqua = 4 tazzine di caffè;
La capacità massima della caraffa è limitata a quattro tazzine di caffè più vapore per la lancia.
ATTENZIONE: non riempire mai la caldaia mentre l’apparecchio è in funzione, e non riem-
pire la caraffa oltre l’indice indicato con “4” (circa 300 ml di acqua). E’ estremamente
importante riempire la caldaia esclusivamente con la quantità di acqua necessaria per l’o-
perazione desiderata.
L’ apparecchio utilizza sempre tutta la quantità di acqua presente all’interno della caldaia.
Serrate il coperchio della caldaia ruotandolo in senso orario, posizionate la caraffa sotto il portafiltro (Fig.
3) facendo attenzione che la posizione delle due frecce sulla parte in vetro della caraffa e sul suo coperchio
siano allineate e inserite la spina nella presa.
Ruotare la manopola di comando (2) su “ ” (Fig. 7). La spia rossa (8) si accenderà e resterà accesa
fino a che la manopola (2) non verrà riportata nella posizione “ ”.
Non allentare il coperchio del bollitore quando la macchina è in funzione.
Attendere fino alla fine dell’erogazione, dopodiché riportare la manopola (2) nella posizione “ ” (Fig.
4).

4
I
Attenderecheilprocesso di infusione sia terminato e l’intera quantità di acqua sia stata completamente uti-
lizzata. Versare quindi il caffè nelle tazzine e servire.
SI RACCOMANDA DI PRESTARE LA MASSIMA CAUTELA NEL RIMUOVERE IL PORTAFILTRO,
DATO CHE LE PARTI IN METALLO POTREBBERO ESSERE SEMPRE CALDE.
Per rimuovere il portafiltro, ruotare il manico verso sinistra, disconnetterlo dal corpo macchina.
COME PREPARARE UN CAPPUCCINO
Versare latte fresco in un piccolo bricco. Il bricco deve essere sufficientemente piccolo da poter essere
postosotto ilgettoemesso daldispositivovapore, e sufficientementegrande da ospitareil beccuccio vapo-
real suo interno. Siraccomandadi utilizzare latte scrematooparzialmentescremato nel caso incuisi desi-
deri ottenere una schiuma compatta e densa. Utilizzate latte intero se invece preferite una schiuma cremo-
sa.
Preparate prima il caffè, come descritto nel paragrafo precedente.
Non appena il caffè ha raggiunto l’altezza desiderata, ruotare la manopola di comando sulla posizione
“ ” (Fig. 4). A questo punto, l’acqua all’interno della caldaia ha raggiunto un livello di pressione e di
vapore sufficiente per l’utilizzo del dispositivo vapore.
Inserire il beccuccio vapore all’interno del bricco, per circa metà della sua lunghezza.
Ruotare la manopola di comando in senso antiorario, portandola in posizione “ “ (Fig.6).
Mantenere il bricco leggermente sollevato in modo da poter controllare la posizione dell’ugello mentre
montate il latte (Fig. 5). Entro pochi secondi, il latte comincerà a montare. Con l’aumentare della schiuma,
abbassare costantemente il bricco per fare in modo che il dispositivo vapore rimanga costantemente appe-
nasommersosottola superficieschiumosa. NONPORTATEIL LATTEALL’EBOLLIZIONE(QUESTOSI VERI-
FICA QUANDO BOLLE D’ARIA COMINCIANO AD AFFIORARE SULLA SUPERFICIE DEL LATTE).
Appena terminato di montare il latte, chiudere la manopola di comando ruotandola in senso orario(nella
posizione” “ con il beccuccio vapore ancora immerso nel latte. Questa precauzione eviterà spruzzi di
latte e schiuma.
Per una schiuma più corposa, lasciate riposare il latte per un minuto.
I residui di latte tendono ad accumularsi sul dispositivo vapore dopo aver montato il latte. E’ di fondamen-
tale importanza che si provveda alla pulizia del beccuccio, mediante un panno umido, dopo ogni utilizzo.
Questa semplice operazione aiuta a prevenire l’otturazione del beccuccio e quindi a garantire una perfetta
montatura del latte. Se il beccuccio dovesse comunque otturarsi, procedere seguendo le indicazioni ripor-
tate nella sezione “PULIZIA DEL DISPOSITIVO VAPORE”.
DEPRESSURIZZAZIONE
Prima di aprire il coperchio caldaia, accertarsi sempre che la macchina non sia in pressione, seguendo le
seguenti istruzioni:
-Verificare che la manopola di comando (2) sia sulla posizione “ ” (Fig.4) e disconnettere la presa elet-
trica dalla rete.
-Ruotare la manopola di comando (2) in senso antiorario nella posizione “ ”(Fig. 6). La fuoriuscita di
vapore dal beccuccio (3) indica che la caldaia è ancora in pressione. Richiudere la manopola di coman-
do.

5
I
-Riempire una brocca con acqua fredda e posizionarla sotto il getto del beccuccio vapore, avendo cura di
introdurlo bene dentro la brocca. Aprire la manopola di comando (2) ruotandola in senso antiorario.
Mantenerela manopolaapertafino allacessazione dellafuoriuscitadi vaporedalbeccuccio. Unavoltater-
minata l’operazione, chiudere la manopola riportandola nella posizione “ ”.
-Aquestopunto èpossibilerimuovere, procedendosempre lentamente,ilcoperchio dellacaldaiaed ilpor-
tafiltro.
PULIZIA
Prima di iniziare l’operazione di pulizia, spegnere la macchina, disconnetterla dalla rete elettrica, e lasciar-
la raffreddare.
L’apparecchio può essere pulito utilizzando un panno umido. Mai immergere il corpo macchina in acqua
od altro liquido.
Pulire il dispositivo di infusione utilizzando un panno umido e rimuovere qualunque residuo di caffè maci-
nato.
Nelcaso in cui vi fosse ancora acquaall’internodellacaldaia, rimuovere ogni componente non fisso, ever-
sare l’acqua residua dall’apertura superiore, capovolgendo completamente la macchina.
Pulizia del dispositivo vapore
Pulire accuratamente il dispositivo vapore dopo ogni utilizzo, in modo daevitare che l’interno si otturi ed i
residui che si depositano all’esterno si induriscano facendo sì che la loro rimozione diventi particolarmen-
te difficoltosa.
- Se il beccuccio vapore dovesse otturarsi:
rimuovere le particelle di latte utilizzando un ago, e sciacquare il beccuccio utilizzando un getto di acqua
corrente. Strofinare la parte esterna della lancia con un panno umido. Premere il panno inumidito contro il
beccuccio vapore e, agendo sulla manopola di comando, far fuoriuscire il vapore per uno o due secondi,
e quindi richiudere la manopola. Ogni residuo di latte verrà così espulso.
Pulizia della vaschetta raccogligocce
Lapuliziadella grigliaraccogligoccepuòessereeffettuata rimuovendoquest’ultimadallamacchinaelavan-
dola sotto acqua corrente.
DECALCIFICAZIONE DELLA MACCHINA PER CAFFE’
Lamacchinanecessitadi regolari e periodici interventidi decalcificazione. La frequenza dipende dalla qua-
lità dell’acqua utilizzata e dall’intensità di utilizzodella macchina.
In ogni caso, si raccomanda di procedere all’operazione di decalcificazione ogni circa 400 caffè (oppure
100 caraffe da 4 caffè) utilizzando l’apposito prodotto fornito insieme alla macchina.
Procedere nel seguente modo:
-Rimuovere il portafiltro dall’aggancio.
-Dissolvere un cucchiaino colmo di prodotto calcificante (8 gr.circa) in 300 ml di acqua tiepida, versare la
miscela nella caldaia, e chiudere con il tappo.
-Posizionare un contenitore sotto la flangia di erogazione caffè (senza portafiltro inserito), ed un altro sotto
il dispositivo vapore.
-Ruotare la manopola di comando, prima nella posizione” ”( Fig. 7), e lasciare che la miscela decalci-

6
I
ficante fuoriesca dalla flangia di erogazione caffè; dopo ruotare la manopola di comando nella posizione
“ “ e lasciare che la miscela decalcificante fuoriesca dal beccuccio vapore.
-Terminato il processo d’infusione, spegnere la macchina e lasciarla raffreddare.
- Ripetere l’operazione per una seconda volta.
Il prodotto decalcificante rimasto nella bustina, può essere conservato in luogo asciutto per la prossima
decalcificazione.
Terminata la decalcificazione, attivare la macchina per due volte di seguito, utilizzando esclusivamente
acqua, in modo tale da rimuovere ogni traccia d’acido dal sistema. Lasciare che la macchina si raffreddi.
PROBLEMI NELLA PREPARAZIONE DI CAFFE’ O CAPPUCCINO
Problema:
1.Fuoriuscita di caffè dal portafiltro.
Causa:
-Portafiltro inserito scorrettamente.
-Portafiltro non ruotato sufficientemente.
-Guarnizione interna sporca e necessita pulizia.
-Guarnizione irrigidita, sostituire con una nuova.
-Presenza di caffè macinato sui bordi del portafiltro.
Problema:
2.Mancata emissione di caffè dal portafiltro.
Causa:
-Non è stata immessa acqua in caldaia.
-Il portafiltro non è stato riempito di caffè.
-Filtrootturato;dovuto ad un caffè macinato troppo fino, e/o premuto con eccesiva forza all’interno del fil-
tro.
Problema:
3.Mancata erogazione di vapore dal beccuccio vapore.
Causa:
-Mancanza od insufficiente quantità di acqua in caldaia.
-Il beccuccio vapore è otturato (vedere paragrafo della pulizia).
Problema:
4.Schiuma insufficiente durante la montatura del latte.
Causa:
-Il beccuccio vapore è otturato (vedere paragrafo della pulizia).
PER OTTENERE MIGLIORI RISULTATI....
-Utilizzare sempre acqua fresca.
-Si consiglia di macinare il proprio caffè. Chicchi appena macinati emanano aroma e gusto di gran lunga
superiore.
-Servire il caffè immediatamente dopo la preparazione.
-Mai riscaldare il vostro caffè.

7
GB
IMPORTANT WARNINGS
•Read these instructions carefully before using.
•Do not use the appliance unless the boiler contains water.
•The power cord must not come into contact with parts of the appliance which are hot.
•Do not place the appliance on or near sources of heat.
•Remove the plug from the socket before cleaning or repairing the appliance.
•Before plugging into a socket make sure the voltage indicated on the bottom of your appliance corre-
sponds to that of your mains power supply.
•The use of extension cords not authorised by the appliance manufacturer may cause
damage or accidents.
•Never aim the steam or hot water towards body parts; handle the steam/hot water tube
with caution: danger of causing burns.
•In the event of a damaged or faulty appliance or of suspected damage due to a fall, immediately unplug
the appliance. Never use the appliance if it is damaged or faulty. ALL REPAIRS MUST BE CARRIED
OUT ONLY BY AUTHORISED SERVICE PERSONNEL. All responsibility for damage caused by
faulty unqualified repair work is declined.
•Do not leave the appliance outside in temperatures below 0°C because water remains inside the boiler
could freeze and damage the appliance.
•Do not leave the appliance exposed to the weather (rain, sun, etc.).
•Packaging must never be left within the reach of children since it is potentially dangerous.
•Unplug the appliance before filling the boiler .
•This appliance has been designed for home use only and must not be used for commercial or industrial
purposes.
•Never leave the appliance in use within the reach of children or unable persons .
•To eliminate all possible risks, if the power cord is damaged it must be replaced by the
manufacturer, a technical assistance centre or in any case by a similarly qualified per-
son.
•Never touch the filter-holder or the steam nozzle while the appliance is being used as
they can cause burns.
•Never use fizzy water (water with carbon anidride).
•Afterunplugging theapplianceand only whenthe hot partshavecooled off,theappliance mustbeclean-
sed exclusively with a damp, non abrasive cloth and a few drops of a neutral detergent (never use sol-
vents that damage the paint). DO NOT IMMERSE THE APPLIANCE IN WATER OR IN OTHER
LIQUIDS.
•This appliance complies with the EEC 89/336 Directive with regard to electromagnetic compatibility.
•In the event that you decide to dispose of the appliance, we advise you to make it inoperative by cutting
off the power cord. We also recommend that any parts that could be dangerous be rendered harmless,
especially for children, who may play with the appliance or its parts.
•Never remove the filterholder during infusion or if the boiler is under pressure.
•Do not unscrew or remove the boiler top when the appliance is in use. Wait until the preparation cycle

8
GB
has been completed and all the water and steam have been used up.
•The jug is designed to be used exclusively with this appliance. It must not be utilised on the stove or on
any other kind of cooker tops.
•Do not place the hot jug on cold or wet surfaces.
•Do not use beaker in presence of crack on it or if handle is not steady enough
•Do not clean the jug with solvents, steel sponge or any kind of abrasive material.
•DonottouchtheBOILERTOP(1)whilethe applianceisinuse.Beforeremovingthetop,turntheapplian-
ce off and let it cool down for at least two or three minutes; then depressurize (see ‘DEPRESSURIZA-
TION’ section).
WARNING: to avoid accidents, never remove the boiler top or the filterholder from the applian-
ce until the pressure within the boiler has not completely exhausted.
•DO NOT THROW THESE INSTRUCTIONS AWAY
ARIETE coffee makers are ideal for those people who know how to appreciate the pleasures of life, begin-
ning with a good cup of coffee. Your appliance, when correctly used, will produce deliciously intense dark
coffee.Allyou have to do is carefully follow the instructions and make sure youalwaysusewill toasted and
fresh moka coffee mixes.
Furthermore, for cappuccino-lovers, with the provided steam nozzle in only a few seconds you can obtain
a rich dense foam just like at a café.
Wishing you all a good coffee with Ariete Mokita!
DESCRIPTION OF PARTS
BEFORE USING
Insert the filter (4) into its filterholder (5) and attach it onto the appliance. To eliminate any traces of resi-
dues due to manufacturing that there might be on the appliance, it is advisable to activate the appliance
(followingtheinstructiontobe foundin the‘HOW TO MAKE COFFEE’ sectionat leastonce ortwiceusing
onlywater,thatis without filling the filter with coffee. Carefully wash all removable parts, then rinse and dry
carefully.
HOW TO MAKE COFFEE
Place the appliance near an electrical outlet and uncoil the power cord just enough to reach the socket.
Insertthe filter (4) into itsfilterholder(5).Fill the filter withgroundcoffee.Inside the filter there aretwonot-
ches which indicate the quantity of coffee needed for two or four cups.
1-Boiler top
2-Controls knob
3-Steam device
4-Coffee filter
5-Filter holder
6-Glass beaker with cap
7-Removable drip collector grid
8-Red light
9- - Measuring cup
10-Decalcifier

9
GB
Lightly press the coffee in the filter and remove any coffee residues on the border.
Do not press the coffee too hard into the filter.
Do not fill the filter above the amount indicated by the four cups notch. Overfilling could cause plugging
and spilling over.
To insert the filterholder align the arrow printed on filterholder handle with the arrow printed on the left-
hand side of the appliance (fig. 1). Lift the filterholder to attach it onto the filterholder seat and turn it with
vigour towards the right until it locks. The filterholder arrow should be located on the far right of the loc-
king arch.
Until the arrow is not located at least in the centre of the locking arch, do not operate the
appliance because if the filterholder has not been properly attached, with the increase of pressure during
infusion it could become detached.
Unscrew the boiler top by rotating it counter clockwise and fill the boiler with cold water using the provi-
ded glass beaker and measuring the water with the measuring notches found on the glass beaker (fig. 2).
2 cups of water = 2 cups of coffee
3 cups of water = 2 cups of coffee plus steam for cappuccino;
4 cups of water = 4 cups of coffee;
The maximum capacity of the beaker is four cups of water plus steam for the nozzle.
WARNING: Never fill the beaker while the appliance is in use and do not fill the beaker
above the indication ‘4’ (which is approximately 300 ml of water). It is extremely important
to fill the boiler exclusively with the amount of water needed for the desired operation.
The appliance always utilises the whole quantity of water inside the boiler.
Lock the boiler top by rotating it clockwise, place the beaker under the filterholder (Fig. 3) carefully chec-
king that the position of the two arrows printed on the glass part the of beaker and on its top are lined up
and plug into the socket.
Rotate the controls knob (2) and set it on “ ” (fig. 7). The red light (8) will turn on and will stay on until
the knob (2) is brought back to position “ ”.
Do not loosen the boiler top while the appliance is in use.
Wait until the delivery operation is completed before rotating the knob (2) back into position “ ” (fig. 4).
Wait until the brewing process has been completed and the whole amount of water has been completely
utilised and then pour the coffee into the cups and serve.
THE UTMOST CARE MUST BE TAKEN WHEN REMOVING THE FILTERHOLDER SINCE ITS
METAL PARTS COULD STILL BE VERY HOT.
To remove the filterholder, turn the handle towards the left, detach it from the appliance.

10
GB
HOW TO MAKE A CAPPUCCINO
Pour fresh milk into a small jug. The jug must be small enough to be placed under the jet of steam which
will be emitted by the steam devise and large enough to hold the steam nozzle. It is advisable to use skim-
med milk or semi-skimmed milk if you wish to obtain a thick, compact foam. Use whole milk if you desire
a creamier foam instead.
Fist prepare the coffee as described in the above paragraph.
As soon as the desired amount of coffee has been made, rotate the controls knob and set it on position
“ ” (fig. 4). At this point the water inside the boiler will have reached a pressure level and a steam level
high enough to be able to use the steam device.
Insertapproximatelyhalf of the steam nozzle inside the jug. Rotate the controls knob counterclockwiseand
set it in position “ ” (fig. 6).
Hold the jug slightly up in order to control the position of the nozzle while foaming the milk (fig. 5). Within
seconds the milk will start to foam. As it foams more and more, lower the jug so that the steam device
remains constantly just under the surface of the foam. DO NOT BOIL THE MILK (IT IS BOILING WHEN AIR
BUBBLES BEGIN TO APPEAR ON THE SURFACE OF THE MILK).
As soon as the milk has been foamed, close the controls knob by rotating it clockwise (set it on position
“ ” with the team nozzle still inside the milk.
In this way you will avoid spraying milk and foam.
To obtain a thicker foam let the milk stand for a minute.
Milk residues tend to remain on the steam device after foaming milk. It is of fundamental importance to
clean the nozzle with a damp cloth after each use.
This simple procedure will help prevent plugging up the nozzle and will thus guarantee a perfect foam. If
the nozzle should, in any case, become plugged up, proceed according to the instructions given under the
heading “CLEANING THE STEAM DEVICE”.
DEPRESSURISING
Before opening the boiler top always check that the appliance is not under pressure by carrying out the fol-
lowing instructions:
-Check that the controls knob (2) is set on position “ ” (fig. 4) and unplug the appliance.
-Rotate the controls knob (2) counter clockwise and set on position “ ” (fig. 6). If steam comes out of
the nozzle (3) this means that there is still pressure inside the boiler. Close the controls knob.
-Fill a jug with cold water and place it under the steam nozzle carefully inserting it into the jug. Open the
controls knob (2) by rotating it counter clockwise. Keep the knob open until no more steam comes out
of the nozzle. Once this operation has been completed close the knob by turning it back to position
“ ”.
At this point you can remove the boiler top and the filterholder, taking care to proceed slowly.
CLEANING
Before beginning cleaning operations, turn the appliance off, unplug it and let it cool.
The appliance can be cleaned by using a damp cloth. Never immerse the appliance into water or any other
liquid.

11
GB
Clean the brewing device with a damp cloth and remove all residues of ground coffee.
In case there is still water inside the boiler remove all movable parts and pour the leftover water out by tur-
ning the appliance upside down and letting the water pour out of the opening on the top.
Cleaning the steam device
Carefully clean the steam device after each use so that it doesn’t clog up and so that the residues left on it
don’t harden and become particularly difficult to clean off.
- If the nozzle clogs:
remove the milk particles with a needle and rinse the nozzle under running water. Wipe the external part of
the nozzle with a damp cloth. Press the dampened cloth up against the tip of the steam nozzle and, by ope-
rating the controls knob, let steam out of the nozzle for a second or two and then close the knob. In this
way all milk residues will be expelled.
Cleaning the drip collector tray
You can clean the tray by removing it from the appliance and washing it directly under running water.
DECALCIFYING THE APPLIANCE
The appliance regularly needs to be decalcified. How often this needs to be done depends on the kind of
water used and on how intensely the appliance is used.
In any case we recommend decalcifying the appliance after approximately every 400 cups of coffee delive-
red (or 100 four-coffee beakers) using the product provided with the appliance.
Proceed as follows:
-Remove the filterholder
-Dissolveateaspoon fullofthe decalcifier product(approx.8 gr.)into300 mlofwarm water, pourthemix-
ture into the boiler and then close the top.
-Place a container under the collar of the coffee delivery unit (with the filterholder detached) and another
container beneath the steam device
-Rotate the controls knob first setting it on position “ ” (fig. 7) and let the decalcifying mixture pour out
of the collar of the coffee delivery unit; then rotate the controls knob and set it on position “ ” and let
the decalcifying mixture come out of the steam nozzle.
-Once the brewing procedure has been terminated turn the appliance off and let it cool.
Repeat the operation a second time.
What is left over of the decalcifying product can be conserved in a dry place for another time.
When the decalcifying operation has been completed activate the appliance twice in a row using water only
in order to remove all traces of acid from the system. Let the appliance cool down.
PROBLEMS WHEN MAKING COFFEE OR CAPPUCCINO
Problem:
1.Coffee leaking from the filterholder.
Cause:
-The filterholder is not properly inserted.

12
GB
- The filterholder has not been rotated enough.
- The internal gasket may be dirty and need to be cleaned.
- Hardened gasket, to be substituted with a new one.
- Ground coffee on the border of the filterholder.
Problem:
2.No coffee comes out of the filterholder.
Cause:
-No water has been put into the boiler.
-The filterholder has not been filled with coffee.
-The filter is clogged; this is due to coffee which has been ground too small and /or has been pressed too
hard into the filter.
Problem:
3.No steam comes out of the steam nozzle.
Cause:
-Lack of water or insufficient amount of water in the boiler.
-The steam nozzle is clogged (see paragraph on cleaning procedures).
Problem:
4.Not enough steam comes out when foaming milk.
Cause:
-The steam nozzle is clogged (see paragraph on cleaning procedures).
TO OBTAIN THE BEST RESULTS....
-Always use fresh water.
-It is advisable to ground your own coffee. Freshly ground coffee beans have a far superior aroma and
taste.
-Serve the coffee immediately after it has been made.
-Never reheat your cup of coffee.

13
D
WICHTIGE HINWEISE
•Anleitung vor dem Gebrauch sorgfältig durchlesen
•Maschine nie ohne aufgefüllten Wasserkocher benutzen.
•Das Netzkabel darf nicht mit den warmen Maschinenflächen in Berührung kommen.
• Gerät nicht auf oder in die Nähe von Wärmequellen stellen.
•Den Stecker vor Reinigungs- oder Wartungsarbeiten aus der Steckdose ziehen.
•Bevor das Gerät an das Stromnetz angeschlossen wird, ist zu überprüfen, dass die Spannung auf dem
unter der Maschine befindlichen Schild mit der Spannung des Stromnetzes vor Ort übereinstimmt.
•Der Gebrauch von Verlängerungskabeln, die vom Gerätehersteller nicht freigegeben
wurden, kann Schäden und Unfälle verursachen.
•Den Dampf- oder Heißwasserstrahl niemals auf Körperteile richten; das Dampf-
/Heißwasserrohr vorsichtig handhaben: Verbrühungsgefahr!
•Bei Betriebsstörungen, Defekten oder einem bestehenden Schadensverdacht infolge eines Herabfallens
des Geräts ist sofort der Stecker aus der Steckdose zu ziehen. Defektes Gerät niemals benutzen. DIE
REPARATUREN DÜRFEN AUSSCHLIESSLICH VON DER AUTORISIERTEN KUNDENDIENST-
STELLE AUSGEFÜHRT WERDEN. Der Hersteller übernimmt keine Haftung für eventuelle Schäden,
die durch unsachgemäße Reparaturen entstehen.
•Die Raumtemperatur darf nicht unter 0°C fallen, da sonst das im Maschinenkocher verbliebene Wasser
gefrieren und Schäden verursachen kann.
• Gerät keinen Witterungseinflüssen (Regen, Sonne, usw.) aussetzen.
• Verpackungsteile nicht in der Nähe von Kindern lassen. Sie stellen eine Gefahrenquelle dar!
•Das Gerät vom Stromnetz abtrennen; erst dann den Wasserkocher auffüllen.
•Das Gerät ist nur für den Hausgebrauch, nicht für Handels- oder Industriezwecke bestimmt.
•Die eingeschaltete Maschine außer Reichweite von Kindern oder ungeeigneten Personen halten.
• Falls das Speisekabel beschädigt ist, muss es zur Gefahrenvermeidung vom Hersteller,
von seiner Kundendienststelle oder jedenfalls von einer dazu ausgebildeten Person
ausgewechselt werden.
•Die Einhakvorrichtung des Filterhalters und die Dampfdüse dürfen bei eingeschaltetem
Gerät nicht berührt werden, da Verbrühungsgefahr besteht.
•Kein Sprudelwasser (mit Kohlendioxid angereichert) verwenden.
•Das Stromkabel des Geräts abtrennen und abwarten, dass sich die heißen Teile abkühlen. Erst dann das
Gerät mit einem ausschließlich weichen, leicht angefeuchteten Tuch und wenigen Tropfen sanften
Neutralreiniger (keine lackschädlichen Lösungsmittel verwenden) reinigen; NIEMALS IN WASSER
ODER ANDERE FLÜSSIGKEITEN TAUCHEN.
• Dieses Gerät entspricht der Richtlinie EWG 89/336 über die elektromagnetische Kompatibilität.
• FallsdiesesGerätentsorgtwerden soll, ist sein Speisekabel abzuschneiden, so dass es nicht mehr funk-
tionsfähig ist. Darüber hinaus sind all die Geräteteile unschädlich zu machen, die vor allem für Kinder,
die das Gerät als Spielzeug verwenden könnten, eine Gefahr darstellen.
•Den Filterhalter während des Brühvorgangs oder bei unter Druck stehendem Kocher nicht entfernen.

14
D
•Der Verschluss des Wasserkochers darf bei eingeschalteter Maschine weder aufgedreht noch entfernt
werden. Auf das Ende des Zubereitungsverfahrens und die komplette Nutzung der Wasser- und
Dampfmenge warten.
•Die Kanne dient ausschließlich diesem Maschinengebrauch. Sie darf weder auf Kochherde noch auf
andere Kochflächen benutzt werden.
•Heiße Kanne nicht auf kalte oder nasse Flächen abstellen.
•Kanne nicht benutzen, wenn sie rissig ist oder einen ungenügend harten Griff aufweist.
•Kanne nicht mit Lösungsmitteln, Glaswolle oder anderen Scheuermitteln reinigen.
•Den Verschluss (1) des Wasserkochers darf während des Betriebs nicht berührt werden. Vor der
Abnahme des Verschlusses ist die Maschine abzuschalten und mindestens zwei oder drei Minuten
abkühlen zu lassen; sodann ist sie auf normalen Druck zu bringen (siehe Abschnitt “DRUCKABBAU”).
ACHTUNG:ZurUnfallvermeidung sollte der Kocherverschlussoder derFilterhalterderMaschine
erst bei komplett ausgelaufenem Druck aus dem Wasserkocher entfernt werden.
•VORLIEGENDE GEBRAUCHSANLEITUNG AUFBEWAHREN
Die Kaffeemaschinen ARIETE sind das Ideale, um bei einer guten Tasse Kaffee beginnend das Leben zu
genießen. Das sachgemäß eingesetzte Gerät stellt einen stets kräftigen, dunklen und köstlichen Kaffee her.
Befolgen Sie ganz einfach die Anleitungen und verwenden Sie stets nur frisch zubereitete und gut geröste-
te Moka-Kaffeemischungen.
Doch auch die Cappuccino-Fans kommen nicht zu kurz: Die Dampfvorrichtung erzielt in nur wenigen
Sekunden einen dichten und vollen Milchschaum, der ganz und gar dem der Espresso-Bar ähnelt.
Genießen Sie Ihren Kaffee mit Mokita von Ariete!
TEILEBESCHREIBUNG
VOR DEM EINSATZ
Den Filter (4) in den Filterhalter (5) einführen und diesen wiederum in die Maschine einsetzen. Zur
Beseitigungeventueller Herstellungsrückständeim Gerätsolltedie Maschinemindestensein oderzwei Mal
nur mit Wasser, d.h. ohne den Filter mit Kaffee aufzufüllen, eingeschaltet werden (Anweisungen des
Abschnitts “DIE KAFFEEZUBEREITUNG“ befolgen). Alle abnehmbaren Teile gründlich waschen, durch-
spülen und trocknen.
DIE KAFFEEZUBEREITUNG
Das Gerät in Steckdosennähe stellen und das Stromkabel abwickeln, bis es zur Steckdose reicht.
1-Verschluss Wasserkocher
2-Bedienungsknopf
3-Dampfvorrichtung
4-Kaffeefilter
5-Filterhalter
6-Glaskanne mit Deckel
7-Herausnehmbares Tropfgitter
8-Rote Kontrollleuchte
9- - Messbecher
10-Entkalker

15
D
Den Filter (4) in den Filterhalter (5) einsetzen. Filter mit gemahlenem Kaffee füllen. Der Filter weist innen
zwei Kerbeinschnitte auf, die zwei oder vier Tassen darstellen. Den Kaffee im Filter leicht andrücken und
Kaffeereste an den Rändern beseitigen.
Kaffee im Filter nicht allzu stark andrücken.
Die Kaffeemenge im Filter darf die durch die Vier-Tassen-Kerbe angezeigte Menge nicht überschreiten.
Andernfalls können Verstopfungen oder ein Überfließen die Folge sein.
Beim Filtereinsatz ist der Pfeil auf dem Filterhaltergriff mit dem auf der linken Maschinenseite aneinander-
zureihen (Abb. 1). Den Filterhalter anheben, damit dieser in die Brüheinhakvorrichtung eingesteckt werden
kann. Halter anschließend nach rechts bis zum Anschlag fest zudrehen. Der Pfeil am Filterhalter müsste
sich auf der rechten Außenseite des Befestigungsbügels befinden.
Falls sich der Pfeil nicht wenigstens in der Bügelmitte befindet, darf die Maschine nicht
eingeschaltet werden,da sonst die Gefahr besteht, dass der Druckanstieg beim Brühvorgang den
schlecht eingesetzten Filterhalter löst.
Den Verschluss des Wasserkochers nach links aufdrehen, Wasserkocher mithilfe der Glaskanne mit kaltem
Wasser füllen; dabei das Wasser im Hinblick auf die Kerbeinschnitte auf der Glaskanne dosieren (Abb. 2).
2 Tassen Wasser = 2 Tassen Espresso;
3 Tassen Wasser = 2 Tassen Espresso plus Dampf für Cappuccino;
4 Tassen Wasser = 4 Tassen Espresso;
Die Kanne sieht nicht mehr als vier Tassen Espresso plus Dampf für die Düse vor.
ACHTUNG: Den Wasserkocher niemals auffüllen, wenn das Gerät in Betrieb ist. Die Kanne
darf nur bis zum Index “4” (circa 300 ml Wasser) gefüllt werden. Es ist äußerst wichtig,
dass der Kocher mit ausschließlich der Wassermenge aufgefüllt wird, die für die
gewünschte Zubereitung erforderlich ist.
Das Gerät benutzt stets die im Kocher befindliche, ganze Wassermenge.
Den Verschluss des Wasserkochers nach rechts zudrehen; die Kanne unter den Filterhalter setzen (Abb. 3).
Die beiden Pfeile auf dem Glaselement der Kanne und am Verschluss müssen aneinandergereiht sein. Nun
den Stecker anschließen.
Den Bedienungsknopf (2) auf “ ” (Abb. 7) drehen. Die rote Kontrollleuchte (8) schaltet sich ein und
bleibt an, bis der Knopf (2) nicht wieder auf “ ” gebracht wird.
Wasserkocher bei eingeschalteter Maschine nicht aufdrehen.
Das Ende des Kaffeeauslaufs abwarten, anschließend den Knopf (2) wieder auf “ ” setzen (Abb. 4).
Das Brühende und die komplette Nutzung der gesamten Wassermenge abwarten. Nun den Kaffee in die
Tassen gießen und servieren.
BEI DER ABNAHME DES FILTERHALTERS ÄUßERST VORSICHTIG VORGEHEN, DA DIE
METALLTEILE NOCH SEHR HEIß SEIN KÖNNEN.
Zur Abnahme des Filterhalters ist der Griff nach links zu drehen und vom Maschinenblock abzutrennen.

16
D
DIE CAPPUCCINO-ZUBEREITUNG
Frische Milch in eine kleine Kanne gießen. Diese Kanne muss angemessen klein sein, um unter dem
DampfstrahlderDampfvorrichtungeingesetzt werdenzu können,aber auchangemessen groß,umdarindie
Dampfdüse aufzunehmen. Falls ein dichter und fester Milchschaum erwünscht ist, sollte vorzugsweise
entrahmte oder halbfette Milch verwendet werden. Mit Vollmilch wird eine Milchschaum-Crema erzielt.
Bereiten Sie Ihren Kaffee wie zuvor beschrieben zu.
Den Bedienungsknopf auf “ ” (Abb. 4) drehen, sobald der Kaffee die gewünschte Höhe erreicht hat.
Nun hat das im Kocher befindliche Wasser einen Druck- und Dampfwert erreicht, der für den Einsatz der
Dampfvorrichtung ausreicht.
Die Dampfdüse in das Kännchen zur Hälfte einführen.
Den Bedienungsknopf nach links drehen und auf “ “ (Abb.6) setzen.
Die Kanne leicht angehoben halten, so dass die Düsenposition kontrolliert werden kann, während man die
Milch schlägt (Abb. 5). Die Milch schäumt in nur wenigen Sekunden. Mit dem Schaumanstieg gilt es nun,
die Kanne konstant abzusenken, so dass die Dampfvorrichtung knapp unterhalb der Oberfläche des
Milchschaums verbleibt. MILCH NICHT ZUM KOCHEN BRINGEN (LUFTBLASEN STEIGEN ZUR
MILCHOBERFLÄCHE EMPOR).
Nachdem die Milch geschlagen wurde, ist der Bedienungsknopf nach rechts zuzudrehen ( auf “ “). Die
Dampfdüse steckt noch in der Milch. Dadurch werden Milch- und Schaumspritzer vermieden.
Falls Sie einen dichteren Schaum wünschen, sollte man die Milch eine Minute lang setzen lassen.
Die Milchreste bleiben an der Dampfvorrichtung kleben, nachdem die Milch geschlagen wurde. Folglich
sollte die Düse nach jedem Gebrauch mit einem feuchten Tuch gereinigt werden.
Durch diesen einfachen Vorgang wird eine Düsenverstopfung vermieden und folglich ein perfektes
Schlagen der Milch gewährleistet. Falls sich die Düse dennoch verstopfen sollte, sind die Schritte des
Abschnitts “REINIGUNG DER DAMPFVORRICHTUNG” zu befolgen.
DRUCKABBAU
Sich vor dem Öffnen des Kocherverschlusses stets vergewissern, dass die Maschine nicht unter Druck
steht. Hierzu wie folgt vorgehen:
-Sicherstellen, dass sich der Bedienungsknopf (2) auf “ ” (Abb.4) befindet; den Stecker aus der
Steckdose ziehen.
-Den Bedienungsknopf (2) nach links auf “ “ (Abb.6) drehen. Der Dampfaustritt aus der Düse (3) zeigt
an, dass der Wasserkocher noch unter Druck steht. Den Bedienungsknopf wieder zudrehen.
-Eine Kanne mit kaltem Wasser füllen und unter den Dampfdüsenstrahl setzen. Die Düse ist dabei in die
Kanne ganz einzuführen. Den Bedienungsknopf (2) nach links aufdrehen. Den Knopf auf lassen, bis die
Dampfausgabe aus der Düse beendet ist. Den Knopf anschließend durch Positionierung auf “ ” zudre-
hen.
-Nun können der Verschluss des Wasserkochers und der Filterhalter langsam abgenommen werden.

17
D
REINIGUNG
VorderReinigungmussdie Maschine ausgeschaltet und vom Stromnetz abgetrenntwerden.Abkühlenlas-
sen.
Das Gerät kann mit einem feuchten Tuch gesäubert werden. Den Maschinenblock niemals in Wasser oder
andere Flüssigkeiten tauchen.
Brühvorrichtung mit einem feuchten Tuch reinigen und eventuelle Kaffeereste entfernen.
Falls sich im Kocher noch Wasser befindet, sind alle unfesten Elemente abzunehmen und das Restwasser
aus der oberen Öffnung durch vollständiges Umkippen der Maschine herausströmen zu lassen.
Reinigung der Dampfvorrichtung
Die Dampfvorrichtung nach jedem Gebrauch sorgfältig reinigen, so dass Verstopfungen vermieden werden
und sich keine Milchreste auf der Außenseite ansetzen, die besonders schwierig zu entfernen sind.
- Falls sich die Dampfdüse verstopfen sollte:
Die Milchteilchen mit einer Nadel entfernen und die Düse unter laufendes Wasser durchspülen. Den
Außenteilder Düse mit einem feuchten Tuch abreiben. Das angefeuchtete Tuch gegen die Dampfdüsedrüc-
ken und durch Betätigung des Bedienungsknopfes ein oder zwei Sekunden lang Dampf herausströmen las-
sen. Knopf wieder zudrehen. Auf diese Weise werden die Milchreste herausgespült.
Reinigung der Tropfschale
Für die Reinigung kann das Tropfgitter aus der Maschine abgetrennt und unter laufendes Wasser gewa-
schen werden.
ENTKALKUNG DER KAFFEEMASCHINE
DieMaschine muss inregelmäßigen Abständen entkalktwerden.Die Häufigkeit diesesVorgangshängtvon
der Wasserqualität und der Anzahl der Maschineneinsätze ab.
Es empfiehlt sich auf alle Fälle, eine Entkalkung etwa alle 400 Kaffees (oder 100 Kannen zu 4 Kaffees) vor-
zunehmen. Hierzu den zum Lieferumfang der Maschine gehörenden Entkalker verwenden.
Wie folgt vorgehen:
-Den Filterhalter aus der Einhakvorrichtung abziehen.
-Einen vollen Teelöffel Entkalker (etwa 8 gr.) in 300 ml lauwarmes Wasser lösen, die Mischung in den
Wasserkocher geben und den Verschluss ansetzen.
-Einen Behälter unter den Kaffeeabgabeflansch (ohne eingesetzten Filterhalter) sowie einen weiteren unter
die Dampfvorrichtung stellen.
-Den Bedienungsknopf zuerst auf “ “ (Abb.7) setzen und das Entkalkungsgemisch aus dem
Kaffeeabgabeflansch herausströmen lassen; den Bedienungsknopf anschließend auf “ “ stellen, damit
das Entkalkungsgemisch aus der Dampfdüse heraustritt.
-Nach dem Brühverfahren die Maschine abschalten und abkühlen lassen.
- Den Vorgang wiederholen.
Das im Beutel verbliebene Entkalkungsmittel kann für die nächste Entkalkung an einem trockenen Ort auf-
bewahrt werden.
Maschine nach dem Entkalkungsvorgang zwei aufeinanderfolgende Male einschalten; dabei nur Wasser
einsetzen, um aus der Anlage alle Säurereste wegzuspülen. Maschine abkühlen lassen.

18
D
PROBLEME BEI DER KAFFEE- ODER CAPPUCCINO-ZUBEREITUNG
Problem:
1.Aus dem Filterhalter fließt Kaffee heraus.
Ursache:
-Filterhalter falsch eingesetzt
-Ungenügende Drehung des Filterhalters.
-Innendichtung schmutzig, reinigungsbedürftig.
-Dichtung steif, durch eine neue auswechseln.
-Gemahlener Kaffee an den Filterhalterrändern.
Problem:
2.Aus dem Filterhalter fließt kein Kaffee.
Ursache:
-Kocher ohne Wasser.
-Filterhalter wurde nicht mit Kaffee gefüllt.
-Filter infolge eines zu fein gemahlenen bzw. eines im Filter zu stark angedrückten Kaffees verstopft.
Problem:
3.Kein Dampfaustritt aus der Dampfdüse.
Ursache:
-Kein oder ungenügende Wassermenge im Kocher.
-Dampfdüse verstopft (siehe Abschnitt “Reinigung“).
Problem:
4.Ungenügender Milchschaum beim Schlagen der Milch.
Ursache:
-Dampfdüse verstopft (siehe Abschnitt “Reinigung“).
ZUR ERZIELUNG DER BESTMÖGLICHEN RESULTATE....
-Nur frisches Wasser benutzen.
-Selbst gemahlener Kaffee schmeckt am besten! Denn: Das Aroma und die Geschmacknote frisch gemah-
lener Kaffeebohnen sind von Weitem qualitativ besser.
-Servieren Sie den Kaffee sofort nach seiner Zubereitung.
-Kaffee niemals aufwärmen.
Table of contents
Languages:
Other ARIETE Coffee Maker manuals

ARIETE
ARIETE 1389 User manual

ARIETE
ARIETE Caffe Novecento 1387 User manual

ARIETE
ARIETE You&Me User manual

ARIETE
ARIETE 1450 User manual

ARIETE
ARIETE 1318 User manual

ARIETE
ARIETE CAFFE NOVECENTO User manual

ARIETE
ARIETE 1342 User manual

ARIETE
ARIETE 1342 User manual

ARIETE
ARIETE Cafe Roma De Luxe User manual

ARIETE
ARIETE Capricci Cafe MC50 User manual

ARIETE
ARIETE 1313 User manual

ARIETE
ARIETE 00M138730AR0 User manual

ARIETE
ARIETE 1394 User manual

ARIETE
ARIETE 1380 User manual

ARIETE
ARIETE Cialdissima mp60 User manual

ARIETE
ARIETE Moka Aroma Espresso 1337 User manual

ARIETE
ARIETE CREMISSIMA User manual

ARIETE
ARIETE 1389A User manual

ARIETE
ARIETE 1389 User manual

ARIETE
ARIETE 1301 User manual