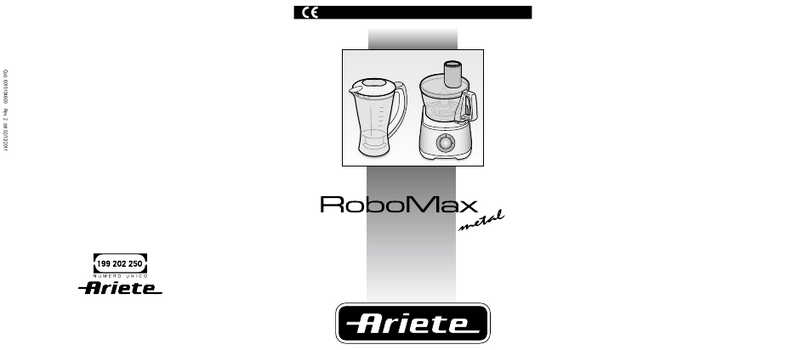
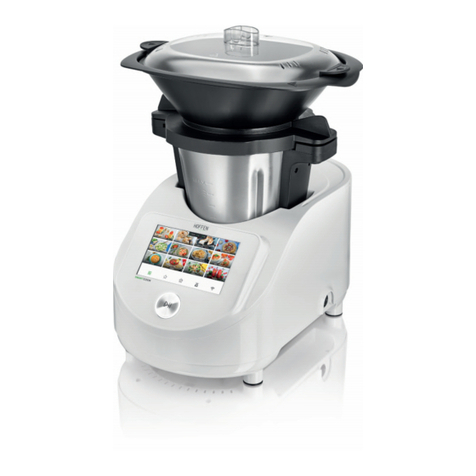
ARIETE RoboMix Compact 1784 User manual

Mod. 1784
Cod. 6015105000 Rev. 1 del 02/12/2011
De’ Longhi Appliances Srl
Divisione Commerciale Ariete
Via L. Seitz, 47
31100 Treviso (TV) - Italy
E-Mail: [email protected]
Internet: www.ariete.net
825440

Fig. 1
Fig. 2 Fig. 3
Fig. 4 Fig. 5
C
B
A
P O
L
I
M
H
FED G
N

- 1 -
Fig. 6 Fig. 7
Fig. 8 Fig. 9
Fig. 10

IT
- 2 -
AVVERTENZE IMPORTANTI
LEGGERE QUESTE ISTRUZIONI PRIMA DELL’USO
Usando apparecchi elettrici è necessario prendere le opportune precauzioni, tra le quali:
Assicurarsi che il voltaggio elettrico dell’apparecchio corrisponda a quello della vostra rete1.
elettrica.
Non lasciare l’apparecchio incustodito quando collegato alla rete elettrica; disinserirlo dopo ogni2.
uso.
Non mettere l’apparecchio sopra o vicino a fonti di calore.3.
Durante l’utilizzo posizionare l’apparecchio su di un piano orizzontale, stabile e ben illuminato.4.
Non lasciare l’apparecchio esposto ad agenti atmosferici (pioggia, sole, ecc...).5.
Fare attenzione che il cavo elettrico non venga a contatto con superfici calde.6.
Questo apparecchio non è adatto all’utilizzo da parte di persone (compresi i bambini) con capa-7.
cita fisiche, sensoriali o mentali ridotte. Gli utenti che manchino di esperienza e conoscenza
dell’apparecchio oppure ai quali non siano state date istruzioni relative all’utilizzo dell’apparec-
chio dovranno essere soggette alla supervisione da parte di una persona responsabile della loro
sicurezza.
E’ necessario vigilare sui bambini per assicurare che non giochino con l’apparecchio.8.
NON IMMERGERE MAI IL CORPO DEL PRODOTTO, LA SPINA ED IL CAVO ELETTRICO IN9.
ACQUA O ALTRI LIQUIDI, USARE UN PANNO UMIDO PER LA LORO PULIZIA.
ANCHE QUANDO L’APPARECCHIO NON E’ IN FUNZIONE, STACCARE LA SPINA DALLA10.
PRESA DI CORRENTE ELETTRICA PRIMA DI INSERIRE O TOGLIERE LE SINGOLE PARTI O
PRIMA DI ESEGUIRE LA PULIZIA.
Assicurarsi di avere sempre le mani ben asciutte prima di utilizzare o di regolare gli interruttori11.
posti sull’apparecchio o prima di toccare la spina e i collegamenti di alimentazione.
NON TOCCARE MAI LE PARTI IN MOVIMENTO.12.
ATTENZIONE: INSERIRE LA LAMA PRIMA DEGLI ALIMENTI. Prima di togliere il coperchio13.
attendere che la lama sia completamente ferma e scollegare sempre la spina di alimentazione
dalla presa di corrente.
Non fate funzionare l’apparecchio a vuoto.14.
Non usare l’apparecchio se la lama è danneggiata.15.
NON INSERITE MAI INGREDIENTI, LIQUIDI COMPRESI, OLTRE IL LIMITE MASSIMO16.
INDICATO NELLA CIOTOLA.
Non utilizzare l’apparecchio per tritare alimenti aventi un’eccessiva consistenza (esempio: cubetti17.
di ghiaccio o carne con ossa).
Non trasportare l’apparecchio tramite la ciotola montata, ovvero, la maniglia della ciotola non18.
deve servire per trasportare l’apparecchio.
Per evitare infortuni e danni all’apparecchio, tenere sempre le mani e gli utensili da cucina lon-19.
tano da lame e dischi in movimento.
Le lame sono taglienti. Maneggiarle con attenzione.20.
Non introdurre mai gli alimenti con le mani. Servirsi sempre del premicibo.21.
Non rimuovere gli alimenti dalle pareti della ciotola mentre l’apparecchio è in funzione. Spengere l’ap-22.
parecchio, scollegare la spina di alimentazione dalla presa ed utilizzare sempre un’apposita spatola.

IT
- 3 -
IL PRODOTTO E’ STATO PROGETTATO IN MODO CHE SIA FUNZIONANTE SOLO SE23.
LA CIOTOLA ED IL RELATIVO COPERCHIO SONO STATI MONTATI CORRETTAMENTE.
QUALORA QUESTO NON SI VERIFICASSE, PORTARE IL PRODOTTO AD UN CENTRO
ASSISTENZA AUTORIZZATO.
STACCARE SEMPRE LA SPINA PRIMA DI QUALSIASI OPERAZIONE ALL’INTERNO DELLA24.
CIOTOLA.
Per staccare la spina, afferrarla direttamente e staccarla dalla presa a parete. Non staccarla mai25.
tirandola per il cavo.
Non usare l’apparecchio se il cavo elettrico o la spina risultano danneggiati, o se l’apparecchio26.
stesso risulta difettoso; in questo caso portatelo al più vicino Centro di Assistenza Autorizzato.
Se il cavo di alimentazione è danneggiato, esso deve essere sostituito dal Costruttore o dal27.
suo servizio assistenza tecnica o comunque da una persona con qualifica similare, in modo da
prevenire ogni rischio.
L’apparecchio è concepito per il SOLO USO DOMESTICO e non deve essere adibito ad uso28.
commerciale o industriale.
Questo apparecchio è conforme alla direttiva 2006/95/CE e EMC2004/108/CEE.29.
Eventuali modifiche a questo prodotto, non espressamente autorizzate dal produttore, possono30.
comportare il decadimento della sicurezza e della garanzia del suo utilizzo da parte dell’utente.
Allorchè si decida di smaltire come rifiuto questo apparecchio, si raccomanda di renderlo inope-31.
rante tagliandone il cavo di alimentazione. Si raccomanda inoltre di rendere innocue quelle parti
dell’apparecchio suscettibili di costituire un pericolo, specialmente per i bambini che potrebbero
servirsi dell’apparecchio per i propri giochi.
Gli elementi dell’imballaggio non devono essere lasciati alla portata dei bambini in quanto poten-32.
ziali fonti di pericolo.
CONSERVARE QUESTE ISTRUZIONI

IT
- 4 -
DESCRIZIONE DELL’APPARECCHIO (Fig. 1)
A Manopola di funzionamento
B Corpo motore
C Perno motore
D Supporto lama
E Lama per tritare
F Lama per impastare
G Premicibo
H Disco per montare
I Porta lama
L Lama per julienne
M Lama per fette
N Lama per bastoncini
O Coperchio
P Ciotola
ATTENZIONE
L’apparecchio è munito di un dispositivo che ne impedisce il funzionamento se il coperchio (O) non
è debitamente bloccato e la ciotola (P) non è inserita correttamente.
ISTRUZIONI PER L’USO
ATTENZIONE: Prima di pulire l’apparecchio e di installare o rimuovere accessori, assicurarsi sia
scollegato dalla rete elettrica e che la manopola di funzionamento (A) sia su “0”.
- Inserire il perno motore (C) nell’apposito alloggiamento sul corpo motore (B) (Fig. 2).
- Collocare la ciotola (P) sul corpo motore (B) e bloccarla ruotandola in senso orario in modo che
l’aletta posta nella parte inferiore del manico si innesti perfettamente a scatto nella fessura sul
corpo motore (Fig. 3).
- Montare il supporto lama (D) sul perno motore (C) all’interno della ciotola (P) (Fig. 4).
Tritare, impastare o montare
- Se si desidera utilizzare l’apparecchio in funzione tritatutto, montare la lama in metallo (E) sul
supporto lama (D), altrimenti per impastare montare la lama in plastica (F), facendo coincidere
le fessure interne alla base della lama con le tacche presenti sul supporto e premendola verso il
basso (Fig. 5).
ATTENZIONE: Le lame sono taglienti, maneggiarle con attenzione.
- Nel caso invece si desiderasse montare albumi o panna, installare l’apposito accessorio (H) sul
supporto lama (D) come mostrato in Fig. 6.
AVVERTENZA: Prima della lavorazione, accertarsi che la ciotola (P) ed il disco (H) siano perfetta-
mente puliti da qualsiasi traccia di burro o tuorlo.
- Tagliare gli alimenti a piccoli pezzi (1,5 x 1,5 cm) e inserirli nella ciotola (P) o nel caso si desideri
impastare, inserire gli ingredienti.
ATTENZIONE: Non inserire alimenti oltre il livello massimo indicato sulla ciotola (P).

IT
- 5 -
- Inserire il coperchio (O) sopra la ciotola (P) allineando la tacca presente all’interno della ciotola (P)
col simbolo ( ). Bloccare il coperchio (O) a scatto ruotandolo in senso orario ( ) (Fig. 7).
ATTENZIONE: Assicurarsi di aver bloccato saldamente il coperchio prima di mettere in funzione
l’apparecchio.
- Inserire la spina elettrica in una presa di corrente.
- Mettere in funzione l’apparecchio selezionando la velocità di rotazione della lama tramite la mano-
pola di funzionamento (A).
L’apparecchio è dotato di due velocità, la minima “1” e la massima “2”.
ATTENZIONE: Quando si utilizza l’apparecchio per impastare o montare, si consiglia di iniziare con
la velocità “1” e passare successivamente alla velocità “2”. Quando lo si utilizza per tritare, è consi-
gliabile selezionare il funzionamento ad impulsi ruotando la manopola (A) in senso antiorario sulla
posiozione “P”. L’utilizzo ottimale avviene premendo per un brevissimo tempo (2/3 sec.).
ATTENZIONE: Non far funzionare l’apparecchio per più di 30 secondi consecutivamente. Attendere
almeno 2 minuti prima di procedere con un nuovo utilizzo.
- Per ottenere un trito fine ed omogeneo rimuovere, se necessario, l’alimento dalla parete della
ciotola e portarlo verso il centro con l’aiuto di una spatola.
ATTENZIONE: Non rimuovere gli alimenti dalle pareti della ciotola mentre l’apparecchio è in funzio-
ne. Spegnere prima l’apparecchio e scollegare la spina di alimentazione.
ATTENZIONE: Per evitare infortuni e danni all’apparecchio, tenere sempre le mani e gli utensili da
cucina lontano da lame e dischi in movimento.
ATTENZIONE: Non utilizzare le dita per rimuovere gli alimenti dalle pareti della ciotola mentre l’ap-
parecchio è in funzione. Utilizzare sempre un’apposita spatola.
- Se durante il funzionamento si rendesse necessario aggiungere alimenti, utilizzare il foro presente
sul coperchio (O). Spingere gli alimenti inseriti con l’ausilio del premicibo (G) (Fig. 8).
ATTENZIONE: Non introdurre mai gli alimenti con le mani. Servirsi sempre del premicibo.
- Per interrompere il funzionamento dell’apparecchio agire sulla manopola (A) e posizionarla su “0”.
Affettare
ATTENZIONE: Le lame sono taglienti, maneggiarle con attenzione.
- Inserire la lama desiderata, lama per fette (M), lama per taglio a julienne (L) o la lama per
bastoncini (N) sul disco porta lame (I) in modo che il foro situato sulla lama risulti al centro del
disco (Fig. 9).
- Montare il disco porta lame (I) completo sul perno motore (C), afferrandolo dagli appositi occhielli,
con la lama rivolta verso l’altro (Fig. 10).
- Inserire il coperchio (O) sopra la ciotola (P) e procedere come indicato nel paragrafo “Tritare,
impastare o montare”.

IT
- 6 -
PULIZIA E MANUTENZIONE
ATTENZIONE: NON IMMERGERE MAI IL CORPO DEL PRODOTTO, LA SPINA ED IL CAVO
ELETTRICO IN ACQUA O ALTRI LIQUIDI, USARE UN PANNO UMIDO PER LA LORO PULIZIA.
ATTENZIONE: ANCHE QUANDO L’APPARECCHIO NON E’ IN FUNZIONE, STACCARE LA SPINA
DALLA PRESA DI CORRENTE ELETTRICA PRIMA DI INSERIRE O TOGLIERE LE SINGOLE
PARTI O PRIMA DI ESEGUIRE LA PULIZIA.
ATTENZIONE: Le lame sono taglienti; maneggiarle con attenzione.
- Rimuovere tutti gli accessori utilizzati, operando in senso inverso a quanto descritto in precedenza
per l’assemblaggio.
- Tutti gli accessori possono essere lavati in lavastoviglie nel cestello superiore ad una temperatura
max di 50°C/ 122°F.
- Per la pulizia del corpo motore (B) utilizzare un panno leggermente umido.
ATTENZIONE: Dopo la pulizia, far asciugare ogni parte perfettamente prima di rimontarla.

EN
- 7 -
IMPORTANT SAFEGUARDS
READ THESE INSTRUCTIONS BEFORE USE.
The necessary precautions must be taken when using electrical appliances, and these include the
following:
Make sure that the voltage on the appliance rating plate corresponds to that of the mains electricity.1.
Never leave the appliance unattended when connected to the power supply; unplug it after2.
every use.
Never place the appliance on or close to sources of heat.3.
Always place the appliance on a flat, level surface during use.4.
Never leave the appliance exposed to the elements (rain, sun, etc....).5.
Make sure that the power cord does not come into contact with hot surfaces.6.
This appliance is not intended for use by persons (including children) with reduced physical,7.
sensory or mental capabilities, or lack of experience and knowledge, unless they have been
given supervision or instruction concerning use of the appliance by a person responsible for
their safety.
Children should be supervised to ensure that they do not play with the appliance.8.
NEVER PLACE THE APPLIANCE BODY, PLUG OR POWER CORD IN WATER OR OTHER9.
LIQUIDS; ALWAYS WIPE CLEAN WITH A DAMP CLOTH.
ALWAYS UNPLUG THE POWER CORD FROM THE ELECTRICITY MAINS BEFORE FITTING10.
OR REMOVING SINGLE ATTACHMENTS OR BEFORE CLEANING THE APPLIANCE.
Always make sure that your hands are thoroughly dry before using or adjusting the switches on11.
the appliance, or before touching the power plug or power connections.
NEVER TOUCH MOVING PARTS.12.
WARNING: ALWAYS FIT THE BLADE BEFORE INSERTING THE FOOD. Before removing the13.
lid, unplug the appliance and make sure that the blade has stopped moving.
Never operate the appliance when empty.14.
Never use the appliance if the blade is damaged.15.
NEVER PLACE INGREDIENTS, INCLUDING LIQUIDS, ABOVE THE MAXIMUM LIMIT SHOWN16.
ON THE BOWL.
Never use the appliance to chop excessively hard foods (e.g., ice cubes or meat on the bone).17.
Never use the fitted bowl to move the appliance; i.e., the handle on the bowl is not a carry handle18.
for the appliance as a whole..
To prevent accidents or damage to the appliance, always keep hands and cooking utensils well19.
away from moving blades or cutting discs.
The blades are sharp. Handle them with care. Always hold them by the plastic parts.20.
Never introduce foods by hand. Always use the pusher.21.
Never remove foods from the sides of the bowl while the appliance is operating. Switch off the22.
appliance, unplug the power cord from the mains and use the special spatula.
THIS APPLIANCE HAS BEEN DESIGNED TO OPERATE ONLY IF THE BOWL AND RELEVANT23.
LID HAVE BEEN FITTED CORRECTLY. IF THIS IS NOT THE CASE, TAKE IT TO YOUR
NEAREST AUTHORISED ASSISTANCE CENTRE.
EN
- 8 -
ALWAYS UNPLUG THE APPLIANCE BEFORE CARRYING OUT ANY OPERATION INSIDE24.
THE BOWL.
To unplug the appliance, grip the plug and remove it directly from the power socket. Never pull25.
the power cord to unplug the appliance.
Never use the appliance if the power cord or plug are damaged or if the appliance itself is faulty;26.
in this case, take it to your nearest Authorised Assistance Centre.
To prevent any risks, if the power cord is damaged, it must be replaced by the manufacturer, its27.
Technical Assistance Service or a similarly qualified person.
This appliance is designed for HOME USE ONLY and may not be used for commercial or indus-28.
trial purposes.
This appliance conforms to the 2006/95/EC and EMC2004/108/EEC directives.29.
Any changes to this product that have not been expressly authorised by the manufacturer may30.
lead to the user’s guarantee being rendered null and void.
In the event that you decide to dispose of the appliance, we advise you to make it inoperative31.
by cutting off the power cord. We also recommend that any parts that could be dangerous be
rendered harmless, especially for children, who may play with the appliance or its parts.
Packaging must never be left within the reach of children since it is potentially dangerous.32.
DO NOT THROW AWAY THESE INSTRUCTIONS
DESCRIPTION OF THE APPLIANCE (Fig. 1)
A Operating dial
B Power base
C Motor shaft
D Blade support
E Chopping blade
F Mixing blade
G Pusher
H Whisking disc
I Blade disc
L Julienne blade
M Slicing blade
N Chip cutting blade
O Lid
P Bowl
WARNING
The appliance is fitted with a device to prevent it from operating if the lid (O) is not securely locked
in place and the bowl (P) is not correctly inserted.

EN
- 9 -
INSTRUCTIONS FOR USE
WARNING: Make sure that the appliance is unplugged and that the control dial (A) is set to “0” before
cleaning it or fitting or removing attachments.
- Insert the motor shaft (C) into the special seating on the power base (B) (Fig. 2).
- Fit the bowl (P) onto the power base (B) and lock it into place turning it clockwise so that the tab
in the bottom section of the handle clicks perfectly into the slit in the power base (Fig. 3).
- Fit the blade support (D) onto the motor shaft (C) inside the bowl (P) (Fig. 4).
Chopping, mixing or whisking
- To use the appliance as a chopper, fit the metal blade (E) onto the blade support (D), while for
mixing, fit the plastic blade (F) by making sure that the slots inside the base of the blade are in line
with the notches in the support and pressing the blade downwards (Fig. 5).
WARNING: The blades are sharp; handle them with care.
- To use the appliance to whisk egg whites or whip cream, fit the special attachment (H) onto the
blade support (D), as illustrated in Fig. 6.
WARNING: Before starting the appliance, make sure that the bowl (P) and the disc (H) are perfectly
clean and without any traces of butter or egg yolk.
- Cut the foods into small pieces (1.5 x 1.5 cm) and place them inside the bowl (P) or for mixing,
insert the ingredients.
WARNING: Never add foods over the maximum level marked on the bowl (P).
- Fit the lid (O) over the bowl (P) moving the mark inside the bowl (P) so that it is in line with the
symbol ( ). Block the lid (O) so it clicks into place by moving it clockwise ( ) (Fig. 7).
WARNING: Make sure that the lid is firmly locked into place before starting the appliance.
- Plug the appliance into the mains power.
- Start the appliance, selecting the rotation speed of the blade using the operating dial (A).
The appliance has two operating speeds: minimum «1» and maximum «2».
WARNING: When the appliance is used to mix or whisk, we recommend starting at speed “1” and
then passing on to speed “2”. When used to chop, it is advisable to use the pulse function, turning
the dial (A) anticlockwise to the “P” setting. For optimum use, press the button in short bursts (2/3
sec.).
WARNING: Never operate the appliance for more than 30 seconds at a time. Wait at least 2 minutes
before operating it again.
- For smoother, finer chopped foods, remove the food, if necessary, from the sides of the bowl with
a spatula, pushing it towards the centre.
WARNING: Never remove foods from the sides of the bowl while the appliance is operating. Switch
off the appliance first and unplug it from the mains power.
WARNING: To prevent accidents or damage to the appliance, always keep hands and cooking
utensils well away from moving blades or discs.
WARNING: Never use your fingers to remove food from the sides of the bowl while the appliance is
operating. Always use the special spatula.

EN
- 10 -
- If it is necessary to add foods during appliance operation, use the opening in the lid (O). Push the
foods down with the pusher (G) on its own (Fig. 8).
WARNING: Never insert foods by hand. Always use the pusher.
- To stop the appliance, turn the dial (A) to “0”.
Slicing
WARNING: The blades are sharp; handle with care.
- Fit the required blade, the slicing blade (M), julienne blade (L) or chip blade (N) into the blade
disc (I) so that the hole in the blade is in the centre of the disc (Fig. 9).
- Fit the assembled blade support disc (I) on the motor shaft (C), gripping it by the relevant slots
and keeping the blade so it is facing upwards (Fig. 10).
- Fit the lid (O) over the bowl (P) and proceed as described in the section “Chopping, mixing or
whisking”.
CLEANING
WARNING: NEVER PLACE THE APPLIANCE BODY, PLUG OR POWER CORD IN WATER OR
OTHER LIQUIDS; ALWAYS WIPE CLEAN WITH A DAMP CLOTH.
WARNING: ALWAYS UNPLUG THE POWER CORD FROM THE ELECTRICITY MAINS BEFORE
FITTING OR REMOVING SINGLE ATTACHMENTS OR BEFORE CLEANING THE APPLIANCE.
WARNING: The blades are extremely sharp. Always handle them with care.
- Remove all of the attachments used, working in the opposite order to the way they were fitted.
- All attachments can be washed in the top rack of the dishwasher, at a maximum temperature of
50°C/ 122°F.
- Wipe the power base (B) clean with a slightly damp cloth.

FR
- 11 -
INSTRUCTIONS IMPORTANTES
LIRE CES INSTRUCTIONS AVANT L’EMPLOI.
Lors de l’utilisation d’appareils électriques, il est nécessaire de prendre les précautions suivantes:
Vérifiez que le voltage électrique de l’appareil corresponde à celui de votre réseau électrique.1.
Ne laissez jamais l’appareil sans surveillance lorsqu’il est branché au réseau électrique; débran-2.
chez-le après chaque utilisation.
Ne placez pas l’appareil au dessus ou près de sources de chaleur.3.
Lors de son utilisation, placez l’appareil sur une surface horizontale et stable.4.
N’exposez jamais l’appareil aux agents atmosphériques externes (pluie, soleil, etc.).5.
Veillez à ce que le câble électrique n’entre jamais en contact avec des surfaces chaudes.6.
Cet appareil n’est pas indiqué pour l’utilisation de la part de personnes (y compris les enfants)7.
ayant des capacités physiques, sensorielles ou mentales réduites. Les utilisateurs n’ayant pas
l’expérience, une connaissance suffisante de l’appareil ou n’ayant pas reçu les instructions
relatives à l’appareil, devront faire l’objet d’un contrôle de supervision de la part d’une personne
responsable de leur sécurité.
Il est nécessaire de surveiller les enfants pour empêcher qu’ils ne jouent avec l’appareil.8.
NE PAS PLONGER LE CORPS DU PRODUIT, LA FICHE NI LE CABLE ELECTRIQUE DANS9.
L’EAU OU AUTRES LIQUIDES, ET UTILISER TOUJOURS UN CHIFFON HUMIDE POUR LES
NETTOYER.
MEME LORSQUE L’APPAREIL N’EST PAS EN MARCHE, DEBRANCHER LA FICHE DE LA10.
PRISE DE COURANT ELECTRIQUE AVANT D’INSTALLER OU DE DEFAIRE LES SIMPLES
PARTIES OU AVANT DE PROCEDER AU NETTOYAGE.
Vérifier d’avoir toujours les mains sèches avant d’utiliser ou de régler les interrupteurs placés sur11.
l’appareil ou avant de manipuler la fiche et les connexions électriques.
NE TOUCHEZ JAMAIS LES PARTIES EN MOUVEMENT.12.
ATTENTION: INTRODUIRE LA LAME AVANT LES ALIMENTS. Avant de retirer le couvercle,13.
attendre que la lame soit entièrement arrêtée et débrancher la fiche d’alimentation de la prise
de courant.
Ne faites pas fonctionner l’appareil à vide.14.
N’utilisez pas l’appareil si la lame est endommagée.15.
NE VERSEZ JAMAIS LES INGREDIENTS (Y COMPRIS LES LIQUIDES) AU-DELA DE LA16.
LIMITE MAXIMUM INDIQUEE SUR LE BOL.
N’utilisez pas l’appareil pour hacher des aliments ayant une consistance excessive (exemple:17.
cubes de glaçons ou viande avec os).
Ne transportez pas l’appareil en le saisissant par la poignée du bol.18.
Pour éviter les incidents ou les dommages à l’appareil, gardez toujours vos mains ainsi que les19.
ustensiles de cuisine loin des lames et des disques en mouvement.
Les lames sont tranchantes. Manipulez-les avec soin. Saisissez-les toujours sur la partie en20.
plastique.
N’introduisez jamais les aliments avec les mains. Utilisez toujours le pressoir à aliments.21.
N’enlevez pas les aliments sur les parois du bol pendant que l’appareil est en fonction. Eteindre22.
l’appareil, débrancher la fiche de la prise de courant et utiliser toujours une spatule adéquate.

FR
- 12 -
CE PRODUIT A ETE CONÇU DE FAÇON A FONCTIONNER SEULEMENT SI LE BOL ET LE23.
COUVERCLE DU BOL ONT ETE CORRECTEMENT INSTALLES. DANS LE CAS CONTRAIRE,
AMENEZ L’APPAREIL AUPRES D’UN CENTRE D’ASSISTANCE TECHNIQUE APRES-VENTE
AUTORISE.
AVANT TOUTE OPERATION A L’INTERIEUR DE LA TASSE, DEBRANCHER LA FICHE DE LA24.
RPISE DE OCURANT ELECTRIQUE.
Pour débrancher l’appareil, saisir directement la fiche en la débranchant de la prise murale. Ne25.
tirez jamais sur le câble d’alimentation.
N’utilisez pas l’appareil si le câble électrique ou la fiche sont endommagés, ou si l’appareil résulte26.
défectueux; dans ce cas, contactez le Centre d’Assistance Après-vente Autorisé le plus proche.
Si le câble d’alimentation est endommagé, il doit être remplacé par le Constructeur ou par son27.
service après-vente ou, dans tous les cas, par un technicien qualifié, de façon à éviter tout risque
de danger.
L’appareil a été conçu EXCLUSIVEMENT pour un USAGE DOMESTIQUE et il ne peut en aucun28.
cas être destiné à un usage commercial ou industriel.
Cet appareil est conforme à la directive 2006/95/CE et EMC2004/108/CEE.29.
Toute modification du produit, non autorisé expressément par le producteur, peut comporter la30.
réduction de la sécurité et la déchéance de la garantie.
Si vous décidez de vous défaire de cet appareil, il est fortement recommandé de le rendre inuti-31.
lisable en éliminant le câble d’alimentation électrique. Nous conseillons en outre d’exclure toute
partie de l’appareil pouvant constituer une source de danger, en particulier pour les enfants qui
peuvent se servir de l’appareil pour jouer.
Ne laissez pas les parties de l’emballage à la portée des enfants car elles constituent une source32.
potentielle de danger.
CONSERVEZ SOIGNEUSEMENT CES
INSTRUCTIONS
DESCRIPTION DE L’APPAREIL (Fig. 1)
A Poignée de fonctionnement
B Corps moteur
C Tourillon moteur
D Support lame
E Lame à hacher
F Lame à pétrir
G Pressoir à aliments
H Disque pour battre en neige
I Porte-lame
L Lame pour coupe à la Julienne
M Lame pour tranches
N Lame pour coupe en petits bâtons
O Couvercle
P Tasse

FR
- 13 -
ATTENTION
L’appareil est muni d’un dispositif qui empêche son fonctionnement si le couvercle (O) n’est pas
correctement bloqué et si le bol (P) n’est pas installé correctement.
MODE D’EMPLOI
ATTENTION: Avant de nettoyer l’appareil et d’installer ou de retirer les accessoires, vérifier que ce
dernier soit débranché du réseau électrique et que la poignée de fonctionnement (A) soit sur “0”.
- Introduire le tourillon moteur (C) dans son emplacement sur le corps moteur (B) (Fig. 2).
- Placer le bol (P) sur le corps moteur (B) et le bloquer en le tournant vers la droite de façon à ce
que l’ailette située sur la partie inférieure du manche s’enclenche parfaitement à travers le déclic
dans la fissure située sur le corps moteur (Fig. 3).
- Installer le support de la lame (D) sur le tourillon moteur (C) à l’intérieur du bol (P) (Fig. 4).
Hacher, pétrir ou battre en neige
- Si on désire utiliser l’appareil en fonction de hachoir, monter la lame en métal (E) sur le support
lame (D), alors que pour pétrir, monter la lame en plastique (F), en faisant coïncider les fissures
internes sur la base de la lame avec les crans présents sur le support et en la poussant vers le
bas (Fig. 5).
ATTENTION: Les lames sont coupantes; manipulez-les avec attention.
- Si on désire par contre battre en neige les blancs d’œuf ou la crème fraîche, installer l’accessoire
(H) sur le support lame (D) comme illustré en Fig. 6.
NOTE: Avant de procéder à la préparation, vérifier que le bol (P) et que le disque (H) soient parfai-
tement nettoyés de toute trace de beurre ou de jaune d’œuf.
- Couper les aliments en petits morceaux (1,5 x 1,5 cm) avant de les verser dans le bol (P) et, si on
veut pétrir une pâte, introduire les ingrédients.
ATTENTION: Ne pas dépasser le niveau maximum indiqué sur le bol (P).
-
Installer le couvercle (O) sur le bol (P) en alignant le cran situé à l’intérieur du bol (P) avec le sym-
bole ( ). Bloquer le couvercle (O) à travers le déclic en le tournant vers la droite ( ) (Fig. 7).
ATTENTION: Vérifier que le couvercle soit solidement bloqué avant de mettre l’appareil en mar-
che.
- Introduire la fiche électrique dans une prise de courant.
- Mettre l’appareil en marche en sélectionnant la vitesse de rotation de la lame au moyen de la
poignée de fonctionnement (A).
L’appareil est muni de deux vitesses : vitesse minimum «1» et vitesse maximum «2».
ATTENTION: Quand on utilise l’appareil pour pétrir la pâte ou pour monter les œufs en neige, il est
conseillé de commencer avec la vitesse “1” et de passer ensuite à la vitesse “2”. Quand on utilise
l’appareil pour hacher, il est conseillé de sélectionner le fonctionnement à impulsions en tournant
la poignée (A) vers la gauche en position “P”. L’utilisation optimale se fait en appuyant pendant un
temps très court (2/3 secondes).
ATTENTION: Ne faites pas fonctionner l’appareil pendant plus de 30 secondes consécutives.
Attendre au moins 2 minutes avant de faire repartir l’appareil.

FR
- 14 -
- Pour obtenir un hachage fin et homogène, pousser les aliments qui sont attachés contre la paroi
du bol vers le centre du récipient avec une spatule.
ATTENTION: Ne retirez pas les aliments sur la paroi du bol pendant que l’appareil est en fonction.
Eteindre d’abord l’appareil et d’ébrancher la fiche d’alimentation.
ATTENTION: Pour éviter de se blesser ou d’endommager l’appareil, gardez toujours vos mains ou
les ustensiles de cuisine loin des lames et des disques en mouvement.
ATTENTION: N’essayez jamais d’enlever les aliments sur les parois du bol quand l’appareil est en
marche. En outre, n’utilisez pas vos doigts pour effectuer cette opération mais toujours une spatule
adéquate.
- Si, pendant le fonctionnement, il s’avère nécessaire d’ajouter des aliments, utiliser pour cela
l’ouverture située sur le couvercle (O). Pousser les aliments à l’aide du presseur (G) en introdui-
sant aussi (Fig. 8).
ATTENTION: Ne jamais introduire les aliments avec les mains. Se servir toujours du pressoir à
aliments.
- Pour interrompre le fonctionnement de l’appareil, agir sur la poignée (A) et la positionner sur “0”.
Couper en tranches
ATTENTION: Les lames sont extrêmement tranchantes ; manipulez-les avec la plus grande atten-
tion.
- Installer la lame désirée, lame pour tranches (M), lame pour coupe à la Julienne (L) ou lame pour
coupe en petits bâtons (N) sur le disque porte-lames (I) de façon à ce que le trou situé sur la lame
soit au centre du disque (Fig. 9).
- Monter le disque porte-lame (I) complet sur le tourillon moteur (C), en le saisissant par les œillets
et avec la lame dirigée vers le haut (Fig. 10).
- Placer le couvercle (O) sur le bol (P) et procéder selon les indications reportées au paragraphe
“Hacher, pétrir ou battre en neige”.
NETTOYAGE
ATTENTION: NE PAS PLONGER LE CORPS DU PRODUIT, LA FICHE NI LE CABLE ELECTRIQUE
DANS L’EAU OU AUTRES LIQUIDES, ET UTILISER TOUJOURS UN CHIFFON HUMIDE POUR
LES NETTOYER.
ATTENTION: MEME LORSQUE L’APPAREIL N’EST PAS EN MARCHE, DEBRANCHER LA FICHE
DE LA PRISE DE COURANT ELECTRIQUE AVANT D’INSTALLER OU DE DEFAIRE LES SIMPLES
PARTIES OU AVANT DE PROCEDER AU NETTOYAGE.
ATTENTION: Les lames sont tranchantes; manipulez-les avec soin.
- Retirer tous les accessoires utilisés, en procédant dans le sens inverse aux indications précédem-
ment décrite pour l’assemblage.
- Tous les accessoires peuvent être lavés au lave-vaisselle dans la clayette supérieure à une tem-
pérature maximum de 50°C/ 122°F.
- Pour le nettoyage du bloc moteur (B) utiliser un chiffon légèrement humide.
ATTENTION: Après le nettoyage, faire essuyer parfaitement chaque partie avant de la remonter.

DE
- 15 -
WICHTIGE HINWEISE
VOR GEBRAUCH BITTE DIESE ANLEITUNG LESEN.
Beim Gebrauch von Elektrogeräten sind einige Vorsichtsmaßnahmen zu treffen:
Vergewissern Sie sich, dass die Netzspannung mit der Gerätespannung übereinstimmt.1.
Das am Stromnetz angeschlossene Gerät niemals unbeaufsichtigt lassen; die Stromzuführung2.
des Geräts nach jedem Gebrauch unterbrechen.
Gerät nicht auf oder an Wärmequellen abstellen.3.
Gerät beim Gebrauch auf eine waagerechte und solide Fläche stellen.4.
Gerät keinen Witterungseinflüssen (Regen, Sonne, usw.) aussetzen.5.
Das Stromkabel darf nicht mit heißen Flächen in Berührung kommen.6.
Dieses Gerät ist nicht für den Gebrauch durch Personen (einschließlich Kindern) geeignet, die7.
nicht im vollen Besitz ihrer körperlichen, sensoriellen und geistigen Fähigkeiten sind. Benutzer,
denen es an Erfahrung und Kenntnis des Geräts mangelt oder die nicht in die Verwendung
des Geräts eingewiesen wurden, müssen durch eine Person überwacht werden, die für ihre
Sicherheit verantwortlich ist.
Kinder müssen überwacht werden, um sicher zu stellen, dass sie nicht mit dem Gerät spielen.8.
DAS GEHÄUSE, DEN STECKER UND DAS STROMKABEL DES GERÄTS KEINESFALLS9.
IN WASSER ODER SONSTIGE FLÜSSIGKEITEN TAUCHEN. VERWENDEN SIE ZUR
REINIGUNG EIN FEUCHTES TUCH.
AUCH WENN DAS GERÄT NICHT IN BETRIEB IST, ZIEHEN SIE DEN NETZSTECKER10.
AUS DER DOSE, BEVOR SIE DIE EINZELNEN TEILE EINSETZEN ODER DIE REINIGUNG
VORNEHMEN.
Vergewissern Sie sich immer, dass Ihre Hände trocken sind, bevor Sie die Schalter am Gerät11.
benutzen oder einstellen, oder bevor Sie den Stecker und die Versorgungsanschlüsse berüh-
ren.
BERÜHREN SIE KEINESFALLS DIE IN BEWEGUNG BEFINDLICHEN TEILE.12.
ACHTUNG: SETZEN SIE DAS MESSER EIN, BEVOR SIE DIE ZUTATEN EINFÜLLEN. Bevor13.
Sie den Deckel entfernen, warten Sie ab, bis das Messer vollkommen zum Stillstand gekommen
ist und ziehen Sie immer den Netzstecker aus der Dose.
Lassen Sie das Gerät nicht leer laufen.14.
Verwenden Sie das Gerät nicht, wenn das Messer beschädigt ist.15.
NIEMALS ZUTATEN, AUCH FLÜSSIGKEITEN, ÜBER DEN ANGEGEBENEN MAXIMALEN16.
WERT IN DIE SCHÜSSEL GEBEN.
Verwenden Sie das Gerät nicht zum Zerkleinern allzu harter Zutaten (beispielsweise Eiswürfel17.
oder Fleisch mit Knochen).
Transportieren Sie das Gerät nicht, indem sie es an der montierten Schüssel halten; auch der18.
Griff darf nicht zum Transportieren des Geräts benutzt werden.
Um Unfälle und Schäden am Gerät zu vermeiden, halten Sie Hände und Küchengeräte immer19.
von den in Bewegung befindlichen Messern und Scheiben fern.
Die Messer sind scharf. Gehen Sie also vorsichtig damit um. Fassen Sie sie immer am20.
Kunststoffteil an.

DE
- 16 -
Füllen Sie das Schneidgut nie mit den Händen ein. Verwenden Sie dazu immer den21.
Andruckstempel.
Nicht die Lebensmittel von dem Schüsselrand entfernen, während das Gerät in Betrieb ist. Das22.
Gerät ausschalten, den Stecker aus der Steckdose ziehen; zum Entfernen den dafür bestimmten
Schaber benutzen.
DAS GERÄT WURDE SO ENTWICKELT, DASS ES NUR FUNKTIONIERT, WENN DER23.
DECKEL UND DIE SCHÜSSEL RICHTIG MONTIERT WURDEN. SOLLTE DIES NICHT DER
FALL SEIN, BRINGEN SIE DAS GERÄT ZUM VERTRAGSKUNDENDIENST.
BEVOR SIE IRGENDWELCHE VORGÄNGE INNERHALB DER SCHÜSSEL VORNEHMEN,24.
ZIEHEN SIE DEN NETZSTECKER AUS DER DOSE.
Direkt am Stecker ziehen, um diesen aus der Wandsteckdose zu führen. Niemals am Kabel25.
ziehen.
Das Gerät nicht benutzen, falls das Stromkabel oder der Stecker beschädigt sein sollten oder26.
das Gerät selbst defekt ist. Es zur nächsten Vertrags-Kundendienststelle bringen.
Zur Gefahrenvorbeugung darf das eventuell beschädigte Stromkabel nur vom Hersteller oder sei-27.
ner Kundendienststelle, d.h. nur von einer ähnlich qualifizierten Person ausgewechselt werden.
Das Gerät ist AUSSCHLIEßLICH FÜR DEN HAUSGEBRAUCH und nicht für Handels- oder28.
Industriezwecke bestimmt.
Dieses Gerät ist konform mit den Richtlinien 2006/95/EWG und EMV2004/108/EWG.29.
Eventuelle Abänderungen an diesem Produkt, die nicht ausdrücklich vom Hersteller genehmigt30.
wurden, können die Sicherheit und Garantie seines Einsatzes durch den Bediener aufheben.
Falls dieses Gerät entsorgt werden soll, ist sein Stromkabel abzuschneiden, so dass es nicht31.
mehr funktionstüchtig ist. Darüber hinaus sind all die Geräteteile unschädlich zu machen, die vor
allem für Kinder, die das Gerät als Spielzeug verwenden könnten, eine Gefahr darstellen.
Die Verpackungsteile nicht in Reichweite von Kindern lassen. Sie stellen eine potentielle Gefahr dar.32.
ANLEITUNG AUFBEWAHREN
BESCHREIBUNG DES GERÄTS (Abb. 1)
A Betriebs-Drehschalter
B Motorgehäuse
C Motorzapfen
D Messerhalterung
E Hackmesser
F Knetmesser
G Andruckstempel
H Scheibe zum Schlagen von Flüssigkeit
I Messer-Aufnahme
L Messer für Julienne-Form
M Messer zum Scheiben schneiden
N Messer für gestiftelte Form
O Deckel
P Schüssel

DE
- 17 -
ACHTUNG
Das Gerät ist mit einer Vorrichtung ausgerüstet, die den Betrieb verhindert, wenn der Deckel (O)
nicht korrekt befestigt oder die Schüssel (P) nicht korrekt eingesetzt wurde.
BETRIEBSANLEITUNG
ACHTUNG: Vor dem Reinigen des Geräts sowie vor dem Einsetzen oder Herausnehmen
von Zubehörteilen sicher stellen, dass es nicht an das Stromnetz angeschlossen ist und der
Betriebsschalter (A) auf “0” steht.
- Den Motorzapfen (C) in den entsprechenden Sitz auf dem Motorgehäuse (B) (Abb. 2) einsetzen.
- Die Schüssel (P) auf dem Motorgehäuse (B) positionieren und sie durch Drehen im Uhrzeigersinn
so feststellen, dass die auf dem Mixer vorhandenen Kerben perfekt in die entsprechenden
Öffnungen auf dem Motorgehäuse passen (Abb. 3).
- Die Messerhalterung (D) auf dem Motorzapfen (C) in der Schüssel (P) (Abb. 4) einsetzen.
Hacken, kneten oder schlagen
- Wenn Sie das Gerät zum Hacken verwenden wollen, setzen Sie das Metallmesser (E) in die
Halterung (D) ein. Wenn Sie das Gerät dagegen zum Kneten benutzen wollen, montieren Sie
das Kunststoffmesser (F) so, dass Schlitze am Ansatz des Messers in die Rillen der Halterung
eingeführt werden und drücken Sie es dann nach unten (Abb. 5).
ACHTUNG: Die Messer sind scharf. Gehen Sie daher vorsichtig damit um.
- Wenn hingegen Eiweiß oder Sahne geschlagen werden soll, muss das entsprechende Zubehör
(H) auf die Messerhalterung (D), wie in Abb. 6 gezeigt, aufgesetzt werden.
HINWEIS: Vor der Benutzung müssen Sie sich vergewissern, dass die Schüssel (P) und die Scheibe
(H) keinerlei Spuren von Butter oder Eigelb aufweisen.
- Die Zutaten in kleine Stückchen (1,5 x 1,5 cm) schneiden und in die Schüssel (P) geben; wenn ein
Teig hergestellt werden soll, die Zutaten dazugeben.
ACHTUNG: Füllen Sie die Zutaten nicht über die an der Schüssel (P) gekennzeichnete maximale
Füllhöhe ein.
- Den Deckel (O) auf der Schüssel (P) anbringen; nach den Kerben, die auf der Schüssel (P) ange-
bracht und mit dem Symbol ( ) markiert sind, genau ausrichten. Den Deckel (O) durch Drehen
gegen den Uhrzeigersinn ( ) (Abb. 7) einrasten.
ACHTUNG: Vergewissern Sie sich, dass der Deckel fest verriegelt ist, bevor Sie das Gerät in Betrieb
setzen.
- Stecken Sie den Stecker in eine Steckdose.
- Setzen Sie das Gerät in Betrieb, indem Sie den Drehschalter (4) auf die gewünschte Messer-
Drehgeschwindigkeit einstellen.
Das Gerät hat zwei Geschwindigkeiten, die niedrigste „1“ und die höchste „2“.
ACHTUNG: Wenn das Gerät zum Kneten oder Schlagen benutzt wird, wird empfohlen, mit der
Geschwindigkeitsstufe “1” zu beginnen und dann auf die Geschwindigkeitsstufe “2” überzugehen.
Wenn es zum Hacken benutzt wird, wird der Impulsbetrieb empfohlen; dazu den Drehschalter (A)
gegen den Uhrzeigersinn auf die Position “P” drehen. Der optimale Gebrauch erfolgt durch kurzes
Drücken (2/3 Sek.).

DE
- 18 -
ACHTUNG: Lassen Sie das Gerät nicht länger als 30 Sekunden nacheinander laufen. Warten Sie 2
Minuten ab, bevor Sie es wieder in Betrieb nehmen.
- Um ein feines, gleichmäßiges Hackgut zu erzielen, entfernen Sie mit Hilfe des mitgelieferten
Schabers das an den Schüsselwänden haftende Gut und schieben es zur Mitte hin.
ACHTUNG: Entfernen Sie an den Schüsselwänden haftende Zutaten nicht, während das Gerät in
Betrieb ist. Schalten Sie vorher das Gerät ab und ziehen Sie den Netzstecker aus der Steckdose.
ACHTUNG: Um Unfälle und Schäden des Geräts zu vermeiden, die Hände und Küchengeräte immer
von den in Bewegung befindlichen Messern und Scheiben fern halten.
ACHTUNG: Nicht mit den Fingern die Lebensmittel von dem Schüsselrand entfernen, wenn das
Gerät in Betrieb ist. Immer den dazu bestimmten Schaber benutzen.
- Sollte es während des Betriebs notwendig sein, weitere Nahrungsmittel zuzugeben, benutzen Sie
dazu die Öffnung des Deckels (O). Die hinzugefügten Nahrungsmittel mit Hilfe des Stopfers (G)
(Abb. 8).
ACHTUNG: Führen Sie die Nahrungsmittel nie mit den Händen ein. Verwenden Sie dazu immer den
Andruckstempel.
- Zur Unterbrechung des Betriebs, den Drehschalter (A) auf “0“ stellen.
Scheiben schneiden
ACHTUNG: Die Messer sind scharf, vorsichtig benutzen.
- Das gewünschte Messer, Messer für Scheiben (M), Messer zum Schneiden von Julienne-Form (L)
oder Messer zum Schneiden von gestiftelter Form (N) so einsetzen, dass die Öffnung des Messers
in der Mitte der Scheibe ist (Abb. 9).
- Die komplette Messerhalterungsscheibe (I) auf dem Motorzapfen (C) montieren; halten Sie sie
dabei an den entsprechenden Ösen mit der Schneide nach oben (Abb. 10).
- Den Deckel (O) auf die Schüssel (P) einsetzen und wie in Abschnitt “Hacken, kneten oder schla-
gen” beschrieben, vorgehen.
REINIGUNG
ACHTUNG: DAS GEHÄUSE, DEN STECKER UND DAS STROMKABEL DES GERÄTS
KEINESFALLS IN WASSER ODER SONSTIGE FLÜSSIGKEITEN TAUCHEN. VERWENDEN SIE
ZUR REINIGUNG EIN FEUCHTES TUCH.
ACHTUNG: AUCH WENN DAS GERÄT NICHT IN BETRIEB IST, ZIEHEN SIE DEN NETZSTECKER
AUS DER DOSE, BEVOR SIE DIE EINZELNEN TEILE EINSETZEN ODER DIE REINIGUNG
VORNEHMEN.
ACHTUNG: Die Messer sind scharf. Vorsichtig damit umgehen.
- Alle verwendeten Zubehörteile in der umgekehrten Reihenfolge entfernen, wie oben in der
Einbauanleitung beschrieben.
- Alle Zubehörteile können im oberen Korb bei einer Höchsttemperatur von 50°C/122°F in der
Spülmaschine gewaschen werden.
- Zur Reinigung des Motorblocks (B), ein leicht angefeuchtetes Tuch verwenden.
ACHTUNG: Nach der Reinigung müssen alle Teile einwandfrei getrocknet werden, bevor sie wieder
eingebaut werden.
Table of contents
Languages:
Other ARIETE Food Processor manuals

ARIETE
ARIETE riete 1783 User manual

ARIETE
ARIETE Speedy 1819 User manual

ARIETE
ARIETE RoboMax metal 1786 User manual

ARIETE
ARIETE ROBOMIX METAL User manual

ARIETE
ARIETE passi 261 User manual

ARIETE
ARIETE ROBOMAX METAL User manual

ARIETE
ARIETE Robomix Metal 1779 User manual

ARIETE
ARIETE Saladino User manual

ARIETE
ARIETE ROBOMAX METAL User manual