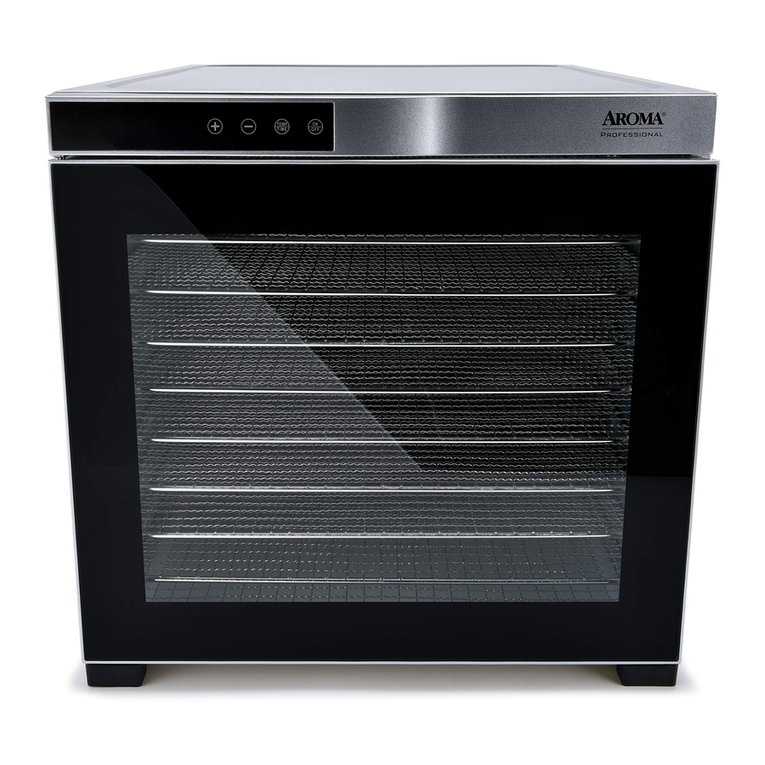
Aroma AFD-1000SD User manual

instruction manual
AFD-1000
Questions or concerns about your Aroma product?
www.AromaCo.com/Support
1-800-276-6286
Collapsible Dehydrator

Here at Aroma we strive to make a
dierence—to design and distribute
products that enhance and enrich
people's lives.
Aroma oers an array of exceptional
products to make cooking simple
and satisfying. Discover other
countertop appliances and cookware
from our current product lineup to
complement your kitchen.
Stay connected for more recipe
ideas and monthly giveaways!
To Enhance and Enrich Lives.
Published By:
Aroma Housewares Co. |6469 Flanders Drive, San Diego, CA 92121, U.S.A.
1-800-276-6286 | www.AromaCo.com
©2017 Aroma Housewares Company | All rights reserved.
www.AromaTestKitchen.com
/AromaHousewares
2.
Multicookers/
Rice Cookers
Induction Cooktops
Indoor Grills
Pressure Cookers
Water Kettles
DISCOVER
more of our
products!

SAVE THESE INSTRUCTIONS
IMPORTANT SAFEGUARDS
3.
Basic safety precautions should always be followed when using electrical appliances,
including the following:
1. Important: Read all instructions
carefully before first use.
2. Do not touch hot surfaces. Use the
handles or knobs.
3. Use only on a level, dry and heat-
resistant surface.
4. To protect against fire, electric shock
and injury to persons, do not immerse
cord, plug or the appliance in water
or any other liquid. See instructions for
cleaning.
5. Close supervision is necessary when
the appliance is used by or near
children.
6. Unplug from outlet when not in use
and before cleaning. Allow unit to cool
before putting on or taking o parts
and before cleaning the appliance.
7. Do not operate any appliance with
a damaged cord or plug or after
the appliance malfunctions or has
been damaged in any manner.
Contact Aroma®customer service for
examination, repair or adjustment.
8. The use of accessory attachments
not recommended by Aroma®
Housewares may result in fire,
electrical shock or injury.
9. Do not use outdoors.
10. Do not let cord touch hot surfaces or
hang over the edge of a counter or
table.
11. Do not place on or near a hot gas or
electric burner or in a heated oven.
12. Do not use the appliance for other than
its intended use.
13. Use only with a 120V AC power outlet.
14. Do not clean with metal scouring
pads. Pieces can break o the pad
and touch electrical parts, creating
a risk of electric shock. Metal-
scouring pads may also damage
the finish.
15. Always unplug from the plug gripping
area. Never pull on the cord.
16. To disconnect, turn any control to OFF,
then remove the plug from the wall
outlet.
17. Do not wrap or tie cord around
appliance.
18. Store in a cool, dry place.
19. Extreme caution should be
exercised when using or moving an
appliance containing food.
20. Intended for countertop use only.
21. Place the food dehydrator on a flat
and heat-resistant surface, and use
in a well-ventilated area.
22. Do not place too close to the edge
of the table or countertop as it may
be knocked o.
23. The food dehydrator should be
operated on a separate electrical
circuit from other operating
appliances. If the electrical circuit is
overloaded with other appliances,
the appliance may not operate
properly.
THIS APPLIANCE IS FOR
HOUSEHOLD USE ONLY.
1. A short power-supply cord is provided to
reduce the risks resulting from becoming
entangled in or tripping over a longer cord.
2. Longer extension cords are available and
may be used if care is exercised in their use.
3. If a longer extension cord is used:
a.) The marked electrical rating of
the extension cord should be at
least as great as the electrical
rating of the appliance.
b.) The longer cord should be
arranged so that it will not
drape over the counter top or
tabletop where it can be pulled
by children or tripped over
unintentionally.
c.) The extension cord should be
grounding-type 3-wire cord.
Grounding Instructions
This appliance must be grounded while in use to protect the operator from electrical
shock. The appliance is equipped with a 3-conductor cord and a 3-prong grounding-
type plug to fit the proper grounding-type receptacle. The appliance has a plug that
looks like figure (A). An adapter, figure (B), should be used for connecting figure (A)
plugs to two-prong receptacles. The grounding tab, which extends from the adapter,
must be connected to a permanent ground such as a properly grounded outlet box
as shown in figure (C)using a metal screw.
DO NOT
DRAPE CORD!
KEEP AWAY
FROM CHILDREN!
Short Cord Instructions
IMPORTANT SAFEGUARDS
4.
GROUNDING
PRONG
ADAPTER
GROUNDING MEANS
AA22D
Figure (A)
Figure (B)
Figure (C)
CIRCUIT
GROUNDING
CONDUCTOR
CONNECTED
PROPERLY
METAL
MOUNTING
SCREW
COVER OF
GROUNDED
OUTLET BOX

Parts Identification
Controls/Functions
Temperature Settings
Preset temperature ranges for specific
food. Available temperatures: 95°- 155°F.
Power ()
Turns the dehydrator on and o.
Timer
Countdowns the time left for dehydrating.
5.
Stainless Steel
Mesh Inserts
(Five)
Stainless Steel
Drying Trays
(Five)
#8 Panel
(Front Cover)
#1 Panel
(Lower Base)
#7 Top Panel
BONUS!
Ten (10 Plastic Mesh Sheets
Great for easy clean-up and
quick release with sticky foods
#3 Panel
#5 Brackets
(Left Set)
#6 Brackets
(Right Set)
#4 Digital
Control Panel
#2 Panel
Timer (arrows)
When pressed, the ( ) or ( ) arrows
adjust the desired time for dehydrating
your foods.
Temperature (arrows)
When pressed, the ( ) or ( ) arrows
adjust to the preset temperature for
dehydrating your foods.

6.
Note:
· Do not wash parts in
a dishwasher, as heat
may cause the parts to
warp or deform.
· Do not immerse the
food dehydrator base,
cord or plug in water
at any time.
· Do not use abrasive
cleaners or scouring
pads.
B F U
T C
T A
1. Read all instructions and important safeguards.
2. Remove all packaging materials and check that
all items have been received in good condition.
3. Tear up all plastic bags and dispose of properly
as they can pose a risk to children.
4. Wipe the surface of the body with a wet cloth. Do
not wash the fan or heating element at the back
of the unit.
5. After cleaning, the unit must be broken in by
running for 30 minutes without any food inside.
Any smoke or smells produced during this time
frame are normal. Please ensure sucient
ventilation of the room and at least an inch of
clearance on all sides of the food dehydrator is
available.
6. Do not operate the dehydrator for more than 20
hours in one single use. After 20 hours, power o
and unplug the unit, and let it cool down for at
least 2 hours before operating again.
1. Wash removable Front Cover, Drying Trays, Mesh
Rack, and Drip Tray in warm, soapy water.
2. Use a soft brush to remove food sticking to the
trays.
3. Wipe the surface of the body with a wet cloth.
4. Do not wash the fan or heating element at the
back of the unit.
5. Dry all parts thoroughly. Reassemble for next use.
1. Place the #1 panel on a
sturdy, flat surface.

Note:
· Assembly may be easier with another adult to assist by holding side panels upright.
· The use of protective gloves are recommended when assembling the dehydrator.
(Images are for illustrative purposes only).
2. Insert the #2 panel onto the left groove of the #1 panel. Hook bottom
latches properly. Ensure plastic handle is positioned at the top.
7.
T A (C.)
3. Insert the #3 panel on to the right groove of the #1 panel. Hook bottom
latches properly. Ensure plastic handle is positioned at the top.
4. Place #4 control panel on rear side next to #2 and #3 panels. Ensure there is
no gap. Latch #2 and #3 panels to #4 control panel (4 total latches).
5. Insert each #5 bracket (5 pieces) onto the notches on the #2 panel ensuring
brackets are set evenly. The stopping tabs must go closer to the control panel.

8.
T A (C.)
6. Insert each #6 bracket (5 pieces) onto the notches on the #2 panel ensuring
brackets are set evenly. The stopping tabs must go closer to the control panel.
7. Insert #7 top panel onto the top edges of #2 and #3 panels. Ensure the lip
of the panel is facing opposite of the control panel. Secure all remaining
latches on both panel #2 and #3 panels.
8. Insert stainless steel mesh trays (5 low density trays and 5 high density trays)
9. Hang the #8 panel Door. Plastic handle goes towards the bottom.
Slightly push panel #8 at the bottom to securely close cover.
10. Insert the power cord.

Note:
*For meat/poultry cook to
160-165 °F respectively,
prior to dehydrating.
· For smaller ingredients,
fit the mesh insert onto
a drying tray to prevent
pieces from falling
through the holes.
· For best results, set a
lower temperature for
thinner/smaller pieces
of food or for smaller
loads, and a higher
temperature for thicker/
larger pieces and larger
loads. The temperature
buttons can also be
used to decrease the
temperature as the
food nears the end of
its drying cycle to allow
more control over the
final moisture level.
D F
1. Place pre-treated ingredients onto the drying
trays. Do not overload the trays and/or have
ingredients overlap.
2. Slide the loaded trays into the food dehydrator.
3. Slide on the Front Cover.
4. Ensure at least an inch of clearance on all sides
of the food dehydrator for ventilation.
5. Plug the power cord into an available 120V AC
wall outlet.
6. Press the Power ()button. The digital display
will show “00:00”.
7. Adjust the temperature by pressing
Temperature ( ) or ( ) to the recommended
temperature settings chart.
8. Press the Timer ( ) or ( ) to set time 5 minutes
to 15 hours.
9. Your dehydrator is now in operation. Check the
status of the food periodically.
10. When the timer has reached “End”, the
dehydrator will beep several times and shut
o. Unplug the power cord.
11. Allow finished food items to cool, and
then enjoy!
Temperature Settings
(Recommendations)
FOOD TEMPERATURE
Jerky* 158°F
Fruits 149°F
Vegetables 140°F
Granola 122°F
Yogurt 113°F
Herbs 104°F
Potpourri 95°F
9.

R
Mango Chili Fruit Leather
Cinnamon Apple Chips
32 oz
----
3-4
⁄ tbsp
----
mango chunks
chili powder
apples
lemon juice
cinnamon
Line 4 trays with parchment paper. Add
mango to a blender or food processor and
blend until smooth.
Spread 1/4 of the puree onto each tray and
spread into a thin layer roughly 1/4 inch thick.
Sprinkle evenly with chili powder.
Dry at 145°F for 6-8 hours until leather is no
longer sticky to the touch. Cut into strips or
pieces and enjoy.
Slice apples 1/8-1/4 inch thick and place in a bowl
of water with the lemon juice to prevent browning.
Arrange evenly on each tray, sprinkle with
cinnamon and dry at 155°F for 7-8 hours until
apples are completely dry to the touch.
10.
T D
1. To disassemble, follow T A steps in
reverse order beginning on step 10 of page 8.

Aroma Housewares Company
6469 Flanders Drive, San Diego, CA 92121, U.S.A.
1-800-276-6286 |www.AromaCo.com
M-F, 8:30am – 4:30pm, Pacific Time
Note:
· Proof of purchase is
required for all warranty
claims.
L W
S & S
Aroma Housewares Company warrants its products
against defects in material and workmanship for two
years from provable date of purchase in the United States.
Within this warranty period, Aroma Housewares Company
will repair or replace, at its discretion, defective parts
at no charge, provided the product is returned, freight
prepaid with proof of purchase and U.S. $35.00 for
shipping and handling charges payable to Aroma
Housewares Company. Before returning an item, please
call the toll free number below for a return authorization
number. Allow 2-4 weeks for return shipping.
This warranty does not apply if the warranty period
expired; the products has been modified by any
unauthorized service center or personnel; the defect
was subject to abuse, improper use not conforming to
product manual instructions, or environment conditions
more severe than those specified in the manual
and specification, neglect of the owner or improper
installation; the defect was subject to Force Majeure such
as flood, lightning, earthquake, other natural calamities,
war, vandalism, theft, brownouts or sags (damage due to
low voltage disturbances).
This warranty gives you specific legal rights, which may
vary from state to state, and does not cover areas outside
the United States.
In the event of a warranty claim, or if service is required
for this product, please contact Aroma® customer service
toll-free at:
1-800-276-6286
M-F, 8:30am-4:30pm, Pacific Time
Or we can be reached online at:
CustomerService@AromaCo.com
For your records, we recommend stapling your sales
receipt to this page along with a written record of the
following:
· Date of Purchase:
· Place of Purchase:
11.

To Enhance and Enrich Lives.
www.AromaCo.com
Table of contents
Other Aroma Kitchen Appliance manuals

Aroma
Aroma ARC-1230B User manual

Aroma
Aroma ACJ-260 User manual

Aroma
Aroma ARC-1020SB User manual

Aroma
Aroma Professional User manual

Aroma
Aroma ARC-5100SB User manual

Aroma
Aroma ARC-363-1NG User manual

Aroma
Aroma AFD-815B User manual

Aroma
Aroma AFP-1210G Use and care manual

Aroma
Aroma ARC-5104SB User manual

Aroma
Aroma gourmet ARC-790SD-1NG User manual

Aroma
Aroma ARC-150SB User manual

Aroma
Aroma Aeromatic Turbo Oven AST-930 User manual

Aroma
Aroma ASP-600 User manual

Aroma
Aroma ACU-024 User manual

Aroma
Aroma AWK-160SB User manual

Aroma
Aroma AFD-925SD User manual

Aroma
Aroma APM-837 User manual

Aroma
Aroma SuperPot ASP-137 User manual

Aroma
Aroma APS-990 User manual

Aroma
Aroma ARC-614BP User manual