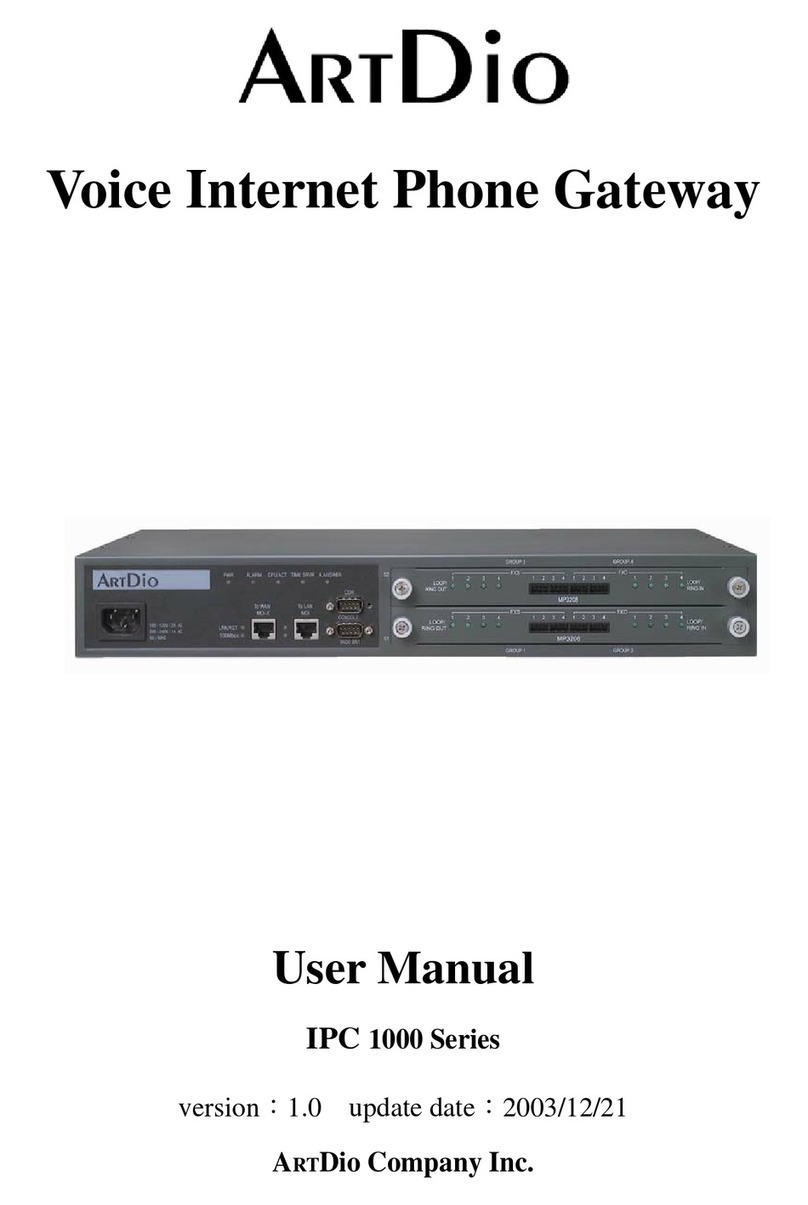
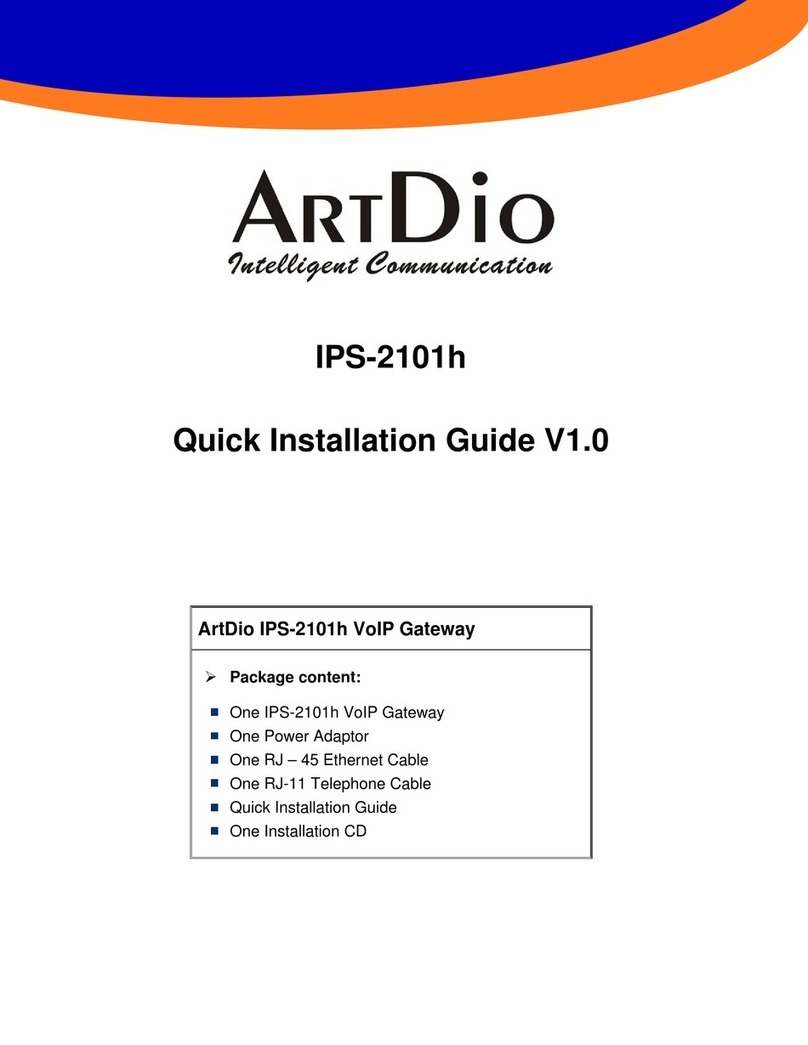
ArtDio IPC 1000 User manual

Voice Internet Phone Gateway
User Manual
IPC 1000 Series
version:1.0 update date:2004/1/6
ARTDio Company Inc.

IPC 1000 Series VoIP Gateway
2
1.Safety Instructions
1. Do not attempt to service the product yourself.Any servicing of this product should be referred to qualified service personal.
2. To avoid electric shock, do not put your finger, pin, wire, or any other metal objects into vents and gaps.
3. To avoid accidental fire or electric shock, do not twist power cord or place it under heavy objects.
4. The product should be connected to a power supply of the type described in the operating instructions or as marked on the product.
5. To avoid hazard to children, dispose of the product’s plastic packaging carefully.
6. The phone line should always be connected to the LINE connector. It should not be connected to the PHONE/FAX connector as it may
cause damage to the product.
7. Please read all the instructions before using this product.
WARNING

IPC 1000 Series VoIP Gateway
3
Table of Contents
1. SAFETY INSTRUCTIONS..................................................................................................2
2. PREFACE...........................................................................................................................6
3. PACKAGE CONTENTS......................................................................................................7
4. PANEL DESCRIPTIONS ....................................................................................................8
4.1 Front Panel........................................................................................................................................................................8
4.2 Rear Panel.........................................................................................................................................................................8
4.3 LED Indicators.................................................................................................................................................................9
4.4 Connectors ......................................................................................................................................................................10
5. INFORMATION REQUIRED BEFORE INSTALLATION...................................................11
5.1 The IPC unit’s IPAddress .............................................................................................................................................11
5.1.1 The IPC Unit’s phone number.........................................................................................................................................11
5.1.2 SIP Information...............................................................................................................................................................12
5.1.3 Setting a password for Web based Management .............................................................................................................12
6. INSTALLATION AND CONFIGURATION.........................................................................13
6.1 Step 1:Confirming the Region ID...............................................................................................................................13
6.2 Step 2:Parameter Settings...........................................................................................................................................14
6.2.1 Static IP and DHCP Mode...............................................................................................................................................15
6.2.2 PPPoE..............................................................................................................................................................................16
6.2.3 Notice for Cable ISP users...............................................................................................................................................21
7. PLACING IP CALLS.........................................................................................................25
7.1 When the IPinformation stored in the dynamic phone book is no longer correct ...................................................26
7.2 Voice Calls.......................................................................................................................................................................26
7.2.1 Making traditional phone calls (through your local PSTN) ............................................................................................26
7.2.2 Making On-net IP calls between IPC units......................................................................................................................26

IPC 1000 Series VoIP Gateway
4
7.2.3 Outbound transit calls (Placing calls from the IPC unit to a traditional phone line via another IPC unit)......................27
7.2.4 Inbound Transit Calls ......................................................................................................................................................28
7.3 Sending Faxes over an IP network................................................................................................................................29
7.3.1 Sending Faxes between IPC units over an IP network....................................................................................................29
7.3.2 Using Outbound Transit to send faxes.............................................................................................................................29
7.3.3 Using Inbound Transit to send faxes ...............................................................................................................................29
7.4 Dialing Examples............................................................................................................................................................29
7.4.1 Voice Examples...............................................................................................................................................................29
7.4.2 FAX sending examples....................................................................................................................................................31
7.5 Connecting the IPC unit to the PBX extension line.....................................................................................................32
7.5.1 Configuring the Phone Number.......................................................................................................................................33
7.5.2 Disabling Auto Answer ...................................................................................................................................................33
7.5.3 PBX CO line access (trunk access code) configuration ..................................................................................................33
7.5.4 Calling Examples ............................................................................................................................................................34
8. SIP (SESSION INITIATION PROTOCOL) ........................................................................36
8.1 What is SIP .....................................................................................................................................................................36
8.1.1 Components of SIP..........................................................................................................................................................36
8.1.2 SIPArchitecture ...........................................................................................................................................................37
8.1.3 SIP Clients.......................................................................................................................................................................37
8.1.4 SIP Servers......................................................................................................................................................................37
8.2 SIPConfiguration...........................................................................................................................................................38
8.2.1 SIP Basic Information .....................................................................................................................................................38
8.2.2 SIP Outbound Authentication..........................................................................................................................................39
8.2.3 SIP Inbound Authentication.............................................................................................................................................39
8.2.4 STUN ..............................................................................................................................................................................39
8.2.5 SIP Phone Book...............................................................................................................................................................39
8.3 Place SIPCalls................................................................................................................................................................40
9. WEB MANAGEMENT INTERFACE .................................................................................41
9.1 The TreeArchitecture of Web Management................................................................................................................41
9.2 Parameters of Web Pages ..............................................................................................................................................42
9.2.1 BASIC / GENERAL .......................................................................................................................................................42

IPC 1000 Series VoIP Gateway
5
9.2.2 BASIC / INBOUND TRANSIT......................................................................................................................................44
9.2.3 BASIC / OUTBOUND TRANSIT..................................................................................................................................44
9.2.4 BASIC / OFFNET FORWARD.......................................................................................................................................46
9.2.5 IP SETTING....................................................................................................................................................................47
9.2.6 ADVANCED / GENERAL..............................................................................................................................................49
9.2.7ADVANCED / SET REMOTE IPH ................................................................................................................................51
9.2.8 SIP COMMON................................................................................................................................................................53
9.2.9 SIP Outbound Authentication..........................................................................................................................................54
9.2.10 SIP INBOUND ANTHENTICATION ..........................................................................................................................55
9.2.11 STUN.............................................................................................................................................................................56
9.2.12 CHANNEL....................................................................................................................................................................57
9.2.13 PHONEBOOK \ IPH.....................................................................................................................................................58
9.2.14 PHONE BOOK \ SIP ....................................................................................................................................................59
9.2.15 ACCESSCODE.............................................................................................................................................................60
10. SPECIAL CONDITIONS...................................................................................................63
10.1 Using a Private IPin a NAT Environment ...................................................................................................................63
10.2 Firewall............................................................................................................................................................................63
10.3 Bypassing the IPC unit...................................................................................................................................................63
11. APPENDIX........................................................................................................................64
11.1 Appendix A: Manual IP Learning Procedure..............................................................................................................64
11.2 Appendix B: Automatic IP Learning............................................................................................................................64
11.3 Appendix C: Editing the Phone Book...........................................................................................................................65
11.3.1 Using the Web based management interface to edit the static phone book ...................................................................65
11.3.2 Moving a dynamic phone book entry to the static phone book .....................................................................................66
11.4 Appendix D: Enabling/disabling the automatic answer mode ...................................................................................66
11.5 Appendix E: Phone-Set Command Codes and Parameters. Phone-Set..................................................................67
11.6 Specifications ..................................................................................................................................................................71
11.7 Mapping table of characters used in PPPoE user name and password.....................................................................73

IPC 1000 Series VoIP Gateway
6
2.Preface
The IPC unit is a personal VoIP gateway developed using the latest in VoIP technology. Equipped with QoS capability, the IPC unit is
able to provide enhanced voice quality while at the same time using limited bandwidth. It is also very simple to install and easy to carry and
operate.
When you are connected to the Internet, the IPC unit turns your regular home phone into an IP phone while maintaining the same
traditional dialing behavior. When you are making traditional phone calls, dial as usual. Your friends can use your same number to call you.
You will hear the phone ring as before. When you want to make IP phone calls, simply dial the “*” or “#” digits and follow it with the same
telephone number normally used. If both of parties are equipped with IPC units, you will be making VoIP calls without occurring additional
phone bills.
Besides the ability to make free Internet phone calls, the IPC unit also provides the following unique features.
While out, you can use the IPC unit to place IP calls
When you are away from home, you can still use the IPC unit to place calls to people who are also using the IPC unit. Simply use a
standard phone or even a mobile phone to call the IPC unit located at your home, the IPC unit will then transfer your calls through the IP
network to the remote IPC unit that is located at your intended recipient’s residence.
Using Analogy Phone make SIP calls
After simply configuration, you can use standard phone to make SIP calls to connect to IP phone or soft phone, which support SIP
protocol.
Making long distance phone calls while paying local phone bill
If you live in Taipei, you can make a phone call to anyone located in the Shanghai area through another IPC unit located in Shanghai.
Because there are no costs involved when placing a call from the Taipei IPC unit to the Shanghai IPC unit there are no additional costs
incurred. The IPC unit in Shanghai is only charged the Shanghai local phone rates. Since the Shanghai IPC is covering the charge, you must
obtain permission (a configuration setting) from the Shanghai IPC unit.

IPC 1000 Series VoIP Gateway
7
3.Package Contents
The IPC 1000 series VoIP Gateway Unit
AC/DC PowerAdapter
RJ-45 Ethernet Cable
RJ-11 Telephone Cable
User’s Manual
CD-ROM

IPC 1000 Series VoIP Gateway
8
4.Panel Descriptions
4.1 Front Panel
IPC 1000
4.2 Rear Panel
IPC 1000

IPC 1000 Series VoIP Gateway
9
4.3 LED Indicators
LED Label Description
On Link up
Off Link down
LNK/ACT
Flash Sending/Receiving data
packets
On (LNK is on) 100Mbps
10/100
Ethernet
100Mbps
Off (LNK is on) 10Mbps
On Off hook
Off On hook
FXS
Flash Ringing out
On Line is active
Off Line is inactive
LOOP/RING
FXO
Flash Ringing in
Alarm The red light “On” indicates that the configured
phone number does not match the phone number of
the connected phone line.
Power “On” indicates that the power supply is working
normally.
CPU/ACT “On” indicates that the CPU is working normally.
Time SRVR “On” indicates that IPC is able to access the
network’s Time Server.
Forward “On” indicates that Call Forwarding is enabled.
Device
A.Answer “On” indicates thatAutoAnswer is enabled.

IPC 1000 Series VoIP Gateway
10
4.4 Connectors
Ports Label Description
FXS Connects to a telephone set or fax machineVoice Ports
FXO Connects to the phone line
LAN/Internet RJ-45 connector
MDI-X connects to a Modem
Ethernet
Ports
PC RJ-45 connector
MDI connects to a PC
Console Port Console RJ-45 connector

IPC 1000 Series VoIP Gateway
11
5.Information required before Installation
You need to prepare the following information before installing the IPC unit.
5.1 The IPC unit’s IP Address
The IPC unit requires an IP address for operation. Before installation you need to know how toobtain an IP address from your local ISP.
Static IP, DHCPor PPPoE can be used. The following table helps you to decide what information you need. If your ISP offers static IP, you
may need to obtain an IP from MIS personnel in order to prevent an IPconflict. Otherwise DHCP (most cable broadband providers offer this)
and PPPoE (mostADSLbroadband providers offer this) will work fine.
IP Environment Requiring information
Public IPAddress IPAddress
Subnet Mask
Default Gateway
It is strongly suggested that you obtain an IP address from
MIS personnel in order to prevent an IP conflict.
Static IP
Private IPAddress IPAddress
Subnet Mask
Default Gateway
It is strongly suggested that you obtain an IP address from
MIS personnel in order to prevent IP conflicts.
Your private IP requires an IP Sharing device and you
must configure the IP Sharing device to treat the IPC unit
and the IP that it is using as a virtual server.
Dynamic IP address (DHCP) DHCP mode
PPPoE Account Number
Password
This information is normally provided by your ISP. If you
don’t have this information please contact your ISP.
5.1.1 The IPC Unit’s phone number
Atraditional phone number is required. You can use an existing phone line at home or an extension line at your office. The IPC unit
must be configured with the phone number, and area code that your phone line belongs to, such as 2 for Taipei, 7 for Kaohsiung, 21 for
Shanghai and 10 for Peking.
The IPC unit can also be connected to a PBX extension line. In this case you need to know theTrunkAccess Code of the PBX which is
normally assigned “9” or “0” by most companies.

IPC 1000 Series VoIP Gateway
12
5.1.2 SIP Information
Before configuring SIP, the IPC unit requires SIP information for operation. The following table helps you to decide what information
you need.
Items Description
1. SIP Proxy The proxy server is an intermediate
device that receives SIP requests from
a client and then forwards the requests
on the client's behalf. If you don’t know
which SIP proxy for setting, contact
your distributor.
2. PublicAddress (SIP Phone number)
The public address is like phone number,
you can get SIP phone number from SIP
proxy or contact your distributor.
3. OutboundAuthentication The authentication information is for SIP
proxy server or other SIP phone requested.
5. SIP Phone Book Using index and SIP phone number
mapping, you can use a standard phone
to make SIP calls.
5.1.3 Setting a password for Web based Management
You will need to prepare a password for Web based Management. It can be a digit and/or letter combination ranging from 1 to 6 digits
(E.g. 123). You will need this password to access the web management interface (Browser Based). If you don’t set this password, you will
not have access to the web management interface.

IPC 1000 Series VoIP Gateway
13
6.Installation and Configuration
After preparing the information you need as specified in section 5, follow the following steps to install the IPC Unit. Connect the phone
or system console to perform basic configurations
With the IPC unit, you can use either a telephone or a system console to perform basic configurations such as setting the region ID.
Before you connect the RJ-45 connector to the console port, you have to configure your VT100 terminal to match the settings of the
IPC unit’s console port. The console port’s terminal connection is set to 9600 baud, 8 data bits, 1 stop bit and no parity. Turn on the IPC
unit’s power and wait for the terminal to display “Press Enter…” follow the directions to begin.
6.1 Step 1:Confirming the Region ID
Skip this step if you are installing your IPC unit in the default region. The default Region ID is printed on the label located outside the
box. If you are installing your IPC unit at any region other then the region ID specified on the label, you will then need to configure the IPC to
the correct Region ID. The Region ID is coded as follows:
ID NO. Country ID NO. Country ID NO. Country ID NO. Country
01 Argentina 02 Australia 03 Philippines 04 Portugal
05 Brazil 06 Canada 07 China 08 Russia
09 Sweden 10 Vietnam 12 France 13 Germany
15 Hong Kong 18 India 22 Italy 23 Japan
24 Korea 26 Malaysia 27 Mexico 28 Netherlands
29 New Zealand 36 Singapore 38 Slovenia 39 South Africa
40 Spain 42 Switzerland 43 Taiwan 44 Thailand
46 British 47 USA 60 Iran 61 Dubai
Region ID

IPC 1000 Series VoIP Gateway
14
Phone Setting
1. Connect the power.
2. Connect the phone cable to the “Phone” socket on the rear panel as pictured above.
3. When the CPU/ACT LED is on, pick up the handset and listen for the dialing tone.
4. Dial “##0000” and listen for 3 short beep.
5. Dial “9507#” ;Assuming you are modifying for China (The last 2 digits are the regional ID)
6. Dial “971#” ;Sets the new regional ID.
7. Hang up the phone. The device will be updated with the new region setting after it restarts (restart time is about 10 seconds)
System console settings
IPC>enable
IPC #configure
Enter configuration commands, one per line. End with CNTL/Z
IPC (config)# regional_id 07
IPC (config)#exit
IPC #delete nvram
This command resets the system with factory defaults.
All system parameters will revert to their default factory settings. All static
and dynamic addresses will be removed.
Reset system with factory defaults, [Y]es or [N]o? Yes
6.2 Step 2:Parameter Settings
We recommend using a traditional phone to configure the unit’s parameters, as this is the easiest way. The following two sections
contain the procedures used to configure the IPC unit according to how you obtain your IP address (Static IP; DHCP or PPPoE).
Since a lot of the configuration procedures in the following sections are using a standard telephone set to modify the settings.
Configuring the IPC unit via the phone set will be described first.
Using a Traditional Telephone to Configure the IPC unit
Follow the steps specified on the following figure.
Pick up the phone
Dial “##0000” to enter configuration
Command (two digits) +
Parameter (variable length) + the
Replace
the phone
Set
next parameter

IPC 1000 Series VoIP Gateway
15
Every time you set a parameter item and press the “#” key to complete it, a successful setting will be confirmed by three equal tones in
succession. If your setting is unsuccessful you will be prompted with one long tone.
The Command length is two-digits long. For example, “configure area code” would be “01”, “configure phone number” would be “02”
and “restart” would be “98” etc. For details please refer to section 11.5 Appendix E: Phone-Set Command Codes and Parameters.
6.2.1 Static IP and DHCPMode
If your network environment is using a static IP, you need to prepare the information as specified in section 0.
Information required before Installation.
The following table shows an example.
Area Code 2 (Taipei)
Phone Number 82261111
IPAddress 210.67.96.121
Subnet Mask 255.255.255.248
Default Gateway 210.67.96.120
Web Management Password 123
Using the information contained in the example above. The procedure is as follows:
1. Connect the IPC unit to a suitable Power source.
2. Connect a traditional phone set to the “FXS” connector located on the rear panel.
3. When the CPU/ACT light is on, pick up the phone to hear the dialing tone.
4. ##0000 ; you should hear three short tones.
5. 012#” ; the number “2” digit represents the Taipei area code.
6. 0282261111# ; Phone Number
7. 030# ; the digit “0” is used to enable “manual” IP mode.
8. 04210*67*96*121# ; IP address.
9. 05255*255*255*248# ; Subnet Mask.
10. 06210*67*96*120# ; Default Gateway.
11. 88123# ; “123” is the web management password.
12. 981# ; restarts the IPC
13. Hang up the phone. The system should now restart.
If your network is using DHCP, you should skip steps 8, 9, 10 and jump to step 11, while modifying step 7 to “031#”.

IPC 1000 Series VoIP Gateway
16
You can also use console to configure IP address. But phone number can’t be configured by console.
IPC>enable
IPC #configure
Enter configuration commands, one per line. End with CNTL/Z
IPC (config)#ip state user
IPC (config)#ip address 210.67.96.121 255.255.255.248
System need to restart
IPC (config)#ip default-gateway 210.67.96.120
IPC (config)#exit
IPC #restart
This command resets the system. System will restart operation code agent.
Reset system, [Y]es or [N]o? Yes
6.2.2 PPPoE
If your network environment is using PPPoE, you need to prepare the information as specified in section 0.
Information required before Installation.
The following table shows an example.
Area Code 2 (Taipei)
Phone Number 82261111
PPPoEAccount [email protected]
PPPoE Password 234iol26
Web management password 123
There are three ways to configure user name and password of PPPoE
1. Use phone set to configure user name and password of PPPoE:
You can configure the user name and password by using phone set. The command 36 is used for username, and 37 is for password of
PPPoE. Since the user name and password use characters and telephone can input digits, you need a mapping between characters and
digits. You can find them at 錯誤! 找不到參照來源。 錯誤! 找不到參照來源。
;You will hear 3 short tones.
;Set user name:83721
@
hinet.net
;Set password is 123ab
1. Connect the phone to IPC.
2. When CPU/ACT is light, pick up the phone and press
3. ##0000
4. 3638333732314048494*44554*4*44554#
5. 373132334142#
6. 981# ;Save and restart.
2. Use Console to configure user name and password of PPPoE:
IPC >enable
IPC #configure

IPC 1000 Series VoIP Gateway
17
Items 8, 9, 10 can be omitted if this
is the first time to configure it.
Enter configuration commands, one per line. End with CNTL/Z
IPC (config)#pppoe password 234iol26
IPC (config)#exit
IPC #restart
This command resets the system. System will restart operation code agent.
Reset system, [Y]es or [N]o? Yes
3. Use WEB Interface to configure user name and password of PPPoE:
You can configure the user name and password by using WEB interface. Follow the steps to finish configuration.
Step 1: Using a traditional phone set to configure the web management password and
phone number
You will need to use a web browser to perform the PPPoE settings through the IPC unit’s web based management interface. To enter
the web based management interface you must have previously configured a password. Follow the next procedure to setup your password
and phone number.
1. Connect the IPC unit to a suitable Power source.
2. Connect a traditional phone set to the “Phone/FAX” connector located on the rear panel.
3. When the CPU/ACT light is on, pick up the phone. You should hear the dialing tone.
4. ##0000 ; you should hear three short tones.
5. 012# ; the number “2” digit represents the Taipei area code.
6. 0282261111# ; Phone Number
7. 88123 ; “123” is the web management password.
8. 030# ; “0” is to enable “manual” IP mode.
9. 04192*168*0*2# ; IP address.
10. 05255*255*255*0# ; Subnet Mask .
11. 981# ; Used to restart the IPC unit.
12. Hang up the phone to complete the configuration.
Step 2:Configure IP address of PC
Use the provided Ethernet cable to connect your PC to the port labeled “PC”, located on the rear panel of the IPC
unit.
Because the IPC unit’s default IP setting is 192.168.0.2, you must configure your PC to the same subnet. 192.168.0.x for example. The
following example uses 192.168.0.5 for the IP address and 255.255.255.0 for the subnet mask.

IPC 1000 Series VoIP Gateway
18
After you have completed the PC’s IPaddress setting, you will be required to restart the PC in order for the new settings to take affect.
Step 3: Using the browser to configure the PPPoE Parameters of the IPC unit
On the PC that is connected to the IPC unit, enter the IPC unit’s IP address (Default 192.168.0.2) and press enter. The IPC will then
prompt you with a dialogue box requesting that you enter a password. Use “WEB” (all capitals), for the User field and “123” for the password
field that you have previously configured. Click the OK button; you should now have access to the IPC unit’s web based management
interface page.

IPC 1000 Series VoIP Gateway
19
Upon entering the web based configuration interface.
1. Click on “IP SETTING” at the top of the page and you will see the page as shown in the following image.
2. Select PPPoE from the “IP State” pull down menu.
3. Fill in the “Account”, “Password”, and “Confirm Password” under the PPPoE Settings. You can obtain this information from your ISP.
4. Click on theApply button.
5. Click the “BASIC” button at the top to go to the BASIC page. Select “Warm Start” to restart the system.You can also perform a warm
start using the phone by picking up the handset and dialing “##0000” then “981#”.
6. After restarting, the IPC unit will use PPPoE to obtain it’s IP address.
The IPC unit’s
IP address
(192.168.0.2)
“WEB” should
be all Capitals

IPC 1000 Series VoIP Gateway
20
Click “IP setting” to
open this display
Click the “Apply”
button to apply
any changes.
1
2
3
Other manuals for IPC 1000
2
Table of contents
Other ArtDio Gateway manuals

ArtDio
ArtDio IPS-2101h User manual

ArtDio
ArtDio IPE 1000 Series User manual

ArtDio
ArtDio IPE 1000 Series User manual

ArtDio
ArtDio IPH-1000 User manual

ArtDio
ArtDio IPS-3101h User manual

ArtDio
ArtDio IPS-2101h User manual

ArtDio
ArtDio IPH-102 User manual

ArtDio
ArtDio IPC 1000 User manual

ArtDio
ArtDio IPS 1000 Series User manual

ArtDio
ArtDio IPS-3101h User manual