manuals.online logo
Brands
  1. Home
  2. •
  3. Brands
  4. •
  5. Ashcroft
  6. •
  7. Measuring Instrument
  8. •
  9. Ashcroft 50 HPS User manual

Ashcroft 50 HPS User manual

Installation and Maintenance Instructions
for 50 mm HPS High Purity Gauge
© Ashcroft Inc. 2022, 250 East Main Street, Stratford, CT 06614-5145, USA, Tel: 203-378-8281, Fax: 203-385-0357, www.ashcroft.com
All sales subject to standard terms and conditions of sale. 50_HPS_Gauge_I&M008-10305_RevA_02-10-22 1
Table of contents:
1. INTRODUCTION ................................................................. 1
2. APPLICATION ..................................................................... 1
3. TRANSPORTATION, STORAGE, UNPACKING
PRECAUTION...................................................................... 1
4. INSTALLATION.................................................................... 1
5. OPERATION ........................................................................ 2
6. INSPECTION AND MAINTENANCE .................................. 3
7. TROUBLESHOOTING......................................................... 3
1. INTRODUCTION
Accurate measurement is an important aspect of manufac-
turing. Advancement of equipment and plant engineering
technology requires higher performance and more versatile
instrument functions.
The Ashcroft model 50 HPS High-Purity pressure gauges are
similar to ordinary instruments, yet have been assembled
under a significantly different process where treatment,
control, and inspection are rigidly maintained. This manual
describes the basic operation of this product for the semi-
conductor industry. Adhering to the following instructions
will ensure their proper and effective application.
Before Using the Pressure Gauge
It is highly recommended that this instruction be thoroughly
reviewed to prevent improper instrument handling and/or
implementation. Consult Ashcroft on related topics not cov-
ered within this document.
Warranty
Instruments are repaired or replaced, at no cost, if deter-
mined to be within the 1-year warranty period and non-con-
forming in accordance with defects due to design or manu-
facture by Ashcroft.
Please note that the following instances are excluded.
1Delivered products are disassembled, altered, parts
replaced, or where any new function is added by the user
or any third party.
2Directions described within the instruction manual or cat-
alog have not been observed.
3Non-conformance is caused by deterioration due to use,
natural disaster, fire or other force majeure events.
DSecondary damage caused by the non-conformance of
the products including the above.
Regardless of recognized mishandling, any apparent evi-
dence of deformation, abrasion, burnout or other identi-
fied issue shall be excluded from the warranty scope with
the cost being incurred by the customer.
Definition of Safety Terms
Safety precautions within this manual have been classified
as follows:
DANGER - Ignoring this warning may result in serious injury
or death.
 WARNING - Ignoring this warning may result in serious
injury or death.
 CAUTION - Ignoring this warning may result in the material
damage and render instrument performance defective.
2. APPLICATION
This pressure gauge has an electropolished wetted sur-
face for measuring materially-compatible gas pressure (EP
grade). The pressure gauge is fabricated in accordance with
high cleanliness and tightly sealed standards. Therefore,
the models 50 HPS High-Purity pressure gauges are ideally
suited for pressure measurement within the semiconductor
production process, etc.
 WARNING
The instrument’s pressure element is a bourdon tube.
Do not use the pressure gauge with the wetted mate-
rial exposed to any corrosive gas or atmosphere.
Additionally, it is industry practice for the gas detector’s
to be installed within the same environment; this will
provide an alert to escaping gas that may adversely
affect the human body and/or equipment
3. TRANSPORTATION, STORAGE, UNPACKING PRECAUTION
3.1 Transportation
Units should be handled the same as electronic or test mea-
surement instruments. Be very careful not to apply vibration
to the pressure gauge during transportation.
Never hit or drop the pressure gauge.
 CAUTION
The instrument may incur damage if dropped/impacted.
3.2 Storage
Store in a temperature-controlled environment free from
dust, humidity, and vibration. Prevent temperature variances
as this may result in condensation developing in the product.
3-3 Unpacking
Handle product with great care during unpacking.
Verify the product has not been damaged and that the
instrument fulfills the required specifications. Please contact
the dealer or Ashcroft if an issue exists.
50 mm HPS
High Purity Gauge
Installation and Maintenance Instructions
for 50 mm HPS High Purity Gauge
© Ashcroft Inc. 2022, 250 East Main Street, Stratford, CT 06614-5145, USA, Tel: 203-378-8281, Fax: 203-385-0357, www.ashcroft.com
All sales subject to standard terms and conditions of sale. 50_HPS_Gauge_I&M008-10305_RevA_02-10-22 2
4. INSTALLATION
4.1
Install the instrument where the environment is free from
vibration, humidity, dust and high temperature.
4.2
The pressure gauges (Grade A) are packaged in a hermet-
ically-sealed polyethylene bag. To avoid contamination,
unpack the bag immediately before using the instrument.
4.3
Direct connection pressure gauges, directly screwed to the
piping, should always be supported.
4.4
Install the pressure gauge so that the dial reading is vertical.
 CAUTION
An error is an accuracy that will result in the event the
pressure gauge is not installed in a vertical position.
4.5
In liquid measurement, the pressure head difference
between the pressure outlet port and pressure gauge has a
negative effect upon the accuracy.
 CAUTION
If a pressure gauge with a range of 0 to 0.1 mPa is
installed one meter higher than the pressure outlet port,
the instrument reading will reflect a lower than actual
pressure. This error corresponds to 10% of the span. On
the contrary, if a pressure gauge is one meter lower than
the pressure outlet port, the unit will register a value that is
10% higher than the actual gauge.
In the event the installation point is known, the point-
er may be adjusted higher or lower to coincide with the
estimated error. A pressure gauge with a zero adjustment
pointer can be re-zeroed after it has been installed.
4.6
Reduce pressure pulsation to an absolute minimum.
4.7
When installing the instrument, be sure to apply a wrench
to the flats of the gauge’s pressure connection and rotate
clockwise. Do not apply force to the enclosure as this will
cause the dial to move and result in the zero-point shift.
 CAUTION
Do not apply force to the enclosure as this will cause dam-
age and adversely affect product performance.
4.8
Take precautions to ensure the unit is not exposed to tem-
peratures where process media is liable to freeze.
4.9
It is recommended that a siphon or length of pipe be utilized
when high-temperature fluids are being measured.
4.10
Take precautions on the use of 9⁄16-18UNF (Connection thread)
1Take care not to damage the seat surface.
 WARNING
Scratches or scoring can result in the measuring device to
leak. This may prove hazardous, though this would depend
upon the type of application being measured.
 2Do not use previously removed packing and filter packing.
Replace with new parts whenever they are disassembled.
SWITCH SETTING:
Please follow these instructions, the switch are normally
factory set to save time the customer time. However, they
are field adjustable.
CAUTION:
Supply voltage should not exceed switch rating. For higher
supply, adding a relay is recommended.
SWITCH ADJUSTMENT:
The following procedure must be done by putting the
gauge on a test bench or while in actual service. The
switch adjustment along the inner case. Remove threaded
window and mover orange pointer by hand to desired
pressure. One or two trials may be necessary to attain the
exact setpoint.
5. OPERATION
5.1
Make sure that the pointer is at the ‘0’ position prior to
applying pressure to the gauge.
5.2
Raise and lower pressure slowly, while avoiding sudden
increase/decrease of pressure.
5.3
Never apply pressure in excess of the unit’s pressure rating.
5.4
Use the pressure gauge for measuring pressure less than ½
to 2⁄3of the full-scale range.
 WARNING
Never apply pressure beyond the maximum pressure (i.e.,
the full-scale value). Injury and/or damage may occur if
pressure element ruptures due to extreme pressure in
excess of its pressure rating.
5.5
Measured fluids, gas or liquid, should be compatible and not
corrosive to SUS316L.
Installation and Maintenance Instructions
for 50 mm HPS High Purity Gauge
© Ashcroft Inc. 2022, 250 East Main Street, Stratford, CT 06614-5145, USA, Tel: 203-378-8281, Fax: 203-385-0357, www.ashcroft.com
All sales subject to standard terms and conditions of sale. 50_HPS_Gauge_I&M008-10305_RevA_02-10-22 3
 WARNING
Do not use this pressure gauge with fluids that may cor-
rode the instrument’s wetted parts.
If corrosive fluid flows through this pressure gauge, the
pressure element (Bourdon tube) may be damaged or
burst and it flows out, resulting in injury or damages to the
peripheral device and equipment.
5.6
Do not modify the pressure gauge.
 WARNING
Do not attempt to modify the product itself or provide it
with additional functions.
5.7
Do not apply glue to the blow-out disk, tear a hole, inter-
space, or make any other alterations to the instrument. Duly
note, if ignored, the unit will fail to function as designed.
Failure to relieve pressure properly, this could result in quite
dangerous accidents.
6. INSPECTION AND MAINTENANCE
6.1
Check the gauge accuracy regularly to ensure correct indi-
cation; this is recommended to be once or more per year.
6.2
Pressure indication error of approximately 1 graduation is
repairable, yet the instrument must be replaced when the
error is identified as substantial.
7. TROUBLESHOOTING
Refer to the accompanying table and implement appropriate
countermeasures. Contact Ashcroft in the event the issue
persists.
Installation and Maintenance Instructions
for 50 mm HPS High Purity Gauge
© Ashcroft Inc. 2022, 250 East Main Street, Stratford, CT 06614-5145, USA, Tel: 203-378-8281, Fax: 203-385-0357, www.ashcroft.com
All sales subject to standard terms and conditions of sale. 50_HPS_Gauge_I&M008-10305_RevA_02-10-22 4
TROUBLES CHECKPOINTS POSSIBLE CAUSES COUNTERMEASURES
The pointer does not move. 1. Check if the pressure had been
applied to the pressure gauge.
1. The pressure is zeroed. 1. Apply pressure.
The pointer does not indicate
pressure.
1. Check whether the fluid and
ambient temperature are within
the operating temperature
range of the pressure gauge.
2. Check whether excessive
vibration exists.
3. Check whether excessive
pressure fluctuations exist.
1. The operating temperature
range has been exceeded.
2. Movement wears due to
vibration.
3. Movement wears due to
pressure fluctuations.
1. Re-install pressure gauge in a
different position.
2. Re-install pressure gauge in a
different position.
3. Reduce pressure fluctuations.
The pointer does not read zero
when the pressure gauge is
removed from the piping.
1. Check whether excessive
pressure had been applied.
2. Check whether excessive
vibration or fluctuating pressure
had been applied.
1. The Bourdon tube has been
deformed due to excessive
pressure.
2. Movement wears due to
vibration or fluctuating
pressure.
1. Use a higher pressure range.
2. Re-install pressure gauge in a
different position.
The pointer indicates overpressure
reading.
1. Check whether excessive
pressure had been applied.
2. Check whether the gauge was
exposed to excessive vibration
or if it was dropped/impacted.
1. Deformed sensing element due
to excessive pressure.
2. Pointer shift or material
deformation due to excessive
pressure or impact.
1. Use a higher pressure range.
2. Be careful not to drop/impact
gauge.

Other Ashcroft Measuring Instrument manuals

Ashcroft 28HPX User manual

Ashcroft

Ashcroft 28HPX User manual

Ashcroft F5510 User manual

Ashcroft

Ashcroft F5510 User manual

Ashcroft 8008 User manual

Ashcroft

Ashcroft 8008 User manual

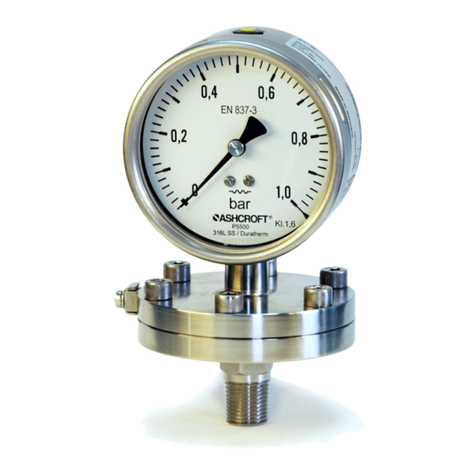
Ashcroft P5500 Instruction Manual

Ashcroft

Ashcroft P5500 Instruction Manual

Ashcroft P6500 Instruction Manual

Ashcroft

Ashcroft P6500 Instruction Manual

Ashcroft T5500 Instructions for use

Ashcroft

Ashcroft T5500 Instructions for use

Ashcroft A Instruction Manual

Ashcroft

Ashcroft A Instruction Manual

Ashcroft T5500 User manual

Ashcroft

Ashcroft T5500 User manual

Ashcroft F5509 Instruction Manual

Ashcroft

Ashcroft F5509 Instruction Manual

Ashcroft 1131 User manual

Ashcroft

Ashcroft 1131 User manual

Ashcroft 2074 User manual

Ashcroft

Ashcroft 2074 User manual

Ashcroft F5401 Instruction Manual

Ashcroft

Ashcroft F5401 Instruction Manual

Ashcroft 1132 User manual

Ashcroft

Ashcroft 1132 User manual

Ashcroft 2074 User manual

Ashcroft

Ashcroft 2074 User manual

Ashcroft t5500e Instruction Manual

Ashcroft

Ashcroft t5500e Instruction Manual

Ashcroft DURALIFE 1009 Installation and operating instructions

Ashcroft

Ashcroft DURALIFE 1009 Installation and operating instructions

Ashcroft 2032 User manual

Ashcroft

Ashcroft 2032 User manual

Ashcroft DG25 User manual

Ashcroft

Ashcroft DG25 User manual

Ashcroft Digital Test Gauge User manual

Ashcroft

Ashcroft Digital Test Gauge User manual

Ashcroft F5503 Instruction Manual

Ashcroft

Ashcroft F5503 Instruction Manual

Ashcroft TC User manual

Ashcroft

Ashcroft TC User manual

Ashcroft F5503 User manual

Ashcroft

Ashcroft F5503 User manual

Ashcroft N5500 Instruction Manual

Ashcroft

Ashcroft N5500 Instruction Manual

Ashcroft A5400 Instruction Manual

Ashcroft

Ashcroft A5400 Instruction Manual

Popular Measuring Instrument manuals by other brands

Hanna Instruments HI 254 instruction manual

Hanna Instruments

Hanna Instruments HI 254 instruction manual

SMART Centellis 2000 DC 1.2 quick start guide

SMART

SMART Centellis 2000 DC 1.2 quick start guide

HBM MP85ADP quick start guide

HBM

HBM MP85ADP quick start guide

Econ sens3 manual

Econ

Econ sens3 manual

ENDEAVOUR ET0055A user manual

ENDEAVOUR

ENDEAVOUR ET0055A user manual

RS PRO RS-90 instruction manual

RS PRO

RS PRO RS-90 instruction manual

Flexim FLUXUS G601 user manual

Flexim

Flexim FLUXUS G601 user manual

Shodex IEC SP-825 Operation manual

Shodex

Shodex IEC SP-825 Operation manual

Klein Tools ET110 instruction manual

Klein Tools

Klein Tools ET110 instruction manual

Suin SA2100 user guide

Suin

Suin SA2100 user guide

HP 16530A Service manual

HP

HP 16530A Service manual

Abtus IFP-600 User's operation guide

Abtus

Abtus IFP-600 User's operation guide

Mitutoyo HDM-30AX user manual

Mitutoyo

Mitutoyo HDM-30AX user manual

Nibe EME 10 Installer manual

Nibe

Nibe EME 10 Installer manual

ipf electronic SS430020 manual

ipf electronic

ipf electronic SS430020 manual

Eclipse VeriFlame 5600 instruction manual

Eclipse

Eclipse VeriFlame 5600 instruction manual

Rice Lake LaserLight3 Quick reference guide

Rice Lake

Rice Lake LaserLight3 Quick reference guide

PASCO PS-3230 quick start guide

PASCO

PASCO PS-3230 quick start guide

manuals.online logo
manuals.online logoBrands
  • About & Mission
  • Contact us
  • Privacy Policy
  • Terms and Conditions

Copyright 2025 Manuals.Online. All Rights Reserved.