manuals.online logo
Brands
  1. Home
  2. •
  3. Brands
  4. •
  5. Asko
  6. •
  7. Dryer
  8. •
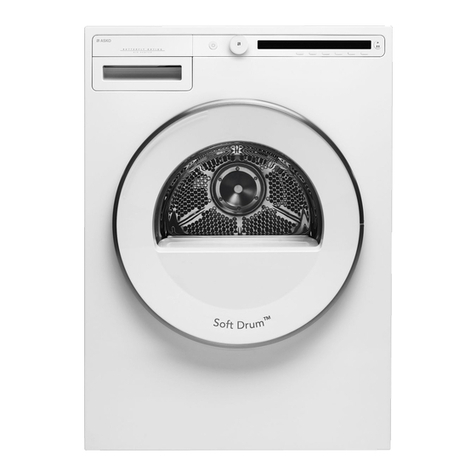
  9. Asko T721 User manual

Asko T721 User manual

Other manuals for T721

4

Other Asko Dryer manuals

Asko T408HD.W.AU User manual

Asko

Asko T408HD.W.AU User manual

Asko T753 User manual

Asko

Asko T753 User manual

Asko T784 Assembly instructions

Asko

Asko T784 Assembly instructions

Asko T793C User manual

Asko

Asko T793C User manual

Asko TD60 User manual

Asko

Asko TD60 User manual

Asko T741 User manual

Asko

Asko T741 User manual

Asko T783 User manual

Asko

Asko T783 User manual

Asko TD85 C38X Series User manual

Asko

Asko TD85 C38X Series User manual

Asko T411HD User manual

Asko

Asko T411HD User manual

Asko T720 User manual

Asko

Asko T720 User manual

Asko TD25 User manual

Asko

Asko TD25 User manual

Asko TD60.C User manual

Asko

Asko TD60.C User manual

Asko T712C User manual

Asko

Asko T712C User manual

Asko 7705 - User manual

Asko

Asko 7705 - User manual

Asko T784C W User manual

Asko

Asko T784C W User manual

Asko T731 User manual

Asko

Asko T731 User manual

Asko Professional TDC145HPS User manual

Asko

Asko Professional TDC145HPS User manual

Asko T721 User manual

Asko

Asko T721 User manual

Asko T712C User manual

Asko

Asko T712C User manual

Asko T744C User manual

Asko

Asko T744C User manual

Asko T731 User manual

Asko

Asko T731 User manual

Asko T761 User manual

Asko

Asko T761 User manual

Asko PROFESSIONAL TDC112VS MARINE User manual

Asko

Asko PROFESSIONAL TDC112VS MARINE User manual

Asko T754C User manual

Asko

Asko T754C User manual

Popular Dryer manuals by other brands

Whirlpool WED9270XL2 parts list

Whirlpool

Whirlpool WED9270XL2 parts list

Kleenmaid KED2000 Repair instructions

Kleenmaid

Kleenmaid KED2000 Repair instructions

SPI Supplies SPI-DRY Operation manual

SPI Supplies

SPI Supplies SPI-DRY Operation manual

Amana NGD5800DW Use & care guide

Amana

Amana NGD5800DW Use & care guide

Bosch WTG86402GB Installation and operating instructions

Bosch

Bosch WTG86402GB Installation and operating instructions

Maytag MED4200BW0 installation instructions

Maytag

Maytag MED4200BW0 installation instructions

ffuuss eos user manual

ffuuss

ffuuss eos user manual

KitchenAid 53-3498 installation instructions

KitchenAid

KitchenAid 53-3498 installation instructions

Schulthess Spirit topLine TW 8340 operating instructions

Schulthess

Schulthess Spirit topLine TW 8340 operating instructions

Whirlpool LGR4624BW0 parts list

Whirlpool

Whirlpool LGR4624BW0 parts list

World Dryer AirMax D M5-972A manual

World Dryer

World Dryer AirMax D M5-972A manual

Alliance Laundry Systems ADEE9BSS user guide

Alliance Laundry Systems

Alliance Laundry Systems ADEE9BSS user guide

Miele PDR 910 EL Operating and installation instructions

Miele

Miele PDR 910 EL Operating and installation instructions

Amana NGD5800TQ0 parts list

Amana

Amana NGD5800TQ0 parts list

Bosch WTA79200GB Installation and operating instructions

Bosch

Bosch WTA79200GB Installation and operating instructions

AEG TR838P4OB user manual

AEG

AEG TR838P4OB user manual

Electrolux EW2H328R2 user manual

Electrolux

Electrolux EW2H328R2 user manual

Dawlance Spinner DS 6000 C owner's manual

Dawlance

Dawlance Spinner DS 6000 C owner's manual

manuals.online logo
manuals.online logoBrands
  • About & Mission
  • Contact us
  • Privacy Policy
  • Terms and Conditions

Copyright 2025 Manuals.Online. All Rights Reserved.

Start
180 min
150 min
120 min
90 min
60 min
30 min
ProgramsTemperature
Air fluff
Air fluff
Timed dry
Normal
Low
We know youre excited about owning an ASKO dryer and youre anxious to get started, so here is a brief summary of the operating
procedures. To get the most of the features of your machine, we recommend that you read your Use and Care Guide.
THE CONTROL PANEL
Buzzer Option Button
Press to turn the buzzer
off and on.
Temperature/Air Fluff Control
Turn to select Normal or Low
drying temperatures or the Air
Fluff program.
Dryer Quick Start Guide T721
Power Button
Press to turn on power
to the machine.
Power Indicator Light
Glows when the
power is turned on.
Start Button
Press to start a program.
Power Button
The ower button turns the power to the machine on and off. When the power is on, the power indicator light glows red. The power must be
on before you can start the machine.
Start Button
This button starts the dryer. If you open the door during a program, the dryer will stop tumbling automatically. To continue the program, close
the door and press Start.
Timer Control
Use this knob to set the number of minutes you want to dry the laundry.
Air Fluff Program
The Air Fluff program is designed to shake dust out of fabrics, air them, or soften them.
Anti-crea e Button
Press to turn the Anti-crease
program off and on.
Quick Cooling Button
Press to reduce the cooling
time to minutes.
Timer Control
Turn to set the drying time.
Buzzer
Anti-crease
Options
You have the option to turn the buzzer on or off. If you turn the buzzer on, it will sound for three seconds when the
program is complete.
The Anti-crease option is designed to prevent garments from becoming wrinkled if youre unable to remove them
from the dryer right away. When you select this option, after the drying program is complete the drum will continue
to rotate for three seconds every minute until the door is opened or one hour has passed. If the buzzer is on, it will
sound each time the anti-crease program activates.
Quick Cooling This option reduces the cool-down time from 18 minutes to 9 minutes. Quick Cooling can not be selected with the
Anti-crease option.
Temperature Control
This temperature setting should be used for heavier fabrics, such as denim, cotton, linen, etc.
This setting does not activate the heating element. It simply circulates the air as the clothes tumble to shake out the
dust and refresh the clothes.
This temperature setting should be used for lighter, more delicate fabrics, such as synthetics.
Normal
Low
Air Fluff
QUICK START PROCEDURES
CLEANING THE LINT FILTER
Although the lint in your ASKO dryer will be minimal, the lint filter should be cleaned after each
load to ensure maximum air flow and prevent possible overheating. To clean the filter, follow the
steps below:
1. Grasp the handle and pull it toward you.
2. Remove the filter from the holder by pulling it up.
3. Open the filter and gently brush away any lint.
4. Fold the filter together and return it to the holder on the door.
5. ush the holder in until it snaps into place.
We recommend that you clean the lint filter after every load.
NOTE:
OVERHEATING PROTECTION
The dryer has a protection device that shuts the machine off if the temperature becomes too high. Overheating could occur if the lint filter is
clogged or the fan or condenser unit needs to be cleaned. If the dryer shuts off during a program, first make sure the condensation water
container is empty. If that isnt the problem, check the lint filter. Lastly, it could be the fan or the condenser unit needs to be cleaned. See your
Use and Care Guide for instructions on how to clean these items.
1.
2.
3.
4.
5.
6.
7.
8.
ress the ower button to turn on the machine.
Load the laundry into the dryer.
Check the lint filter. Clean it, if needed.
Check that the door is clear of laundry then close it firmly. (The door wont shut if its slammed.)
Turn the Timer Control knob to the desired drying time.
Turn the Temperature Control knob to the desired setting.
Make your program option selections (e.g., Anti-crease).
ress Start. The machine will start.
EMPTYING THE CONDENSATION WATER CONTAINER
If the dryer is not installed to pump out the condensed water into a drain or sink, you
should empty the water container every three to five dryer loads, depending on the
spin speed you use when you wash the clothes. For example, clothes spun at 800
rpm will have more moisture when you take them out of the washer than clothes
spun at 1400 rpm. Therefore, the dryer will have to remove more water.
To empty the container, simply pull it out and pour out the water. This water is clean
and can be used to water plants.
If the container becomes too full, the machine will shut down. To restart the program,
empty the container and press Start. It may be a few minutes before the machine
starts because it drains the excess water from the sump before it restarts.
Do not remove the water container while the machine i running.
NOTE:
Simply pull out the container
and pour out the water.
T721
Art. No. 80 646 43 rev. 02