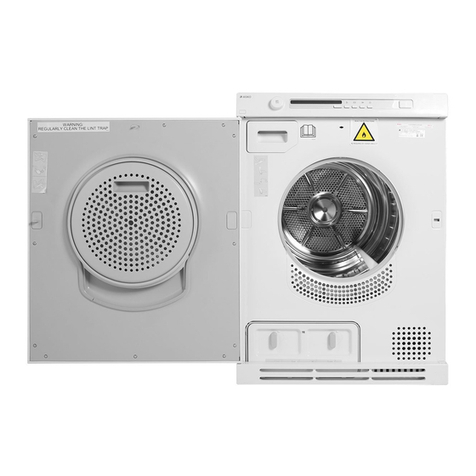
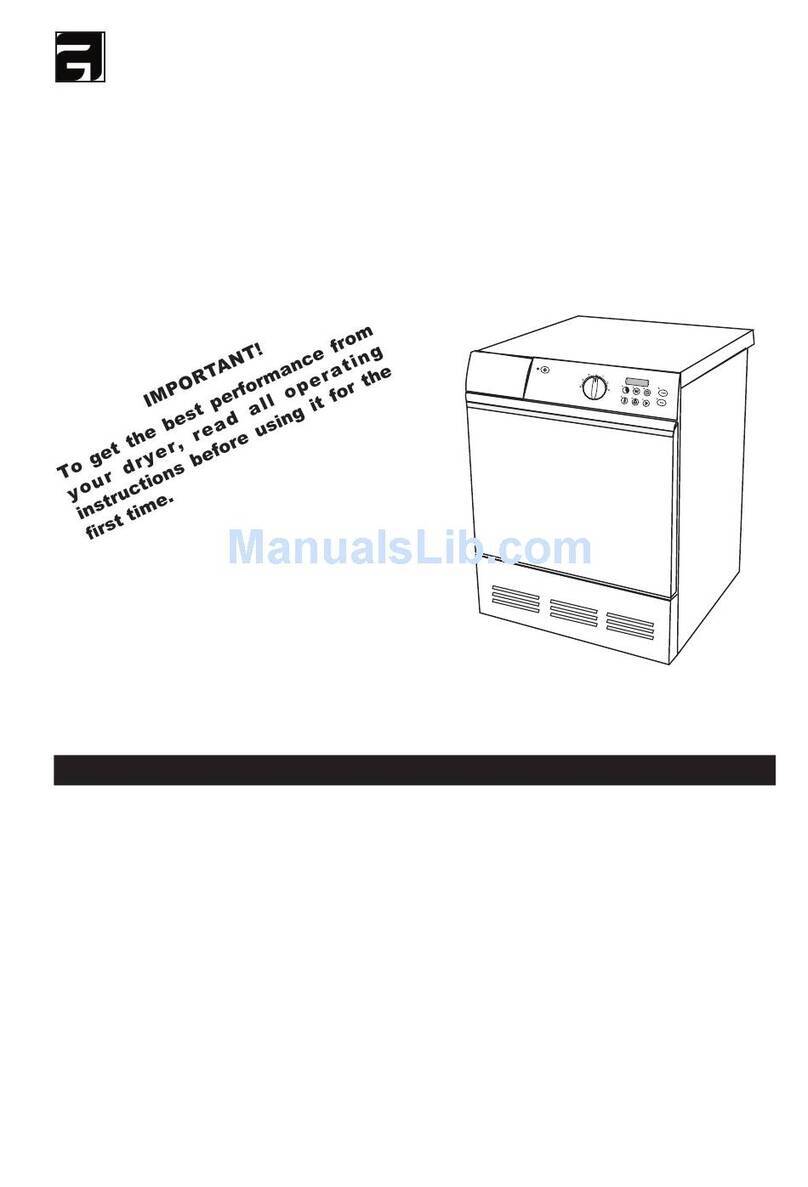
Asko T741 User manual

Tumledryer
Dear ASKO customer,
ThankyouforchoosingthisScandinavianqualityproductmade
in Vara, Sweden.
We want you to feel confident that the inside of your new
machineisasgoodastheoutside,andthattheethicalandmoral
principlesonwhichwebuiltthismachinearejustashighasthe
qualityandperformancethatyouobtainfromit.Wehopethat
our machine will keep you happy for many years to come.
Toderivethebestpossiblebenefitfromyourproduct,werecom-
mend that you read this Use & Care Guide and the Installa-
tion Instructions before using the machine.
ASKOT741

2
CONTENTS
READ FIRST Page
1 Before tumble drying for the first time 3
2 Safety instructions 4
General,Installation,Safety,Interruptinga
program, Transport/Winter storage, Pack-
ing materials, Disposal
3 Child safety 6
General, Child lock on Start button
4 Parts of the tumble dryer 7
5 Panel 8
6 Option buttons 8
INSTALLATION
See Installation Instructions
TUMBLE DRYING
7 Before tumble drying 9-11
Spin-dried? Recommended washing label-
ling, Sorting fabrics, programs, Options,
Temperature, Drying time
8 Tumble dry 12-15
Tumble dry – step-by-step
9 Consumption values 16
CARE Page
10 Care and cleaning 17-19
Cleaning the lint filter, Draining the con-
densation water container, Cleaning the
outside of the machine, Cleaning the fan,
Cleaning the condenser
PROBLEMS?
11 Trouble shooting 20-21
The machine will not start, Overheating
protection,Drying takestoolong, Faultin-
dicationonthedisplay,Normalindications
on the display
MISCELLANEOUS
12 Technical information 23
Technical data, Standard tests
13 Service and guarantee 25
14 Quick guide 26
15 Index 27

3
1BEFORETUMBLEDRYINGTHEFIRSTTIME
READ THE OPERATING INSTRUCTIONS
Please read through this Use and Care Guide
before attempting to use the machine, particu-
larly Chapter 2, Safety instructions, and 3,
Children’s safety.
DO NOT TUMBLE-DRY
Some fabrics are sensitive to tumble drying.
Check the Recommended washing label on the
items concerned, and study Chapter 7, Before
tumbledrying.
NOTE
When you start the tumble dryer the first time,
or after a long period when it has not been in
use,youmayhearalightrumblingnoise.Thisis
quitenormaland the sound willdisappearafter
a few drying operations.
For brief operating instructions; see Chapter 14, Quick guide.

4
2SAFETYINSTRUCTIONS
GENERAL
• Study and save this Use and Care Guide for
future reference.
• Electrical installation, if required, must be
carried out by an authorized electrician.
• The machine may only be used for tumble
drying in accordance with this Use and Care
Guide.
• Repairs and maintenance which affect safety
or performance must be carried out by an aut-
horized specialist.
INSTALLATION
Seethe accompanyinginstallationinstructions.
SAFETY
Thismachinemaynotbeusedfordryingfabrics
that have been dry-cleaned at home, or which
canbesuspected ofcontainingresiduesofflam-
mablefluids.
The tumble dryer is intended only for drying
textile material washed in water.
The tumble dryer is fitted with an overhea-
tingprotectiondevice,whichswitchesthemach-
ine off in the event of excessive temperature.
A float valve switches the machine off if the
condensation water hose becomes clogged, or if
there is danger of water ower flowing from the
container.
INTERRUPTING THE PROGRAM
You can interrupt adryingprogrambyopening
the door, causing the drum to stop automati-
cally. The machine will then “remember” the
point in the drying program at which it was
interrupted.Restarting:closethedoorandpress
the button. The machine will restart
automatically from the point at which the pro-
gram was interrupted.
You can also interrupt a program by pressing
the button for three seconds. If you in-
terrupt a program with this button, the machi-
ne will forget where it was in the program, and
you will have to select a new program to rest-
art.
TRANSPORT/WINTER STORAGE
If the machine is to be transported or stored
during the winter, on unheated premises, ensu-
re that the water container is drained.
PACKING MATERIAL
Sort the packing material for recycling accor-
ding to recommendations by the local authori-
ties.
DISPOSAL
Contact your local refuse collection service or
your local authorities for advice on how to scrap
the machine in a proper manner.
Themachineismade andmarked tofacilitate
recycling.

5
2SAFETYINSTRUCTIONS
To minimize the risk of fire in a tumble dryer,
the following should be observed:
• Items that have been spotted or soaked with
vegetable or cooking oil constitute a fire
hazard and should not be placed in a tumble
dryer.
Oil-affected items can ignite spontaneously, es-
pecially when exposed to heat sources
such as in a tumble dryer. The items become
warm, causing an oxidation reaction in
the oil. Oxidation creates heat. If the heat can-
not escape, the items can become hot
enough to catch fire. Piling, stacking or storing
oil-affected items can prevent heat
from escaping and so create a fire hazard.
If it is unavoidable that fabrics that contain ve-
getable or cooking oil or have been
contaminated by hair care products be placed
in a tumble dryer they should first be
washed in hot water with extra detergent - this
will reduce, but not eliminate, the
hazard.The ’cool down’ cycle of tumble dryers
should be used to reduce the
temperature of the items. They should not be
removed from the tumble dryer or piled
or stacked while hot.
• Items that have been previously cleaned in,
washed in, soaked in or spotted with
petrol/gasoline, dry-cleaning solvents or other
flammable or explosive substances
should not be placed in a tumble dryer.
Highly flammable substances commonly used
in domestic environments include
acetone, denatured alcohol, petrol/gasoline,
kerosene, spot removers (some brands),
turpentine, waxes and wax removers.
• Items containing foam rubber (also known
as latex foam) or similarly textured rubberlike
materials should not be dried in a tumble dryer
on a heat setting.
Foam rubber materials can, when heated, pro-
duce fire by spontaneous combustion.
• Fabric softeners or similar products should
not be used in a tumble dryer to eliminate
the effects of static electricity unless this practi-
ce is specifically recommended by the
manufacturer of the fabric softener or product.
• Undergarments that contain metal reinfor-
cements should not be placed in a tumble
dryer.
Damage to the tumble dryer can result if metal
reinforcements come loose during
drying. When available a drying rack could be
used for such items.
• Plastic articles such as shower caps or babies’
waterproof napkin covers should not
be placed in a tumble dryer.
• Rubber-backed articles, clothes fitted with
foam rubber pads, pillows, galoshes and
rubber-coated tennis shoes should not be pla-
ced in a tumble dryer.
VENTED DRYERS
• that there has to be adequate ventilation to
avoid the back flow of gases into the room
from appliances burning other fuels, including
open fires, when operating the tumble dryer.
• that exhaust air must not be discharged into a
flue which is used for exhausting fumes
from appliances burning gas or other fuels

6
GENERAL
Do not allow children to play with the tumble
dryer.
The tumble dryer is fitted with a magnetic
catch, which allows the door to be pushed ope-
nedfromtheinside.Thedoorisequippedwitha
switch, which automatically stops the tumble
dryer when the door is opened. The machine
will not start automatically on closing the door
(eg, if a child should close the door from the
inside). You must push to re-activate the
dryer.
CHILD LOCK ON BUTTON
You can prevent a child from starting the tum-
bledryerbymistake.Youcandothisbylocking
the button, as follows.
Child lock On/Off:
Set the program selector knob to the position
in which it points directly upwards.
Turn off the main power switch and
then turn it on again so that the machine is in
stand-by mode.
Press the button five times, and then
pressthe buttonfivetimes.Thesetenpres-
ses must be completed within 15 seconds.
Within three seconds after pressing the
button for the last time, you must then use the
button to select Child lock On (the figure
3 appears in the display) or Off (the figure 0
appears in the display).
To start a program with the button
locked:
To start the machine, you must hold the
button down for three seconds.
3CHILDREN’SSAFETY

7
1. LINT-FILTER HOLDER
2. DATA PLATE
3. CONDENSATION WATER CONTAINER
4. PANEL
5. OUTER DOOR
4PARTSOFTHETUMBLEDRYER
8
6. FAN (BEHIND THE LOWER COVER)
7. CONDENSER (BEHIND THE LOWER
COVER)
8. LINT FILTER
Start/Stop
34
1
2
56
7

8
5PANEL
1. INDICATOR LAMP ON/OFF
2. MAIN POWER SWITCH
3. PROGRAM SELECTOR KNOB
THE PROGRAMS ARE DESCRIBED IN
CHAPTER 7, BEFORE TUMBLE DRYING.
4. DISPLAY
5. START BUTTON WITH LED TO INDICATE
PROGRAM RUNNING
6. SETTING AND OPTION BUTTONS
7. STOP BUTTON WITH LED TO INDICATE
THAT THE PROGRAM IS COMPLETED
1 4
235
6OPTIONBUTTONS
7
6
2 3 1. TIME ADJUSTMENT BUTTON FOR TIMED
DRY AND AIR FLUFF PROGRAM
2. ANTI-CREASE PROGRAM BUTTON
3. DELAYED START BUTTON
4. LOW TEMPERATURE BUTTON
5. BUZZER BUTTON
6. QUICK COOLING BUTTON
The LEDs indicate that your choice has been
activated.
654
1

9
7BEFORETUMBLEDRYING
Before you start tumble drying, here is some
advice that can be useful.
SPIN-DRIED?
Items that are to be tumble dried should first
bespin-dried,preferablyat800revsperminute
or more. Better spin drying saves both energy
anddryingtime.
RECOMMENDED WASHING LABELLING
Material suitable for tumble drying
The symbol above indicates that the material
can be tumble-dried. Cotton fabrics, towelling
and synthetic fibres are best suited to tumble
drying. Clothes and fabrics become softer and
fluffier when tumble-dried than when dried on
a line.
PLEASE NOTE
Wear and tear of fabrics in a tumble dryer is
minimal. The lint caught in the lint filter con-
sists of dust and fibre residue that has been for-
med when wearing the garments.
Material which should not be tumble-
dried
Thissymbolindicates that the materialwillnot
withstandtumble-drying.
Certain materials will melt or become dan-
gerously flammable if heated, while others will
loose their shape or shrink.
Do not tumble-dry...
• Materials that are marked “Do not dry close
to heat”.
• Items that have been dry-cleaned at home.
• Foam plastic.
• Glass-fibre materials
• Woollen items, because of the risk of felting.
SORTING FABRICS
Best results are obtained if all articles are of the
same material.
Close zip-fasteners, button up garments, tie
belts, and sort the fabrics and adapt the load
and the temperature as shown in the table be-
low.
TYPE OF FABFIC LOAD TEMPERATURE
White, coloured Cotton and 1/1 (5.0 kg) Normal
and synthetic linen
Polyester/ 1/2 (2.5 kg) Normal
cotton
Delicate and Acrylic, rayon, 1/2 (2.5 kg) Low
mild acetate etc.
Sort a suitable amount and type of fabric.

10
PROGRAMS
Your choice of program will depend on what
you wish to do with the fabrics after tumble
drying. The programs are Extra dry, Dry, Nor-
mal dry, Iron dry, Timed dry program and Air
fluff.
1. Extra dry
This program is designed for washing that is
extremely difficult to dry, eg, jeans with very
thick seams.
PLEASE NOTE
Knittedfabricsin particulararelikelytoshrink.
Use the Dry, Normal dry or Iron dry program
forthesematerials.Alwaysstretchgarmentsout
directly after drying.
2. Dry, 3. Normal dry
Theseprogramsturnofftheheatwhenthewash-
ing is dry, but not bone-dry.
The Dry program turns off the heat a little
later than Normal dry. Choose what you prefer
bytrialand error.Usetheseprogramswhenyou
want dry fabrics.
4. Iron dry
Thisprogramturns offtheheatwhenthe wash-
ing is just damp enough for ironing or mang-
ling.
5. Timed program
The program length that you should choose
depends on what you wish to do with the fa-
brics after tumble drying. Dry different times
for different materials to find the right combi-
nation.
When using a timed program with mixed
washing it may happen that some of the items
will not be sufficiently dried. Such items can
suitablybydriedbyrunningthetimedprogram
for a further 10 minutes or so.
The timed programs automatically operates
atalowtemperature,butyoucanchangeityour-
self to Normal.
NOTE
When using a timed program it is possible to
over-dry fabrics if you set it far too long a time.
This can cause fabrics to shrink or crease and
feelrough.Syntheticmaterialscanalsobecome
chargedwithstatic electricity.Setashortertime
if you tumble dry at temperature Normal.
6. Air fluff program
Use the air fluff program just to remove dust
out of garments, air them or soften them up.
To select Timed program or Air fluff program,
see Chapter 10, Making own drying programs.
OPTIONS
To choose an option, see Chapter 10, Making
owndryingprograms.
Cooling
You can choose between Normal cooling and
Quick cooling . Normal cooling lasts 20
minutes and Quick cooling lasts 5 minutes.

11
Buzzer
The machine offers you the possibility to choo-
se an audible end signal. Set the option Buzzer
on anditwillsoundforthreesecondswhen
the program is completed.
Anti-crease
You can select the anti-crease option to
prevent the fabrics from lying still and beco-
ming creased at the end of the program.This is
a helpful option if you are unable to take out
the fabrics promptly at the end of the tumbling
phase.
You can choose this option for a duration of
1,2 or 3hours.Thedrumwillthen continueto
rotate intermittently, i.e., three seconds every
minute for the number of hours chosen.
Ifyou chooseBuzzer ON,asignal willsound
each time the drum rotates.
TEMPERATURE
You can select Low temperature for the
Extra dry, Dry, Normal dry and Iron dry pro-
grams.
DRYING TIME
Thedryingtimemaybeinfluencedbyanumber
of factors, such as the size of the load, the pro-
gramselected,themoisturecontent oftheload,
the materials being washed, connection capaci-
ty and the ambient temperature and humidity.
Dryingtimeremainingiscalculatedwithinfour
minutesofthe start ofthedrying program.The
estimated time is shown in the bottom right-
hand corner of the display, together with the –
symbol.
If the actual drying time is less than that calcu-
lated, the time display may jump ahead, e.g.
from 50 to 20 minutes, at the end of the pro-
gram.
If the actual drying time is longer than that
calculated, the countdown will stop at the end
of the progam until the load is dry.
Please note that times include a cooling period.
The remaining drying time is estimated ap-
proximately(withinfourminutesof thestartof
the drying program) and is shown on the dis-
play in intervals of five minutes.

12
Thefollowingstep-by-stepinstructionsarepro-
vided to help you to achieve the best possible
dryingresult.
SORT FABRICS
Fortipsand advice, see Chapter7–Before
tumbledrying.
PLEASE NOTE
Empty the pockets. Coins, nails and similar
items can cause damage to the machine and
textiles.
TURN ON THE MAIN POWER
SWITCH
OPEN THE DOOR, PUT IN THE WASHING
AND CLOSE THE DOOR
Closethedoorcarefully,anddonotslam
it. See Chapter 7 for the recommended quanti-
ty of washing – Before tumble drying.
SELECT A PROGRAM
Select the program that you wish to use
with the program selector knob.
Your choice of program will depend on
what you wish to do with the fabrics after tum-
ble drying. See also Chapter 7 – Before tumble
drying.
The choice of programs is:
1. Extra dry, 2. Dry, 3. Normal dry, 4. Iron dry,
5. Timed program and 6. Air fluff.
8TUMBLE DRY
6
6
1
1
2
2
3
3
5
5
4
4
SET THE TIME FOR AIR FLUFF AND TIMED
PROGRAMS
For the Air fluff program and theTimed
dryprogram,youcansetthedurationbyindex-
ing forwards with the button. The selec-
ted time is shown in the display.
Youcanselecttimes between 5and90 minu-
tes.
Try different drying times for yourself.Then
note the times that you find best for different
fabrics.
PLEASE NOTE
When using theTimed program, the garments
may become “over-dry” if the set drying time is
toolong.This can cause the fabrics to shrink or
creaseandtakeona roughfeel. Syntheticmate-
rials can also become charged with static elec-
tricity. Try to find the suitable drying time by
selecting a shorter time on the first few occasi-
ons.
SELECT AN OPTION
By selecting an option, you can obtain a
dryingprogramthatisidealforyourgar-
ments,
The machine will remember the settings and
options that you make for each program and
will start with these (with one exception – De-
layed start) the next time you select the pro-
gramconcerned.Of course, you can thenmake
further changes if you wish.

13
Anti-crease
Selectanti-creaseby indexingforwardswiththe
button. You can select an active period of
1, 2 or 3 hours for this option.
indicates that the option is disconnected.
This option means that the drum will rotate
for three seconds per minute after the drying
program is complete. This option prevents the
fabrics from lying in the same position and be-
coming creased.
This is helpful if you are unable to take out
the fabrics promptly at the end of the tumbling
phase.
IfyouhaveselectedtheBuzzeroption,a buz-
zer will be heard every time the drum rotates
duringthis program.Thisisto remindyouthat
the drying program has ended.
Delayed start
Set the number of hours by which the start will
be delayed by indexing forwards with the
button. The selected time is shown in the dis-
play as you index forwards. A delay of 5 hours
thus means that the machine will start the pro-
gram in 5 hours after pressing the start button.
You can select a delay of between 1 and 24
hours. indicates that the option is disconnec-
ted and the program will start directly as usual.
Low temperature
You can switch the Low temperature option on
or off by pressing the button.
The LED next to the button will light when
Low temperature is switched on.
Low temperature is not available with the
Airfluffprogram.
Buzzer
You can switch the Buzzer option on or off by
pressing the button.
The LED next to the button will light when
the Buzzer option is switched on.
Thisoptionmeans thatthebuzzerwillsound
for three seconds when the drying program has
ended.
Quick cooling
You can switch the Quick cooling option on or
off by pressing the button.
The LED next to the button will light when
Quick cooling is switched on.
Cooling normally continues for 20 minutes.
Quick cooling reduces the cooling period to 5
minutes.
Quick cooling is not available with the Air
fluffprogram.
START THE DRYING PROGRAM WITH THE
BUTTON
The LED next to the button will light
to indicate that the program has started.
PLEASE NOTE
If the child lock is on, the button must be held
down for 3 seconds.
Remaining drying time
The remaining drying time is shown in the dis-
play while the program is operating. (indicated
7
7

14
in steps of 5 minutes, within four minutes after
the start of the start of the drying program).
indicates 2 hours and 35 minutes, for
example. Only the time for the Time program
andAirfluffdryingisindicatedforventingdry-
ers.
Duringcooling, isindicatedinthedisplay
together with the number of minutes remain-
ing.
IftheAnti-creaseoptionisselected,thedrum
will rotate every minute for a certain period
after cooling. The text is indicated in the
display during this period. The program will
stop as soon as the door is opened.
DURING THE PROGRAM
If you wish to interrupt or change the program
Hold down the button for three se-
conds.AnextinguishedLEDnexttothebutton
indicates that the program has been interrup-
ted.
Changing the program selector knob after
starting will not affect the program.
Putting in or taking out washing
If you wish to put in or take out washing after
youhavestarted themachine,openingthedoor
will cause the machine to stop automatically.
Put in more washing, close the door and press
the button.The program will restart au-
tomatically from the point at which it was in-
terrupted.
DRYING PROGRAM ENDED
The text in the display indicates
that the program has ended.
IftheAnti-creaseoptionisselected,thedrum
will rotate every minute for a certain period
after cooling. The text is indicated in the
display during this period. The program will
stop as soon as the door is opened.
NOTE
- Clean the lint filter after each tumble drying
operation.
- Drain the condensation water container.
WARNING
Regularly clean the lint filter. If the lint filter
becomescompletelyclogged,thismaycausethe
overheating protection to trip. The filter must
then be cleaned and the overheating protection
must be reset before restarting the machine; see
Chapter 11,Trouble shooting.
Cleaning the lint filter
1. Graspthefilterhandleandpull
it towards you.
2. Pull the filter up out of the
holder.
3. Openthefilterand
brush away any lint
with your hand.
4. Fold the filter to-
gether and replace it in
the filter holder.
1
2
8
8
NOTE
Regularly clean the lintfilter.

15
The filter may require cleaning if lime scale
deposits are present; see Chapter 10, Care and
Cleaning.
Draining the condensation water container
The condensation water container must be
emptied after each tumble drying.
Pull out the condensation water
container, drain any water
and replace the
container.
If the condensa-
tion water contai-
nerbecomestoofull, the program will be inter-
rupted and will appear in the display.
Drain the container and press the but-
ton, and the program will now continue from
where it was interrupted; see also Chapter 11,
Trouble shooting, heading Fault indications.
NOTE
Donotpull out the condensationwatercontai-
ner while the tumble dryer is running.
TIP
The condensation water is soft, which makes it
suitablefor useinasteamiron. Strainthewater
through a coffee filter before use.
Automatic emptying
See the Installation instructions if you prefer
the water to be emptied automatically.
AFTER TUMBLE DRYING
Turn off the main switch .
Take out the clothes, and close the door
to prevent small children from crawling into
the machine.
9
9

16
9CONSUMPTIONVALUES
The following conditions apply for the consumption values indicated below:
Temperature of intake air:20 ºC.
Humidity of intake air: 65 %.
Drying temperature: Normal ( ), Low ( ).
Element power: 2500 W.
Thecottonfabricsare,before tumbledrying,spin-driedat800and1600 rpm(longspin)withASKO
an washing machine.
Other fabrics (creasfree and acrylics) are, before tumble drying, spin-dried at 800 rpm (short spin)
with an ASKO washing machine.
PROGRAM WASHING AMOUNT OF ENERGY CONSUMPTION PROGRAM TIME
WASHING ( ca kWh) (ca minutes)
800rpm - 1600rpm 800rpm - 1600 rpm
P1 Cotton, linen, 1/1 (5.0 kg) 3.8 - 3.1 120 - 105
Extradry
P2 Cotton, linen, 1/1 (5.0 kg) 3.5 - 2.8 110 - 95
Dry Creasefree,poly- 1/2 (2.5kg) 1.3 --- 55 ---
ester/cotton,
P3 Cotton, linen, 1/1 (5.0 kg) 3.2 - 2.4 95 - 80
Normaldry Crease free, poly- 1/2 (2.5kg) 1.1 --- 50 --
ester/cotton,
Acrylics,rayon, 1/2 (2.5 kg) 1.5 --- 75 ---
acetate,
P4 Cotton, linen, 1/1 (5.0 kg) 2.5 - 1.5 95 - 65
Irondry

17
EMPTYING THE CONDENSATION WATER CONTAINER
Empty the condensation water container after
each tumble drying.
Pull out the condensation water container,
empty the water and put the container back.
If the
condensa-
tion water
containerbecomes too full,theprogram will be
interrupted and will appear in the display.
Empty the container and press the but-
ton and the program will continue from where
itwasinterrupted,see also Chapter11,Trouble
shooting.
NOTE
Donotpull out the condensationwatercontai-
ner while the machine is running.
CLEANING THE OUTSIDE OF THE MACHINE
Use a mild detergent to clean the outside of the
machine. Do not use any solvents, they can da-
mage the machine. Do not spray the machine
with water.
NOTE
Do not allow dust to accumulate round the
machine. Keep clean and cool around the tum-
ble dryer. Dust, heat and moisture prolong the
dryingtime.
1
2
CLEANING THE LINT FILTER
Clean the lint filter after each tumble drying
operation.
If your water is very hard a deposit of lime
may be formed on the filter. Check when clea-
ning lint from the filter if there is any sign of
lime,ifsowashthelintfilterby handtoremove
any deposits.
1. Grasp the filter handle
and pull towards you.
2. Pull the filter
up out of the hol-
der.
3. Open the filter and remove fluff from all
sides of the filter by hand. Use a soft dry cloth
to remove any remaining fluff.
4. Replace the filter in the filter holder.
10CARE ANDCLEANING
NOTE
If limescale develops on the filter, rinse it in
water to remove the limescale.
Dry the filter thoroughly with a hand towel.

18
CLEANING THE FAN
The fan should be cleaned at least once a year.
If you have any household pets the fan must be
cleaned more often.
1.Turn off the main power switch.
2. Remove the lower cover.
3. Remove the safety screw (1). Prise out the
four clips in the order shown and remove the
fan cover.
4. Unscrew the nut while holding the fan.
5. Take out the fan
and clean it with a
brush and water.
6. Put the fan back into place and screw on the
nut.
7. Refit the fan cover, making sure the clips
hold the cover
in place. Don’t
forget to fit the
safety screw.
8. Fit the lower cover back in place.
2
2
1
2
2
1
4
3
5
2

19
CLEANING THE CONDENSER
The condenser should be cleaned at least three
times a year. . If you have any household pets
the condenser must be cleaned more often.
1.Turn off the main power switch.
2. Remove the lower cover.
3. Turn the two levers anticlockwise to open
the conden-
ser cover.
4. Take the condenser out and rinse the con-
denserfins clean, eg, using a hand-held shower.
Do not poke
anything bet-
ween the fins,
you might da-
mage the con-
denser. Do not
use any sharp ob-
ject when cleaning the fins.
NOTE
Do not attempt to clean the condenser in a
dishwasher.
5. Refit the condenser, taking care to fit it the
right way up.
The top of
the conden-
ser is marked
“upp”, “up” and
“oben”.
6. Fit the lower cover back in place.
2
2
1
2
2
UPP
UP
OBEN

20
11TROUBLESHOOTING
THE MACHINE WILL NOT START
Check that:
• The door is properly closed.
• The main switch is pressed in.
• You have correctly set the required program
or the required time in the timed program.
• the Delayed start option is not switched on.
Inthiscase,thetimeremainingtostartinhours
willbe indicatedinthe display(e.g. ).To
interrupt the program, see Chapter 8 –Tumble
dry.
• The electric plug, if any, is firmly inserted in
its socket.
• All fuses are intact. Switch two fuses over. It is
not always possible to see directly if a fuse has
blown.
• The overheating device has not triggered, see
below.
OVERHEATING PROTECTION
The overheating protection device switches off
the tumble dryer if the tem-
peraturebecomestoohigh,
eg, because the fluff filter
is clogged. If this happens,
clean the filter, empty the
water container and clean
the condenser. Then reset
theoverheatingdevicebypressing
the black rubber button on the back of the
machine.
EXCESSIVE DRYING TIME
Empty the water container and check that the
lint filter and the condenser are not clogged,
see Chapter 10, Care and Cleaning. Excessive
drying times can also be caused by the machine
being installed in a very confined space and by
the air in the room (which cools the machine)
becomingtoowarm.Inthissituationmakesure
that ventilation is improved, eg, by opening
doors and/or windows.
If this does not help, check the fuses.
Other manuals for T741
1
This manual suits for next models
1
Table of contents
Other Asko Dryer manuals
Popular Dryer manuals by other brands

ziltek
ziltek RemScan operating instructions

Crosslee PLC
Crosslee PLC TUMBLE DRYER Instructions for use

GEAppliances
GEAppliances GFD49 Owner's Manual & Installation Instructions

Drieaz
Drieaz TurboDryer Sahara owner's manual

Homeline
Homeline LBH-07 User instructions

AirPlus
AirPlus DryGuy instruction manual

V-ZUG
V-ZUG Unimatic TSL WP operating instructions

XPower
XPower X-430TF owner's manual

V-ZUG
V-ZUG Unimatic TL WP operating instructions

Fantini Cosmi
Fantini Cosmi Aspira SUPERKALI DRY User and installation manual

V-ZUG
V-ZUG Adora TS WP operating instructions

flow-med
flow-med dry-sun uv 2 instruction manual