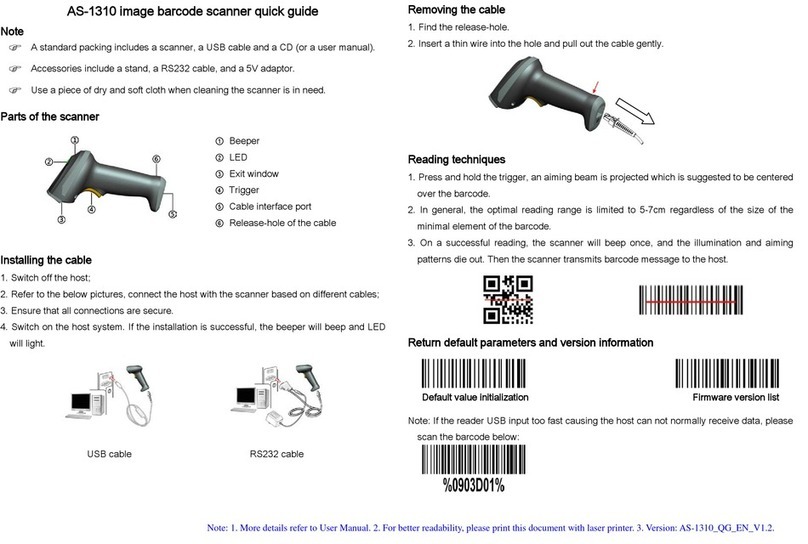
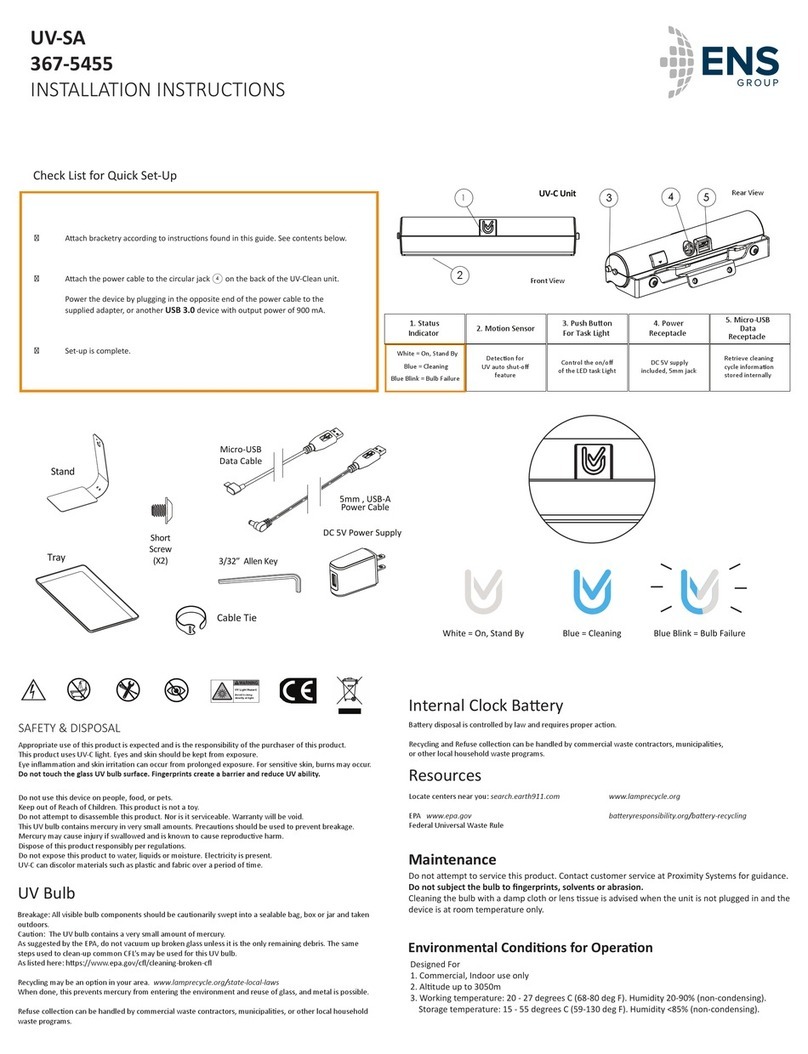
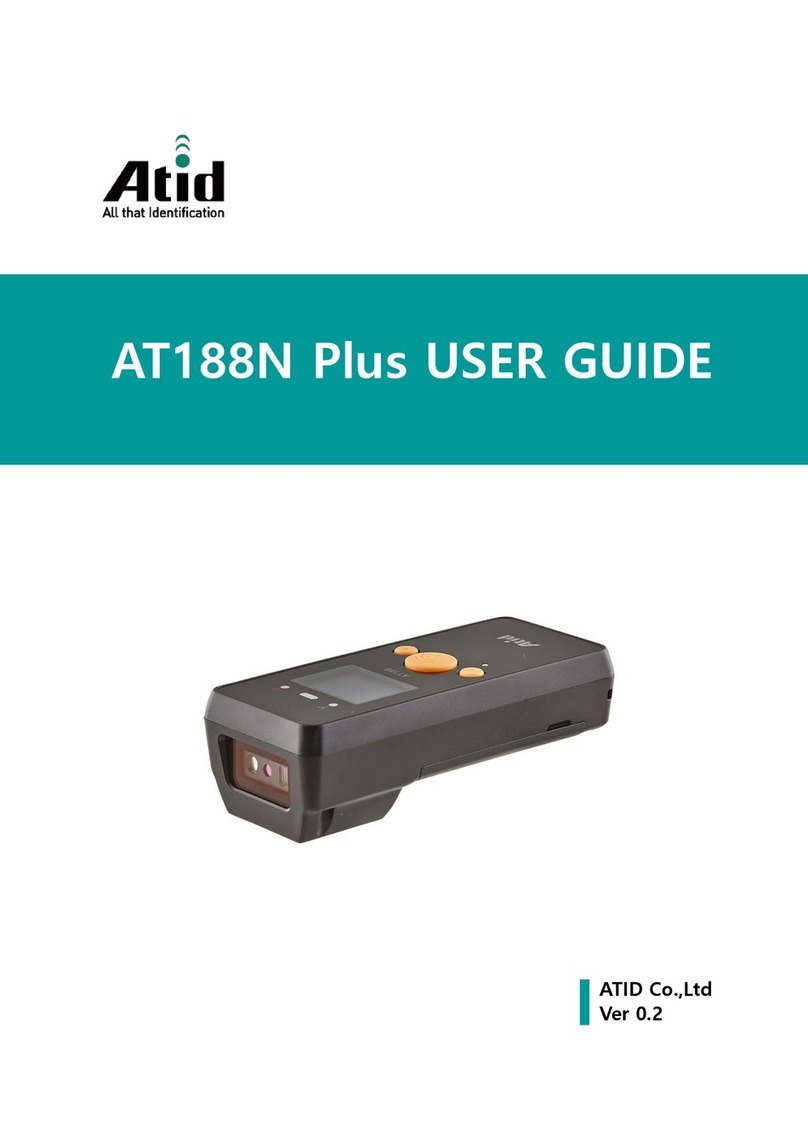
ASP Zapper Tornado BT User manual

Zapper
Tornado BT
™
Users Manual
ASP Microcomputers
Australia
Telephone: (03) 9578-7600
FAX: (03) 9578-7727
email: solutions@asp.com.au
World Wide Web: http://www.asp.com.au
ASP Microcomputers is a division of Grayline Holdings Pty. Ltd,. A.C.N. 004 940 729
Zapper Tornado, Zapper Tornado BT and Barcode Zapper are trademarks of ASP Microcomputers
Manual revised: April 20th, 2017 Copyright © 2010-2017 by ASP Microcomputers
14 Business Park Drive,
Notting Hill, Victoria, 3168

Contents
Your Zapper Tornado BT™.......................................................................................................................................1
Before you use your Zapper Tornado BT.................................................................................................................2
Charging the battery............................................................................................................................................2
Installing a new battery .......................................................................................................................................2
Use USB Bus Power .............................................................................................................................................3
Choosing Your Radio Link Mode..............................................................................................................................4
PAIR Mode ...........................................................................................................................................................4
PICO Mode...........................................................................................................................................................4
HID Mode.............................................................................................................................................................4
SPP Master/Slave Mode ......................................................................................................................................4
Using your Zapper Tornado BT in PAIR Mode .........................................................................................................5
Using your Zapper Tornado BT in PICO Mode.........................................................................................................6
Using your Zapper Tornado BT in HID Mode...........................................................................................................7
Using your Zapper Tornado BT in SPP Mode...........................................................................................................8
Establishing an SPP Master Connection ..............................................................................................................8
Establishing an SPP Slave Connection .................................................................................................................9
Out-of-range Scanning...........................................................................................................................................10
Presentation Scanning...........................................................................................................................................10
Paging Function .....................................................................................................................................................11
Batch Scanning (Inventory Mode) .........................................................................................................................11
How to Transmit Stored Data............................................................................................................................12
Using the Quantity Feature ...............................................................................................................................13
Scanner Indicators .................................................................................................................................................14
Charging Cradle Indicator......................................................................................................................................14
Smart Cradle Indicators.........................................................................................................................................14
Miscellaneous Options ..........................................................................................................................................15
ISBN-10 and ISBN-13 .........................................................................................................................................15
SCIS ....................................................................................................................................................................16
Beeper Mode.....................................................................................................................................................17
Output Terminators...........................................................................................................................................18
Tilde Prefix.........................................................................................................................................................18
System Commands ................................................................................................................................................19
Electromagnetic Interference (EMC).....................................................................................................................20

Warranty................................................................................................................................................................20


Zapper Tornado BT™ Users Manual
© 2010-2017 ASP Microcomputers Page 1
Your Zapper Tornado BT™
Thank you for choosing the ASP Zapper Tornado BT Bluetooth Cordless Image Scanner.
Powered by a combination of cutting-edge Imaging Technology and Bluetooth 2.1 EDR
wireless technology, it not only provides outstanding reading performance, but also
delivers the convenience and freedom of mobility. This document provides a quick
reference for installation and operation purposes.

Zapper Tornado BT™ Users Manual
© 2010-2017 ASP Microcomputers Page 2
Before you use your Zapper Tornado BT
Please note that your Zapper Tornado BT will be shipped to you with the battery
already charged and fitted, and set up for PAIR mode. All you need to do is plug it in
and use it!
Charging the battery
1. Plug the AC power plug into the appropriate AC wall
socket.
2. Plug the DC power cord of the power supply unit into the
DC power jack of the cradle. The smart cradle will issue
the power on beeps and the center indicator will give one
blue blink. If you use the charging cradle, please check the
power indicator of the charging cradle turns steady blue.
3. Place the scanner on the cradle. The status indicator will
turn steady red if the battery is not fully charged. When
the battery is fully charged, the status indicator of scanner
will flash green at regular interval.
Please charge a new battery pack for 8 hours prior to the
first use.
Installing a new battery
1. Undo the screw on the grey end cap, and remove the end
cap.
2. Gently tap the Zapper Tornado BT until the battery slides
out.
3. Ensure the contacts of the new battery pack are facing the
charging contacts inside the battery cavity.
4. Slide the battery pack into the battery cavity until it clicks
into place. The scanner will give four beeps when the
battery pack is installed properly if the battery pack still has
power.
5. Re-fit the end cap and fasten it in place with the screw.
Make certain that the end cap is secured properly before
using the scanner.

Zapper Tornado BT™ Users Manual
© 2010-2017 ASP Microcomputers Page 3
Use USB Bus Power
1. If your host device has USB 3.0 ports available, both battery
charging and regular operation can be supported by the
USB bus power without using the provided external power
supply.
2. If only USB 2.0 is available in your host device, you must
use the provided power supply as the power source. The
available power of standard USB2.0 ports is not enough to
support both battery charging and regular operation
simultaneously.
3. If you want to use the USB Bus Power feature AND you can
connect the cradle to a USB 3.0 port, slide the USB bus
power switch underneath the cradle to “ON”. Then
connect the cradle to the host device USB 3.0 port via the
USB cable.

Zapper Tornado BT™ Users Manual
© 2010-2017 ASP Microcomputers Page 4
Choosing Your Radio Link Mode
The Zapper Tornado BT Bluetooth image scanner provides several radio link modes to
communicate with host devices.The most common is PAIR mode, where the scanner
communicates with its cradle, and the cradle connects to your PC via USB.
The Zapper Tornado BT can also work in PICO mode, where multiple scanners can
communicate with a single cradle.
Finally, the Zapper Tornado BT can work with your existing Bluetooth-enabled devices,
such as PDAs or portable computers, via HID or SPP master/slave modes.
If the scanner moves out of Bluetooth range, it resumes the radio connection
automatically when it moves back into range (this feature is not available in SPP slave
mode). To change the radio link mode, you must scan the “Uninstall” command to
revert the scanner to uninstall state.
PAIR Mode
This is the simplest plug-and-play solution. In this mode, one scanner works with one
smart cradle. The smart cradle not only provides the Bluetooth radio link for the
scanner, but also offers a cabled USB interface to the host device.
PICO Mode
In PICO mode, up to seven scanners can be connected to one smart cradle at the same
time. If you want to un-pair all paired scanners from the smart cradle, simply press
and hold the paging/reset button of the smart cradle for over three seconds. If you
just want to un-pair some of the paired scanners, scan the “Uninstall” command on
each scanner you want to un-pair, one by one.
HID Mode
Using the HID service, the scanner can work like a Bluetooth keyboard. In this mode,
the scanner is discoverable by a connection request from a remote host device. For
security reasons, you will need to input a PIN Code to establish the Bluetooth
connection.
SPP Master/Slave Mode
Through the standard SPP service, the scanner can work like a serial input device. In
SPP master mode, the scanner initiates the radio connection request to a remote slave
device. In SPP slave mode, the scanner is discoverable by a connection request from a
remote master device.

Zapper Tornado BT™ Users Manual
© 2010-2017 ASP Microcomputers Page 5
Using your Zapper Tornado BT in PAIR Mode
Make sure that the battery is fully charged, and plug the cradle into your computer.
If your scanner was shipped together with the smart cradle, please note that your
scanner and cradle have been paired already. The scanner link indicator will blink blue
every 2.5 seconds, and the middle indicator of the smart cradle will be steady blue.
This means everything is ready to go, and you don’t need to do anything else.
If the scanner and the smart cradle both show alternating red and green blinks
(“Uninstall” state), please follow the steps below to establish a connection between
the scanner and the smart cradle.
1. Scan the “PAIR mode” command below. The status indicator of the scanner will
turn steady red.
PAIR Mode
2. Place the scanner into the smart cradle. You will hear one short beep to indicate
the pairing process is activated. The scanner will give continuous short clicks and
the scanner’s link indicator will flash blue quickly during the pairing process.
3. When you hear four beeps in ascending tone, the pairing process is completed. If
scanner link indicator is now blinking blue every 2.5 seconds, and the middle
indicator of the smart cradle is now steady blue, you’re finished – stop here!
If the scanner pairing process fails (or the scanner was not placed on the smart cradle
within 20 seconds), you will hear two “Dee-doo Dee-doo” beeps to indicate pair
failure. At this stage, you need to get both the scanner and the smart cradle back into
“Uninstall” state with both showing alternating red and green blinks.
4. If the scanner is not blinking red and green, scan the Uninstall barcode below.
Uninstall
5. If the smart cradle is not blinking red and green, press and hold down the smart
cradle paging/reset button for about five seconds (until the cradle beeps).
6. If both the scanner and the smart cradle are now blinking red and green, go back
to step 1 above.
The default host interface of the smart cradle is USB HID. If you want to set the host
interface to USB COM, you have to install a USB virtual COM driver into your host
device before using the scanner. Please contact ASP for this software driver.

Zapper Tornado BT™ Users Manual
© 2010-2017 ASP Microcomputers Page 6
Using your Zapper Tornado BT in PICO Mode
Make sure that the battery is fully charged, and plug the cradle into your computer.
1. The smart cradle must be in “Uninstall” state. If the smart cradle indicator is not
flashing alternate red and green blinks, press and hold down the smart cradle
paging/reset button for about five seconds (until the cradle beeps).
2. Prepare the scanners you want to pair with the smart cradle. Ensure the status
indicator of each scanner is flashing alternate red and green blinks (in “Uninstall”
state). If the scanner is not in uninstall state, please scan the “Uninstall” barcode
below to un-pair the scanner.
Uninstall
3. Scan the “PICO mode” barcode below, and the status indicator of the scanner will
turn steady red.
PICO mode
4. Place the scanner on the smart cradle, then you will hear one short beep to indicate
the pairing process is activated. The scanner will give continuous short clicks and
the scanner’s link indicator will flash blue quickly during the pairing process.
5. When you hear four beeps in ascending tone, the pairing process is completed. The
scanner’s link indicator will now give one blue blink every 2.5 seconds, and the
centre indicator of the smart cradle will turn steady blue, and its side indicators will
turn steady green.
If the scanner pairing process fails (or the scanner is not placed on the smart cradle
within 20 seconds), you will hear two “Dee-doo Dee-doo” beeps to indicate pair
failure. At this stage, you need to get both the scanner and the smart cradle back into
“Uninstall” state with both showing alternating red and green blinks - see steps 4 and 5
on the previous page.
Please return to step 2 above to pair additional scanners (up to 7 in total) with the
smart cradle.
Please note that while in Pico mode, the smart cradle centre indicator will remain
steady blue and its side indicators will remain steady green

Zapper Tornado BT™ Users Manual
© 2010-2017 ASP Microcomputers Page 7
Using your Zapper Tornado BT in HID Mode
1. Ensure the battery is fully charged. Power on the scanner within radio range and
ensure the status indicator of scanner gives alternating red and green blinks (in
“Uninstall” state). If the scanner is not in uninstall state, please scan the “Uninstall”
command first. Then scan the “HID Mode” command, and the scanner’s link
indicator will give three blue blinks every 2.5 seconds.
Uninstall
HID mode
2. Begin the Bluetooth Discovery process to find all available Bluetooth devices
available to your remote host. You will see ‘’FxxxBT-xxxx’’ is shown in the list if the
scanner is successfully discovered.
3. Double click the “FxxxBT-xxxx” in the discovered Bluetooth device list. If a PIN Code
or Passkey is requested, please enter “00000000” (without the quotes). You will
see “Keyboard on FxxxBT-xxxx”, and you can then double click this HID service to
establish the connection between the scanner and the remote host device.
4. The scanner will give four beeps in ascending tone to indicate the radio is
connected. At the same time, the scanner’s link indicator will give one blue blink
every 2.5 seconds to indicate the scanner is in radio-connected state.
Please note that if the scanner is not connected to the host device within one
minute after scanning the “HID Mode” command, the scanner will go to sleep
automatically. You just need to press the trigger to wake up the scanner to
continue the installation.
The installation procedures vary on different remote host devices, operation systems
and Bluetooth software drivers. Please consult your professional IT consultant to
obtain necessary support if any problem is encountered during the installation
processes.
While using HID mode, beware of potential errors in the data transmitted at the
same time when radio link quality is poor. We suggest you only use the scanner in
areas of good communications coverage at all times.

Zapper Tornado BT™ Users Manual
© 2010-2017 ASP Microcomputers Page 8
Using your Zapper Tornado BT in SPP Mode
Establishing an SPP Master Connection
1. Ensure the battery is fully charged. Go to the “Hardware” folder located in
Bluetooth Advanced Settings of the remote host device to check its device MAC
address. Then prepare a 12-character Code 128 barcode of the remote host device
MAC address.
2. Ensure a virtual COM port is available in your remote host for connecting the
scanner. If not, please go to the “Local Services” folder located in Bluetooth
Advanced Settings. Click “Add Serial Services” to add a Bluetooth COM port.
3. Power on the scanner within radio range and ensure the status indicator of scanner
gives alternating red and green blinks (“Uninstall” state). If the scanner is not in
uninstall state, please scan the “Uninstall” command below first. Then scan the
“SPP Master Mode” command below, and the status indicator of scanner will turn
steady red.
Uninstall
SPP MASTER mode
4. Scan the 12-character MAC address barcode. The scanner will give continuous
short clicks and the link indicator of the scanner will flash blue quickly during the
radio connecting process. If a PIN Code or Passkey is requested, please enter
“00000000” (without the quotes).
5. The scanner will give four beeps in ascending tone to indicate the radio is
connected. At the same time, the scanner’s link indicator will give one blue blink
every 2.5 seconds to indicate the scanner is in radio-connected state.
Please note that if the scanner fails to connect to the host device within 30 seconds,
the link indicator will give three blue blinks every 2.5 seconds. However, the
scanner will continue to try to discover the host device for another 30 seconds
before it goes to sleep. In the interim, you can still scan the “Uninstall” command
to revert the scanner to uninstall state. If the scanner goes to sleep, you just need
to press the trigger to wake up the scanner to continue the installation.
The installation procedures varies on different remote host devices, operating
systems and Bluetooth software driver. Please consult your professional IT
consultant to obtain necessary support if any problem has been encountered during
the installation processes.

Zapper Tornado BT™ Users Manual
© 2010-2017 ASP Microcomputers Page 9
Establishing an SPP Slave Connection
1. Ensure the battery is fully charged and a virtual COM port is available in your
remote host for connecting the scanner. If not, please go to the “Client
Applications” folder located in Bluetooth Advanced Settings. Click “Add COM Port”
to add a Bluetooth COM port.
2. Power on the scanner within radio range and ensure the status indicator of scanner
gives alternating red and green blinks (“Uninstall” state). If the scanner is not in
uninstall state, please scan the “Uninstall” command below first. Then scan the
“SPP Slave Mode” command below, and the scanner’s link indicator will give three
blue blinks every 2.5 seconds.
Uninstall
SPP SLAVE mode
3. Execute the Bluetooth Discovery process to find all available Bluetooth device listed
in your remote host. You will see ‘’ FxxxBT-xxxx’’ in the list if the scanner has been
successfully discovered already.
4. Double click the “FxxxBT-xxxx” on the discovered Bluetooth devices. If a PIN Code
or Passkey is requested for security connection, please enter “00000000” (without
the quotes). You will see “Serial Port on FxxxBT-xxxx”, and double click this SPP
service to establish the connection between the scanner and the remote host
device.
5. The scanner will give four beeps in ascending tone to indicate the radio is
connected. At the same time, the scanner’s link indicator will give one blue blink
every 2.5 seconds to indicate the scanner is in radio-connected state.
Please note that if the scanner is not connected to the host device within one
minute, the scanner will go to sleep. Just press the trigger to wake up the scanner
to continue the installation.
The installation procedures varies on different remote host devices, operating
systems and Bluetooth software drivers. Please consult your professional IT
consultant to obtain necessary support if any problem has been encountered during
the installation processes.

Zapper Tornado BT™ Users Manual
© 2010-2017 ASP Microcomputers Page 10
Out-of-range Scanning
When the radio is connected between the scanner and the remote host device, the
scanner will transmit each scanned data right after scanning the barcode. However, if
the scanner loses the radio connection with the remote host device, it is configured to
be unable to scan any barcode data.
If you enable the out-of-range scanning function, the scanner can continue scanning
barcode data while it is out of working range. The scanned data will be temporarily
stored into the memory buffer until radio link is restored.
Enable Out-Of-Range scanning
Disable Out-Of-Range scanning
If the scanner moves out of working range, you will hear four beeps in descending tone
to indicate the radio connection has been lost. The scanner’s link indicator will give
three blue blinks every 2.5 seconds. Once the scanner returns to working range, you
will hear four beeps in ascending tone to indicate the radio connection is restored and
the scanner will give one blue blink every 2.5 seconds. At the same time, all stored
scanned data will be transmitted automatically right after the radio link is resumed.
Presentation Scanning
Presentation Scanning is designed for hand-free applications. If the “Presentation
Scanning Auto-sense” function is enabled, the scanner automatically switches to
presentation mode when you place it onto the Smart Stand or cradle.
Enable Presentation Scanning
Auto-Sense
Disable Presentation Scanning
Auto-Sense

Zapper Tornado BT™ Users Manual
© 2010-2017 ASP Microcomputers Page 11
Paging Function
A paging function is provided to help you locate a paired smart cradle or scanner. To
page the paired smart cradle, scan the “Paging” command below. To page the paired
scanner, press the paging/reset button of the smart cradle for less than three seconds.
Paging
Batch Scanning (Inventory Mode)
Thanks to the specially designed Batch Scanning function, the scanner is capable of
storing up to 20,000 EAN-13 labels. It is an ideal cost-saving solution for inventory
applications.
Once you scan the “Enter Batch Scanning” command below to activate this function,
all scanned barcode data will be stored in memory, and the scanner’s status indicator
will blink green at regular interval during batch scanning. You can scan and store
barcode data until memory storage is full. If memory storage is full, you will hear two
long beeps and the status indicator will give two red blinks to indicate memory full.
You must download the scanned barcode data before you can continue.
To exit from batch scanning mode, scan the “Exit Batch Scanning” command.
Enter Batch Scanning
Exit Batch Scanning

Zapper Tornado BT™ Users Manual
© 2010-2017 ASP Microcomputers Page 12
How to Transmit Stored Data
The scanner is preset to scan the “Transmit Stored Data” command to transmit all
stored data. During the transmission process, the scanner will give continuous short
clicks and blue blinks. Then the scanner will give two short beeps after data
transmission is completed.
Transmit Stored Data
Alternatively, you can also set the scanner to transmit the stored data as soon as the
scanner is placed onto the cradle.
Transmit Stored Data by
Scanning Barcode Command
◆
Transmit Stored Data by Scanning
Barcode or Placing Scanner onto Cradle
Transmit Stored Data by
Placing Scanner onto Cradle
The scanner is preset to keep all the stored data until you scan the “Clear All Stored
Data” command. But you can change the setting to “Auto Delete Stored Data after
Transmission” as well.
Auto Delete Stored Data
after Transmission
Keep Stored Data
after Transmission
◆
Clear All Stored Data
If you scan a wrong barcode, the “Delete Last Scanned Data’’ command is available to
recover from the mistake. If you scan the ‘’Delete Last Scanned Data’’ command, the
last stored data will be deleted.
Delete Last Scanned Data

Zapper Tornado BT™ Users Manual
© 2010-2017 ASP Microcomputers Page 13
Using the Quantity Feature
If you want to input quantity information with your barcode data, you can enter a
quantity from 1 to 9999 by scanning the quantity barcodes below right after you
scanned the barcode data. The quantity information will be stored into the memory
storage together with the barcode data.
Quantity 0
Quantity 7
Quantity 4
Quantity 1
Quantity 8
Quantity 5
Quantity 2
Quantity 9
Quantity 6
Quantity 3
There are two ways to output the stored barcode data and quantity information.
Please refer to following for details:
•Stored data is transmitted as many times as the quantity indicated.
•Stored data is transmitted together with quantity information in two fields.
Please scan “Enable Quantity Field Transmission” command to enable this
function. The preset delimiter is a comma.
Disable Quantity Field Transmission
◆
Enable Quantity Field Transmission

Zapper Tornado BT™ Users Manual
© 2010-2017 ASP Microcomputers Page 14
Scanner Indicators
Description
Link Indicator
Beeper
Radio connected
1 blue blink per 2.5 sec.
Off
Radio disconnected
3 blue blinks per 2 sec.
Off
During connection
Quick blue blinks
Short clicks
Radio connection built
1 blue blink per 2.5 sec.
4 beeps in ascending tone
Radio connection lost
3 blue blinks per 2 sec.
4 beeps in descending tone
Data Transmission
Quick blue blink
Short clicks
Description
Status Indicator
Beeper
Under charging (on cradle)
Steady red
Off
Fully charged (on cradle)
1 green blink at regular interval
Off
Under batch scanning
1 green blink per 2.5 sec.
Off
Pair failure
Steady red
2 Di-do-Di-do beeps
Out of memory
2 red blinks
2 long beeps
Battery power low
1 red blink at regular interval
1 beep at regular interval
Battery power extremely low
8 red blinks
8 beeps
Good read
1 green blink
1 good read beep
Under Configuration
Steady red
Off
Uninstall state
Alternative red and green blinks
Off
Upgrade state
Steady red
Short click
Time out warning
Off
3 long beeps
Paged by smart cradle
Off
6 page beeps
Sleep state / Battery no power
Off
Off
Charging Cradle Indicator
Description
Power
Beeper
Power on
Steady blue
Off
Smart Cradle Indicators
Description
Indicators
Beeper
Centre
Side
Power on
1 blue blink
Off
Power on beeps
Smart Cradle Upgrade State
Off
Steady red
Short clicks
Uninstall state
Off
Alternative red-green blinks
Off
PICO Mode
Radio Connected
Steady blue
Steady green
Off
Radio
Disconnected
Off
Steady red
Off
PAIR Mode
Radio Connected
Steady blue
Off
Off
Radio
Disconnected
Off
Steady red
Off
Smart cradle
paged by
scanner
PICO Mode
Steady blue
Steady green
6 page beeps
PAIR Mode
Steady blue
Off
6 page beeps

Zapper Tornado BT™ Users Manual
© 2010-2017 ASP Microcomputers Page 15
Miscellaneous Options
This final section of the manual contains the setup barcodes for a number of the more
common options, such as setting the beeper and trigger modes, the termination
character, and ISBN (SCIS) mode.
Remember that you shouldn’t need to scan any of these setup barcodes – your Zapper
Tornado BT™ will normally have been supplied already set up correctly for you.
ISBN-10 and ISBN-13
Prior to the start of 2007, everyone knew what to do with ISBN (or SCIS) codes. Now, it
depends on what you’re trying to achieve.
What we used to call just ISBN is now called ISBN-10, and this is the 10 digit code that
is printed at the top of an ISBN barcode. An example is shown on the left below.
The ISBN barcode on the right above is what people are now calling an ISBN-13
barcode. You'll notice that the ISBN-13 code is exactly the same as the number
underneath the barcode. And if you look even more closely, you'll see that the only
difference between the two example barcodes is what's printed at the top.
So, as you can see, ISBN-10 and ISBN-13 are really just different ways of looking at the
same thing.
Every ISBN barcode with a number underneath that starts with "978" has both a 13
digit ISBN-13 code, and a 10 digit ISBN-10 code that is derived from the full 13 digit
barcode number.
The Zapper Tornado BT™, by default, outputs the 13 digit number at the bottom of an
ISBN barcode. If ISBN (or SCIS) mode is turned on using the barcodes on the next page,
the barcode scanner will translate the 13 digit number at the bottom of the barcode
into the 10 digit ISBN-10 code at the top.

Zapper Tornado BT™ Users Manual
© 2010-2017 ASP Microcomputers Page 16
Most likely, you will only need to scan ISBN codes for use with SCIS. SCIS say that they
now allow either ISBN-10 and ISBN-13 codes to be used, so it really doesn't matter if
your scanner outputs the 10 digit code or the 13 digit code when the ISBN barcode is
scanned.
If you're still reading, you're probably thinking "why did
they bother changing if ISBN-10 and ISBN-13 are really the
same thing?". The answer is that sometime in the future,
ISBN-13 barcodes that start with "979" (as shown on the
right) will be released, and these codes do not have a 10
digit equivalent - they are 13 digit only.
SCIS
As long as SCIS accepts both ISBN-10 and ISBN-13 codes, it really doesn’t matter
whether your barcode scanner outputs 10 digits or 13 digits.
However, at some time in the future, SCIS may change this policy. If they do, or if you
use your scanner with ISBN codes and an application other than SCIS that only accepts
13 digit ISBN codes, you can easily turn off ISBN/SCIS mode using the barcodes below.
First, scan the PROGRAM barcode on the left below, then the EAN/CAN/JAN SETTING
barcode, then one of the ISBN barcodes on the right, and finally the END barcode on
the left.
1
PROGRAM
3
Convert to ISBN-10/SCIS
2
EAN/CAN/JAN SETTING
3
Leave as ISBN-13
4
END

Zapper Tornado BT™ Users Manual
© 2010-2017 ASP Microcomputers Page 17
Beeper Mode
To set the beeper mode, scan the PROGRAM barcode on the left below, then the
BEEPER TONE barcode, then one of the option barcodes on the right, then the END
barcode on the left.
1
PROGRAM
3
No Beep
2
BEEPER TONE
3
Low Pitch
3
Medium Pitch
3
High Pitch
4
END
3
Very High Pitch

Zapper Tornado BT™ Users Manual
© 2010-2017 ASP Microcomputers Page 18
Output Terminators
To set the output terminator character, scan the PROGRAM barcode on the left below,
then TERMINATOR barcode, then one of the terminator barcodes on the right, then
the END barcode on the left.
1
PROGRAM
3
NONE
2
TERMINATOR
3
ENTER
3
TAB
4
END
3
SPACE
Tilde Prefix
Some applications require each barcode to be output with an extra character before
the barcode. A common prefix character is the tilde ~, and the barcodes below allow
this to be set.
You must scan all of the barcodes below in the numerical order shown, and the
scanner must beep after every barcode.
1
PROGRAM
4
E
2
PREAMBLE
5
FINISH PREAMBLE
3
7
6
END
To turn off the tilde prefix, just scan all of the barcodes above except for barcodes 3
and 4.
Other manuals for Zapper Tornado BT
1
Table of contents
Other ASP Barcode Reader manuals

ASP
ASP Zapper Tornado 2D User manual

ASP
ASP zapper User manual

ASP
ASP Zapper Z22000 User manual

ASP
ASP Barcode Zapper User manual

ASP
ASP Zapper Tornado 2D User manual

ASP
ASP SlimScan Installation instructions

ASP
ASP Z4 DataTraq User manual

ASP
ASP Zapper Tornado BT User manual

ASP
ASP LongReach User manual

ASP
ASP LaserTraq User manual
Popular Barcode Reader manuals by other brands

Datalogic
Datalogic PowerScan PM9600 Series Quick reference guide

Unitech
Unitech MS650BT quick guide

Datalogic
Datalogic Gryphon I GD441 Series Quick reference guide

Delfi
Delfi DelfiScan C85 Quick reference guide

Budgie
Budgie On The Go! User programming manual

Intermec
Intermec ScanPlus 1800 quick start guide