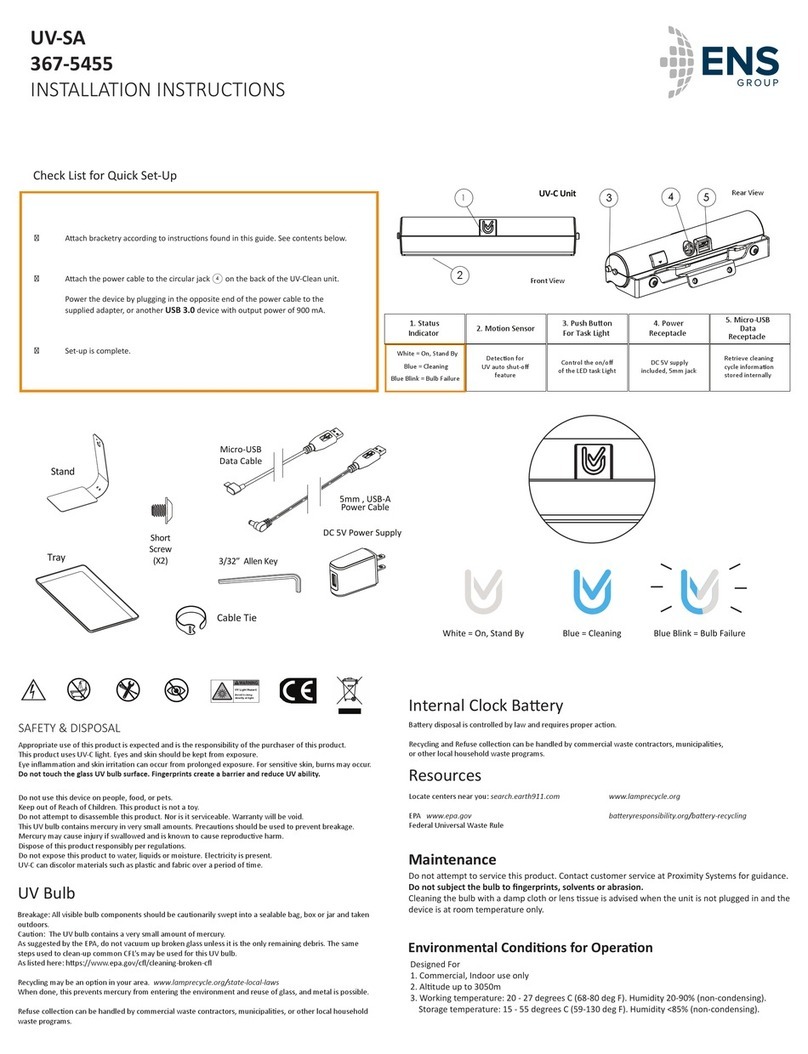
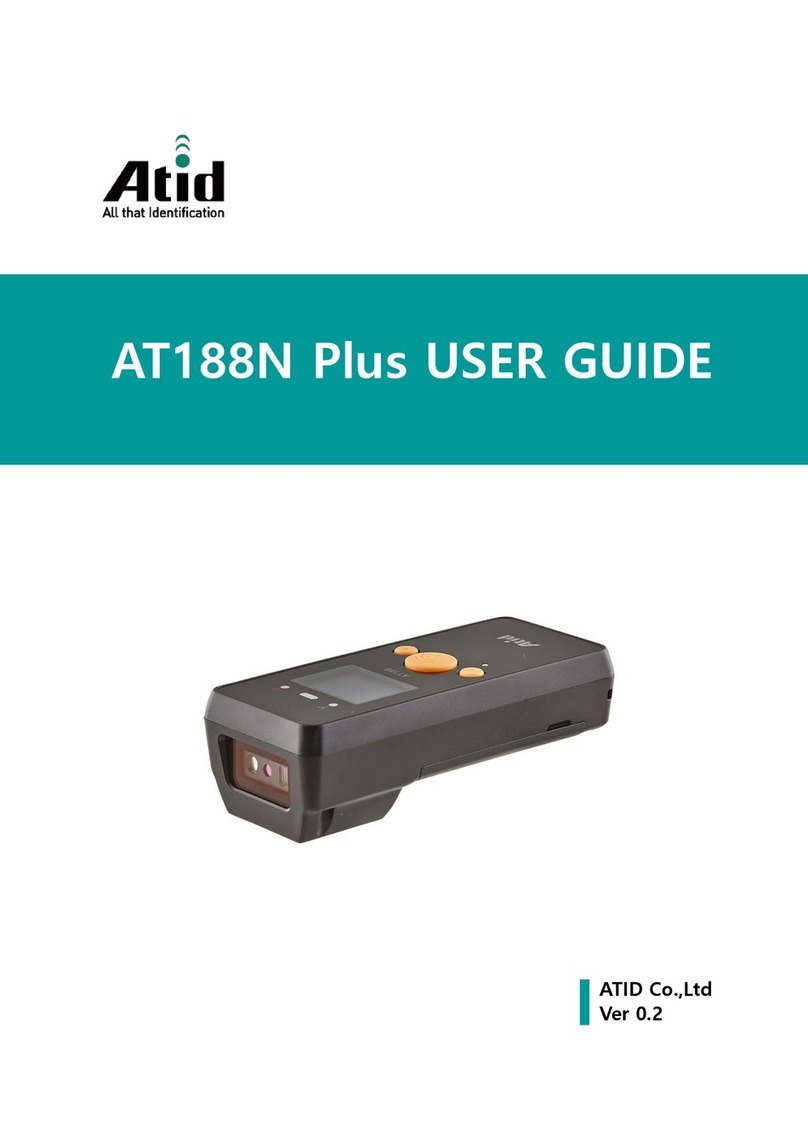
ASP Barcode Zapper User manual

ASP
Barcode Zapper
Only for Beige/Grey Zappers
ASP Microcomputers
14 Business Park Drive,
Notting Hill,Victoria, 3168
Australia
Telephone: (03) 9578-7600
FAX: (03) 9578-7727
WWW: http://www.asp.com.au
(ASP Microcomputers is a division of Grayline Holdings Pty. Ltd,. A.C.N. 004 940 729)
Manual revised: November 19th, 2020 Copyright © 1998-2020 byASP Microcomputers
Only for Beige/Grey Zappers


Contents
The ASP Barcode Zapper........................................................................1
Barcode Symbologies..............................................................................2
Host Interfaces.........................................................................................2
PC Keyboard Wedge......................................................................3
Wand Emulation ............................................................................3
Apple Macintosh............................................................................4
RS-232 Output...............................................................................4
RS-232 Serial Wedge.....................................................................4
Standard Barcode Zapper Configurations...............................................5
Standard Wand Emulation Setup...................................................6
Standard PC Keyboard Wedge Setup............................................7
USB Keyboard Wedge...................................................................8
Standard Apple Macintosh Setup..................................................9
Standard RS-232 Setup................................................................10
Standard RS-232 Serial Wedge Setup.........................................11
Standard ZapStore Setup .............................................................12
ZapStore Symbology Setup.........................................................13
Notebook Type 10 Setup.............................................................14
Notebook Type 13 Setup.............................................................15
Notebook Type 14 Setup.............................................................16
Miscellaneous Options ..........................................................................17
RS-232 Baud Rate Setup .............................................................17
Beeper Mode Setup......................................................................18
Trigger Mode Setup.....................................................................18
ISBN (SCIS) Conversion.............................................................19
Output Terminators for PC, Notebook, USB and Apple.............19
Terminators for RS-232 and Serial Wedge Only........................20
Output Delays for PC Keyboard Wedge & Notebooks...............21
Electromagnetic Interference.................................................................22
Warranty ................................................................................................22


Barcode Zapper 1
The ASP Barcode Zapper
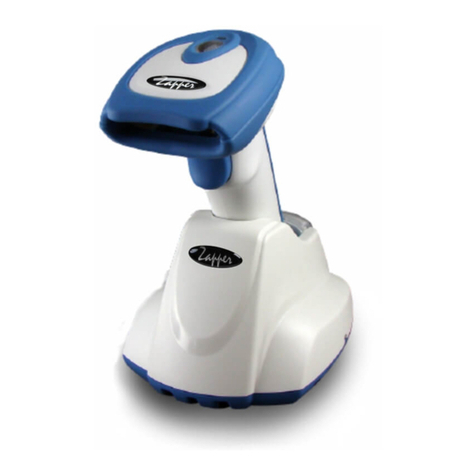
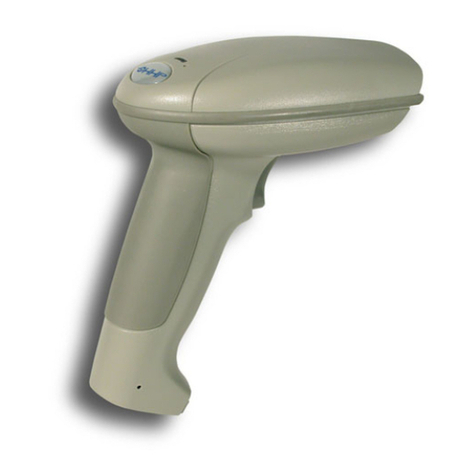
ASP's Barcode Zapper is a compact high-performance hand-held
barcode scanner suitable for reading barcodes up to 80mm wide.
The Barcode Zapperhas an
oval shaped push button
switch on the left side,
positioned right where your
thumb comfortably sits when
held in your right hand, or
where your index finger sits
when held in your left hand.
To read a barcode, simply
place the scanner's reading
window over a barcode, and
press the button. The scanner
will automatically read the
barcode, output the data, and
beep to signal a successful
read.
You can place the scanner's reading window down onto the barcode
label, or “slide” it onto the barcode in the direction of the bars, but you
can’t slide it across the barcode as you would with a wand.
The Barcode Zapper has been pre-programmed to read most barcode
types you are likely to encounter. For special requirements, please
contact ASP or your dealer.
If you are having trouble reading barcode labels, the most common
causes are likely to be:
•Trying to read a barcode too wide for the scanner (ie, wider than
80mm)
•Not having the reading window properly positioned over the
barcode, or
•Having the reading window covering more than one barcode.
Very poor quality or damaged barcode labels may also present scanning
problems, but it may be possible to read them by moving the scanner up
and down the label in the direction of the bars, to find an undamaged
path across the barcode symbol.

2 Barcode Zapper
Barcode Symbologies
Scanning nicely printed barcode labels is simple, and most decoders
can easily read well-printed labels. But because there are so many
poorly printed barcode labels in the real world, the Barcode Zapper
has been designed to handle printing tolerances of up to ± 200% to help
it to read virtually any barcode label, even if it’s badly printed.
The ASP Barcode Zapper auto-discriminates all popular and special
barcode symbologies, including:
•Standard Code 39, Full ASCII Code 39, Code 32, HIBC
•Code 93, Code 11, Codabar, NW-7
•Code 128 A/B/C sets, UCC/EAN 128
•Product Codes (UPC/EAN/JAN/CAN/APN) with addendum
•Standard/Industrial/Matrix/Inverted/Compressed 2 of 5
•MSI/Plessey, UK/Plessey, IBM Delta, BCD, ITF
•Interleaved 2 of 5, Interleaved 2 of 5 S Code, IATA
Host Interfaces
The ASP Barcode Zapper has five standard interface types built-in - PC
Keyboard Wedge, Wand Emulation, Apple Macintosh, RS-232 Output
and RS-232 Serial Wedge. These interfaces are selected via special
setup barcodes, and connect via plug-in adaptor cables.
One adaptor cable is supplied with each ASP Barcode Zapper;
additional adaptor cables are available as optional extras. Adaptor
cables can be removed by pushing the end of a paper clip into the hole
near the Barcode Zapper end of the adaptor, and then carefully pulling
the connector out.
The standard termination character for the Barcode Zapper is a single
carriage return. To remove this terminator, or to change it back to a
single carriage return, please use the setup barcodes on page 19. Other
termination characters are also available - please contact ASP or your
dealer with your requirements.

Barcode Zapper 3
PC Keyboard Wedge
The Keyboard Wedge interface connects between an IBM AT or PS/2
or compatible computer and its keyboard, and power for the scanner
and interface is taken from the computer.
The PC’s keyboard still operates normally, but when a barcode is
scanned, the keyboard is momentarily disabled, and the barcode data is
sent to the computer as if it had been entered from the keyboard. In this
way, all your existing programs are able to accept barcode input
without requiring any modifications.
The Keyboard Wedge adaptor cable is available in two forms - for AT
type computers (not old PC or XT types) using large 5-pin DIN
connectors, and for PS/2 type computers using 6-pin mini-DIN
connectors.
To install the Keyboard Wedge, first turn off your computer, and
unplug the keyboard from the computer. The cable from the keyboard
should now be plugged into the socket on the adaptor cable, and the
plug on the adaptor cable plugs in to where the keyboard used to be
connected on the computer.
Turn the computer on, and the Barcode Zapper will emit a high/low
beep to indicate that it has passed its power-on diagnostic tests.
Wand Emulation
The Wand Emulation interface decodes barcodes and converts them to
wand-compatible signals, so that you can easily upgrade your existing
barcode decoder.
The Wand Emulation interface uses the Hewlett Packard wand signal
standard, with a high level idle state, high output on black, 30ms
margin time and 50us module time. Other signal levels and timings are
also available - please contact ASP or your dealer with your
requirements. The Wand Emulation interface uses a female D9
connector, with wand data on pin 2, ground on pin 7 and +5v on pin 9.
The Barcode Zapper is a low power scanner, ideally suited to portable
applications.

4 Barcode Zapper
Apple Macintosh
The Apple Macintosh interface connects between an Apple Mac
keyboard and mouse, or to the second ADB port, and barcode data is
transmitted to the computer as if it had been entered from the keyboard.
In this way, all of your existing programs automatically accept barcode
input.
To connect the Barcode Zapper, unplug the Mac from mains power,
then unplug the mouse from the keyboard. Plug the adaptor’s male
connector (the one with the pins) into the socket that the mouse used to
plug into, then plug the mouse into the other socket on the adaptor
cable, effectively interposing the adaptor between the two.
Alternatively, the male connector of the Apple Macintosh interface can
be connected directly to the second ADB port on the back of the
computer. The other socket on the adaptor cable can simply be left
hanging free.
RS-232 Output
The RS-232 interface outputs decoded barcode scans using ASCII
codes and the RS-232 standard. The RS-232 interface is compatible
with ASP's ASPKey software, allowing RS-232 output to be accepted
from the serial port and placed directly in the keyboard buffer of IBM
PC compatible computers.
The RS-232 interface is supplied with a special power supply and
regulator (5 volt DC 500mA), which provides power for the Barcode
Zapper.
The RS-232 interface is supplied set to 9600 baud, 8 data bits, no parity
and 1 stop bit. To change the baud rate, please use the setup barcodes
on page 17.
RS-232 Serial Wedge
The RS-232 Serial Wedge interface also outputs decoded barcode
scans using ASCII codes and the RS-232 interface standard, but it
includes RS-232 joining circuitry, allowing it to be used in between an
RS-232 video terminal and host computer.
The Serial Wedge is supplied with a special power supply and
regulator (5 volt DC 500mA), which provides power for the Barcode
Zapper.

Barcode Zapper 5
The Serial Wedge assembly connects between a full-duplex
asynchronous ASCII RS-232 video terminal and its host computer.
Data from the terminal is fed into the Serial Wedge and logically
joined with the wedge's outgoing RS-232 signal. In this manner, the
host computer is “tricked” into thinking that barcode scans have been
typed on the terminal’s keyboard. ASCII code only is available.
The Serial Wedge is designed to suit video terminals fitted with a
female D25 connector (this is the usual case). If your video terminal
instead uses a D25 male connector, you should contact ASP for advice.
Switch off the terminal, then unplug the RS-232 cable from the host
computer from the back of the video terminal, and plug it into the serial
wedge cable. Next, plug the other connector on the serial wedge cable
into the connector on the video terminal that the cable from the host
computer was plugged into, effectively interposing the Serial Wedge
between the two.
The RS-232 Serial Wedge interface is supplied set to 9600 baud, 8 data
bits, no parity and 1 stop bit. To change the baud rate, please use the
setup barcodes on page 17.
Standard Barcode Zapper Configurations
The next section of this manual contains the standard configuration sheets
for each of the available interfaces. Your Barcode Zapper will already
have been properly configured and tested for the interface you ordered it
with, so these setup sheets are included just for completeness and in case
you purchase additional interface adaptors.
To set up your Barcode Zapper unit, simply turn to the relevant page for
the interface type you require, and scan the setup barcodes on that page,
taking care to scan them in the numerical order shown. You must not skip
any barcodes, or scan any of the barcodes more than once. If you make a
mistake, simply scan the END barcode and start again.
The Barcode Zapper has a vast number of data formatting, verification
and operational control options, far more than could be covered in this
manual. If you have any special scanning requirements, it’s likely that the
Barcode Zapper can be configured to suit, so please contact ASP or your
dealer to discuss your needs.


6 Barcode Zapper
Standard Wand Emulation Setup
You must scan the barcodes below in the numerical order shown. Note,
however, that you won’t normally need to scan these setup barcodes – your
Barcode Zapper will normally have been supplied already set up for you.
1
MASTER DEFAULT
2
WAND EMULATION DEFAULTS
3
PROGRAM
4
HOST INTERFACE SELECTION
5
0
6
8
7
MARGIN TIME
8
4 (30 millisecs)
9
NARROW/WIDE RATIO
10
1 (1:2.5)
11
ADJUSTABLE BUZZER TONE
12
0 (DISABLE)
13
CCD/LASER OP. MODE
14
0 (LOW POWER MODE)
15
CODE 39 MIN LENGTH
16
0
17
1
18
CODE 25 MIN LENGTH
19
0
20
2
21
END

Barcode Zapper 7
Standard PC Keyboard Wedge Setup
You must scan the barcodes below in the numerical order shown. Note,
however, that you won’t normally need to scan these setup barcodes – your
Barcode Zapper will normally have been supplied already set up for you.
1
MASTER DEFAULT
2
KEYBOARD WEDGE DEFAULTS
3
PROGRAM
4
HOST INTERFACE SELECTION
5
0
6
1
7
CODE 39 MIN LENGTH
8
0
9
1
10
CODE 25 MIN LENGTH
11
0
12
2
13
END

8 Barcode Zapper
USB Keyboard Wedge
You must scan the barcodes below in the numerical order shown. Note,
however, that you won’t normally need to scan these setup barcodes – your
Barcode Zapper will normally have been supplied already set up for you.
1
MASTER DEFAULT
2
USB KEYBOARD DEFAULTS
3
PROGRAM
4
HOST INTERFACE SELECTION
5
1
6
8
7
CODE 39 MIN LENGTH
8
0
9
1
10
CODE 25 MIN LENGTH
11
0
12
2
13
END

Barcode Zapper 9
Standard Apple Macintosh Setup
You must scan the barcodes below in the numerical order shown. Note,
however, that you won’t normally need to scan these setup barcodes – your
Barcode Zapper will normally have been supplied already set up for you.
1
MASTER DEFAULT
2
PROGRAM
3
HOST INTERFACE SELECTION
4
0
5
5
6
CODE 39 MIN LENGTH
7
0
8
1
9
CODE 25 MIN LENGTH
10
0
11
2
12
END

10 Barcode Zapper
Standard RS-232 Setup
You must scan the barcodes below in the numerical order shown. Note,
however, that you won’t normally need to scan these setup barcodes – your
Barcode Zapper will normally have been supplied already set up for you.
1
MASTER DEFAULT
2
SERIAL COMMS DEFAULTS
3
PROGRAM
4
HOST INTERFACE SELECTION
5
0
6
6
7
CODE 39 MIN LENGTH
8
0
9
1
10
CODE 25 MIN LENGTH
11
0
12
2
13
END

Barcode Zapper 11
Standard RS-232 Serial Wedge Setup
You must scan the barcodes below in the numerical order shown. Note,
however, that you won’t normally need to scan these setup barcodes – your
Barcode Zapper will normally have been supplied already set up for you.
1
MASTER DEFAULT
2
SERIAL COMMS DEFAULTS
3
PROGRAM
4
HOST INTERFACE SELECTION
5
0
6
7
7
CODE 39 MIN LENGTH
8
0
9
1
10
CODE 25 MIN LENGTH
11
0
12
2
13
END

12 Barcode Zapper
Standard ZapStore Setup
You must scan the all of the barcodes below in the numerical order shown,
then select one or more symbologies from the next page.
1
MASTER DEFAULT
2
SERIAL COMMS DEFAULTS
3
PROGRAM
4
HOST INTERFACE SELECTION
5
0
6
6
7
HANDSHAKING PROTOCOL
8
1 (RTS/CTS)
9
TIMEOUT CONTROL
10
3 (1 SECOND)
11
CCD/LASER OP. MODE
12
0 (LOW POWER MODE)
13
ADJUSTABLE BUZZER TONE
14
0 (DISABLE)
15
CODE 39 MIN LENGTH
16
0
17
1
18
CODE 25 MIN LENGTH
19
0
20
2
21
DEBOUNCE TIME CONTROL
22
4
23
END

Barcode Zapper 13
ZapStore Symbology Setup
After scanning the ZapStore setup barcodes on the previous page, you must
then select one or more symbologies (or barcode types) from the list below.
Scan the PROGRAM barcode on the left, then the SYMBOLOGY barcode, then
scan a two-digit sequence from the right column for each symbology to be
enabled (see the table on the left below), then finally scan the END barcode
on the left.
1
PROGRAM
2
SYMBOLOGY
4
END
The table below lists the
two-digit codes that must be
scanned to enable barcode
symbologies. For best results,
you should enable only the
symbologies that you will
actually be using.
Symbology Code
Code 128 01
UPC-A 02
UPC-E 03
EAN/CAN/JAN-13 04
EAN/CAN/JAN-8 05
Codabar 06
Code 39 07
Interleaved 2 of 5 08
Code 93 09
0
1
2
3
4
5
6
7
8
9

14 Barcode Zapper
Notebook Type 10 Setup
You must scan the barcodes below in the numerical order shown. Note,
however, that you won’t normally need to scan these setup barcodes – your
Barcode Zapper will normally have been supplied already set up for you.
1
MASTER DEFAULT
2
KEYBOARD WEDGE DEFAULTS
3
PROGRAM
4
HOST INTERFACE SELECTION
5
1
6
0
7
INTERCHARACTER DELAY
8
1
9
2
10
CODE 39 MIN LENGTH
11
0
12
1
13
CODE 25 MIN LENGTH
14
0
15
2
16
END

Barcode Zapper 15
Notebook Type 13 Setup
You must scan the barcodes below in the numerical order shown. Note,
however, that you won’t normally need to scan these setup barcodes – your
Barcode Zapper will normally have been supplied already set up for you.
1
MASTER DEFAULT
2
KEYBOARD WEDGE DEFAULTS
3
PROGRAM
4
HOST INTERFACE SELECTION
5
1
6
3
7
INTERCHARACTER DELAY
8
1
9
2
10
CODE 39 MIN LENGTH
11
0
12
1
13
CODE 25 MIN LENGTH
14
0
15
2
16
END

16 Barcode Zapper
Notebook Type 14 Setup
You must scan the barcodes below in the numerical order shown. Note,
however, that you won’t normally need to scan these setup barcodes – your
Barcode Zapper will normally have been supplied already set up for you.
1
MASTER DEFAULT
2
KEYBOARD WEDGE DEFAULTS
3
PROGRAM
4
HOST INTERFACE SELECTION
5
1
6
4
7
INTERCHARACTER DELAY
8
1
9
2
10
CODE 39 MIN LENGTH
11
0
12
1
13
CODE 25 MIN LENGTH
14
0
15
2
16
END
Table of contents
Other ASP Barcode Reader manuals

ASP
ASP Zapper Tornado BT User manual

ASP
ASP Zapper Z22000 User manual

ASP
ASP SlimScan Installation instructions

ASP
ASP zapper User manual

ASP
ASP LaserTraq User manual

ASP
ASP Zapper Tornado 2D User manual

ASP
ASP LongReach User manual

ASP
ASP Portable BCR User manual

ASP
ASP Zapper Tornado BT User manual

ASP
ASP Z4 DataTraq User manual