manuals.online logo
Brands
  1. Home
  2. •
  3. Brands
  4. •
  5. Assured Wireless
  6. •
  7. Modem
  8. •
  9. Assured Wireless AW12 HPUE User manual

Assured Wireless AW12 HPUE User manual

Copyright ©2021 Assured Wireless Corporation. All rights reserved. All information provided here is subject to change
without notice. Assured Wireless and the Assured Wireless logo are property of Assured Wireless Corporation.
assured-wireless.com
aw12xqsg211v2
FIXED INSTALLATION
This quick start guide gives the basic steps for installing the AW12 MegaRange unit in xed locations.
Note. The antennas can be purchased as separate units or as a single package. See our recommended
antennas at assured-wireless.com/products/antennas.
1 Locate the SIM card slot on the side of the AW12 modem.
2 Remove the screw on the SIM slot door.
3 Use the depression on the upper left corner of the SIM
slot door to open the door off. You should now see the
edge of the silver SIM tray.
4 Insert the inclued SIM extractor tool into the hole on the
SIM tray; the tray should pop partway out.
5 Remove the SIM tray completely.
6 Insert your activated FirstNet SIM into the tray. Note that
the tray is notched, so the card can only be inserted the
correct way.
7 Re-insert the SIM tray into its slot.
8 Replace the SIM slot door and replace the screw, being
careful not to overtighten.
1Ensure you have all the necessary equipment
2Insert SIM card
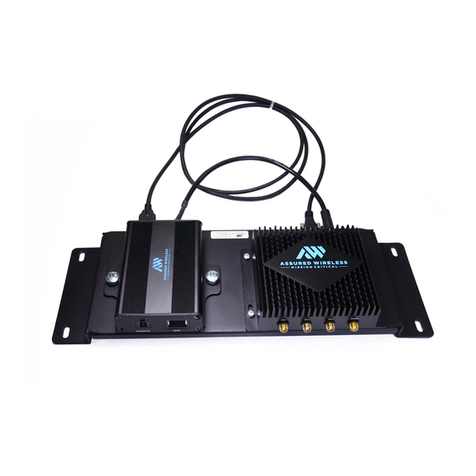
AW12 Modem Fixed Installation Kit
QUICK START GUIDE
The following is included in the xed installation kit:
■AW12-DE modem
■AW12-PC-EI USB to Ethernet converter
■Mounting bracket
■(2) M6 screws and (2) M6 lock washers
■(4) M3 screws and (4) M3 lock washers
■SIM extractor tool
■Ethernet cable
■USB screwtight cable
■DC power cable (4-pin Molex)
■DC power cable (modem to Ethernet converter)
■AC adapter
You will also need the following (not included in your kit):
■GPS active/passive antenna
■LTE antennas (3 required)
■Activated FirstNet micro SIM card
■Small Phillips head screwdriver
Align notch and
insert in tray
Note. Your distributor may have already inserted the SIM. If
so, please skip to section 3.
Copyright ©2021 Assured Wireless Corporation. All rights reserved. All information provided here is subject to change
without notice. Assured Wireless and the Assured Wireless logo are property of Assured Wireless Corporation.
assured-wireless.com
aw12xqsg211v2
AW12 FIXED INSTALLATION KIT
QUICK START GUIDE
Connect the USB-C to USB-A cable between the modem and the USB to Ethernet converter:
1 Insert the USB-C connector into the port labeled USB on the modem and tighten the thumb
screws. Be careful not to overtighten.
2 Insert the USB-A end of the
cable into the port on the
USB to Ethernet converter
labeled Modem and tighten
the thumb screw. Do not
overtighten.
Connect the short power cable:
1 Find the end of cable with the
light green color connector.
Insert it into the port labeled
PWR IN on the modem. Twist
to tighten.
2 Insert the other end of the
cable into the port on the USB
to Ethernet converter labeled
PWR OUT.
1 Use the included M6 screws and washers
and a Phillips #2 screwdriver to mount the
modem to the mounting bracket. (Put the
antenna ports to the edge as shown.)
2 Use the included M3 screws and washers
to mount the USB to Ethernet converter to
the mounting bracket. (Put the side with
the ethernet port to the same edge as the
modem antenna ports.)
3Mount modem and Ethernet converter on bracket
4Connect power and communication between modules
Install the bracket in your desired location with the proper hardware. Mount securely near the power source.
Where and how you install the bracket will vary based on your location.
5Mount bracket in desired location
AW12 Modem USB to Ethernet Converter
Copyright ©2021 Assured Wireless Corporation. All rights reserved. All information provided here is subject to change
without notice. Assured Wireless and the Assured Wireless logo are property of Assured Wireless Corporation.
assured-wireless.com
aw12xqsg211v2
AW12 FIXED INSTALLATION KIT
QUICK START GUIDE
1 Install the antennas in a location where they are free from obstructions that could block their signal. For best
performance, we recommend you keep at least one meter of separation between these antennas and any
other antennas nearby.
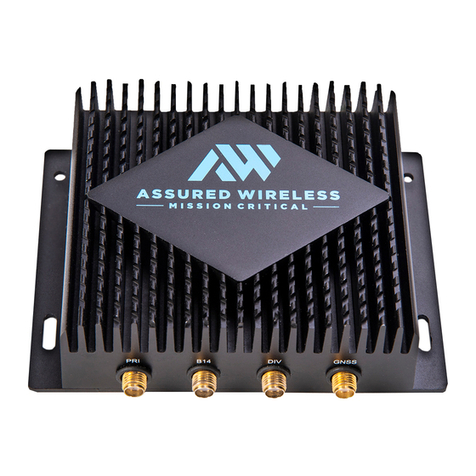
2 Connect the ends of the antennas into the four RF ports on the modem as follows:
1 Insert the ethernet cable into the RJ-45 port labeled PoE+ on the USB to Ethernet converter and then
connect the ethernet cable to the WAN port on your router.
2 Locate the AC adapter power cable. Insert the Molex connector into the port labeled PWR IN on the bottom
of the USB to Ethernet converter, and then plug into an AC power outlet.
3 Refer to your router user manual for router conguration. Please make sure the MTU size setting in your
router is 1342 or as otherwise advised at https://iotdevices.att.com/att-iot/FirstNetMTU.aspx.
6Install antennas
7Connect power and Ethernet cables
■PRI port: LTE-1
■B14 port: B14
■DIV port: LTE-2
■GNSS port: GPS/GNSS
Note. See our antenna recommendations at assured-wireless.com/products/antennas.
Antennas To Ethernet port of a
router or a computer
To AC/DC wall adapter

Other manuals for AW12 HPUE

7

Other Assured Wireless Modem manuals

Assured Wireless AW12 HPUE User manual

Assured Wireless

Assured Wireless AW12 HPUE User manual

Assured Wireless AW12 HPUE User manual

Assured Wireless

Assured Wireless AW12 HPUE User manual

Assured Wireless AW12-EI User manual

Assured Wireless

Assured Wireless AW12-EI User manual

Assured Wireless AW12 HPUE User manual

Assured Wireless

Assured Wireless AW12 HPUE User manual

Assured Wireless AW12 HPUE User manual

Assured Wireless

Assured Wireless AW12 HPUE User manual

Assured Wireless AW12 HPUE User manual

Assured Wireless

Assured Wireless AW12 HPUE User manual

Assured Wireless AW12 HPUE User manual

Assured Wireless

Assured Wireless AW12 HPUE User manual

Assured Wireless AW12 HPUE User manual

Assured Wireless

Assured Wireless AW12 HPUE User manual

Popular Modem manuals by other brands

Patton electronics RocketLink-G 3088 Series user manual

Patton electronics

Patton electronics RocketLink-G 3088 Series user manual

Sony Ericsson GM29 user guide

Sony Ericsson

Sony Ericsson GM29 user guide

TP-Link TM-EC5658V user guide

TP-Link

TP-Link TM-EC5658V user guide

Novatel OVATION U720 user guide

Novatel

Novatel OVATION U720 user guide

Kyocera KPC680 user guide

Kyocera

Kyocera KPC680 user guide

Huawei EchoLife BM325 user guide

Huawei

Huawei EchoLife BM325 user guide

D-Link DWA-X3000 Quick installation guide

D-Link

D-Link DWA-X3000 Quick installation guide

Digi XLR PRO user manual

Digi

Digi XLR PRO user manual

D-Link DP-601M user guide

D-Link

D-Link DP-601M user guide

Scientific Atlanta WebSTAR DPX2203 user guide

Scientific Atlanta

Scientific Atlanta WebSTAR DPX2203 user guide

Paradyne Hotwire 7985 user guide

Paradyne

Paradyne Hotwire 7985 user guide

Huawei U.S. Cellular FT2260 owner's manual

Huawei

Huawei U.S. Cellular FT2260 owner's manual

Campbell RF401 quick start guide

Campbell

Campbell RF401 quick start guide

shemeck VOLTAN user manual

shemeck

shemeck VOLTAN user manual

Huawei E353S-6 quick start guide

Huawei

Huawei E353S-6 quick start guide

US Robotics USR9001 Quick installation guide

US Robotics

US Robotics USR9001 Quick installation guide

Sierra Wireless AirCard 580 WAN install guide

Sierra Wireless

Sierra Wireless AirCard 580 WAN install guide

Zoom 1086 Series quick start

Zoom

Zoom 1086 Series quick start

manuals.online logo
manuals.online logoBrands
  • About & Mission
  • Contact us
  • Privacy Policy
  • Terms and Conditions

Copyright 2025 Manuals.Online. All Rights Reserved.