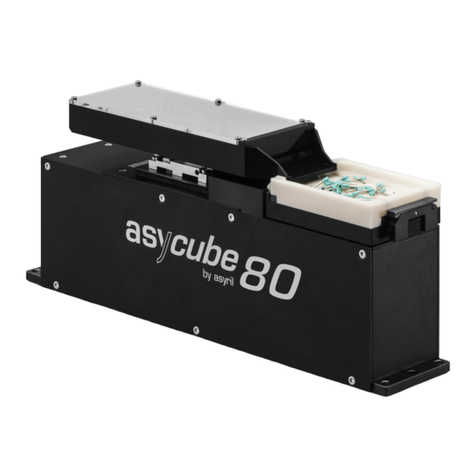
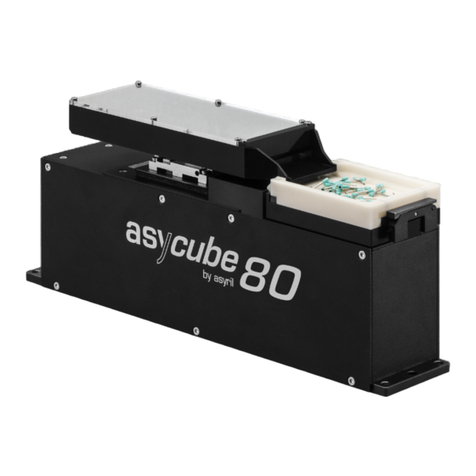
Asyril Asycube Control URCap User manual

Asycube Control
URCap
User guide
Document
Asyril_Plugin_UniversalRobots_Asycube_User_Guide_EN
000.102.083
Version
A2
Date
04.06.2019

Asycube Control URCap
User guide
© Copyright Asyril S.A.
Table of Contents
Version: A2
000.102.083 2/50
Table of Contents
TABLE OF CONTENTS..............................................................................................................................2
1. INTRODUCTION...............................................................................................................................4
1.1. GENERAL INFORMATION...........................................................................................................4
1.2. OTHER MANUALS......................................................................................................................5
1.3. OVERVIEW ................................................................................................................................5
1.4. COMPATIBILITY.........................................................................................................................6
1.5. GENERAL NOTICE .....................................................................................................................6
2. ASYCUBE CONTROL URCAP INSTALLATION AND CONFIGURATION ...........................7
2.1. INSTALLATION...........................................................................................................................7
2.2. ENABLING THE URCAP ............................................................................................................8
2.3. NETWORK CONFIGURATION......................................................................................................8
2.3.1. Asycube network settings....................................................................................................8
2.3.2. UR robot network settings.................................................................................................10
2.3.3. Connection between the UR robot & the Asycube platform.........................................11
3. STANDARD USE OF THE ASYCUBE CONTROL URCAP....................................................14
3.1. STANDARD CONTROL..............................................................................................................14
3.2. PROGRAMMING WITH THE URCAP.........................................................................................18
3.2.1. Asycube Vibrate..................................................................................................................18
3.2.2. Asycube Backlight..............................................................................................................21
3.2.3. Offline programming...........................................................................................................22
3.3. WARNINGS AND ALARMS........................................................................................................23
4. ADVANCED USE OF THE ASYCUBE CONTROL URCAP ...................................................25
4.1. ADVANCED PROGRAMMING....................................................................................................25
4.1.1. Smart feeding......................................................................................................................25
4.1.2. Smart centering...................................................................................................................29
4.1.3. Sequence node...................................................................................................................32
4.1.4. Asycube Terminal...............................................................................................................35
4.2. MANAGING VARIABLES &LOGS ..............................................................................................36
6. UR PROGRAM EXAMPLES.........................................................................................................38
6.1. EXAMPLES’DESCRIPTION.......................................................................................................38
6.1.1. Flexible_pick_and_place_without_vision_feedback......................................................40
6.2. FLEXIBLE_PICK_AND_PLACE_STRUCTURED_PLATE_WITHOUT_VISION_FEEDBACK............40
6.2.1. Flexible_pick_and_place_with_vision_feedback ...........................................................41
6.3. LOADING AN EXAMPLE............................................................................................................41
7. TROUBLESHOOTING...................................................................................................................43
8. TECHNICAL SUPPORT................................................................................................................45
Asycube Control URCap
User guide
© Copyright Asyril S.A.
Table of Contents
Version: A2
000.102.083 3/50
8.1. TO HELP US PROVIDE THE BEST SERVICE..............................................................................45
8.2. CONTACT................................................................................................................................45
9. REVISION TABLE..........................................................................................................................46
10. ANNEX I : ASYCUBE PLATFORM USE OVERVIEW .............................................................47
10.1. GLOSSARY..............................................................................................................................47
10.2. HMI SOFTWARE......................................................................................................................48

Asycube Control URCap
User guide
© Copyright Asyril S.A.
Introduction
Version: A2
000.102.083 4/50
1. Introduction
1.1. General information
This document is the exclusive property of Asyril SA; it may not be reproduced, modified or
communicated, in whole or in part, without our prior written authorisation. For the purposes of
product improvement, Asyril SA reserves the right to modify any information contained in this
document without prior notice. Before using the product, please read this entire document in
order to ensure that the product is used correctly. However, if you encounter difficulties when
using the product, do not hesitate to contact our customer service department.
In this manual, the safety information that must be respected is split into three types:
"Danger", "Important" and "Note". These messages are identified as follows:
DANGER!
Failure to observe this instruction may result in serious physical injury.
DANGER!
This instruction identifies an electrical hazard. Failure to respect this instruction may
result in electrocution or serious physical injury due to an electric shock.
IMPORTANT!
Failure to respect this instruction may result in serious damage to equipment.
NOTE:
The reader's attention is drawn to this point in order to ensure that the product is used
correctly. However, failure to respect this instruction does not pose a danger.
Reference …
For more information on a specific topic, the reader is invited to refer to another manual or
another page of the current manual.
IMPORTANT!
Asyril cannot be held liable for damage to property or injuries to people caused by failure to
follow the instructions specified in the "Safety instructions" paragraph. It is the customer's
responsibility to inform the personnel concerned.
NOTE:
All dimensions and measurements in this manual are expressed in millimetres (mm)

Asycube Control URCap
User guide
© Copyright Asyril S.A.
Introduction
Version: A2
000.102.083 5/50
1.2. Other manuals
The table below provides a list of the standard documents supplied with the product. Each of
these manuals forms an integral part of the set of documentation associated with the product.
Manual name
Reference
Description of the content
Asycube
Operating
manual
ASYCUBE-xxx-
_Operating_Manual_EN
This manual covers the
installation, a technical
description, the maintenance and
reparation of the Asycube
Asycube User
guide
ASYCUBE_User_Guide_EN
Describes how to configure the
Asycube through the HMI
HMI manual
HMI_User_Guide_EN
Describes how to use the Asyril
HMI
Asycube
Programming
guide
ASYCUBE_Programming_Guide_EN
Describes how to program and
integrate the Asycube in the final
machine.
Table 1: Other manuals
1.3. Overview
The Asycube Control URCap is the Universal Robots plugin dedicated to control Asycube
platforms through UR robots.
The Asycube Control URCap provides the following functionalities:
•Network configuration and control of an Asycube platform.
•Standard control of the connected Asycube platform: vibration set selection, standard
vibration activation, backlight toggling.
•Vibration, vibration set, sequence and backlight control in standard UR programs.
•Warning & alarm management.
•2 modes: 1 for basic uses and 1 for more advanced users.
•User interface in English.
Please note that the URCap is dedicated to control one Asycube at a time. The following
platforms are compatible with the URCap: Asycube 50, Asycube 80, Asycube 240 & Asycube
530.

Asycube Control URCap
User guide
© Copyright Asyril S.A.
Introduction
Version: A2
000.102.083 6/50
1.4. Compatibility
On Asyril side:
•Asycube 50, 80, 240, 380 and 530
•Asycube firmware version: 4.0.3 or greater
On Universal Robots side:
For CB-Series:
•Universal Robots Software version: 3.9 or greater
•UR3, UR5, UR10
•CB3.0, CB3.1
For e-Series:
•Universal Robots Software version: 5.3 or greater
•UR3e, UR5e, UR10e
1.5. General notice
The use of the URCap does not prevent the use of the HMI software to define and design the
different vibrations, vibration set & sequences. The user can install this software with the
dedicated installer, provided with the Asycube platforms. The installation procedure is
described in the Human-Machine Interface user guide, provided with the Asycube.
This user guide assumes that the user is familiar with Asycube platforms and knows how to
handle them, as it refers to some concepts implemented by it.
Nevertheless, this guide gives a brief overview of these concepts as well as the standard
functionalities implemented by the HMI software in a dedicated annex. However, it does not
thoroughly explain how to configure it to handle specific products in an industrial context. To
do so, the user can refer to the Asycube User guide & the Asycube Programming guide,
which explains more deeply respectively the different concepts implemented by an Asycube
platform and how to communicate with it, as well as defining the message protocols to do so.
This guide refers as well to the Human-Machine Interface user guide, provided with the
platforms.
This user guide assumes as well that the user is familiar with UR robots and knows how to
use and program them.

Asycube Control URCap
User guide
© Copyright Asyril S.A.
Asycube Control URCap installation and configuration
Version: A2
000.102.083 7/50
2. Asycube Control URCap installation and
configuration
This section describes how to install and enable the Asycube Control URCap on the UR robot
and how to configure the Asycube and robot network settings, to connect the 2 devices
together and to allow the communications in between.
2.1. Installation
To install the URCap on the UR robot, the user must copy the URCap file, called Asyril-
AsycubeCtrl-[version].urcap on a USB key and plug it to one of the USB ports of the robot:
•The robot must be switched on. It is not necessary to initialize it.
•In the main menu, click on Setup Robot. Then, in the Setup Robot menu, click on
URCaps.
•In the URCaps menu, click on the button to add the URCap.
•In the newly displayed window, navigate across the different folders of the robot and
look for your USB key content. Select the URCap file.
•Check that the URCap installation status is all right & restart the robot.
Figure 2-1 - URCap Installation

Asycube Control URCap
User guide
© Copyright Asyril S.A.
Asycube Control URCap installation and configuration
Version: A2
000.102.083 8/50
2.2. Enabling the URCap
The main menu of the URCap, at the Installation tab level, includes a checkbox, Enable
URCap, allowing to enable or disable the URCap. Whether the URCap is enabled or not, the
robot must be restarted. If not, the ehaviour of the URCap cannot be predicted.
Figure 2-2 Enabling & disabling the URCap
2.3. Network configuration
The Asycube platforms and the UR robot must have static IP addresses and must be in the
same network range. It means that, for instance, if the robot has an IP address such as
192.168.100.200, with a subnet mask such as 255.255.255.0, the Asycube platform
connected to the same network must have an IP address such as 192.168.100.[anything
between 0 and 255, excluding 200], with a subnet mask such as 255.255.255.0.
The default IP address of a new Asycube platform is 192.168.127.254 with the subnet mask
255.255.255.0 (port 4001).
2.3.1. Asycube network settings
To connect the HMI software to the Asycube platform for the first time:
•Start the HMI software & click on configuration (#1).
•Select ehavio as a new product (#2), set the name and the type of the platform
(#3), and set the ip address, the subnet mask and the tcp port of the platform (#4).
•Click on the apply configuration button to connect the platform (#5). The platform is
ready.

Asycube Control URCap
User guide
© Copyright Asyril S.A.
Asycube Control URCap installation and configuration
Version: A2
000.102.083 9/50
Figure 2-3 –HMI: set network setting of an Asycube platform for the first time
To modify the network settings of an Asycube platform, already configured in the HMI
software:
•Start the HMI software & click on the Asycube platform, you want to modify the
network configuration of (#1).
•Once the platform selected, click on the configuration tab (#2) and set the ip address,
the subnet mask and the tcp port of the platform (#3).
•Click on the apply configuration button to apply the new platform’s network settings
(#4).
Figure 2-4 - HMI: modify network settings of an already-configured Asycube platform

Asycube Control URCap
User guide
© Copyright Asyril S.A.
Asycube Control URCap installation and configuration
Version: A2
000.102.083 10/50
2.3.2. UR robot network settings
To modify the network configuration of the UR Robot:
•In the main menu, click on Setup Robot. In the Setup Robot menu, click on Network.
•In the Network menu, select the Static Address network method.
•In the Network detailed settings tab, setup the right network configuration of your
robot and click on the button Apply.
Figure 2-5 –Network configuration of the robot

Asycube Control URCap
User guide
© Copyright Asyril S.A.
Asycube Control URCap installation and configuration
Version: A2
000.102.083 11/50
2.3.3. Connection between the UR robot & the Asycube platform
Once the UR robot & Asycube platform network settings configured, the user needs to
connect the two devices together through the URCap:
•In the main menu, click on Program Robot.
•Click on the Installation tab.
•In the list on the left, click on the URCap name. The main menu of the URCap is
displayed.
Figure 2-6 –Access to Network sub-menu
•Click then on Network, to access the sub-menu dedicated to manage the connection between
the UR robot and the Asycube platform.

Asycube Control URCap
User guide
© Copyright Asyril S.A.
Asycube Control URCap installation and configuration
Version: A2
000.102.083 12/50
Figure 2-7 –Connection management with the Asycube platform
Through the Network sub-menu, the user can specify the network settings of the Asycube
platform: IP address, subnet mask and port. These settings must be same as the ones
specified with the HMI software (2.3.1 Asycube network settings).
Once the right network settings are specified, the user can connect to the platform by clicking
on the button Connect, and disconnect it by clicking on the button Disconnect. At the bottom
of the interface, a message is displayed to specify the current state of the
connection/disconnection process. If an error occurs during the connection or the
disconnection process, a popup will be displayed, specifying the reason of the error. The
platform unit, once connected, is displayed at the Unit dropdown level.
By clicking on the Auto connect checkbox, the user specifies that the platform must be
automatically connected when the robot is started.
At the bottom of the main menu of the URCap, at the Installation tab level, and in the Network
sub-menu, a visual indicator is displayed and gives the current connection status of the
Asycube platform at any time (green if connected; red if not).
If a disconnection occurred when handling the URCap, the user must go back to the Network
sub-menu to reinitialize the connection with the Asycube.

Asycube Control URCap
User guide
© Copyright Asyril S.A.
Standard use of the Asycube Control URCap
Version: A2
000.102.083 14/50
3. Standard use of the Asycube Control URCap
This section describes how to use in a standard way the Asycube Control URCap, to test the
different vibration sets loaded within the Asycube and to program an industrial process
involving it. A dedicated chapter explains finally how the URCap handles the warnings and
alarms retrieved from the Asycube.
3.1. Standard control
The Asycube Control URCap allows the user to test the basic functionalities provided by the
platform, though the Standard control sub-menu. Through this sub-menu, the user can select
a specific vibration set; set the Asycube platform orientation with respect to the UR robot
controller; execute the standard vibrations according to the selected vibration set; select the
duration of the vibration; toggle the backlight; get some visual information about the backlight
color. This sub-menu is only available when a platform is physically connected.
To access this sub-menu:
•In the main menu, click on Program Robot.
•Click on the Installation tab.
•In the list on the left, click on the URCap name. The main menu of the URCap is
displayed.

Asycube Control URCap
User guide
© Copyright Asyril S.A.
Standard use of the Asycube Control URCap
Version: A2
000.102.083 15/50
Figure 3-1 –Access to Standard control sub-menu
•Connect the platform if needed (2.3.3 Connection between the UR robot & the
Asycube platform), come back to the URCap main menu and click on Standard
control, to access the sub-menu.
Figure 3-2 –Standard control sub-menu
The user can first select a vibration set, preconfigured in the HMI software, using to the
related dropdown at the top of the menu.

Asycube Control URCap
User guide
© Copyright Asyril S.A.
Standard use of the Asycube Control URCap
Version: A2
000.102.083 16/50
Figure 3-3 –Standard control: vibration set selection
The user can then execute the different standard vibrations implemented by the platform and
related to the selected vibration set by clicking on to the Platform buttons at the bottom of the
interface.
Figure 3-4 –Standard control: vibration execution
The user can control the duration of the vibration by selecting the different options at the
Duration control level:
•default: the vibration is executed according to the duration specified through the HMI
software.
•continuous: the vibration does not stop until the user clicks on the button.
•value: the vibration duration in milliseconds can be specified in the related text field
of the interface. To modify the duration, the user must click on this text field,

Asycube Control URCap
User guide
© Copyright Asyril S.A.
Standard use of the Asycube Control URCap
Version: A2
000.102.083 17/50
displaying then a virtual keyboard. The user must then enter the new duration value
and click on the Submit button.
The button allows the user to stop the currently executed vibration at any time.
Figure 3-5 –Standard control: vibration duration definition
The user can as well control the backlight with the dedicated switch at the Backlight control
level. A visual indicator displays the color of backlight of the platform.
Figure 3-6 –Standard control: backlight control
Finally, the Standard control menu allows the user to specify the orientation of the platform
according to the controller, so that the user does not have to turn around the robot cell to be
sure that the vibration direction is the right one.

Asycube Control URCap
User guide
© Copyright Asyril S.A.
Standard use of the Asycube Control URCap
Version: A2
000.102.083 18/50
The buttons allows the user to change the orientation of the platform by a 90° factor in
one direction or the other. Doing so, the vibration execution buttons, at the Platform level, are
adapted according to the new orientation of the platform.
3.2. Programming with the URCap
For standard use, the URCap implements two programming commands:
•Asycube Vibrate: this command allows the user to select a specific vibration set and
to execute within this context the Asycube vibrations, implemented with the HMI
software, and to trigger the hopper vibrations.
•Asycube Backlight: this command allows the user to control the Asycube backlight.
It is as well possible to implement a UR program, involving the use of an Asycube platform, in
an offline mode, without being physically connected to a platform. A dedicated chapter
explains how to implement such a program (3.2.3 Offline programming).
3.2.1. Asycube Vibrate
The Asycube Vibrate node allows the user to select first the vibration set, preconfigured in the
HMI software and within which the next actions will be triggered and executed, through a
dedicated dropdown.
Figure 3-7 - Standard control: platform orientation

Asycube Control URCap
User guide
© Copyright Asyril S.A.
Standard use of the Asycube Control URCap
Version: A2
000.102.083 19/50
Figure 3-8 –Asycube Vibrate: selection of the vibration set
Once the vibration set selected, the user can choose to add to the sub-program 3 different
actions, implementing thus the desired recipe: Hopper, Platform and Wait. To do so, the user
must select the action through the dedicated dropdown and click on the Add Action button.
Figure 3-9 –Asycube Vibrate: selection of the action
Each time the user is clicking on the Add Action button, a sub-node is added under the main
Asycube Vibrate parent node:
•The Hopper action adds a Hopper node implemented by the URCap.
•The Platform action adds a Platform node implemented by the URCap.
•The Wait action adds a standard Wait node implemented by the UR framework.

Asycube Control URCap
User guide
© Copyright Asyril S.A.
Standard use of the Asycube Control URCap
Version: A2
000.102.083 20/50
The user is then free to organize differently the different sub-nodes and to add other nodes,
as it is usually done in a UR program. The user can as well use variables and assign them to
the different node parameters.
The execution of the Hopper and Platform nodes is synchronous. During the execution of the
UR program involving the use of a Asycube platform, the nodes following one Hopper or
Platform node will be executed only when the actions triggered by this Hopper or Platform
node are finished.
The Asycube unit type is specified at the top of the interface.
3.2.1.1. Hopper node
The Asycube unit type is specified at the top of the interface alongside with the selected
vibration set through the Asycube Vibrate parent node.
Through this node, the user can first select the first 4 hopper vibrations.
Once selected, the user can set the duration of the vibration in seconds with a dedicated text
field. This value must be greater than or equal to 0. If this value is set to 0, the duration is set
to the default one defined through the HMI software. If it is greater than 0, it overrides the
default one defined inside the Asycube.
Figure 3-11 –Setting of the Output 1 for a duration of 1s
The vibration can be tested using the and the buttons, provided
by the interface. Once executed, the real duration of the vibration retrieved from the Asycube
is displayed.
Figure 3-10 - Vibration choice for Asycube 50 & 80 (left) and Asycube 240 & 530 (right)
Table of contents
Other Asyril Industrial Equipment manuals

Asyril
Asyril SmartSight Operating instructions

Asyril
Asyril Asycube 240 User manual

Asyril
Asyril Asycube Series Instruction Manual

Asyril
Asyril Asycube 380 User manual

Asyril
Asyril Asycube Series User manual

Asyril
Asyril Asycube 240 Operating instructions

Asyril
Asyril Asycube 50 User manual

Asyril
Asyril Asycube Largo A5 User manual

Asyril
Asyril Asycube User manual
Popular Industrial Equipment manuals by other brands

SAF-HOLLAND
SAF-HOLLAND CBXAS Series Installation and operation manual

ONTRAK
ONTRAK ADU73 user manual

Keller
Keller THIEME 3000 GS LS manual

Spirax Sarco
Spirax Sarco TD42S2 Installation and maintenance instructions

schmersal
schmersal AZM201Z-CC-T-1P2PW-2719-1-DU Instructions for assembly and operation

ABB
ABB HT592670 Operation manual