Atag SX4411B User manual

Houd, wanneer u contact opneemt met de serviceafdeling, het complete typenummer bij de hand.
En cas de contact avec le service après-vente, ayez auprès de vous le numéro de type complet.
Halten Sie die vollständige Typennummer bereit,
wenn Sie mit der Kundendienstabteilung Kontakt aufnehmen.
When contacting the service department, have the complete type number to hand.
Sørg for at have hele typenummeret klar, når serviceafdelingen kontaktes.
Ha hele typenummeret for hånden når du kontakter serviceavdelingen.
Ha det kompletta typnumret till hands när du tar kontakt med serviceavdelningen.
Adressen en telefoonnummers van de serviceorganisatie vindt u op de garantiekaart.
Les adresses et les numéros de téléphone du service après-vente se trouvent sur la carte de garantie.
Adressen und Telefonnummern der Kundendienstorganisation finden Sie auf der Garantiekarte.
You will find the addresses and phone numbers of the service organisation on the guarantee card.
Adressen og telefonnummeret til servicevirksomheden findes på garantikortet.
Du finner adresser og telefonnumre til serviceorganisasjonen på garantikortet.
Adresser och telefonnummer till serviceorganisationen hittar du på garantikortet.
manual
steam oven
700005249000
SX4411B
SX4492B

NL
Handleiding NL 3 - NL 43
FR
manuel FR 3 - FR 43
DE
Anleitung DA 3 - DA 44
EN
Manual EN 3 - EN 42
DA
brugsanvisning DA 3 - DA 42
NO
håndbok NO 3 - NO 42
SV
bruksanvisning SV 3 - SV 42
Gebruikte pictogrammen - Pictogrammes utilisés - Benutzte Piktogramme
Pictograms used - Anvendte piktogrammer - Symboler brukt
Symboler som används
Belangrijk om te weten - Important à savoir - Wissenswertes - Important information
Vigtig information - Viktig informasjon - Viktig information
Tip - Conseil - Tipp - Tips
NL BE
LU
BE
FR
AT LU
BE
DE
IE
GB
DK
NO
SE

EN 2
CONTENTS
Control panel . . . . . . . . . . . . . . . . . . . . . . . . . . . . . . . . . . . . . . . . . . . . . . . . . . . . . . . . . . . . . . 3
Oven features. . . . . . . . . . . . . . . . . . . . . . . . . . . . . . . . . . . . . . . . . . . . . . . . . . . . . . . . . . . . . . 4
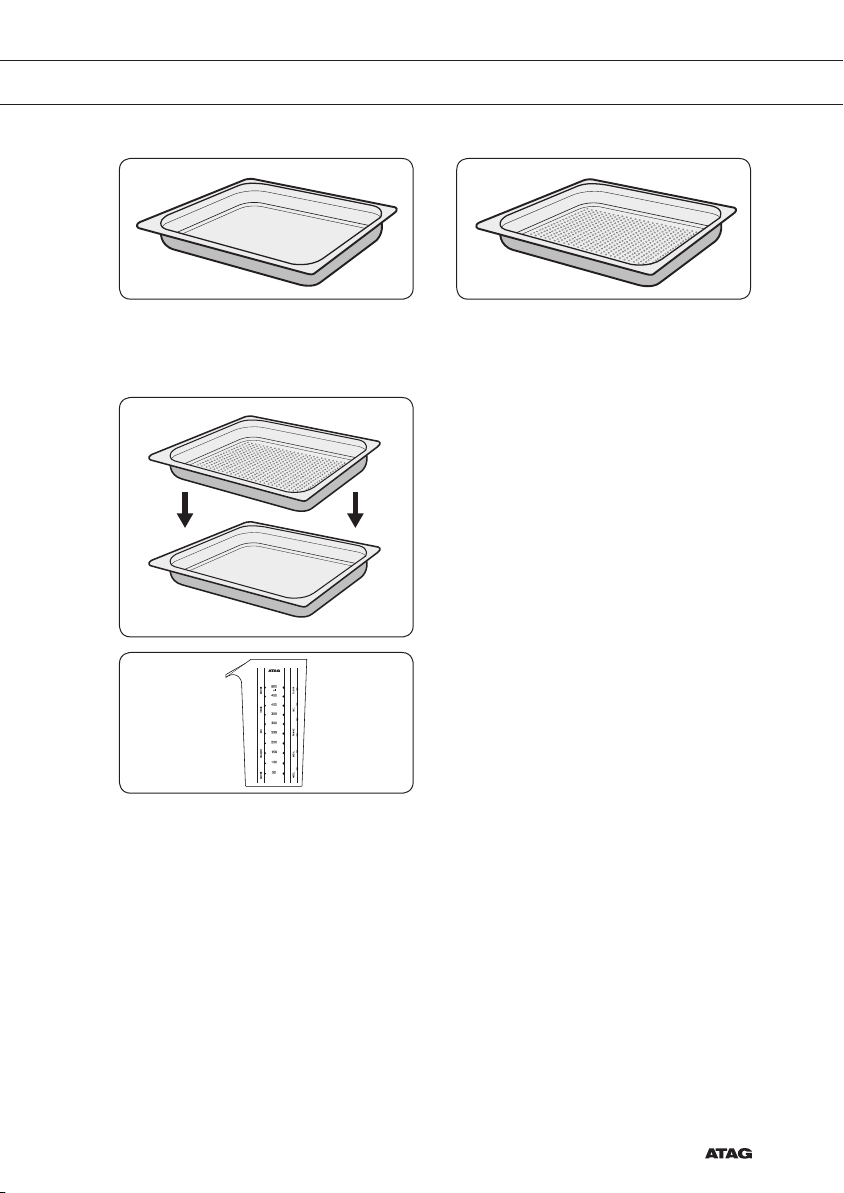
Accessories . . . . . . . . . . . . . . . . . . . . . . . . . . . . . . . . . . . . . . . . . . . . . . . . . . . . . . . . . . . . . . . 5
Using this manual . . . . . . . . . . . . . . . . . . . . . . . . . . . . . . . . . . . . . . . . . . . . . . . . . . . . . . . . . . . 6
Oven . . . . . . . . . . . . . . . . . . . . . . . . . . . . . . . . . . . . . . . . . . . . . . . . . . . . . . . . . . . . . . . . . . . . 6
Changing the oven lamp. . . . . . . . . . . . . . . . . . . . . . . . . . . . . . . . . . . . . . . . . . . . . . . . . . . . .12
Filling the water tank. . . . . . . . . . . . . . . . . . . . . . . . . . . . . . . . . . . . . . . . . . . . . . . . . . . . . . . . 13
Setting the clock . . . . . . . . . . . . . . . . . . . . . . . . . . . . . . . . . . . . . . . . . . . . . . . . . . . . . . . . . . 14
Setting the energy save mode . . . . . . . . . . . . . . . . . . . . . . . . . . . . . . . . . . . . . . . . . . . . . . . . 15
Types of MODE . . . . . . . . . . . . . . . . . . . . . . . . . . . . . . . . . . . . . . . . . . . . . . . . . . . . . . . . . . . 16
Default settings. . . . . . . . . . . . . . . . . . . . . . . . . . . . . . . . . . . . . . . . . . . . . . . . . . . . . . . . . . . . 17
Using the steam mode . . . . . . . . . . . . . . . . . . . . . . . . . . . . . . . . . . . . . . . . . . . . . . . . . . . . . 18
Using the reheat mode . . . . . . . . . . . . . . . . . . . . . . . . . . . . . . . . . . . . . . . . . . . . . . . . . . . . .22
Setting the cook time . . . . . . . . . . . . . . . . . . . . . . . . . . . . . . . . . . . . . . . . . . . . . . . . . . . . . . . 23
Setting the end time . . . . . . . . . . . . . . . . . . . . . . . . . . . . . . . . . . . . . . . . . . . . . . . . . . . . . . . . 24
Cooking time reservation function. . . . . . . . . . . . . . . . . . . . . . . . . . . . . . . . . . . . . . . . . . . . . . 25
Using the auto menu mode . . . . . . . . . . . . . . . . . . . . . . . . . . . . . . . . . . . . . . . . . . . . . . . . . . 26
Using the defrost mode . . . . . . . . . . . . . . . . . . . . . . . . . . . . . . . . . . . . . . . . . . . . . . . . . . . . .30
Setting the water hardness. . . . . . . . . . . . . . . . . . . . . . . . . . . . . . . . . . . . . . . . . . . . . . . . . . .32
Descale mode . . . . . . . . . . . . . . . . . . . . . . . . . . . . . . . . . . . . . . . . . . . . . . . . . . . . . . . . . . . . 33
Cleaning . . . . . . . . . . . . . . . . . . . . . . . . . . . . . . . . . . . . . . . . . . . . . . . . . . . . . . . . . . . . . . . . . 35
Switching o the beeper. . . . . . . . . . . . . . . . . . . . . . . . . . . . . . . . . . . . . . . . . . . . . . . . . . . . . 37
Child safety lock . . . . . . . . . . . . . . . . . . . . . . . . . . . . . . . . . . . . . . . . . . . . . . . . . . . . . . . . . . . 38
Cleaning your steam oven . . . . . . . . . . . . . . . . . . . . . . . . . . . . . . . . . . . . . . . . . . . . . . . . . . . 39
Storing and repairing your steam oven . . . . . . . . . . . . . . . . . . . . . . . . . . . . . . . . . . . . . . . . . . 39
Error codes. . . . . . . . . . . . . . . . . . . . . . . . . . . . . . . . . . . . . . . . . . . . . . . . . . . . . . . . . . . . . . . 40
Technical specifications . . . . . . . . . . . . . . . . . . . . . . . . . . . . . . . . . . . . . . . . . . . . . . . . . . . . . 41
Disposal of appliance and packaging . . . . . . . . . . . . . . . . . . . . . . . . . . . . . . . . . . . . . . . . . . . 42

EN 3
1. OFF
2. STEAM MODE
3. DEFROST MODE
4. AUTO MENU MODE
5. REHEAT MODE
6. MODE SELECTOR
7. DISPLAY
8. LAMP ON/OFF
9. CLOCK
10. STEAM LEVEL
(STEAM 1, 2 or 3)
11. COOK TIME
12. END TIME
13. WEIGHT/TEMP
14. MULTI-FUNCTION SELECTOR
CONTROL PANEL
17
53 42
1413121110986

EN 4
Note
• Shelf level is only one.
• You can use just one shelf for every cooking with provided dishes.
OVEN FEATURES
Control Pannel Water Tank
Oven Light
Grill Heater
Side Shelf
Door Handle
Door

EN 5
ACCESSORIES
The following accessories are provided with your Steam Oven:
1
Steam dish, unperforated, 40 mm
deep. (useful during steam mode for
collecting condensation).
2
Steam dish, perforated, 40 mm deep.
(useful for steam mode).
For steaming, you can use just the
perforated steam dish or place the
perforated steam dish into the unperforated
steam dish to use two dishes together on
the shelf.
3
Measuring jug, for filling the water tank.

EN 6
USING THIS MANUAL
Thank you for purchasing this ATAG Steam Oven.
Your Owner’s Manual contains essential information on using and caring for your new Steam
Oven. The only installation is seperate installation instructions are included separate.
Before using your steam oven, please read the safety instructions and all the information in
this manual first and keep it for future reference.
OVEN
Safe use
• WARNING:
this appliance and the accessible
parts become hot during use. Donot touch
the hot components. Keep children younger
than 8 away from the appliance unless you
can watch them continuously.
• This equipment may be used by children
older than 8, as well as by people with
physical, sensory or learning diculties or
with a lack of experience and knowledge,
provided they are supervised and instructed
in the safe use of the appliance and
understand the associated dangers. Do not
allow children to play with the appliance.
Donot allow children to clean or maintain
the appliance unless supervised.
• This appliance is only designed for household
use. Use it only for food preparation.
• Keep the cable away from hot surfaces.
• Never cover the ventilation openings.
• The appliance is not intended to be operated
by means of an external timer or separate
remote control system.
• In connection with electrical safety, the
appliance may not be cleaned with high-
pressure cleaners or steam cleaners.
• WARNING:
never heat sealed tins.
Pressuredevelops in the tin which can make
it explode.

EN 7
OVEN (CONTINUED)
• In preparing meals containing alcohol, high
temperatures may cause the alcohol to
evaporate. The vapour can catch fire if it
comes into contact with hot parts.
• Do not use the appliance for storing flammable
materials or materials that warp easily.
• Ensure that food is always heated
thoroughly. The time required for this
depends on many factors including the
quantity and type of food. Any bacteria
present in the food are only destroyed if the
food is heated at a temperature higher than
70 °C for more than 10 minutes. Allow the
food to cook for longer if you are not sure if
the food has been heated through.
• Do not use any abrasive cleaners or metal
scrapers to clean the glass door. This will
scratch the surface which may cause the
glass to break.
• Use oven gloves or a pot-holder to remove
dishes and accessories from the appliance.
• If smoke is emitted, switch o or unplug the
appliance and keep the door closed in order
to stifle any flames.
• Only use the temperature probe
recommended for this oven (for appliances
having a facility to use a temperature-
sensing probe).
• Remove all excess spillage and utensils
before cleaning with pyrolytic self cleaning
function.
• If, for cleaning, the controls have to be set
to a position higher than for normal cooking
purposes (pyrolytic), the surfaces may get
hotter than usual and children should be
kept away.

EN 8
OVEN (CONTINUED)
• WARNING: Ensure that the appliance is
switched o before replacing the lamp to
avoid the possibility of electric shock.
• WARNING: If the (glass) control panel is
cracked, switch o the appliance to avoid
the possibility of electric shock.
• WARNING: Unattended cooking with fat or
oil can be dangerous and may result in fire.
• NEVER try to extinguish a fire with water, but
switch o the appliance and keep the door
closed.
• WARNING: Danger of fire: do not store
items in the oven.
Children
• Do not allow children to play with the
appliance. Do not allow children to clean or
maintain the appliance unless supervised.
• Do not store anything of interest to children
in cabinets above or behind the appliance.
Safe use of oven / Steam oven
• WARNING: Keep children at a safe distance
from the oven during baking or roasting. The
oven becomes hot during use. Do not touch
the elements and the interior until the oven
has cooled completely.
• WARNING: The outside of the oven may
become hot if it is used for a long period
of time at high temperatures. If the oven is
used at the maximum temperature for a long
time (when grilling, for example), the glass
panel in the oven door may become hot.
Please be careful if children are around.

EN 9
• The oven is fully insulated. Despite this, there
is always some transfer of heat, as a result
of which the outside of the oven heats up.
This heating up falls well within the norm.
• The oven has a fan that cools the oven
casing. The fan may run for some time after
the oven is switched o.
• Make sure the appliance is turned o before
replacing the bulb to avoid risk of electric
shock.
• Do not place accessories on the open oven
door.
• Close the oven door during cooking.
• Open the oven door carefully; hot steam will
escape.
• Do not store flammable materials in the oven.
• Frozen products such as pizzas should be
cooked on the grid shelf. If the baking tray is
used, it may become deformed due to the
large dierences in temperature.
• Never cover the bottom of the oven with
aluminium foil. The foil blocks heat flow,
which may result in inferior cooking results.
This can also damage the enamel of the
bottom of the oven.
• Smaller quantities require a shorter cooking
time. When the cooking times given in
recipes are used, you might burn them.
• Never pour cold water on the hot oven floor.
This can damage the enamel.
• Fruit juices can result in stains on the oven
floor that are dicult to remove. When cooking
moist pastries (such as apple pie), use a
baking tin/griddle/roasting tin as a drip tray.
OVEN (CONTINUED)

EN 10
• Spilled food containing sugar or fruit juices,
such as prune juice or rhubarb, can damage
the colour of the enamel. It is advisable
to clean the oven immediately after it has
cooled down.
Note: the water in the steam oven insert pan
is still hot!
• Heat and steam resistant baking tins should
be used in the steam oven. Silicone baking
tins are not suitable when combining hot air
circulation and steam.
• Do not use baking tins that have areas of
rust. Even tiny patches can lead to rust in
the oven interior.
Installation
• Check the appliance for transport damage.
Do not connect a damaged appliance.
• This appliance should only be connected by
a registered installer!
• Faulty parts may only be replaced by original
parts. The manufacturer can only guarantee
that original parts meet safety requirements.
• To avoid dangerous situations, a damaged
connecting cable should only be replaced by
the manufacturer, the manufacturer’s service
organisation or suitably qualified persons.
• The electrical connection must comply with
national and local regulations.
• The wall plug socket and plug should always
be accessible.
• If you want to make a fixed connection,
make sure that a omnipolar switch with a
contact separation of at least 3 mm is fitted
in the supply cable.
OVEN (CONTINUED)

EN 11
• The equipment should not be connected
to the network via a multi-plug socket
or extension lead, as the safe use of the
equipment can then not be guaranteed.
• WARNING: Never open the appliance
casing. The casing may only be opened by a
service technician.
• Disconnect the appliance from the mains
supply before starting any repair work.
• Appliance should allow to disconnection
of the appliance from the supply after
installation. The disconnection may be
achieved by having the plug accessible or
by incorporating a switch in the fixed wiring
in accordance with the wiring rules.
If the safety instructions and warnings are
not followed, the manufacturer cannot be
held responsible for any resulting damage.
If you decide to discontinue using the
appliance because of a fault, we recommend
you cut o the cable after removing the plug
from the plug socket. Take the appliance to
your municipality’s waste disposal site.
OVEN (CONTINUED)

EN 12
CHANGING THE OVEN LAMP
Replacing the oven lamp and cleaning the glass cap
1. Take o the cap by turning
counterclockwise.
2. Remove the metal ring and the
two sheet rings and clean the
glass cap.
3. If necessary, replace the bulb with
a 25 Watt, 230 V, 300 °C heat
resistant oven light bulb.
4. Fit the metal and the sheet ring to
the glass cap.
5. Reinstall the glass cap.
Bulb
Metal
ring
Sheet
ring
Glass
cap Sheet
ring

EN 13
FILLING THE WATER TANK
You will see the water tank on the right-hand side. Only fill the tank with fresh tap water or with still
bottled water. If your water is very hard, we recommend that you use softened water (refer to the
“Water hardness” at page 32.)
Caution Do not fill the water tank with distilled water or any other liquids.
Fill the water tank before
each use
Lift the water tank over the interlock and pull the tank out of the
appliance. Open the lid and fill the water tank with cold water
up to the “Max.” mark. If you use the measuring jug to fill the
water tank, you don’t have to pull the water tank completely out
of the appliance. Close the lid until you feel it engage.
Slide the water tank back until it engages.
Empty the water tank after
each use
Pull the water tank out of the appliance slowly. Pulling it
out quickly may cause water to spill. Hold the water tank
horizontally, so that no remaining water can drip out of the valve
seat.
Empty out the water.
Thoroughly dry the water tank in the appliance and the seal in
the lid.
“Fill water tank” display If the water tank is empty, a signal sounds.
A symbol appears in the display. The operation is interrupted.
1.
Take out the water tank, fill to the “
Max
” mark and reinsert.
2. Automatically start after 5 seconds.

EN 14
When the appliance is first plugged in, the DISPLAY lights up. After five seconds, the Clock
symbol and “12:00” blink on the DISPLAY.
Setting the Clock (example 15:15)
1
Turn the MODE SELECTOR to the
“OFF” position.
2
Press CLOCK. The “12” starts blinking.
3
Turn the MULTI-FUNCTION
SELECTOR to set the hour.
4
Press CLOCK again. The “00” starts
blinking.
5
Turn the MULTI-FUNCTION
SELECTOR to set the minutes.
6
Press CLOCK again.
Note
• If you want to change a setting after you have pressed a button, the setting starts blinking. You
can only change this setting during blinking. If it has stopped blinking, you have to press the
button so it will start blinking again.
SETTING THE CLOCK

EN 15
SETTING THE ENERGY SAVE MODE
The oven has an energy save mode. This facility saves electricity when the oven is not in use.
Standby mode
The oven will automatically go to Standby mode after 10 minutes if not operated (default).
ECO mode
In ECO mode, the current time is not displayed. You cannot use the oven.
1
Turn the MODE SELECTOR to the
“OFF” position.
2
Press END TIME for 3 seconds. The
oven switches to ECO mode and the
display shows nothing.
3
To go to Standby mode, open the door
or press any button. The display will
show the current time and the oven is
ready for use.
Note
• If you do not select any function when the appliance is in the middle of setting or operating
with temporary stop condition, the function is canceled and the clock will be displayed after
25 minutes. The oven Lamp will be turned o after 5 minutes with door open condition.
.

EN 16
TYPES OF MODE
The following table represents settings of your oven.
Use the cooking guide tables for those modes as guidelines for cooking.
Steam Mode
(use the button ‘steam level’ to set steam level 1, 2 or 3)
Food is cooked by steam provided by the steam generator and injected into
the cavity by two jet nozzles.
This mode is suitable for steaming food like vegetables, fish, eggs, fruits and
rice. When cooking by using this mode, always fill the water tank with fresh
water.
Suggested temperature: 100 °C
Reheat Mode
(use the button ‘steam level’ to set steam level 1, 2 or 3)
Food is reheated by steam mode. You can reheat some foods by controlling
the setting time. The steam is provided by the steam generator and injected
into the cavity by interval.
This mode is suitable for plated meals. Dishes can be gently reheated
without drying out. When reheating with this mode always fill the water tank
with fresh water.
Defrost Mode
5 pre-programmed defrost settings can be selected for your convenience.
Time and temperature will be set automatically.
You simply select the programme and the weight of your dish and start the
speed cooking process.
Auto Menu Mode
45 pre-programmed auto menu settings can be selected for your
convenience. Time and temperature will be set automatically. You simply
select the programme, the weight of your dish and start the steam cooking
process.

EN 17
DEFAULT SETTINGS
During blinking of the default cook time or default temperature, you can change the time or
temperature by turning the MULTI-FUNCTION SELECTOR.
1
The default time or default temperature
is blinking.
2
While the default time/temperature is
blinking: turn the MULTI-FUNCTION
SELECTOR to set the desired time/
temperature.
If the blinking has stopped, you can change the time/temperature by pressing COOK TIME,
WEIGHT/TEMP first.
During cooking, COOK TIME or TEMPERATURE can always be changed.
►
Cooking time: press COOK TIME and then turn the MULTI-FUNCTION SELECTOR.
►Temperature: press WEIGHT/TEMP and then turn the MULTI-FUNCTION SELECTOR.

EN 18
USING THE STEAM MODE
Steam Mode Setting
1
Fill the water tank up to the maximum
line and place it back. Then place your
food into the cooking cavity.
2
Turn the MODE SELECTOR to Steam
mode position. Press STEAM LEVEL
to set steam level 1, 2 or 3.
3
Press WEIGHT/TEMP. The temperature
is blinking.
4
During Blinking, turn the MULTI-
FUNCTION SELECTOR and set the
temperature.
5
Press COOK TIME. The cook time is
blinking.
6
During Blinking, turn the MULTI-
FUNCTION SELECTOR and set the
cook time.
7
Automatically start after 5 seconds.

EN 19
If there is too little water while cooking, you will see a symbol in
the display along with a beep being played.
Add water into the tank and wait 5 seconds to continue with the
steaming.
• You can add water into the tank at any time while cooking.
Note
1) During cooking, COOK TIME and TEMPERATURE can be changed.
►Cooking time: press COOK TIME and then turn the MULTI-FUNCTION SELECTOR.
►Temperature: press WEIGHT/TEMP and then turn the MULTI-FUNCTION SELECTOR.
2) In Steam mode settings, the top and bottom steam heating elements switch o and on
throughout cooking to regulate the temperature.
3) Be careful when removing the plate as it is hot. First leave the door a little open to allow the hot
steam to escape. Pay attention to the steam outlets as well.
4)
When you have finished cooking, pull the water tank out of the appliance slowly and empty the tank.
5) Dry the cooking cavity with a dry cloth if there is any remaining water.
6) The cooling fan (10 minutes) and drain pump (10 sec) always work after a steaming process.
However, this is not a malfunction and you do not need to worry about this.
Remove the remnant water.
1
After finish the steam mode, empty the
water tank and place it back.
2
Turn the MODE SELECTOR to the
“OFF” position.
3
Press CLOCK and STEAM LEVEL at
the same time and hold for 2 seconds.
The oven starts removing the remnant
water and displays 20 seconds.
4
Remove the water tank and empty any
remnant water.
5
Automatically start after 5 seconds.
USING THE STEAM MODE (CONTINUED)
This manual suits for next models
1
Table of contents
Other Atag Oven manuals