DID Set Up
When the matrix is completely connected and turned on it will load the default EDID, which is the
highest common native resolution of the connected devices. (i.e. In the diagram below the default would
be 1080p with 2ch audio. Multi-channel audio and 3D are not enabled on default mode, unless all devices
support these features.)
4K/UHD-Dolby TrueHD
Input 1
On default, all devices in the diagram will work at 1080p. If a device is not syncing or a different
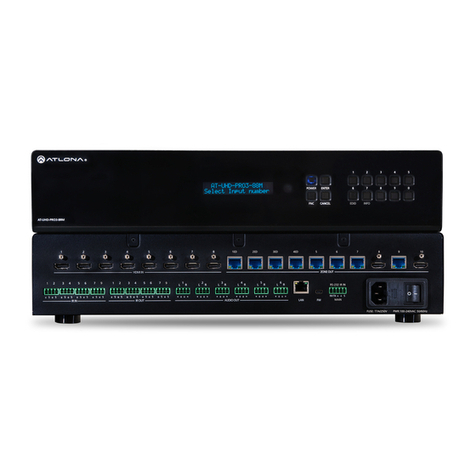
resolution is required, internal EDID or EDID copy and load should resolve these issues. The UHD-
PRO3-1616M can copy and store up to 20 EDIDs to memory.
Step 1: copy an EDID
Before an EDID can be loaded to an input, it must first be copied to the matrix's memory. Each
display's EDID can be saved individually to one of the matrix's twenty preset EDID memories.
home screen
AT-UHD-PRO3-1616M
Select Input Number
1 Copy Output EDID
2 Choose Input EDID
Copy output
Enter to confirm
Feedback=
---> "Output EDID # to
Memory [Failed/Passed]"
Step 2: load a copied EDID to an input
Once EDIDs have been copied to memory they can be loaded to a specific input.
Note: (refer to the diagram above) Using the EDID of output 3 with input 1 will enable 4K/UHD and Dolby TrueHD to
pass. With these settings, output 2 will receive no audio or video and output 1 will receive no audio.
home screen
AT-UHD-PRO3-1616M
Select Input Number
1 Copy Output EDID
2 Choose Input EDID
Current:Default
memory selection
through
Select Input
Memory (1-20)
Load EDID Memory
1? Press Enter
Feedback = "EDID # loaded
to Input #"
Toll free: 1-877-536-3976
Local: 1-408-962-0515
Step 3: Load an internal EDID to an input
If the first two steps don't produce the correct resolution or audio configuration, the fourteen
internal EDIDs should resolve the issue.
Internal EDID options
EDID 1: 1080P 2CH audio
EDID 2: 1080P HD multi-channel audio 7.1*
EDID 3: 1080P Dolby Digital/DTS 5.1
EDID 4: 1080P 3D 2CH audio
EDID 5: 1080P 3D HD multi-channel audio 7.1*
EDID 6: 1080P 3D Dolby Digital/DTS 5.1
EDID 7: 720P 2CH audio
EDID 8: 720P Dolby Digital/DTS 5.1
EDID 9: 1280x800 RGB 2CH audio
EDID 10: 1366x768 RGB 2CH audio
EDID 11: 1080P DVI**
EDID 12: 1280x800 DVI**
EDID 13: 3840x2160 2CH audio
EDID 14: 3840x2160 multi-channel audio 7.1*
*Recommended EDID for AVR use
** Recommended EDID for DVI projectors use
home screen
AT-UHD-PRO3-1616M
Select Input Number
Front panel display readout
ATL 1080P 2CH
ATL 1080P Multi CH
ATL 1080P DD
ATL 1080P 3D 2CH
ATL 1080P 3D MultiCH
ATL 1080P 3D DD
ATL 720P 2CH
ATL 720P DD
ATL 1280x800 RGB 2CH
ATL 1366x768 RGB 2CH
ATL 1080P DVI
ATL 1280x800 RGB DVI
ATL UHD 2CH
ATL UHD MultiCH
1 Copy Output EDID
2 Choose Input EDID
Current:Default
Internal EDID selection
Feedback = "Int EDID # saved
to input #"
1- Cycles through
EDIDs in ascending
order
2- Cycles through
EDIDs in descending
order
RS-232 and TCP/IP commands:
To access different EDIDs through RS-232 or TCP/IP, the following commands must be used.
EDIDMSetX default EDIDMSetX default Sets the EDID of an input to the default EDID
Ex. EDIDMset2 default - sets input 2 to default
EDIDMSetX saveY
EDIDMSetX intZ
EDIDMSetX saveY
EDIDMSetX intZ
Sets the EDID of an input to the previously saved EDID memory
Ex. EDIDMset1 save3 - sets input 1 to EDID memory 3
Sets the EDID of an input to one of the internal EDIDs
Ex. EDIDMset3 int6 - sets input 3 to the internal EDID - 1080p 3D Dolby
Digital 5.1
Toll free: 1-877-536-3976
Local: 1-408-962-0515
Matrix Status
When installing or troubleshooting it's important to verify settings, or be able to come back to a
project and see how it was set up. The AT-UHD-PRO3-1616M matrix settings are viewable through
the front panel display. View current I/O settings, firmware version, IP, MAC Address, and the RS-
232 baud rates of not just the matrix but output zones as well.
View current I/O settings
home screen
AT-UHD-PRO3-1616M
Select Input Number
O 13 14 15 16 17
18
I x x x x
x x
View Firmware/Baud Rate settings
home screen
AT-UHD-PRO3-1616M
Select Input Number
--------------------------------------------------------------->
IP Address:
XXX.XXX.XXX.XXX
Press INFO to cycle through
the IP Address, IP Port, and
MAC Address
MAC Address
B8:98:B0:03:0D:4C
TX Baud Rate
115200
Matrix Baud Rate
RX 01 Baud Rate
X X X X
Output Baud Rate
Press 2 to cycle through the
baud rates of each output.
Factory Reset
Press and hold the
buttons for 5 seconds for the factory reset to occur
Note: The matrix will not display any signs of the reset. Please wait 5 additional seconds and resume normal operation
Toll free: 1-877-536-3976
Local: 1-408-962-0515
LAN
For convenience, the matrix comes with DHCP default on. This ensures the matrix IP will not
override another device.
To find the matrix IP:
home screen
AT-UHD-PRO3-1616M
Select Input Number
AT-UHD-PRO3-1616M
FW Ver: 0.3.XX
IP Address:
X.X.X.X
IP Address
EX. 010.010.001.200
The address to type into the
browser would be 10.10.1.200
Browser WebGUI
Atlona has created an easy to use WebGUI for changing settings and controlling the matrix.
To begin, plug a LAN cable into the matrix and your network router, then type the IP address of the
matrix into a web browser (as seen below).
If any stability issues are experienced, disable any anti-virus or firewall that may be
interfering with network communication to the Matrix. Once set up is done and the
matrix GUI is no longer being used, the firewall and anti-virus can be re-enabled.
A login screen will appear (this is the same log in for admin and general users). For the first log in (and future
admin changes) the username is "root" and password is "Atlona".
Note: Admin password can be changed within the WebGUI (see page 16).
Toll free: 1-877-536-3976
Local: 1-408-962-0515
the analog audio outputs ensuring the best
audio performance for each zone. 5 band frequency options at 63Hz, 250Hz, 1kHz, 4kHz, and
8kHz as well as zone output volume and mute.
Toll free: 1-877-536-3976
Local: 1-408-962-0515
RS-232 Connection
RS-232 pin out will be determined by the RS-232 cable
RS-232 is often connected through a DB 9-pin to captive screw
connector. The pins will have functions associated with them,
some will be unassigned.
Note: Typical DB9 connectors use pin 2 for TX, pin 3 for RX, and pin 5
for ground. On some devices functions of pins 2 and 3 are
reversed.
Set Up
To set up the RS-232 hyperterminal (if not using 3rd party software) use the following steps:
1. Connect the AT-HD-1600-SL to a PC using a DB9 to USB cable
a. Remove the DB9 connector, strip and connect the wires to the included captive screw
connector (as explained above), then connect the captive screw connector to the matrix
2. Go to the Device Manager folder (see picture A)
3. Find the AT-HD-1600-SL COM port and right click with a mouse and select properties
(see picture B)
NOTE: If unsure which COM port is the AT-HD-1600-SL, unplug the cable and plug it back in. It will
disappear and reappear on the COM port list.
4. Under the properties menu select the port settings tab and update the menu to the AT-HD-1600-SL default
settings of:
CONTROL1:Bits Per Second: 115200, Data Bits: 8, Parity: None, Stop Bits: 1 and Flow Control: None.(see picture C)
CONTROL2:Bits Per Second: 9600 , Data Bits: 8, Parity: None, Stop Bits: 1 and Flow Control: None.
TCP/IP Connection
Login :Username:root Password:Atlona
Default IP: 192.168.5.247:8700
NOTE: TCP/IP Connect matrix LAN ports through management software with AMS
Set up is done and any hyperterminal program may be used to control the AT-HD-1600-SL now.

