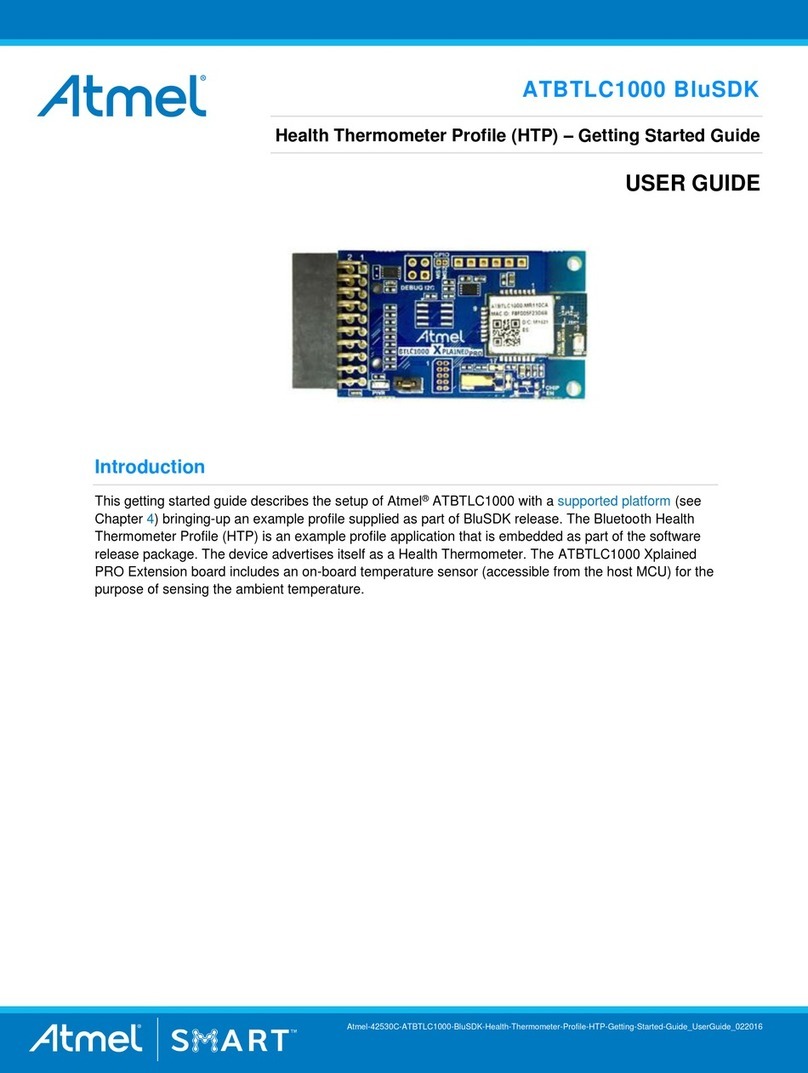
Atmel ATBTLC1000 BluSDK User manual

ATBTLC1000 BluSDK
Proximity Reporter –Getting Started Guide
USER GUIDE
Introduction
This getting started guide describes the setup of ATBTLC1000 with Atmel supported platform and
bringing-up an example profile supplied as part of BluSDK. This document explains the bring-up of
Proximity Reporter example application that is embedded as part of the software release package.
The Proximity profile defined by the Bluetooth SIG enables proximity monitoring between two devices.
The Proximity Monitor (a GATT client) configures the behavior of a peer Proximity Reporter device
(GATT server) based on link conditions. The Proximity Monitor configures desired behavior of the peer
device through setting Alerts Levels on Link Loss and Path Loss. In addition, it also maintains the
connection with the Proximity Reporter and monitors the link quality of the connection based on RSSI
reporting from the peer device. The Proximity Reporter implements the Link Loss Service, Immediate
Alert Service and Transmit Power Service. The Proximity Reporter receives the alert level configuration
from the Monitor and adapts behavior and provides notification accordingly.
This document explains the details about:
1. Getting started with the setup of Atmel supported platform with ATBTLC1000 Xplained Pro.
2. Demonstration of Proximity Reporter functionality using Atmel SmartBLU mobile application for
Android and iOS included in the BluSDK release package.
The Proximity Reporter application example supports the following features:
Advertisement
Pairing/bonding
Services: Link Loss Service, Immediate Alert Service and TX Power Service
The Proximity Reporter application example supports the following characteristics:
Alert Level
Transmit Power Level
Atmel-42517C-ATBTLC1000-BluSDK-Proximity-Reporter-Getting-Started-Guide_USERGUIDE_022016

Proximity Reporter –Getting Started Guide USER GUIDE
Atmel-42517C-ATBTLC1000-BluSDK-Proximity-Reporter-Getting-Started-Guide_USERGUIDE_022016
2
2
Table of Contents
1Demo Setup .................................................................................................................3
2Supported Hardware Platforms and IDEs..................................................................3
3Hardware Setup...........................................................................................................4
3.1 SAM L21 Xplained Pro Proximity Reporter Setup.................................................................................4
3.2 SAM D21 Xplained Pro Proximity Reporter Setup ................................................................................4
3.3 SAM G55 Xplained Pro Proximity Reporter setup.................................................................................5
3.4 SAM 4S Xplained Pro Proximity Reporter setup ...................................................................................5
4Software Setup ............................................................................................................6
4.1 Installation Steps...................................................................................................................................6
4.2 Build Procedure.....................................................................................................................................7
5On-board LED Configuration....................................................................................11
5.1 Link Loss.............................................................................................................................................11
5.2 Alert on Path Loss (Immediate Alert)...................................................................................................11
6Console Display.........................................................................................................12
7Running the Demo.....................................................................................................12
8BluSDK Software Architecture ................................................................................. 21
9ATMEL EVALUATION BOARD/KIT IMPORTANT NOTICE AND DISCLAIMER........ 22
10 Revision History........................................................................................................23

Proximity Reporter –Getting Started Guide USER GUIDE
Atmel-42517C-ATBTLC1000-BluSDK-Proximity-Reporter-Getting-Started-Guide_USERGUIDE_022016
3
3
1 Demo Setup
Figure 1-1. Demo Setup of Proximity Reporter Application on ATBTLC1000
BLE LINK
2 Supported Hardware Platforms and IDEs
Table 2-1. BluSDK –Supported Hardware and IDEs
Platform
MCU
Supported
BLE device
Supported evaluation kits
Supported IDEs
SAM L21 (MCU)
ATSAML21J18B
ATBTLC1000
ATBTLC1000-XSTK
(ATSAML21-XPRO-B + ATBTLC1000
XPRO)
Atmel Studio v7.0
SAM L21 (MCU)
ATSAML21J18A
ATBTLC1000
ATSAML21 XPRO + ATBTLC1000
XPRO
Atmel Studio v7.0
SAM D21 (MCU)
ATSAMD21J18A
ATBTLC1000
ATSAMD21-XPRO + ATBTLC1000
XPRO
Atmel Studio v7.0
SAM G55 (MCU)
ATSAMG55J19
ATBTLC1000
ATSAMG55-XPRO + ATBTLC1000
XPRO
Atmel Studio v7.0
SAM 4S (MCU)
ATSAM4SD32C
ATBTLC1000
ATSAM4S-XPRO + ATBTLC1000
XPRO
Atmel Studio v7.0
Android/iPhone
Atmel Smart Connect
Mobile Application
(Proximity Monitor role)
ATBTLC1000+
Supported Atmel MCU
(Proximity Reporter
Application)

Proximity Reporter –Getting Started Guide USER GUIDE
Atmel-42517C-ATBTLC1000-BluSDK-Proximity-Reporter-Getting-Started-Guide_USERGUIDE_022016
4
4
3 Hardware Setup
3.1 SAM L21 Xplained Pro Proximity Reporter Setup
Figure 3-1. ATBTLC1000 Xplained Pro Extension Connected to a SAM L21 Xplained Pro
3.2 SAM D21 Xplained Pro Proximity Reporter Setup
Figure 3-2. ATBTLC1000 Xplained Pro Extension Connected to a SAM D21 Xplained Pro

Proximity Reporter –Getting Started Guide USER GUIDE
Atmel-42517C-ATBTLC1000-BluSDK-Proximity-Reporter-Getting-Started-Guide_USERGUIDE_022016
5
5
3.3 SAM G55 Xplained Pro Proximity Reporter setup
Figure 3-3. ATBTLC1000 Xplained Pro Extension Connected to a SAM G55 Xplained Pro
3.4 SAM 4S Xplained Pro Proximity Reporter setup
Figure 3-4. ATBTLC1000 Xplained Pro Extension Connected to a SAM 4S Xplained Pro

Proximity Reporter –Getting Started Guide USER GUIDE
Atmel-42517C-ATBTLC1000-BluSDK-Proximity-Reporter-Getting-Started-Guide_USERGUIDE_022016
6
6
4 Software Setup
4.1 Installation Steps
1. Atmel Studio installation [Atmel Studio 7.0 (build 594) Installer –with .NET]
http://www.atmel.com/tools/atmelstudio.aspx.
(Note: SAM L21 Rev B/SAM D21/SAM G55/SAM 4S part pack is built-in as part of Atmel Studio
7.0)
2. Atmel USB Driver Installer 7.0.712 http://www.atmel.com/tools/atmelstudio.aspx.
3. Install the standalone ASF package from
http://www.atmel.com/tools/AVRSOFTWAREFRAMEWORK.aspx.
Note: Refer to the BluSDK release notes for updates to version numbers of the components
mentioned above.
This ASF msi package will install the following examples within the Atmel Studio environment.
1. Proximity Profile Reporter Application for SAM D21
2. Proximity Profile Reporter Application for SAM L21
3. Proximity Profile Reporter Application for SAM G55
4. Proximity Profile Reporter Application for SAM 4S

Proximity Reporter –Getting Started Guide USER GUIDE
Atmel-42517C-ATBTLC1000-BluSDK-Proximity-Reporter-Getting-Started-Guide_USERGUIDE_022016
7
7
4.2 Build Procedure
The following procedure is explained for SAM L21 application example. The same procedure is valid for
the case of other Atmel supported platform as well.
1. Select New Example Project
Figure 4-1. Creating a New Project

Proximity Reporter –Getting Started Guide USER GUIDE
Atmel-42517C-ATBTLC1000-BluSDK-Proximity-Reporter-Getting-Started-Guide_USERGUIDE_022016
8
8
2. Enter “Proximity Reporter” in search window and expand Atmel Corp Projects. The location and the
name of the project can be selected in the respective fields. Click OK.
Figure 4-2. Selecting Proximity Reporter Application from Example Projects
3. Accept the license Agreement. The studio will generate the Proximity Profile Reporter project for
SAM L21.

Proximity Reporter –Getting Started Guide USER GUIDE
Atmel-42517C-ATBTLC1000-BluSDK-Proximity-Reporter-Getting-Started-Guide_USERGUIDE_022016
9
9
4. Building the solution.
Figure 4-3. Building the Proximity Reporter Application
5. Download the application via the DEBUG USB to the SAM L21 board using Device Programing
option available in Tools as shown below.
Figure 4-4. Selecting Device Programming Option

Proximity Reporter –Getting Started Guide USER GUIDE
Atmel-42517C-ATBTLC1000-BluSDK-Proximity-Reporter-Getting-Started-Guide_USERGUIDE_022016
1
1
11
5 On-board LED Configuration
The on-board LED in supported platform is configured to notify the user about the alerts received. This
section provides the default configuration of on-board LED for the Link Loss and Immediate Alert
service.
5.1 Link Loss
On link loss the LED will blink according to the alert level set by the Proximity Monitor.
The Alert Levels are:
1. ‘0’ for “No Alert”
2. ‘1’ for “Mild Alert”
3. ‘2’ for “High Alert”
The rate of LED blinking depends on the alert level configured by the Proximity Monitor. If the link loss
alert level is ‘High Alert’ then LED blinking rate will be fast (1 second interval) and if it is ‘Mild Alert’then
the blink rate is moderate (2 second interval) and for ‘No Alert’ the LED is turned off.
5.2 Alert on Path Loss (Immediate Alert)
This alert is applicable when ‘Immediate Alert Service’ is implemented. The example application relies
on path loss configuration done by the Proximity Monitor and will notify accordingly.
The Alert Levels are:
1. ‘0’ for “No Alert”.
2. ‘1’ for “Mild Alert”.
3. ‘2’ for “High Alert”.
The rate of LED blinking depends on the alert level sent by the Proximity Monitor. If the link loss alert
level is ‘High Alert’then LED blinking rate is configured for 3-second interval and if it is ‘Mild Alert’then
it is configured for 5-second interval and for ‘No Alert’ the LED is turned off.
B

Proximity Reporter –Getting Started Guide USER GUIDE
Atmel-42517C-ATBTLC1000-BluSDK-Proximity-Reporter-Getting-Started-Guide_USERGUIDE_022016
1
2
12
6 Console Display
For the purpose of debugging, logging is made available through a serial console. The logging interface
utilizes the same COM port that connects to Atmel supported platform. A serial port monitor application
(for example TeraTerm) shall be opened and attached to the appropriate COM port enumerated by the
device on the PC.
7 Running the Demo
1. Connect the ATBTLC1000 Xplained Pro Board to SAM L21 Xplained Pro EXT1 as indicated in
Figure 3-1.
2. Power on the SAM L21 by connecting the USB Cable.
3. On the PC, open any Terminal Application (e.g. TeraTerm). Select the appropriate COM Port
(Settings: Baudrate 115200, None Parity, one Stop bit, one Start bit, no Hardware Handshake).
4. Press the Reset button on the SAM L21 board.
5. The device is now in advertising mode as shown below.
Figure 7-1. Proximity Reporter Device Initialization

Proximity Reporter –Getting Started Guide USER GUIDE
Atmel-42517C-ATBTLC1000-BluSDK-Proximity-Reporter-Getting-Started-Guide_USERGUIDE_022016
1
4
14
2. The Atmel Proximity reporter device will be discovered and displayed in the scan screen as
shown.
Figure 7-3. Proximity Reporter Devices Listed in Scan Results
3. Click on the Proximity Reporter device displayed in the scan results and this will initiate the
pairing procedure
Figure 7-4. Pairing Request

Proximity Reporter –Getting Started Guide USER GUIDE
Atmel-42517C-ATBTLC1000-BluSDK-Proximity-Reporter-Getting-Started-Guide_USERGUIDE_022016
1
5
15
4. Click on ‘Pair’. A pop-up requesting the pass-key will appear. Enter the pass-key “123456” and
click on OK as shown below. A pop-up will appear indicative successful connection.
Figure 7-5. Pass-Key Entry
Figure 7-6. Connecting with PXP-Reporter

Proximity Reporter –Getting Started Guide USER GUIDE
Atmel-42517C-ATBTLC1000-BluSDK-Proximity-Reporter-Getting-Started-Guide_USERGUIDE_022016
1
7
17
6. On the Atmel Smart Connect App, the supported services will be displayed for the Atmel
Proximity Reporter Device.
Figure 7-8. Display of Services Supported by Proximity Reporter
7. Click on the desired service (Link Loss or Immediate Alert) for configuration of the alert level
characteristics. Choose a value from a given set of three values viz High, Mild, and Low alert
levels as shown.
Figure 7-9. Settings Screen for Configuring the Alert Level

Proximity Reporter –Getting Started Guide USER GUIDE
Atmel-42517C-ATBTLC1000-BluSDK-Proximity-Reporter-Getting-Started-Guide_USERGUIDE_022016
1
8
18
8. After configuration of desired alert levels, click on the ‘Immediate Alert Service’ and then move
the mobile phone away from the Proximity reporter. Based on the distance of separation, path-
loss is plotted on the zone radar (using received RSSI values from the Proximity Reporter).
Based on the zone, the Proximity Monitor sends the corresponding alert level. The console log
on the Proximity Reporter will display the corresponding alerts and on-board LED behavior will be
as specified in Chapter 6.2.
Figure 7-10. Proximity Reporter Path-Loss Plot Across Safe, Mid., and Danger Zone
Figure 7-11. Proximity Reporter Path-Loss Console-Log Notifying Alerts

Proximity Reporter –Getting Started Guide USER GUIDE
Atmel-42517C-ATBTLC1000-BluSDK-Proximity-Reporter-Getting-Started-Guide_USERGUIDE_022016
1
9
19
9. After configuration of desired alert levels, click on the ‘Link Loss Service’ and then move the
mobile phone away from the reporter. Based on the distance of separation, the Proximity reporter
will receive the path loss notifications based on alert settings. Keep moving after until you
observe the ‘Link Loss’ pop-up appear. The console log on the Proximity Reporter will display
the corresponding alerts and when link-loss happens, will report disconnection. The on-board
LED behavior will be as specified in Chapter 6.1.The lock screen is used to emulate a common
use-case application where this Link Loss service could be used (For e.g.: Key Fob). When the
user is in close proximity, the lock remains open. Subsequently the user moving out of range can
be trigger to close the lock.
Figure 7-12. Link Loss Pop-up on Proximity Monitor
Figure 7-13. Proximity Reporter Console Log for Link Loss

Proximity Reporter –Getting Started Guide USER GUIDE
Atmel-42517C-ATBTLC1000-BluSDK-Proximity-Reporter-Getting-Started-Guide_USERGUIDE_022016
2
0
20
10. After link loss the mobile application will attempt to reconnect to the PXP Reporter. On moving
the mobile device closer to the reporter, the connection is re-established.
11. The TX power service is used to retrieve the TX Power of the Proximity reporter. Click on the TX
Power Service icon in the services screen. The Proximity Monitor reads the TX Power value from
the Proximity reporter and displays it as shown below.
Figure 7-14. Proximity Monitor –Reading TX Power Service
Other manuals for ATBTLC1000 BluSDK
6
Table of contents
Other Atmel Control Unit manuals

Atmel
Atmel ZIGBIT ATZB-RF-233-1-C User manual

Atmel
Atmel SAM4 Series Installation and operating instructions

Atmel
Atmel STK503 User manual

Atmel
Atmel ATF15 Series User manual

Atmel
Atmel STK504 User manual

Atmel
Atmel ZIGBIT ATZB-X0-256-3-0-C User manual

Atmel
Atmel AT90USBKey Installation manual

Atmel
Atmel ATBTLC1000 BluSDK User manual

Atmel
Atmel ATSAMR21 Instruction Manual

Atmel
Atmel AT89RFD-08 User manual