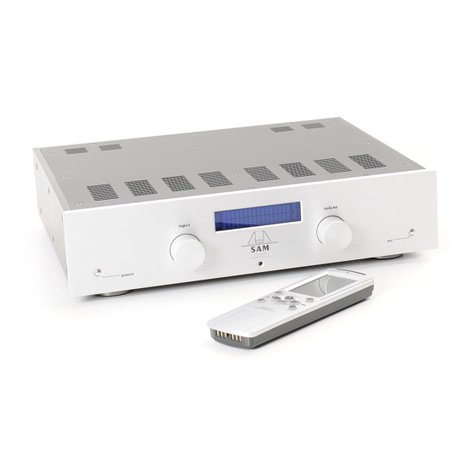
Audionet SAM 20 SE User manual

1
audionet
SAM20 SE
Stereo Amplifier
User'sManual

2

3
Contents
1Preface.......................................................................5
1.1 Included....................................................................................... 6
1.2 Transport..................................................................................... 6
2Overviewfrontpanel................................................7
3Overviewbackpanel................................................8
4Installation and powersupply.................................9
4.1 Placement.................................................................................... 9
4.2 Mainsconnection........................................................................ 9
4.3 Orientation ofmainsplug........................................................ 10
5Inputsand outputs..................................................11
5.1 Inputs......................................................................................... 11
5.2 Speaker terminals..................................................................... 11
5.3 Preamplifier Output................................................................. 12
5.4 Recording devices ..................................................................... 12
5.5 Phono......................................................................................... 13
5.6 Headphonessocket................................................................... 13
5.7 AudionetLink........................................................................... 13
6Usage.......................................................................14
6.1 Powering up.............................................................................. 14
6.2 Switching on and off................................................................. 14
6.3 Using AudionetLink................................................................ 15
6.4 Controlelementson thefrontpanel....................................... 15
6.5 Volumecontrol.......................................................................... 16
6.6 Display ....................................................................................... 16
6.7 Inputselection........................................................................... 17
6.8 Muting....................................................................................... 18
7Setup menu.............................................................19
7.1 Overviewsetupmenu............................................................... 20
7.2 SelectInput................................................................................ 20
7.3 GlobalSetup.............................................................................. 21
4
7.3.1 Headphones................................................................................ 21
7.3.2 Display........................................................................................ 22
7.3.3 Pre Output................................................................................... 23
7.3.4 AutoStart .................................................................................... 23
7.3.5 By-Pass Mode............................................................................. 24
7.3.6 ChannelName............................................................................ 26
7.4 Factory DefaultReset............................................................... 27
7.4.1 Overviewfactorydefaultsettings............................................... 27
7.5 DeviceInfo................................................................................. 28
8AudionetMetal RemoteControl............................ 29
8.1 Key assignmentSAM 20 SE.................................................... 30
8.2 Changing the batteries ............................................................. 30
8.3 Settingsfor Audionetpreamplifier......................................... 31
9Protection system.................................................. 33
10 Phono module........................................................ 34
10.1 Setup.......................................................................................... 34
10.2 Jumpersettings......................................................................... 35
10.3 MM pickup systems.................................................................. 35
10.4 MCpickup systems................................................................... 36
10.5 Typicalsetups........................................................................... 36
10.6 Fine tuning................................................................................ 37
10.7 Factory defaults........................................................................ 38
11 Securityadvice ....................................................... 39
12 Technical data........................................................ 40

5
1Preface
The AudionetTeamcongratulatesyou verywarmlyon yourpurchaseof
thisveryspecialunit.
Designed tocelebrate20yearsofscientificaudiophilemagic. Enjoythe
once morevastlyimproved sonicalcapabilitiesofyourSAM20 SE.We're
happyyou'vefound yourwaytousand will be happytobe yourfaithful
companion on yourmusicaladventures.At theveryleastuntil the next
celebratoryunit willcome along, in 2027, forthe 30th jubilee.
All the verybest,
Dipl.-Volksw.ThomasGesslerDipl.-Kfm. Robert Hagemann
(ManagingPartner) (ManagingPartner)
Dipl.-Ing. ThomasPohl
(Head ofR&D Hardware)
Audionetcomponentsare no marketingproducts, theyare authentic. Con-
ceived anddeveloped withscientificinspiration, professionalengineering
expertiseand apassion forachievingthe perfectsound. Theyareunique
creationsdesigned toinspiremusicalenjoymentand havean excellentrep-
utation amongstall connoisseursthroughouttheworld. Each and everyone
ofourprecision-manufactured devicesisindividually craftedatourBerlin
worksbyourexperiencedand passionate workforce.
Butbeforeyou startlisteningtoyournewAudionetSAM20 SE,please
read thismanualcarefully soyou areabletouseand enjoy all functionsof
thisunitwithoutdrawbackon music quality.

6
1.1Included
Included you will find the followingitems:
·the stereo integrated amplifierSAM20 SE
·the user'smanual(thatyou are currentlyreading)
·one standard mainspowercord
·AudionetMetalRemote Control
1.2Transport
Important
·Please transportthe SAM20 SEonlyinthe included package.
·Alwaysuse the provided cloth bagtopreventscratches on thecasing.
·Pleaseallowthe SAM20 SEtoadapttotheclimaticconditionsinyour
listeningroombeforeyou switchontheunitforthefirsttimeafter
transport.

7
2Overviewfront panel
Display
power
key
down
key
IRremote control
receiver
up
key
set
key
SAM20SE

8
3 Overviewback panel
1
Balancedinput(XLR) no. 1, left/right
2
RCAinputno. 2, left/right
3
RCAinputno. 3, left/right
4
RCAinputno. 4, left/riht
5
RCAinputno. 5, left/right
6
Phono input (RCA) no. 6, left/right
7
Speaker terminal,rightchannel
8
Speaker terminal, leftchannel
9Mainsinput
10 Mainsswitch
11 Marking mainsphase
12 Audionet Link output
OUT
13 Earthconnector for turntable
14 Headphonessocket
15 Recording output
REC OUT
, left/right
16 Pre amplifer Output,
PRE OUT
left/right
1 10
15
7
11
12
13
14
16
9
8
2 3 4 5 6
ENGINEEREDANDHANDMADEBYIDEKTRON GMBH&CO. KG,BERLIN
,GERMANY
SAM20SE
PHONO

9
4Installationandpowersupply
Important
·Duringconnecting andremoving ofsourcesor amplifiers tothe
SAM 20SEall unitsofyouraudiosystem have tobeswitchedoffto
preventdamageoftheSAM 20 SEor anyoftheother connected
units.
·Pleasemake surethatallcablesare inabsolutebest conditions!
Broken shieldsor short-cutcablescoulddamage the SAM 20 SE
and/or any other connected unit.
4.1Placement
Important
·Itisrecommended to placethe SAM20 SEinto a high qualityrackor
onto a stable table.
·Do notexposetheunitto directsunlight.
·Do notcovertheventilation slots.
·Donotplace the SAM20 SEinclose rangetoheatsources likeradia-
tors.
·Donotplace the SAM20 SEon topofotherunits,especiallynoton
top ofpoweramplifiers,preamplifiers orsimilarthatproduce heat.
Both unitscould sufferdamage fromthermaloverload.
·Do notuse the unit in placeswhereitisexposed to vibrations.
·Donotplace the unitclosetoloudspeakers orintothecornerofaroom
whereitisexposed tohighlevelsofsonic energy,whichmightreduce
the sound qualityofthe unit.
4.2Mainsconnection
The mainsinput9 *ison thebackpanelofthe SAM20SE.Toconnectthe
unit tomainsusethe includedmainspowercord.Ifyou prefertouse adifferent
powercordmakesure thatit meetsthe specificationsforyourhome country.
*see numbersinsection'Overviewback panel'onpage8.

10
Important
·The electricalspecificationsofyour homecountrymustmeetthe
electricalspecificationsprinted ontothe back panel.
·TheSAM20 SEisaClass Iunit andmustbe earthed. Please ensurea
stableearthconnection. Phase('hot'pin)ismarked onthebackpanel
('PHASE')11 .
·Ifyou connectthemainspowercordpleasemakesurethatmains
switch10 atthe backpanelisswitched off.
·Neverpull the mainsplugwhilethe SAM20 SEisswitched on!Before
youpull the mainspowercordoff itssocket9 atthe backpanel,power
downthe unit tostand-bymode andswitch off the unit usingmains
switch 10 .
Onlyincasesofextended absence– likevacations–orifmassivetrouble
on the mainspoweristobe expected you shouldswitch off the SAM20 SE
fromthe mainsusingthe mainsswitch 10.Todisconnectthe unitcom-
pletelyfrommainspullthe mainsplug.
Tip
·The useofhighqualitymainspowercordscouldimprovesound qual-
ity. Askyourlocaldealerformore information.
4.3Orientation ofmainsplug
Thecorrectpolarizationofmainsisimportantforreasonsofaudioclarity
and stability.Pleaseconnectthe mainspowercordsothatthehotpinof
the wall outletisconnected tothe pinofthe mainsinput9 marked
'PHASE'11 .

11
5Inputs and outputs
Important
·During connecting andremoving ofsourcesor amplifierstothe
SAM 20 SEallunitsofyour audiosystemhavetobeswitched off
topreventdamageoftheSAM 20 SEoranyoftheother connected
units.
·Pleasemake surethatallcablesare inabsolutebest conditions!
Broken shieldsor short-cutcablescoulddamage the SAM 20 SE
and/or any other connected unit.
5.1Inputs
The SAM20 SEisequippedwithfourRCA inputs2 to5 and one bal-
anced (XLR)input1forconnectingsignalsourcesatline level.RCA
input6 isdedicated to connecta turntable.
Pleaseconnectthe leftand rightinputofthesamenumberprinted onthe
backpanelofthe SAM20SEtothe correspondingoutputofthesource
you would like to connectto the SAM20 SE.
5.2Speakerterminals
Connectyourspeakers totheterminals7and 8on theback panelofthe
SAM20 SE.You can usebanana plugsorspadesaswell assimplecable
ends. Lookoutforthe correctconnection ofyourspeakercables. Usually,
theterminalsofyourspeakersare marked '+'and '-'. The SAM20 SEuses
the samemarks.
Note
·Wrongspeakerpolarization will result in severe lossofsound quality.
·In case you wouldlike tobi-wire yourspeakerspleaseinsertthecable
to thetweetersfromtherearusingbananaplugsandmountthecables
tothe bass speakersfromthe side. Indoubtpleaseaskyourdealerfor
assistance.

12
Important
·Although theSAM 20 SEhasan effectiveprotectionsystemtopre-
ventdamage tothecircuits,switch off theunit whileworkingon
the speaker and/or audiocables.
·The nominalloudspeakerimpedance hastobe atleast4 Ohmsor
higher.
·Neveruse force ortoolstighteningthe terminalscrews.
5.3Preamplifier Output
TheSAM20 SEisequipped withapairofRCA preamplifieroutputsto
connecte.g. an additionalamplifierora subwoofer.
Pleaseusehighqualityinterconnectorstoconnectthe PREOUT 16 of
yourSAM20 SEwith an additionalamplifierorsubwoofer.
5.4Recording devices
You can connectone recordingdevice tothe SAM20 SEforrecordingand
playback.
Connectyourrecordingdevice (likeDATortape recorder) tothe recording
output REC OUT 15 ofthe SAM20 SE.Forplaybackpleaseconnect
yourrecordingdevice onlytoinputno. 5 IN 5 5 oftheSAM20 SE,if it
isalso connected tothe output REC OUT 15ofyourSAM20 SE. Ifyou
selectinputno. 5 IN 5 5 theoutput REC OUT 15 isswitched offtopre-
ventanyfeedbackloopsbetweenyourrecordingdeviceandthe
SAM20 SE.
Pleaseuseinputsno. 1 1 tono. 4 4 and no. 6 6 toconnectsourcesyou
liketorecordfrom.Withtheseinputstherecordingoutput
REC OUT 15 isalwaysactive.

13
5.5Phono
TheSAM20 SEisequippedwithaphonopreamplifierboard.Use thein-
putno.6 IN 6 6marked as PHONO toconnectyourturntabletothe
SAM20 SE.Connectthe earthwireofyourturntabletotheearthcon-
nector GND 13 .Forfurtherinformationon thephono preamplifierboard
pleasereferto section 'Phono 'on page 34.
Important
·Inputno. 6 IN 6 6mustonlybe used to connectaturntable.
·Inputno. 6 IN 6 6isnotavailableforBy-Pass mode (see section 'By-
Pass Mode'on page 24).
5.6Headphones socket
A6.3 mmheadphonessocket14 islocated atthe rearofyourSAM20 SE.
Thesignalatthissocketcan be switched onand offtoallowthe head-
phonestobe plugged inpermanently.Switchingiseasilydone on the front
panel. Pleaserefertosection 'Headphones'on page 21.
5.7Audionet Link
Foryourconvenience, theSAM20 SEcan switchon/offall otherAudionet
units(e.g.poweramplifiers) connected viaAudionetLinkbyasimple
touch on the remote controlorthe power keyon the frontpanel.
You onlyneed asimpleoptical'Toslink'cable. Connectthe AudionetLink
output Link OUT 12 ofyourSAM20 SEtotheAudionetLinkinputof
the unitto be controlled.

14
6Usage
All functionsofthe SAM20 SEaremicroprocessorcontrolled. Thisguar-
anteeshighestprecision, exclusivefunctions,easyhandlingandprotection
againstoperatingerrors.
6.1Powering up
Firstofall,pleasemakesureyourSAM20 SEisconnected correctlyto
mainspowerand toyoursignalsources(see section 'Installation and power
supply'on page 8 and 'Inputsand outputs'on page 11).
TheSAM20SEisastand-byunit.Pleaseoperatethe mainsswitch 10 on
the backpanel.The displayshowsawelcomemessageforabriefmoment.
Afterthatthe SAM20 SEisinstand-bymode.
Onlyincasesofextended absence(likevacations)orif massivetroubleon
the mainspoweristobe expected (e.g.thunderstorms) it isrecommended
todisconnectthe SAM20 SEfrommainspower.WhiletheSAM20 SEis
instand-bymode, operatemainsswitch 10 onthe back panel.Todiscon-
necttheSAM20 SEfrommainspowercompletely,you havetopull the
mainspowercord off themainsjack9 .
Important
·Beforeyou switch off theSAM 20 SEfrommains,powerdownand
discharge completelyallunitsconnected tothe outputsofthe
SAM 20 SE.
6.2Switching on and off
TopoweruptheSAM20 SEfromstand-by mode, pressthe power keyon
the frontpanel.TheSAM20 SEdisplaysthe message Waking up...Af-
tera shortmomentthe unitisin normaloperatingmode and readytouse.
Ifyou would like to switch off the unit, please press the power keyon the
frontpanel.The displayshowsthe message Going tosleep.. and unit
enters the stand-bymode.
Note
·Ofcourse, you mayswitchon/off the SAM20 SEwiththe Audionet
MetalRemoteControl.Fordetailed information pleaserefertosection
'AudionetMetalRemote Control'on page 29.

15
6.3Using Audionet Link
The SAM20 SEisequippedwithan AudionetLinkoutput
Link OUT 12 allowingyou toswitchon/offfurtherAudionetunits(e.g.
poweramplifiers orCD player) connectedviaAudionetLink(alsosee sec-
tion 'AudionetLink'on page 13).
Ifthe restofyourAudionetsystemisconnectedtoyourSAM20 SEvia
AudionetLink,alllinked unitswillbeautomaticallyswitchedon/offas
soon asyouswitchon/offyourSAM20 SEusingthe power keyon the
frontpanelorthe key SAM20 SE on theAudionetMetalRemoteControl.
Note
·Pleaseread section 'AudionetLink'on page13. Also, consulttheuser's
manualofyourAudionetcomponentsconnectedviaAudionetLinkfor
furtherinformation.
·Ifyou switch off yourAudionetchainusingAudionetLink,it isim-
portanttowaituntil all devicesareshutdownbeforeyou restartthe
system.
6.4Control elementson thefrontpanel
The frontpanelhasfourkeystocontroltheSAM20 SE(see section'Over-
viewfrontpanel'on page7).With thesekeysyou areable controlallfunc-
tionsaswellasallsetup optionsto adjustthe unitto yourpreferences(see
section 'Setup menu'on page 19).
power Usekeytoswitch on/offtheunit(see section 'Switching
on and off'on page 14).
set Press keyshortlytogettothesetupmenu. Withinamenu
item,press keyshortlytonavigatetothe subordinated
menu orto confirmand save a selected menu option.
Presskeyand holditforlongerthantwo secondsto step
backtothe higher-levelmenu ortodismiss aselected
menu option withoutsaving (seesection 'Setup menu'on
page 19).
down Press keytoreduce volume, selectpreviousinputchan-
nel(see section 'Inputselection'on page17)orchange
an option ofthe setup menu(see section'Setup menu'on
page 19).
up Presskeytoincreasevolume, selectnextinputchannel
(see section'Inputselection'on page17)orchangean
option ofthe setupmenu (seesection 'Setup menu'on
page 19).

16
6.5Volume control
WhiletheSAM20 SEisinnormaloperatingmode usekeys up and down
on the frontpaneltoadjustthe volume. up increases, down decreasesthe
volume.
The volumecontroloftheSAM20 SErunsina range from –80 dB (very
quiet) to +0 dB (veryloud)relative tothe levelofthe inputsignal.
Note
·Usekeys up and down alsotochangean optionfromthe setup menu
(see section'Setup menu'onpage19)aswellastoselectan inputchan-
nel(see section 'Inputselection'on page 17).
6.6Display
Inthe normaloperatingmode thedisplayprovidesthe followinginfor-
mation:
1Statusofthe loudspeakeroutputmode (seesection'Headphones'on
page 21).
2Statusoftheheadphonesoutputmode (seesection 'Headphones'on
page 21).
3Nameofthecurrentlyselected inputchannel,fullyuser-definable(see
section 'ChannelName'on page 26).
4Statusofthepreamplifieroutputmode (seesection 'Pre Output'on page
23).
5Numberofcurrentlyselected inputchannel,correspondstothenum-
berprinted abovethe inputjackon the backpanel(see section 'Over-
viewback panel'on page 8).
6CurrentvolumelevelindBrelativetothe inputlevel(see section'Vol-
ume control'on page 16).
Line Input 2
IN
2
-
32
dB
1
6
4
2
3
5

17
Assoonasyou enterthesetupmenu bypushingthe set key,the display
changestoshowinformationrelated tothe selected menu item.Forfurther
detailsrefertothe description ofeach menu iteminsection 'Setup menu'
startingfrompage 19.
Note
·After10minuteswithoutanyuserinteraction the'displaysaver'isin-
voked automatically.Thedisplaythen showsonlythe numberofthe
currentlyselected inputchanneland the currentvolume level.
6.7Inputselection
Pushthekey set on the frontpanelforless than twosecondstoenterthe
systemmenu. Thefirstmenu itemis Select Input.Presskey set
again. Nowselectthe desired inputchannelwiththe keys up and down.
The lastlineofthe displayprovidesthe numberand the (user-definable)
nameofthecurrentlyselectedinputchannel.Push set againtoactually
switch tothe desired inputchannel.
Note
·Leave theinputselectionfunction byholdingdownthe set keylonger
than 2 seconds.
·Usingthe AudionetMetalRemote Control, selectan inputchannelby
usingthekeys CH+ and CH- toswitch tothenextorpreviousinput
channelwithoutusingthe Select Input function.
·Ifyou dedicatedone ofthe inputchannels1to5totheBy-Pass func-
tion(see section'By-Pass Mode'on page24),thisinputchannelis
marked by'*'afterthechannelnumberinthedisplayduringinputse-
lection toremind you thatswitchingtothisinputchannelwillactivate
the By-Pass Mode.

18
6.8Muting
Note
·Themutefunction isonlyavailableon the AudionetMetalRemote
Control.
Presskeyonthe AudionetMetalRemoteControltomute orun-mute
yourSAM20 SE.
Thedisplayinformsthe userofamutedunitwiththe text mute.Even if
thebrightnesslevelissetto Off,thetextisdisplayed (see section'Display'
on page 22).
To un-mute the SAM20 SEpresskeyagain.
Note
·Whilethe unitismuted, youmayofcourseselectadifferentinputchan-
nelas described above. Butthe SAM20 SEwill staymuted until you
press thekeyagaintoun-muteand restorethe originalvolume
level.
·Ifyou turnup the volumebyusingthe key up or VOL+,whilethe
SAM20 SEismuted, the mutingfunction will be deactivated and the
newvolume levelset.

19
7 Setup menu
Toadjustthe SAM20 SEto yourpreferences, pleaseuse the setupmenu.
Pushthekey
set
onthefrontpanelshortlytoenterthesetupmenu. Push
the key
set
againforlessthan twosecondstonavigatetothe subordinate
menu, toenterthe selected menu itemortoacknowledgeand savethe cur-
rentlyselected setup option.
Holddown thekey
set
forlongerthan 2 secondstogo backto the higher-
levelmenu ordismiss the currentmenu option withoutsaving
Presskey
up
tomovethe menu itemmarkerone step upwardsortochange
an option.
Presskey
down
to movethe menu itemmarkerone stepdownwardstothe
previousmenu itemortochange an option.
The currentlyselected menu itemisenclosed on the left and on the right
bythe menu itemmarker.Usekeys
up
and
down
onthefrontpaneltomove
the menu itemmarkertothe desiredmenu item.Toselectamenu item
presskey
set
shortly.
Totherightofeach menu itema symboldenotes,ifthe itemisa submenu
oramenu option .Navigatethroughanysub menu withthesame
keysasthrough the main menu.
Ifyou opened amenu option, usethe keys
up
and
down
toselectthede-
sired setting.Press key
set
shortlytoconfirmand savethe selection. In
caseyou wouldliketoleavea(sub-)menu ordismissaselectedsetting
withoutsaving, thenhold down thekey
set
forlongerthan 2 seconds.The
SAM20 SEwill returntothe higher-levelmenu.
Note
·Ifyou makeno adjustmentsforlongerthan 12secondsthe SAM20 SE
willautomaticallyleavethe setup menu and returntonormaloperating
mode.
Global Setup ◄
Factory Default Reset
Device Info
2 of 4
Menu itemmarker Symbol
'submenu'
Menu position Symbol
'menu option'
Menu item

20
·Whileyou arein the setup menu the displaybrightnessissetto100%
forbetterreadability.Afterleavingthe setup menu the displaybright-
ness isautomaticallyresetto itsuserselected level.
·Ifyou powerdownthe SAM20 SEtostand-bymode allsettingsare
stored automaticallyinthe non-volatilememoryofthe unit.Even after
disconnectingfrommainspowertheSAM20 SEwill still remember
yoursettings.
In the followingalloptionsofthe setup menu are explained in detail.
7.1Overviewsetup menu
The setup menu ofthe SAM20 SEconsistsoffourmenu items.The menu
item Global Setup isasub menu containing6furthersetup options.
Thefollowingtable give anoverviewofthe whole menu structure.
Select Input Selectthedesiredinputchannel
Global Setup Mainsetupmenu
Headphones Headphones mode
Display Adjustdisplaybrightness
Pre Output Switchpreamplifieroutputon/off
AutoStart Setup automaticstart-up mode
By-Pass Channel SelectinputchannelforBy-Pass mode
Channel Name Edit nameofinputchannel(max.14 characters)
FactoryDefault Reset Resetdevice tofactorydefaults
Device Info Getinformation on device
7.2SelectInput
Please referto section "Inputselection"on page 17.
Table of contents
Other Audionet Amplifier manuals

Audionet
Audionet PRE User manual

Audionet
Audionet AMP II G2 User manual

Audionet
Audionet PREI G3 User manual

Audionet
Audionet AMP IV User manual

Audionet
Audionet SAM V2 User manual

Audionet
Audionet DNA User manual

Audionet
Audionet PRE I G2 User manual

Audionet
Audionet HEISENBERG User manual

Audionet
Audionet SAM G2 User manual

Audionet
Audionet WATT User manual

Audionet
Audionet AMP VII User manual

Audionet
Audionet PRE G2 User manual

Audionet
Audionet DNA User manual

Audionet
Audionet AMP III User manual

Audionet
Audionet AMP V User manual

Audionet
Audionet PAM G2 User manual

Audionet
Audionet MAP User manual

Audionet
Audionet AMP III User manual

Audionet
Audionet STERN User manual

Audionet
Audionet AMP IV User manual