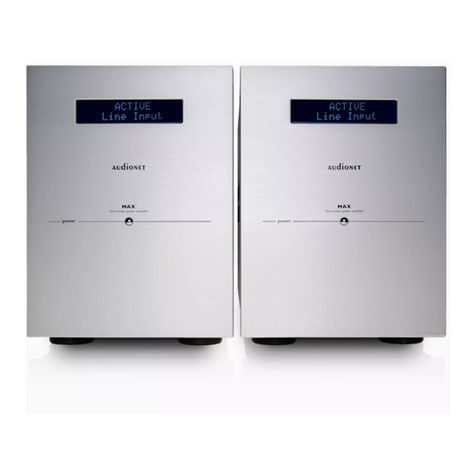
Audionet HEISENBERG User manual

HEISENBERG
Ultimate Linear Mono Power Amplifier
User’s Manual
HANDMADE
IN BERLIN,
GERMANY


3
Contents
1!Preface 4!
1.1!Included items 5!
1.2!Transport 5!
2!Overview front panel 6!
3!Overview back panel 7!
4!Installation and power supply 8!
4.1!Placement 8!
4.2!Mains connection 9!
4.3!Orientation of mains plug 10!
5!Inputs and outputs 11!
5.1!Inputs 11!
5.2!Speaker terminals 11!
5.3!Bi-Wiring 12!
5.4!Audionet Link 12!
6!Operating 14!
6.1!Powering up 14!
6.2!Switching on and off 14!
6.3!Using Audionet Link 15!
6.4!Auto Power Off function 15!
6.5!Operation indicator 16!
7!Protection system 17!
8!Setup 19!
8.1!Input Select 19!
8.2!Auto Power Off 20!
9!Technical information 21!
10!Security advice 23!
11!Technical data 24!

4
1 Preface
The Audionet Scientists Team and its leading scholars congratulate you on your
purchase of this unit, sending cheers directly from our research and development
center.
Audionet components are no marketing products, they are authentic. Conceived
and developed with scientific inspiration, professional engineering expertise and
a deep passion for achieving the truly perfect sound. They are unique creations
designed to inspire musical enjoyment and have an excellent reputation amongst
all connoisseurs throughout the world. Each and every one of our precision-man-
ufactured devices is individually crafted by hand at our new Berlin headquarters.
Built by audiophiles for audiophiles. With the utmost precision and total control
of each and every perceptible detail.
Even if you're an experienced aficionado of ultra-highend components, please
start listening to your new Audionet HEISENBERG by reading this manual care-
fully before you plug it in. This will ensure you'll enjoy all functions of this unit
without any compromise or potential disruption.

5
1.1 Included items
You will find the following items included:
• Mono power amplifier HEISENBERG
• Power cord
• 1 Toslink cable
• Cover bag
• Gloves, 2 pairs
• User's manual (that you are currently reading)
• Red warning note
• Fumigation certificate
1.2 Transport
Important
• Only transport the HEISENBERG in the original packaging.
• Always use the provided cloth bag to prevent scratches on the casing.
• Please allow the HEISENBERG to adapt to the climatic conditions in your
listening room before you switch the unit on for the first time after the
transport.

6
2 Overview front panel
I
2
power
key
operation
indicator

7
3 Overview back panel
3balanced (XLR) input
4
line (cinch/RCA) input
5
speakers output 1
6
speakers output 2
7
input switch
8‘Auto Power Off’ switch
9‘Audionet Link’ input
10 ‘Audionet Link’ output
11 mains input
12 ‘mains phase’ marking
3
12
4
5
6
11
8
7
9
10

8
4 Installation and power supply
Important
• For connecting or removing loudspeakers and/or the preamplifier, your
HEISENBERG must be switched off to prevent damage to the amplifier or the
connected units.
• Please make sure that all cables are in absolute best conditions! Broken shields
or short-cut loudspeaker cables could damage the speaker, the HEISENBERG
and/or any other units connected.
4.1 Placement
Your Audionet HEISENBERG has the perfect format for placing it right beside
your speakers. It is recommended to place the HEISENBERG into a high quality
rack or onto a stable table.
Important
• Please find a place for your Audionet HEISENBERG that is sufficiently venti-
lated to allow the heat to dissipate.
• Do not expose the unit to direct sunlight.
• Do not place the HEISENBERG in close range to heat sources like radiators.
• Do not cover the ventilation slots.

9
4.2 Mains connection
The mains input * is on the back panel of the HEISENBERG. Use the included
power cord to connect the unit to mains. If you prefer to use a different power
cord, make sure that it meets the specifications for your home country.
Important
• The electrical specifications of your home country must meet the electrical
specifications printed onto the back panel.
• The HEISENBERG is a Class I unit and must be earthed. Please ensure a stable
earth connection. The phase ('hot' pin) is marked on the back panel
(PHASE) .
• Never pull the mains plug while the HEISENBERG is switched on! Before you
disconnect the power cord off its socket at the back panel, power down the
unit to stand-by mode first.
The HEISENBERG should only be switched off from the mains in cases of ex-
tended absence (like vacations) or if massive trouble on the mains power is to be
expected. Pull the mains plug off the mains input socket to completely discon-
nect the unit from mains.
Tip
• The use of high quality power cords (e.g. Audionet P1000) could improve
the sound quality of your Audionet HEISENBERG. Please refer to our website
(www.audionet.de) or consult your local Audionet retailer for further infor-
mation.
*Please refer to the sections "Overview front panel" on page 6 and "Overview back panel" on page 7.

10
4.3 Orientation of mains plug
The correct polarization of mains is important for reasons of audio clarity and
stability. Please connect the power cord so that the hot pin of the wall outlet is
connected to the pin of the mains input marked with 'PHASE' .

11
5 Inputs and outputs
Important
• For connecting or removing loudspeakers and/or the preamplifier, your
HEISENBERG must be switched off to prevent damage to the amplifier or the
connected units.
• Please make sure that all cables are in absolute best conditions! Broken shields
or short-cut loudspeaker cables could damage the HEISENBERG, the speak-
ers and/or any other connected unit.
5.1 Inputs
At first, connect your preamplifier alternatively to inputs or of the HEISEN-
BERG. You can use both a Cinch or a balanced (XLR) cable. For cable lengths
exceeding 10 m we recommend the use of balanced cables.
Note
• Do not forget to select the correct input that you are using with the input
selector switch on the back panel of the unit. Switching the inputs is pos-
sible during operations.
5.2 Speaker terminals
Connect your speakers to the rhodium plated terminals on the back panel of the
HEISENBERG. You may use both banana plugs or spades as well as simple cable
ends. HEISENBERG features two electrically identical speaker terminals
and , which you may use alternatively. In case you would like to bi-wire your
speakers, please refer to section 'Bi-Wiring' on page 12.
Fasten the speaker terminals until the torque stop clicks distinctly. The torque
stop guarantees for the right fastening torque at all times to ensure a safe contact.

12
Note
• Look out for the correct connection of your speaker cables. Usually, the ter-
minals of your speakers are marked '+' and '-'. The HEISENBERG uses the
same marks.
• Wrong speaker polarization will result in severe loss of sound quality!
Important
• Although the HEISENBERG has an effective protection system to prevent
damage to the circuits, always switch off the unit while working on the
speaker and/or audio cables.
• The nominal loudspeaker impedance should be 2 Ohms or higher.
• Never use force or tools to tighten the terminal screws.
5.3 Bi-Wiring
If your speakers support bi-wiring, use two separate cables to connect each
speaker to the output terminals and of the HEISENBERG. Impulse response
and spatiality may improve significantly.
Note
• Please mind the correct polarization of the speakers!
5.4 Audionet Link
For your convenience, the HEISENBERG can be controlled remotely by one of
Audionet's preamplifiers (e.g. STERN) using the 'Audionet Link' interface.
You only need a simple optical 'Toslink' cable to connect the 'Audionet Link'
output of your Audionet preamplifier to the 'Audionet Link' input IN of the
HEISENBERG.

13
In case you would like to automatically switch on/off further Audionet units in
your system (e.g. a second HEISENBERG) using the 'Audionet Link' interface,
please connect the 'Audionet Link' output OUT of your HEISENBERG to the
'Audionet Link' input of the next Audionet unit (e.g. power amplifier, CD player
etc.) using a simple 'Toslink' cable.
Note
• The 'switch on' signal is issued to all further Audionet units daisy chained to
the 'Audionet Link' output of your HEISENBERG with a little delay to avoid
all units switching on at the same time – which could cause an overload of
your mains fuse.

14
6 Operating
6.1 Powering up
First of all, please make sure your HEISENBERG is connected correctly to your
preamplifier, speakers and mains (refer to sections 'Installation and power supply'
on page 8 and 'Inputs and outputs' on page 11).
The HEISENBERG is a stand-by unit. Please insert the power cord into the mains
input socket on the back panel. The operation indicator (light ring around
the key on the front panel) flashes white - red - white once. Afterwards the
HEISENBERG is in stand-by mode.
The HEISENBERG should only be switched off from the mains in cases of ex-
tended absence (like vacations) or if massive trouble on the mains power is to be
expected. Pull the mains plug off the mains input socket to completely discon-
nect the unit from mains.
Important
• Never pull the power cord while the HEISENBERG is switched on! Before
you disconnect the power cord, power down the unit to stand-by mode first.
6.2 Switching on and off
Press the key on the front panel to power up the HEISENBERG from stand-
by mode. While powering up, the operation indicator will flash slowly in white
colour. The unit is ready to play back music when the operation indicator
shows white light permanently. HEISENBERG is in normal operating mode now.
If you would like to switch off the unit, please press the key on the front
panel. The operation indicator will flash in short white pulses until the power
supply of the HEISENBERG is discharged completely. The unit is in stand-by mode
when the operation indicator goes dark permanently.

15
Note
• While powering down, you may re-start the HEISENBERG by pressing the
key on the front panel. The operation indicator flashes slowly white
until the unit is ready to play back music again.
6.3 Using Audionet Link
If your HEISENBERG is connected to an Audionet preamplifier via 'Audionet
Link', use the preamplifier (e.g. with its remote control) to automatically switch
the HEISENBERG on or off (and all other Audionet units connected via 'Audionet
Link').
For setting up the necessary connections please refer to section 'Audionet Link'
on page 12.
Note
• The 'switch on' signal is issued to any further Audionet unit daisy chained to
the 'Audionet Link' output of your HEISENBERG with a little delay to avoid
all units switching on at the same moment – which could otherwise cause an
overload of your mains fuse.
• You may of course switch your HEISENBERG on or off at any time by using
the key on the front panel independently from the 'Audionet Link' in-
terface.
6.4 Auto Power Off function
The Audionet HEISENBERG is equipped with an input signal detection circuit
('Auto Power Off' function). HEISENBERG will shut down automatically ('Auto
Power Off' function) if no input signal is detected for a period of 20 minutes. To
activate this feature please refer to section 'Auto Power Off' on page 20.

16
Note
• Because of the nature of stereo or multi-channel signals it may occur that the
HEISENBERGs in your setup will switch off at a different point of time ac-
cording to each input signal.
• Operate the HEISENBERG as usual. Of course, you are still able to switch
on/off the unit manually.
6.5 Operation indicator
The operation indicator is a ring of light around the key on the front
panel. It indicates the current operating mode (see section 'Switching on and off'
on page 14). In case of an error it displays the code of the detected malfunction
(see section 'Protection system' on page 17).
The indications of all important operating modes are:
indication
duration
meaning
white – red – white
fast flashing
Response after connecting the unit
to mains on the back panel. Unit is
in stand-by mode afterwards.
flashing white
slow flashing
Unit powers up from
stand-by mode.
permanently white
permanently on
Normal operating mode.
white flashes
short flash pulses
Unit powers down to stand-by
mode, discharging power supply.
no indication
permanently off
Unit is in standy-by mode
or switched off.
red flashes
short flash pulses
Error detected: unit powers down,
discharging power supply. Error
code will be indicated afterwards.
red flash code
flashes with pause
before repetition
Error indication: the error number
is flashing in red according to the
detected error. The sequence is
repeated after a pause until the
key is pressed.

17
7 Protection system
The Audionet HEISENBERG as well as the loudspeakers are protected by a com-
plex protection circuitry. In case of a malfunction the operation indicator will
flash the number of the error in red, i.e. you simply have to count the number of
red flashes to determine the error number. It is paused for a longer period before
the flashing error number is repeated, making it easier to count the number of
flashes. The error number indication is repeated until the HEISENBERG is
switched off by pressing the key on the front panel.
Example:
The operation indicator flashes:
VVVVVVVVVVVV...
4 flashes are counted after each pause. This corresponds to the error number 4.
The following table is an overview on all error numbers and their meaning:
error
number
error
possible causes
1
overload
Short circuit or defect in loudspeaker.
2
DC
voltage
High level of DC voltage at the output:
defective preamplifier or source unit.
3
high frequency /
clipping
High frequency oscillation: defective preamplifier.
Clipping: amplifier or preamplifier are overdriven.
4
overheating
Cooling slots covered.
5
power
failure
(Short) blackout of mains power.
6
pos. pre-voltage
missing
Fuse blown or different fault in power supply:
service case.
7
neg. pre-voltage
missing
Fuse blown or different fault in power supply:
service case.
8
pos. and neg. pre-
voltage missing
Fuse blown or different fault in power supply:
service case.
9
mains voltage
error
Mains voltage is out of the permitted range of +/-
17% of nominal mains voltage; the unit switches
off for security reasons or does not start up.
10
multiple
errors
Multiple errors or unknown error detected.

18
Important
• As soon as an error is detected by the protection system, HEISENBERG pow-
ers down. The operation indicator shows short red pulses while the power
supply is discharged – in contrast to the normal discharging, indicated by short
white flashes. After the discharging is completed, the error code is flashed
out by the operation indicator as described above.
• Remove the cause of the error prior to switching the HEISENBERG on again!

19
8 Setup
You are able to adjust the HEISENBERG to your preferences by using the two
switches on the back panel of the unit (see section 'Overview back panel' on
page 7).
List of settings to be adjusted according to your preferences:
• Input selection: balanced (XLR) or Cinch (INPUT SELECT)
• Auto Power Off function: automatic power down (AUTO POWER OFF)
8.1 Input Select
Select the input that you connected your preamplifier to:
LINE
Select this option if you connected your preamplifier to the
Cinch input of the HEISENBERG.
XLR
Select this option if you connected your preamplifier to the
balanced (XLR) input of the HEISENBERG.
Tip
Pinning of the balanced (XLR) input:
The pins are marked with the same number as in the image above.
1: ground
2: positive
3: negative

20
8.2 Auto Power Off
The HEISENBERG will power down automatically (Auto Power Off function)
when no input signal is detected on the selected input for a period of 20 minutes.
NEVER Select this option if you would like to deactivate the
Auto Power Off function. The HEISENBERG will not shut down
automatically if no signal is detected. You have to power down
the unit to stand-by mode manually.
20 MIN If no input signal is detected for longer than 20 Minutes, the
HEISENBERG will shut down automatically.
Table of contents
Other Audionet Amplifier manuals

Audionet
Audionet PRE G2 User manual

Audionet
Audionet AMP V User manual

Audionet
Audionet STERN User manual

Audionet
Audionet AMP II G2 User manual

Audionet
Audionet AMP VII User manual

Audionet
Audionet AMP V User manual

Audionet
Audionet DNA User manual

Audionet
Audionet PAM G2 User manual

Audionet
Audionet DNA User manual

Audionet
Audionet DNA User manual

Audionet
Audionet SAM G2 User manual

Audionet
Audionet AMP IV User manual

Audionet
Audionet SAM 20 SE User manual
Audionet
Audionet AMP 1 User manual

Audionet
Audionet PRE1 G3 User manual

Audionet
Audionet AMP II MAX User manual

Audionet
Audionet HUMBOLDT User manual

Audionet
Audionet MAP User manual

Audionet
Audionet SAM G2 User manual
Audionet
Audionet DNA User manual