Audionet SAM V2 User manual

Stereo - Amplifier
User’s Manual

2
User's Manual
Audionetis proud to welcomeyou in theworld of Germanhigh-end!
Your AudionetSAM (= StereoAMplifier) is designedfor naturaland
audiophilemusicreproduction in conjunction with safeoperation and
perfectlong-termstability. TheSAM combinesexcellent high-frequency
capabilities with total control of your loudspeakers.
We strongly recommend to readthemanualand precautions carefully
first. TheSAM is acomplexunit and offers various uncommon features,
which enableyou to adjust thedevice to your personal preferences.
In caseof difficultiespleasedo not hesitateto contactyour dealeror our
factory directly.

3
Installation and powersupply
Pleasemakesurethatyour AudionetSAM is installedataplace thatis
sufficiently ventilated to allow theheat to dissipate.
Connectthepowerjackattherearto your wall outlet. You should either
usetheprovidedpowercord or anotheronemeeting your homecountry's
specifications. Tuning with "audiophile"powercords canleadto im-
proved sound field. Pleaseask your dealer for assistance.
Thepowerspecifications attherearmust meetto your homecountry's
specifications. TheSAM is aClass Isystemand must beearthed. Please
ensureastableearth connection.
TheAudionetSAM indicatesawrong polarization of themains lead. If
you read: ”Attention: Mains Phase incorrect”whenpow-
ering up, switch off theSAM and flip theplug in your wall outlet.
Thecorrectpolarizing of mains is important for reasons of audio clarity
and stability.
Placement
Installation
Mainsphase recognition

4
Overview
For adding or removing connections your SAM must beswitchedoff or
at least thevolumehas to beturned down completely.
Your SAM is equippedwith 6high-levelRCA inputs marked1..6. The
inputs 2..5 areof thesamekind, howeverinput 6is reservedfor re-
cording systems, suchastapedecks or DAT recorders (see below). In the
caseyou purchasedtheoptionalphono modulepleaseuseinput 1for
connecting your turntable.Otherwiseinput 1canbeusedasaregular
input.
Pleaseconnectyour audio sourcesto theinputs of your AudionetSAM.
Do not careabout theorderbecauseit is possibleto assign dedicated
names to theinputs later on.
Thelineout of atape-, video- or DAT-recorderhasto beconnectedto
input 6. For this unit theSAM delivers anoutput signalatthesockets
REC-OUT. Connect this output to thelinein of your recorder.
If therecorderis connectedto input 6therecorder will beprevented from
recording itself. For input 6 theREC-OUT is disabled (muted).
If you connectedtherecorderto input 3, for instance,therecorderwould
getits own output signalroutedbackon theinput. If therecorderis set
into record modethis could causedangerous feedback oscillations!
In caseyou purchasedtheoptionalphono modulepleaseuseinput 1for
connecting your turntableasmentionedabove.Additionally theturntable
chassis hasto beconnectedto theSAM'searth screwlabeled”GND”to
prevent hum.
Thephono modulefits perfectly to all MM- and MC-systemsavailable.
It offers independent settings of theparameters gain, input resistance and
input impedance.For detaileddescription pleasereferto themanual
shipped with themodule.
Inputs
Recorders
Turntable
Connecting thespeakers

5
Connecttheleft and right speakers to theappropriategold platedWBT
terminals attherear. Pleasemakesurethattheredoutputs (+) of the
SAM areconnectedto thepositiveinputs of theloudspeakers (usually
red) and thewhiteoutputs (-) areconnectedto thenegativeloudspeaker
inputs (usually whiteor black).
Wrong polarization will result in severeloss of sound quality!
Thenominal loudspeaker impedance must be4 ohms or higher!
Although theSAM hasaprotections circuit to prevent damageof the
systemalways switchoff theunit whileworking on theloudspeakerca-
bles. Pleasemakesurethatall cablesarein absolutebest condition. Bro-
kenshields or short-cut loudspeakercablescould damageloudspeakers
or theSAM! Never useforce or tools for tightening theterminal screws!
In caseyou want to useanexternalpoweramplifierfor bi-amping pur-
posesconnectthe”Pre-Out”outputs attherearof theSAM to theinputs
of your externalpoweramplifier. Beforeusing you haveto enablethem
by selecting ”active” for the”Pre-Out”option in thesystemsetup menu
(see ”Systemsetup”). The”Pre-Out”output deliverasignalcontrolledby
the”volume”knob to drivetheexternal power ampilfier.
For bi-wiring theloudspeakers with your AudionetSAM pleaseusetwo
loudspeakercables. Insert thecableto thetweeters fromtherearusing
bananaplugs and mount thecablesto thebass speakers fromtheside.In
doubt pleaseask your dealer for assistance.
A6.3 mm headphonejackis locatedattherearof your SAM. Thesignal
atthis socketcanbeswitchedon and off to allow theheadphonesto be
pluggedin permanently. Switching is easily donefromthefront using the
”set”button. Pleasereferto theparagraph "Programming of specialfea-
tures".
Pleasebeawareof listening musicviaheadphonescanseriously damage
your ears! Control thevolumeatthefront so thatalevelof 95dB SPLis
not exceeded. Theprogramcan start suddenly!
Bi-Amping
Bi-Wiring
Headphones

6
Operating
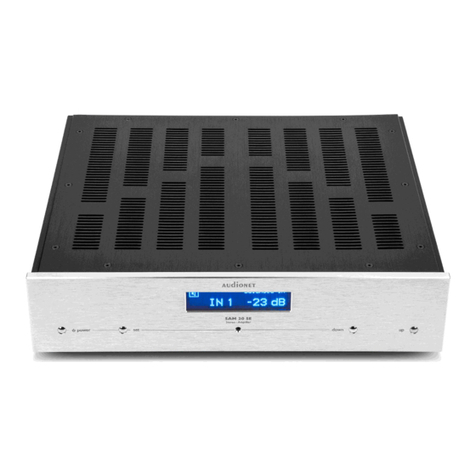
At first pleaseput themains switchattherearof theSAM to position
"1". Theswitchis locatedabovethemains socket. Afterasort time
”Audionet”is displayed indicating thestand-by mode.
For switching your SAM on and off pleaseusethe”power”button atthe
front panel. Themain switchdoesnot needto beusedunless you are
absent for along time.
Turn theknob ”volume”atthefront panelto adjust thevolumelevel. The
volumeis indicatedin dB in thedisplay. Therangeis -80..0dB, where
-80dB is thegreatest possibleattenuation. 0dB means maximumvolume.
Pleasemakesurethatthevolumeis turneddown (counterclockwise)be-
foreyou switch on your SAM thefirst time!
Pleasechooseyour input channelwith theknob ”input”atthefront
panel. Theinputs areswitchedby precisegold platedrelays. You can
perceivetheir ”clicks”fromwithin theunit.
Thecurrent input is shown by thedisplayin numberplus text form.The
text can beadjusted to your preferences (see below).
Using theoptionalremotecontrol you cancontrol all functions of your
SAM fromadistance of up to 10 meters. The”set”function is operated
using short and long keypresses. To selectthechannels 7and 8(digital
inputs if DAC moduleis mounted) pleasepress thekeys 5and 6long
respectively.
Theremotecontrol offers anadditionalfunction ”mute”.Afterpressing
the”mute”keythevolumeis reducedto -80dB automatically. Press this
key again to get back to theprevious volume.
Power
Volume
Inputselection
Remotecontrol

7
Programming ofspecial features
Your AudionetSAM is adjustableto meetyour personalrequirements
using acomputercontrolledmenu. Thesettings remain activeevenwhen
this unit is switched off or disconnected fromthemains.
In detail therearethefollowing possibilities:
·Output selection: Speakers, headphones or both
·Adjust brightness of display (also switching it off)
·Individualselection of atext for eachinput (up to 14 characters in
length)
·Auto-power-on when SAM gets mains supply (for timer usage)
·Enable/DisablePre-Out outputs and digitalinputs 7and 8, if optional
DAC board is mounted
·Choosebetween two texts for stand-by-mode.
Thesettings frequently usedarereachedby ashort keypress on ”set”.
Thenpleaseusethe”input”knob or thevolumeup and down keys on the
remotecontrol and follow thediagrambelow:
Select by short "set"Select by "input"
SET OUTPUT Speakers Speakersonly
Headphones Headphonesonly
Seaker+Phones both
SET DISPLAY 100% Select display
80% brightnes *)
50%
25%
off Display off
If nochangesare madefor10 seconds, yourSAMwill automatically
exit theprogramming menu.
Overview
Usersetup

8
WARNING:
Long termusageof thedisplaysetto maximumbrightness (setting
100%) maycauseextendedsigns of wearresulting in adecayof contrast
or brightness of individualdots in thedisplay. Do not usethedisplay
with abrightness sethigherthanthefactory default setting of 50% overa
longer period of time
With along keypress on ”set”you getto into theedit modefor eachin-
put names. A“^”marks thecurrent characterto bechanged. Turn the
“input”knob or thevolumeup and down keys on theremotecontrol to
chooseacharacter. Press ”set”shortly or the“mute”keyon theremote
control to movethe“^”onestep to theright.
Usethenumerickeys on theremotecontrol to directly chooseaninput
whileediting its name.
For further systempreferences usealong key press on ”set”.
Thesystemssettings usedless frequently arereachedby leaving thetext
edit modewith along keypress on ”set”.Thenpleaseusethe”input”
knob or thevolumeup and down keys on theremotecontrol and follow
thediagrambelow:
Select by short "set"Select by "input"
SET PRE-OUT active Pre-Out active
off Pre-Out off
SET AUTOSTART active SAMwill power on automati-
cally on mainson (for timer
use)
off SAMgoesinto stand-by on
mainson
SET DAC-OPTION available DAC-Board available
missing DAC-Board missing
SET OFF-TEXT AUDIONET Choose between two textsto
be displayed in stand-by-mode
If nochangesare madefor10 seconds, yourSAMwill automatically
exit theprogramming menu.
Editnameforinputs
System setup

9
Precautions
·Prevent children playing with plastic bags!
·Please store and operate this unit in a dry room at reasonable
room temperature!
·Avoid moisture or any liquid to get into this unit!
·Set up this unit in a free position. Do not cover the top!
·Do not open the case! No user serviceable parts inside.
·Unauthorised opening voids warranty!
·Do not short-circuit the output terminals!
·Please use a dry cloth for cleaning!
We would liketo wish you many exciting listening experienceswith
your Audionet products!

10
Technical Data
Function High-End modularstereo amplifier
Power 2 x 110 Watt into 8 Ohms
2 x 200 Watt into 4 Ohms
Freq. response 0 -500.000Hz (-3dB)
Damping factor typ. 1000 at 100Hz, (8 Ohms)
Distortion spectrum k2 typ. -100dB, k3 typ. -120dB, at 25W/4 Ohms
Noise > 112dB (A)at10VRMS
Channel separation > 90dB for1kHz
Input impedance 10kOhms, 150pF
Inputs 6 x LINE IN, Cinch/RCA, gold plated
2 x DIGITAL IN, optional
Outputs 1 x REC OUT, forrecorders
1 x PRE OUT, forexternal poweramplifiers
Speakers output WBT terminals, gold plated
Headphones out 1x 6,3mm, stereo, 32..600 Ohms (rearside)
Powersupply 220..240 Volts / 50..60 Hz
5WStand-By, 700Wmax.
Dimensions 430mm x 110mm x 360mm (WxHxD)
Weight 16kg
Finish Front brushed aluminum, 10mm thick
(natural orblack elox)
Knobs and keys Aluminumnatural orblack
Top brushed aluminumplates, black
Chassis 2mm steel, black
Options Massive remote control forall functions,
Phono plug-in module (MM and MC)
D/A-converterplug-in module
audionet is a trademark of Idektron GmbH & Co KG
Engineered and produced by:
Idektron GmbH & Co. KG, Herner Str. 299, Gebäude 6, 44809 Bochum, Germany
www.audionet.de
Table of contents
Other Audionet Amplifier manuals

Audionet
Audionet DNA User manual

Audionet
Audionet AMP IV User manual

Audionet
Audionet AMP VII User manual

Audionet
Audionet MAP User manual

Audionet
Audionet AMP 1 User manual

Audionet
Audionet SAM G2 User manual

Audionet
Audionet PRE G2 User manual

Audionet
Audionet DNA User manual

Audionet
Audionet Amp I V2 User manual

Audionet
Audionet PREI G3 User manual

Audionet
Audionet PRE1 G3 User manual

Audionet
Audionet SAM G2 User manual

Audionet
Audionet PAM G2 User manual

Audionet
Audionet AMP IV User manual

Audionet
Audionet PAM G2 User manual

Audionet
Audionet STERN User manual

Audionet
Audionet AMP V User manual

Audionet
Audionet DNA User manual

Audionet
Audionet PRE I G2 User manual

Audionet
Audionet AMP III User manual