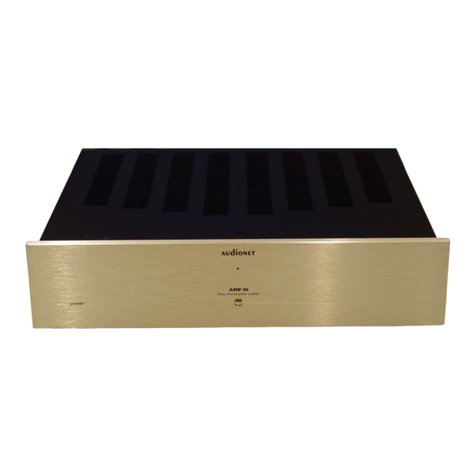
Audionet AMP II G2 User manual

audionet
amP II G2
Mono -Amplifier
Owner'sManual

2
Owner's manual
TheAudionet-Teamwouldliketocongratulateyou topurchasingthe
AudionetAMPII G2!YourAudionetAMPII G2isdesignedforabso-
lutelynaturalmusicreproduction athighestuser comfortembeddingtotal
systemsecurity.
Pleasereadthismanualbefore firstusetomakesure thatyou are ableto
useall provided functions ofyournewamplifier.
Incaseofoccuringquestions pleasedo nothesitatetocontactyourlocal
Audionetdealer orourfactorydirectly.

3
Setting up yoursystem
YourAudionetAMPII G2havetheperfectdimensions tobeplacednear
yourspeakers. ButpositionedsidebysidebothAMPII G2are 43 cmin
width (standard width).
Do notcover thetop to preventtheamplifiers fromoverheating!
Pleaseconnectthepower jackattherear toyourwall outletusingasuit-
ablepower cord. Usinghighqualitypower cords mayincreasesound
quality. Pleaseconsult you localAudionetdealer.
Thevoltagespecifiedattherear ofyour AMPII G2mustmatchyour
mains specifications. TheAMPII G2isaClass Iunit and has tobe
earthed.
Thecorrectpolarization ofmains isimportantforreasons ofaudioclarity
and stability.Pleasemakesure thatthepinlabled"Phase"atyourAPC is
connectedtothe"hot"pinofyourwall outlet.TheAudionetAMPII G2
indicatesawrongpolarization ofthemains lead. Ifyou read:”Atten-
tion: Mains Phase incorrect”whenpoweringup, switchoff
theAMPII G2 and flip theplugin yourwall outlet.
Placing
Powerconnections
Mainsphase recognition

4
Inputs and outputs
ForconnectingorremovinganyunitstheAMPII G2mustbeswitched
off.
Pleasemake surethatall cablesareinabsolutebestcondition. Broken
shields or short-cutloudspeakercablescoulddamageloudspeakers or
theamplifiers!
Atfirstpleaseconnectyourpre amplifier totheinputsofyourAMPII
G2. Foraudioinputyou canusebalanced(XLR)aswell asunbalanced
(cinch)cables. Forconnections longer than10 mwerecommend bal-
anced cables.
Pleasedon'tforgetto activatetheselected inputin thesetmenu.
Nowconnectyourspeakerstoonepairofthegoldplatedoutputjacks of
yourAMPII G2. You mayusepure wires or"banana"plugs.
Check thepolarization ofthespeakers cables:
Usuallythespeaker jacks are labeled"+"and "-".You will find thesame
labelatyourAMPII G2.
Wrong polarization will lead to severeloss ofsound quality!
Thespeaker impedance mustnotbeless than 2
W
!
Though your AMPII G2iseffectivelyprotectedagainstshortedspeaker
jacksit has tobeswitchedoff whileworking on speakers and speaker
cables!
YourAudionetAMPII G2supportsbi-wiringofloudspeakers. Connect
yourspeaker withtwoseparatecablestoeachAMPII G2. Usingthebi-
wiringmethod toconnectyourspeakers can lead to enhanced sound qual-
ity.
Inputs
Speakers
Bi-Wiring

5
Operating
Switchon yourAMPII G2 attherear side. Theswitch is abovethemains
socket.After someshorttimetheline“Audionet”will appear inthe
display. NowyourAMPII G2 is in stand bymode.
Forswitchingon and off pleasepress the“power”button atthefrontof
theAMPII G2. Themainswitchatthebackisonlytobeusedifyou are
absentforalonger time.ItmustonlybeoperatedwhiletheAMPII G2is
in stand bymode
Yourmono amplifiersAMPII G2canbothbeswitchedon remotelyby
severaldifferentways:
§ using"AudionetLink":You canswitchon oroff yourAMPII G2with
yourAudionetpre amplifier PRE G2, PRE IG2, MAPorMAP1,
§ usingautomaticdetection ofan inputsignal: "Auto On/Off",
§ usingacountdown ofspecified time.
(Iftheunit isin stand bymode you enter thecorrespondingmenu by
pressingthebutton atthefrontforlonger than 2 seconds.)
Foraremotecontrolledswitchingon byyourAudionetpre amplifier two
simpleoptical"Toslink"cablesare necessary.Connecttheoutputlabeled
"audionetlink"atyourpre amplifier withthe"audionetlink"inputofthe
firstAMPII G2. Thenconnectthe"audionetlink"outputwiththesecond
opticalcableto the"audionet link"inputofthesecond AMPII G2
TheAMPII G2isequippedwithamulti-stageinputsignaldetection cir-
cuit.Ifaninputsignalisdetectedattheinput(XLRorcinch)crossingthe
user definablethresholdyourAMPII G2will switchon automatically.
Duetothenature ofstereosignalsit mayoccurthatbothAMPII G2will
switch on atdifferentpoints oftime.
Theamplifierswill function asusual.Of courseyou still beableto
switch on and off theunits manually.
Switching on
Remotepoweron
AudionetLink
AutoOn/Off

6
Theamplifierswill shutdownautomaticallywhenno inputsignalisde-
tected forauser definabletime(30 seconds up to 2 hours).
To activateand setup this feature pleaserefer to chapter "Programming".
Duetosecurityconcerns the"Auto-On"featurewill onlybeavailable
after firstmanualswitching on!
Whileyou are absentyourAMPII G2canswitchon automaticallyand
will bepre-heatedforusewhenyou getback. To activatethisfeature
pleaseusea long keypress on the"power"button atthefront. Thedisplay
changestoshowthecountdowntimer.Acursorwill markthenumber to
bechanged. A long keypress will movethecursoronesteptotheright.
Usinga short keypress you canchangethedesirednumber.Hourscan be
programmedin steps ofonehour. Minutes can beprogrammed in steps of
15 min. Thefollowingdiagramexplains thepossiblecountdowntimer
settings:
01 hour 15 min 01hour 15 min 01 hour 15 min
11 hours 15 min 02hours 15 min 01 hour 30 min
91 hours 15 min 00hours 15 min 01 hour 00 min
10-hours-setting 1-hour-setting Min-setting
Legend:longkeypress shortkeypress
Activatecountdownbyleavingthetimer settingsmenu witha long key
press. Itwill beactivatedautomaticallyifyou do notchangeanysetting
forlonger than 10 seconds.
Ifyou wanttousethecountdowntimer againit isactivatedbyasingle
keypress. Press the"power"button formore than2seconds and wait.
After 10 seconds theprevious setup countdown will startagain.
To deactivethecountdown usea short keypress atanytime.
"Warm Up" Countdown

7
Protection system
YourAudionetAMPII G2and yourloudspeakersare protectedbya
complexprotection circuitry.Thedisplaywill reportinclear everyde-
tected error:
§ Overload:Shortedloudspeaker cablesordefectiveloudspeaker (your
AMPII G2 is capableofdrivingeven 1Wloads)
§ Temp Failure:Do notcover theventilation slots
§ HF-Failure:high frequencyoscillation, e.g. defectivepre amplifier
§ DC-Failure:too high levelofDCvoltageattheoutput

8
Programming
Excepttheprevious describedfeature ofcountdowntimer controlled
automaticpower on yourAMPII G2canbesetup toyourpreferencesby
menu selections. Thesettingswill lastafter switchingoff theAMPII G2.
Changingsettingshastobedonewhiletheamplifier isswitchedon and
in operating mode.
Listofsettings to beadjusted to yourpreferences:
· Brightness ofdisplay(default: 50%brightness)
· Displaymode:selected input, temperature, peak-levelmeter
· Inputselection:Cinch orbalanced (XLR)input
· Auto-On:thresholdforlevelcontrolledautomaticpower on (see
above)
· Auto-Off:timeto automaticpower down (see above)
· Choosebetween two texts to bedisplayed in stand bymode
To changesettingsuseshortorlongkeypresseson the"power"button at
thefrontoftheAMPII G2. Switchon your AMPII G2 and holdthebut-
ton pressed foratleast2 seconds to enter themenu.
Forfurther operatingmodespleaseconsult graphicbelow.Alongkey
press will enter amenu orsub-menu. Useshortkeypressingstomove
alongthemenu options.
To savethechangedsettingsusealongkeypress orwait foratleast10
seconds. Forfurther changestothesettingsre-enter themenu asde-
scribed above.
Overview
Operating

9
Operating
SET DIM 100%
80%
50%
25%
Select displaybrightness
(4 steps)*)
SET DISPLAY STANDARD Standard display
TEMPERATURE Temperaturedisplay
PEAK-LEVEL Peaklevel meter
SET INPUT CINCH Select cinchinput
BALANCED (XLR) Select balanced(XLR) input
SET AUTO ON NEVER ON Never power onautomatically
FAST ON High sensitivity
MEDIUM ON Mediumsensitivity
SLOW ON Maximumrudgeness
SET AUTO OFF NEVER OFF Never power off automatically
OFF IN 30 SECS
OFF IN 5 MIN
OFF IN 15 MIN
OFF IN 60 MIN
OFF IN 120 MIN
Whenthemusic stopswait
for thespecifiedtimeuntil
automatic power down
SET OFF TEXT AUDIONET
Select texttobedisplayedin
standbymode
EXIT...
Legend:longkeypress shortkeypress
*) WARNING: Longtermusageofthedisplaysettomaximumbright-
ness (setting100%) maycauseextendedsigns ofwear resultingina
decayofcontrastorbrightness ofindividualdotsinthedisplay.Do
notusethedisplaywithabrightness sethigher thanthefactorydefault
settingof50%over alonger period oftime

10
Technical information
TheAMPII G2isdesignedasadual-mono amplifier.SMDtechniques
are usedtooptimizehigh-frequencycharacteristics. All signalpaths are
reducedtominimumlength. No'evil'elements(likecouplingcapacitors,
coils, relays)are locatedinthesignalpath. Thedesignismagnetically
and capacitivelyoptimized. Negativemagneticand electricinfluence and
interaction betweeninput,decouplingand power section are reducedtoa
residualminimum.
Control,decouplingand power sections haveseparatedtransformersand
rectifiers. Themaintransformer (850 VA) drivestwohigh-currentca-
pacitors(80.000mF)especiallymanufacturedforAudionetbySchottky
diodes.
Fortheinputsection Audionetusesalow-noise,monolithicdualFET.
Thegain-bandwidthproductofthesucceedingdual-stagedifferential
voltageamplifier exceeds 1 GHz. Inputand outputsections are decoupled
using'bootstrapped'emitter followers.
Theoutputsection isequippedwithpower MOS-FETs. Theycanhandle
apulsepower up to2.5 kW.Thehighbiascurrentthroughthatstage
(0.4 Amperes)isregulatedactively.Therefore,signalsatnormalvolume
levelare handled in pure Class Amode.
Inorder todeterminetheimpulsepeakleveltheAMPII G2detectsa
voltagemaximumand measures thecurrentflowingatthatpointoftime.
Bythatimpedance criticalloudspeakersare processedautomaticallyand
accordingtothatahigher peaklevelisdisplayed. You will gettheexact
effectivepower.Ifno loudspeaker connectedonlyasmall measuringer-
rorisdisplayed(e.g.3.0Winsteadof200Wfora4W-loudspeaker).The
currentnumber isdisplayedforabout2seconds ifnotreplacedbya
higher peak level.
Construction
Powersupply
Circuitry
Peak level meter

11
Securityadvice
¨ Avoid packaging material,especiallyplasticbags,to come
into children’shands.
¨ Store and operatetheunit in adryroomatareasonable
roomtemperature.
¨ Avoid moisture oranyliquid to getinto theunit.
¨ Setup theunit in afree position so thattheairis allowedto
flowthrough theunit slits.
¨ Donotcover, e.g. with ablanket.
¨ Donotopen thecase.Unauthorisedopening will cause
loss ofguarantee.
¨ Useadrycloth forcleaning.

12
Technical data
TypeMicroprocessor controlledpower amplifier
Power200 Watt in8W
350 Watt in4W
550 Watt in2W
750 Watt in1W, all trueRMSat 1%THD
Bridgedoperations1400 Watt in4W, twoAMPII G2per channel
Frequencyresponse0-300.000Hz (-3dB)
Damping factor > 1.800 at 10kHz, (8W)
> 10.000 at 100Hz, (8W)
Intermodulation< -110dB SMPTE (100Hz:200kHz, 4:1), 50W/4W
THD < -105dB at 1kHz, 35W/2W
k2typ. -117dB, k3typ. -140dB, at 25W/4W
Noise> 110dB at 10Veff
InputsCinch, WBT(goldplated):37kW, 220pF
XLR, Neutrik(goldplated):3kW, 170pF
(1:GND, 2:Pos, 3:Neg)
Output2pair ofgoldplatedWBTterminals
Mains220..240 Volt /50..60 Hz
5W Stand-By, 1000W max.
Dimensions215mm x190mm x500mm (WxHxD)
Weight22kg
FinishfrontbrushedAluminum, 10mm
(Frontplate in“alunature” or blackavailible)
Buttonchromeor black
Top brushedAluminum, black, 6mm
SidesbrushedAluminium, black, 4mm
ChassisSteel, black
Engineered and produced by:
Idektron GmbH&Co. KG, HernerStr. 299, Gebäude 6, 44809 Bochum
www.audionet.de
contact@audionet.de
Table of contents
Other Audionet Amplifier manuals

Audionet
Audionet DNA User manual

Audionet
Audionet SAM G2 User manual

Audionet
Audionet PRE1 G3 User manual

Audionet
Audionet PRE User manual

Audionet
Audionet SAM 20 SE User manual

Audionet
Audionet PREI G3 User manual

Audionet
Audionet AMP V User manual

Audionet
Audionet SAM V2 User manual

Audionet
Audionet AMP IV User manual

Audionet
Audionet AMP II MAX User manual

Audionet
Audionet DNA User manual
Audionet
Audionet PAM G2 User manual

Audionet
Audionet AMP VII User manual

Audionet
Audionet AMP IV User manual
Audionet
Audionet PRE G2 User manual

Audionet
Audionet HUMBOLDT User manual

Audionet
Audionet WATT User manual

Audionet
Audionet DNA User manual

Audionet
Audionet STERN User manual

Audionet
Audionet DNA User manual