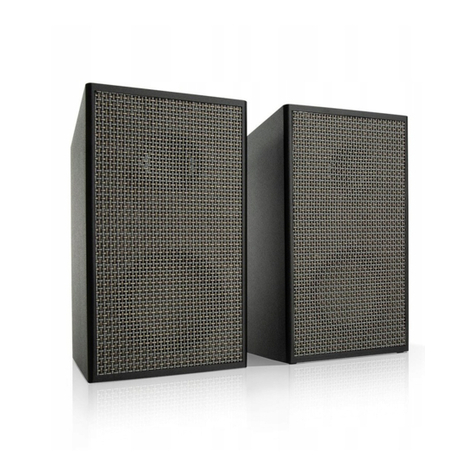
auna LivingQube 10027412 User manual

AUNA LivingQube
10027412 10027413

Sehr geehrter Kunde,
Wir gratulieren Ihnen zum Erwerb Ihres Gerätes. Lesen Sie die folgenden Anschluss- und Anwen-
dungshinweise sorgfältig durch und befolgen Sie diese, um möglichen technischen Schäden vorzu-
beugen. Für Schäden, die durch Missachtung der Sicherheitshinweise und unsachgemäßen Gebrauch
entstehen, übernehmen wir keine Haftung.
Technische Daten
Artikelnummer 10027412, 10027413
Stromversorgung AC 220-240V/50Hz
Leistungsabgabe 2 x 5W
Lautsprecher 2 x 7,62cm
Leistungsaufnahme 20W
Betriebstemperatur 0°C bis 40°C
AUX-In Buchse 3.5mm Stereobuchse
USB-Port DC 5V/1A
Änderungen der Technischen Daten und des Designs ohne Vorankündigungen, aufgrund von tech-
nischen Verbesserungen, bleiben vorbehalten.
Sicherheitshinweise
• Setzen Sie das Gerät keinem Tropf- und Spritzwasser aus und stellen sie auch keine mit Flüssig-
keiten gefüllten Gefäße, wie Vasen, darauf ab.
• Stellen Sie keine brennenden Gegenstände, wie Kerzen, auf dem Gerät ab.
• Achten Sie darauf, dass Kinder nicht mit dem Gerät spielen.
• Decken Sie die Ventilationsöffnungen nicht ab, damit die Ventilation nicht behindert wird.
• Stellen Sie sicher, dass das Gerät an eine AC 220-240V/50Hz Steckdose angeschlossen ist. Stark-
strom könnte das Gerät beschädigen oder einen Brand auslösen. Schalten Sie das Gerät zuerst aus
bevor Sie es aus der Steckdose entfernen, um es komplett auszuschalten.
• Fassen Sie den Stecker beim Ein- und Ausstecken nicht mit nassen Händen an.
• Falls der Stecker nicht in Ihre Steckdose passt, versuchen Sie ihn nicht Gewalt einzustecken.
• Verwenden Sie nur vom Hersteller zugelassenes Zubehör.
• Verwenden Sie nur vom Hersteller zugelassene Ersatzteile.
• Halten Sie sich bei der Installation genau an die Anweisungen in dieser Bedienungsanleitung.
• Stellen Sie das Gerät an einem gut belüfteten Ort auf. Stellen Sie es auf eine ebene, bruchsichere
und stabile Ober äche. Setze Sie das Gerät keinen Temperaturen höher als 40°C aus. Lassen Sie
nach oben und unten 10 cm Platz, zu den Seiten hin 5 cm Platz.
• Drücken Sie die Tasten des Players behutsam, andernfalls könnten Sie den Player beschädigen.
• Entsorgen Sie gebrauchte Batterien fachgerecht.
• Ziehen Sie zuerst den Stecker, bevor Sie das Gerät bewegen oder reinigen. Reinigen Sie es nur
mit einem trockenen Lappen.
• Ziehen Sie den Stecker aus der Steckdose wenn es gewittert, stürmt oder wenn das Gerät lange
nicht benutzt wird.
• Das Gerät enthält Teile, die dem Benutzer nicht zugänglich sind. Reparaturen dürfen nur von qua-
li zierten Fachkräften durchgeführt werden.
WARNUNG
Passen Sie auf dass Niemand (vor allem Kinder) Dinge in Löcher, Lüftungsschlitze oder an-
dere Öffnungen im Gehäuse steckt, dadurch könnte es zu einem gefährlichen Stromschlag
kommen.
2
2

• Befestigen Sie das Gerät nicht an Wand oder Decke.
• Stellen Sie das Gerät nicht in der Nähe von Fernsehern, Lautsprechern und anderen Geräten auf,
die starke Magnetfelder erzeugen.
• Dieses Gerät ist nur für die Nutzung in Innenräumen geeignet.
• Auch wenn Sich das Gerät im Standby-Modus be ndet verbraucht es Strom. Um das Gerät kom-
plett von Stromkreis zu trennen, ziehen Sie den Stecker aus der Steckdose.
Bedienfeld und Bedienelemente
1 Power/Modus Taste
2 Volume- Taste
3 Volume+ Taste
4 Play/Pause Taste
5 LED Kontrollleuchte
6 3.5mm AUX-In Buchse
7 USB-Port zum Laden
(DC 5V/1A)
8 Netzeingang
Installation
Standardzubehör
Entfernen Sie alle Zubehörteile vorsichtig aus der Verpackung. Versichern Sie sich, dass Sie alle Tei-
le aus dem Karton entfernt haben, bevor Sie ihn entsorgen. Entfernen Sie keine der Etiketten oder
Aufkleber, die sich auf der Geräterückseite be nden.
Lieferumfang:
1 Bedienungsanleitung
1 AUX-In Kabel
1 Bluetooth Lautsprecher
Strom anschließen
ACHTUNG
Dieses Gerät wurde für Stromanschlüsse mit AC 220-240V/50Hz entwickelt. Schließen Sie
das Gerät an keine anderen Stromquellen an, sonst könnte es beschädigt werden.
Entrollen Sie das Netzkabel über seine ganze Länge. Stecken Sie zuerst den Netzanschluss in den
Netzeingang des Gerätes. Stecken Sie erst dann den Stecker in die Steckdose. Das Gerät ist nun
angeschlossen und kann benutzt werden. Um das Gerät komplett auszuschalten, ziehen Sie den
Stecker aus der Steckdose.
• Sobald das Gerät angeschlossen ist be ndet es sich im Standby-Modus. Drücken Sie auf den
Power-Knopf auf der Bedienleiste am Gerät, um es anzuschalten.
• Ziehen Sie den Stecker aus der Steckdose, falls Sie das Gerät längere Zeit nicht benutzen.
3

Inbetriebnahme und Bedienung
Gerät an-/ausschalten
Stellen Sie das Gerät an den gewünschten Platz. Entrollen Sie das Netzkabel und stecken Sie es
ein. Versichern Sie sich dass es fest eingesteckt ist. Sobald das Gerät angeschlossen ist geht die
Standby-Kontrollleuchte an. Drücken Sie auf die Power/Mode Taste auf dem oberen Bedienfeld, um
den Lautsprecher anzuschalten. Um den Lautsprecher auszuschalten halten sie die Power/Mode Taste
länger gedrückt.
Betriebsmodus auswählen
Drücken Sie auf die Power/Mode Taste auf dem oberen Bedienfeld des Gerätes, um zwischen dem
Bluetooth- und AUX-Modus zu wechseln. Sie erkennen den eingestellten Modus an der entsprechen-
den Kontrollleuchte. Blaues Licht zeigt an, dass sich das Gerät im Bluetooth-Modus bendet, Grünes
Licht zeigt den AUX-Modus an.
Volume +/- Taste
Drücken Sie auf die Volume +/- Taste um die Lautstärke auf den gewünschten Pegel einzustellen.
Bluetooth-Modus
Ihr Bluetooth-Gerät (iPhone, iPad, iPod, Smartphone, MP3 Player, Computer, etc.) muss das A2DP
Bluetooth Prol unterstützen, um sich mit dem Lautsprecher verbinden zu können. Genaue Informa-
tionen zur Verbindungssuche, zu Prolen und Einstellungen nden Sie im Handbuch Ihres Bluetooth-
Gerätes.
• Drücken Sie auf die Power/Mode Taste am Gerät, um den Lautsprecher anzuschalten. Der Laut-
sprecher geht in den Bluetooth Modus, die Kontrollleuchte leuchtet blau und zeigt an, dass die
Bluetooth-Quelle bereit ist.
• Der Lautsprecher sucht nach bereits verbundenen Geräten. Wenn er innerhalb von 30 Sekunden
keine Geräte ndet, blinkt die Blaue Kontrollleuchte. Der Lausprecher ist nun bereit sich mit einem
neuen Gerät zu verbinden.
• Aktivieren Sie Bluetooth auf dem Gerät, das Sie verbinden wollen, starten Sie die Verbindungssu-
che und stellen sie Ihr Gerät auf „erkennbar“.
• Falls Sie ein iPhone verbinden wählen Sie Einstellungen > Allgemein > Bluetooth und warten Sie
bis das iPhone die Suche nach anderen Geräten startet.
• Die blau blinkende Kontrollleuchte zeigt an, dass der Lautsprecher versucht eine Verbindung auf-
zubauen. Wählen Sie den Lautsprecher aus der Liste der gefundenen Geräte und verbinden sie Ihr
Gerät mit dem Lautsprecher. Falls Sie die Suche nach Bluetooth Geräten unterbrechen möchten,
drücken Sie die Play/Pause Taste am Lautsprecher.
• Sobald der Lautsprecher mit Ihrem Bluetooth Gerät verbunden ist, hört die Kontrollleuchte auf zu
blinken und leuchtet konstant. Die Verbindung zu Ihrem Bluetooth-Gerät wurde erfolgreich her-
gestellt.
• Nun können Sie Musik von Ihrem iPod/iPhone oder Handy über den Lautsprecher abspielen. Sie
können die Lautstärke entweder über die Volume+/- Tasten am Lautsprecher anpassen oder an
Ihrem Bluetooth-Gerät.
• Sollte die Verbindung fehlschlagen versuchen Sie es erneut, indem sie die Schritte wiederholen.
AUX-In Modus
Verbinden Sie den Audioausgang Ihres externen Gerätes (TV, VCR, DVD Player, MP3 Player, Kasset-
tendeck, MD Player, etc.) mit dem AUX-In Eingang auf der Rückseite des Lautsprechers. Der AUX-
Modus wird nur unterstützt, wenn die AUX-In Buchse via AUX-Kabel an eine geeignete Audioquelle
angeschlossen ist.
4
4

• Drücken Sie die Power/Mode Taste auf dem Bedienfeld, um das Gerät anzuschalten.
• Sobald sie das AUX-Kabel eingesteckt und mit ihrem Audiogerät verbunden haben, schalten sie
das Gerät an und bedienen Sie es wie üblich.
• Drücken Sie die Power/Mode Taste am Lautsprecher, um in den AUX-Modus zu wechseln. Die Kont-
rollleuchte leuchtet grün, wenn Sie im AUX-Modus sind. Nun können Sie Musik von Ihrem externen
Gerät über den Lautsprecher hören.
USB-Port
• Der USB-Port an der Geräterückseite liefert eine Leistung von 5V/1A, ist nur zum Laden gedacht
und unterstützt keine weiteren Medienfunktionen.
• Der USB-Port liefert maximal 5V/1A. Laden Sie damit keine Geräte, die mehr Strom oder Span-
nung zum Laden benötigen, sonst könnten Sie den Lautsprecher oder Ihr Gerät beschädigen. Sie
können ein USB-Kabel (nicht im Lieferumfang enthalten) benutzen, um ihr iPad, iPhone oder ihren
iPod aufzuladen.
ACHTUNG
Bevor die Ihr Gerät über den USB-Port laden, gehen Sie sicher, dass der benötigte Lade-
strom Ihres Gerätes 5V/1A nicht überschreitet. Eine Überlastung des Ladestromkreises
kann zu bleibenden Schäden und Garantieverlust führen.
Pfl ege und Wartung
• Ziehen Sie den Stecker immer aus der Steckdose, wenn Sie da Gerät reinigen.
• Falls der Lautsprecher staubig ist, wischen Sie ihn mit einem weichen, trockenen Tuch ab.
• Benutzen Sie zur Reinigung kein Wachs, kein Sprühwachs oder Scheuermittel.
• Dieses Gerät ist nur für den Hausgebraucht und nicht für kommerzielle Zwecke geeignet.
ACHTUNG
Passen Sie auf, dass beim Reinigen kein Wasser oder andere Flüssigkeiten ins Innere des
Gerätes gelangen.
5

Fehlersuche und Fehlerbehebung
Bevor Sie das Gerät zur Reparatur geben, versuchen Sie zuerst das Problem mit Hilfe folgender
Tabelle zu lösen. Falls Sie den Fehler nicht selbstständig beheben können, kontaktieren sie den Kun-
dendienst.
Problem Lösungsansatz
Das Gerät lässt sich nicht anschalten Überprüfen Sie ob der Stecker fest mit der Steckdose
verbunden ist und die Steckdose funktioniert. Falls das
nicht hilft, ziehen Sie den Stecker aus der Steckdose,
bevor sie Hilfe anfordern.
Der Klang ist verzerrt Überprüfen Sie die Lautstärke am Lautsprecher und an
Ihrem verbundenen Gerät und stellen Sie die Lautstär-
ke auf ein angemessenes Level ein. Im Bluetooth-Mode
sollte der Abstand der verbundenen Geräte nicht mehr
als 10m betragen.
Entsorgung von Altgeräten
Be ndet sich die linke Abbildung (durchgestrichene Mülltonne auf Rädern) auf dem
Produkt, gilt die Europäische Richtlinie 2002/96/EG. Diese Produkte dürfen nicht mit
dem normalen Hausmüll entsorgt werden. Informieren Sie sich über die örtlichen
Regelungen zur getrennten Sammlung elektrischer und elektronischer Gerätschaf-
ten. Richten Sie sich nach den örtlichen Regelungen und entsorgen Sie Altgeräte
nicht über den Hausmüll. Durch die regelkonforme Entsorgung der Altgeräte werden
Umwelt und die Gesundheit ihrer Mitmenschen vor möglichen negativen Konsequen-
zen geschützt. Materialrecycling hilft, den Verbrauch von Rohstoffen zu verringern.
Konformitätserklärung
Hersteller: CHAL-TEC Vertriebs- + Handels GmbH, Wallstraße 16, 10179 Berlin.
Dieses Produkt entspricht den folgenden Europäischen Richtlinien:
2014/35/EU (Niederspannung)
2014/30/EU (EMV)
2011/65/EG (RoHS)
6
6

Dear Customer,
Congratulations on purchasing this eqipment. Please read this manual carefully and take care of the
followring hints on installation and use to avoid technical damages. Any failure caused by ignoring
the mentioned items and cautions mentioned in the opration and installation instructions are not
covered by our warranty and any liability.
Technical Data
Item number 10027412, 10027413
AC power source AC 220-240V/50Hz
Unit output Power 2 x 5W
Speaker unit 2 x 7,62cm
Power Consumtion 20W
Operation temperature 0°C bis 40°C
AUX in jack 3.5mm stereo jack
USB charging port DC 5V/1A
As a result of continual improvements, the design and speci cations of the product within may
differ slightly to the unit illustrated on the packaging.
Safety Instructions
• The apparatus shall not be exposed to dripping or splashing and no objects lled with liquids, such
as vases, shall be placed on the product. Dry location use only.
• No naked ame source, such as candles, should be placed on the product.
• Children should be supervised to ensure that they do not play with the appliance.
• Ventilation should not be impeded by covering the ventilation openings.
• Ensure that the unit is plugged into an AC 220-240V 50Hz power outlet. Using higher voltage may
cause the unit to malfunction or even re catching.
• Turn off the unit before unplugging it from power source to completely switch it off.
• Do not plug/ unplug the power plug into/from an electrical outlet with wet hands.
• If the power plug does not t into your outlet, do not force the plug into an electrical socket.
• Only use accessories, which are speci ed by the manufacturer.
• Use replacement parts, which are speci ed by the manufacturer.
• Install the unit in accordance with the manufacturer’s instructions.
• Place the unit where there is good ventilation. Place the system on a at, hard and stable surface.
Do not expose to temperatures above 40°C. Allow at least 10 cm clearance from the rear and the
top of the unit and 5 cm from each side.
• Press the player’s buttons gently. Pressing them too hard can damage the player.
• Dispose of used batteries in an environmental-responsible manner.
• Always ensure that the product is unplugged from the electrical outlet before moving or cleaning.
Clean it with dry cloth only.
• Unplug the product during lightning, storms or when it will not be used for long periods of time.
• This product has no user-serviceable parts. Do not attempt to repair this product yourself. Only
quali ed service personnel should perform servicing. Take the product to the electronics repair
shop of your choice for inspection and repair.
WARNING
NEVER let anyone, especially children, push anything into holes, slots or any other openings
in the unit’s casing as this could result in a fatal electric shock.
7

• Don’t mount this product on a wall or ceiling.
• Do not place the unit near TVs, speakers and other objects that generate strong magnetic elds.
• This unit is for indoor use only.
• Do not leave the unit unattended when it is in use.
• When the system is switched to standby mode, it is still consuming some power. To disconnect the
system completely, remove the AC power plug from the wall outlet.
Location of Controls
1 Power/Modus button
2 Volume- Button
3 Volume+ Button
4 Play/Pause Button
5 LED indicator
6 3.5mm AUX in jack
7 USB port for charging
(DC 5V/1A)
8 AC power cord
Installation
Sandard Accessories
Carefully remove all the accessories from the display carton. Please verify that you have all the fol-
lowing accessories before you dispose of the carton. Do not remove any labels or stickers on the back
panels of the main unit.
Accessories:
1 Instruction manual
1 AUX in cable
1 Bluetooth speaker
Connecting power source
CAUTION
This unit was designed to operate with an AC 220-240V 50Hz power supply. Connecting this
system to any other power source may cause damage to the system.
Unwind the AC power cord to its full length. Connect the plug to the AC mains inlet of the unit, and
then the mains plug into a standard AC socket outlet. Make sure the AC plug is fully inserted into the
socket outlet. The set is now connected and ready to use. To switch the unit off completely, withdraw
the power cord form the wall outlet.
• Once connected to the power supply, the unit will enter standby mode. Press the Power button on
the remote control or the unit to power the unit on.
• Please disconnect the mains plug from the AC outlet if the appliance is not going to be used for a
long period of time.
8
8

Basic Operating Instructions
Turning on/off the unit
Position the unit at the desired location. Unravel the power cord and insert the cord into power port.
Make sure the power plug is properly connected. The Standby indicator will be on, press the power/
mode button on the top panel to turn on the unit, press and hold to turn off the unit.
Operating mode selection
Press the power/Mode button on the top panel of the unit to select the source between the Bluetooth/
Aux mode. The corresponding indicator lights up when it is selected. Blue light indicates the product
in Bluetooth mode; green light indicates the AUX in mode.
Volume +/- Button
Press the VOLUME - / + Button on the main unit to adjust the sound level to the desire level.
Using Bluetooth fuction
Your Bluetooth device (iPod/iPad/iPhone or the Smart phone, MP3 player, computer, etc) must sup-
port the A2DP Bluetooth prole to match this speaker. For accurate information about your product,
please refer to your Bluetooth device’s manual book for details on the Bluetooth proles it supports,
and how to set the device’s Bluetooth pairing/Searching/Setup mode.
• Press the standby/on button on the unit to switch on the speaker, the speaker will enter into Blue-
tooth mode, the blue indicator will ash, which indicates Bluetooth source mode is effective.
• The speaker will search the pre-paired device, if it could not nd it in 30 seconds, the blue LED
indicator will ash quickly, which means the speaker is ready to be paired with a new device.
• Activate the Bluetooth on your device according to the device’s user manual, turn on the Bluetooth
connectivity and make your device “discoverable”.
• For Apple iPhone select Settings, General, Bluetooth and wait for the iPhone to search for the de-
vice.
• The blue LED ashes to indicate pairing operation, your Bluetooth device should search and nd
the device name “Please advise the BT pairing name”, and then pair it.
• Press the PLAY/PAUSE button and hold on the speaker to search Bluetooth device if it is needed.
• Once paired with a device, the Bluetooth light will stop ashing and glow steadily, this indicates
successful pairing and the speaker is connected.
• Now you can play music from your iPod/iPhone or mobile phone through the Bluetooth speaker.
• Adjust the volume by adjusting the control on the speaker or the Bluetooth device.
• If the pairing is unsuccessfully, re-pair your Bluetooth device with the speaker, by repeating the
above steps.
• When it is not being used for a long period of time, please turn off the speaker.
AUX-In Modus
Connect the Audio Output jacks of your auxiliary sound source (TV, VCR, DVD Player, MP3 player,
Cassette Deck, Mini Disc Player, etc,) to the AUX in socket at the back of the unit, The auxiliary func-
tion will only be supported when the AUX in jack has a suitable sound source connected via an AUX
in cable.
• Press the power/mode button on the top panel to power on the unit.
• Once the AUX in cable is connected with your audio device and your speaker system, turn your
auxiliary source ‘On’ and operate it as usual.
• Press the power/mode button on the unit to select AUX in function. The green LED indicator will be
on. The sound from the auxiliary source will be heard through the speakers of this system.
9
USB-Port
• The USB port at the rear of the unit provides a 5V 1A power output via a USB port, the USB port
is for charging only and does not support any media feature.
• The USB port can only provide a maximum power 5V 1A, do not exceed this voltage or current as
it may cause damage to your unit or device.
• You can use the USB cable (not supplied) with your device for charging your iPod/iPad/iPhone.
CAUTION
before charging, refer to the user manual of the device you wish to charge, make sure the
charging current requested does not exceed 5V 1A. Overloading the charging circuit may
damage the unit permanently and void the warranty.
Care and Maintenance
• Disconnect the appliance from the power source when cleaning.
• If the unit becomes dusty, wipe it with a soft and dry duster.
• Use a soft cloth to clean this appliance.
• Do not use any wax, polish sprays, or abrasive cleaners on the unit.
• This product is not intended for commercial use. Household use only.
CAUTION
Never allow any water or other liquids to get inside the unit while cleaning.
10
10

Troubleshooting
Before taking the unit to be repaired, please check the following table when a problem occurs. Con-
sult your dealer or service center if the problem cannot be solved with the following information.
Problem Lösungsansatz
System does not turn on Make sure AC power plug is connected to the wall socket
outlet properly and it has power. If this does not help,
leave the unit unplugged before seeking advice.
The sound is distorted Check the volume setting on both the speaker and your
device and adjust the volume to a suitable level. In Blu-
etooth mode, make sure the effective distance between
the speaker and the smartphone no big than 10m in
open air
Environment Concerns
According to the European waste regulation 2002/96/EG this symbol on the product
or on its packaging indicates that this product may not be treated as household was-
te. Instead it should be taken to the appropriate collection point for the recycling of
electrical and electronic equipment. by ensuring this product is disposed of correctly,
you will help prevent potential negative consequences for the environment and hu-
man health, which could otherwiese be caused by inappropriate waste handling of
this product. For more detailled information about recycling of this product, please
contact your local council or your household waste disposial service.
Declaration of Conformity
Producer: CHAL-TEC Vertriebs- + Handels GmbH, Wallstraße 16, 10179 Berlin.
This produkt is conform to the followring European Directives:
2014/35/EU
2014/30/EU
2011/65/EG
11

12
12
This manual suits for next models
1
Table of contents
Languages:
Other auna Speakers manuals

auna
auna Sound Storm Series User manual

auna
auna PA-2200 User manual

auna
auna Paris User manual

auna
auna Dazzle Pro User manual

auna
auna Intelligence Plug User manual

auna
auna MEG1-HY User manual

auna
auna 10033065 User manual

auna
auna Areal Bar 950 User manual

auna
auna Areal Bar 360 HDMI User manual

auna
auna Karaboom 100 User manual