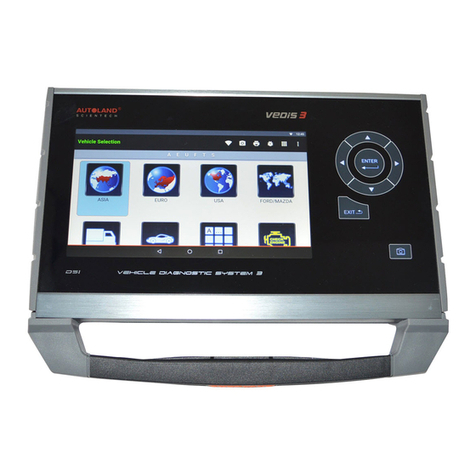
AUTOLAND Scientech Vedis 3 Plus Operation and maintenance manual

-i- Copyright © 2018 AUTOLAND SCIENTECH CO, LTD. All Rights Reserved.
ACKNOWLEDGEMENT
Products and brands referred to in this manual are mentioned for identification purposes only.
Product names appearing in this manual or on the respective scanner's screen may or may not be registered trademarks
or copyrights of their respective companies.
COPYRIGHT
This instruction manual is published by AUTOLAND SCIENTECH and is protected by copyright and other intellectual
property rights in existence at all times and in all territories throughout the world.
Permission is hereby granted to print a hard copy ONLY for the sole purpose of using instruction manual as an
information resource for operating products manufactured by AUTOLAND SCIENTECH. No part of this document may be
reproduced, republished, or transmitted, in any form or by any means, whether electronic, mechanical, copied,
or otherwise, unless a prior consent from Autoland Scientech has been obtained.
DISCLAIMER AND LIABILITY
The information and illustrations contained in this manual are based on the latest information available at the time of
publication. AUTOLAND SCIENTECH reserves the right to make changes at any time without notice.
This instruction manual guides users to use the Scanner to perform diagnostic tests and to locate the possible cause of
the vehicle problem. It does NOT provide answers on how to correct the problem. Consult the manufacturer's vehicle
service manual or other publication for repair instructions.
To make full use of the Scanner's capabilities, the user should be knowledgeable and well-trained in each of the vehicle
computer control systems described in this manual.
Service data that appear to be non-functional on some vehicles may be due to changes in vehicle manufacturing design.
In addition, AUTOLAND SCIENTECH shall not accept responsibility for any incidental or consequential damages under
any circumstances, in connection with using this instruction manual, nor shall AUTOLAND SCIENTECH be liable for any
errors contained in this instruction manual.
CONTACT
Website
Homepage: http://www.autolandscientech.com/v2015p/en
Latest Releases
News: http://www.autolandscientech.com/v2015p/en/news
Member (Software downloads / E-Papers / Specifications)
Member Login: http://www.autolandscientech.com/v2015p/en/member
YouTube: https://www.youtube.com/channel/UC94X0pQr3Meq9uTnJMbOQDw
TECHNICAL ASSISTANCE
Phone: 886-4-24725191
Fax: 886-4-24721881
Email: http://www.autolandscientech.com/v2015p/en/contact
This section explains crucial operational guidelines that must be followed before and during the operation of VeDiS3 Plus
manufactured by AUTOLAND SCIENTECH. Please make sure the guidelines are read before operating VeDiS3 Plus on a
vehicle to avoid any personal injury, or any damage to the vehicle or VeDiS3 Plus.
TO AVOID VOLTAGE SPIKES
To avoid the possible voltage spikes and to protect the vehicle and diagnostic tools from resultant damage,
please do not connect or disconnect the diagnostic tool while the ignition key is ON or while the engine is running.
PUT THE PARKING BRAKE ON
In order to avoid personal injury or damage to the vehicle that might result from incorrect operation,
please always apply the parking brake and block the wheels when operating the diagnostic tool.
USER'S NOTICE

-
i
-
Copyright © 2018 AUTOLAND SCIENTECH CO, LTD. All Rights Reserved.
ACKNOWLEDGEMENT
Products and brands referred to in this manual are mentioned for identification purposes only.
Product names appearing in this manual or on the respective scanner's screen may or may not be registered trademarks
or copyrights of their respective companies.
COPYRIGHT
This instruction manual is published by AUTOLAND SCIENTECH and is protected by copyright and other intellectual
property rights in existence at all times and in all territories throughout the world.
Permission is hereby granted to print a hard copy ONLY for the sole purpose of using instruction manual as an
information resource for operating products manufactured by AUTOLAND SCIENTECH. No part of this document may be
reproduced, republished, or transmitted, in any form or by any means, whether electronic, mechanical, copied,
or otherwise, unless a prior consent from Autoland Scientech has been obtained.
DISCLAIMER AND LIABILITY
The information and illustrations contained in this manual are based on the latest information available at the time of
publication. AUTOLAND SCIENTECH reserves the right to make changes at any time without notice.
This instruction manual guides users to use the Scanner to perform diagnostic tests and to locate the possible cause of
the vehicle problem. It does NOT provide answers on how to correct the problem. Consult the manufacturer's vehicle
service manual or other publication for repair instructions.
To make full use of the Scanner's capabilities, the user should be knowledgeable and well-trained in each of the vehicle
computer control systems described in this manual.
Service data that appear to be non-functional on some vehicles may be due to changes in vehicle manufacturing design.
In addition, AUTOLAND SCIENTECH shall not accept responsibility for any incidental or consequential damages under
any circumstances, in connection with using this instruction manual, nor shall AUTOLAND SCIENTECH be liable for any
errors contained in this instruction manual.
CONTACT
Website
Homepage: http://www.autolandscientech.com/v2015p/en
Latest Releases
News: http://www.autolandscientech.com/v2015p/en/news
Member (Software downloads / E-Papers / Specifications)
Member Login: http://www.autolandscientech.com/v2015p/en/member
YouTube: https://www.youtube.com/channel/UC94X0pQr3Meq9uTnJMbOQDw
TECHNICAL ASSISTANCE
Phone: 886-4-24725191
Fax: 886-4-24721881
Email: http://www.autolandscientech.com/v2015p/en/contact
This section explains crucial operational guidelines that must be followed before and during the operation of VeDiS3 Plus
manufactured by AUTOLAND SCIENTECH. Please make sure the guidelines are read before operating VeDiS3 Plus on a
vehicle to avoid any personal injury, or any damage to the vehicle or VeDiS3 Plus.
TO AVOID VOLTAGE SPIKES
To avoid the possible voltage spikes and to protect the vehicle and diagnostic tools from resultant damage,
please do not connect or disconnect the diagnostic tool while the ignition key is ON or while the engine is running.
PUT THE PARKING BRAKE ON
In order to avoid personal injury or damage to the vehicle that might result from incorrect operation,
please always apply the parking brake and block the wheels when operating the diagnostic tool.
BEFORE YOU START TO USE

-i- Copyright © 2018 AUTOLAND SCIENTECH CO, LTD. All Rights Reserved.
TABLE of CONTENTS
ACKNOWLEDGEMENT
COPYRIGHT
DISCLAIMER AND LIABILITY
CONTACT
TECHNICAL ASSISTANCE
SCANNER FUNCTIONS & FEATURES
FEATURES
ACCESSORIES
TECH SUPPORT & FEEDBACK
1. CONNECTION WITH CAR
1.1 POWER ON/OFF
1.2 RESET SCANNER
2. NAVIGATING THE SCANNER
2.1 MAIN MENU
2.2 SYSTEM
2.3 SLIDING PANEL
3. SET UP
3.1 WiFi
3.1.1 ENABLE / DISABLE
3.1.2 CONNECTING TO A NETWORK
3.1.3 MANUALLY CONNECTING TO NETWORK
3.1.4 ADVANCED OPTIONS
3.2 Device
3.2.1 DISPLAY SIZE
3.2.2 SOUND & NOTIFICATION
3.2.3 TEMPERATURE
3.3 Personal
3.3.1 ACCOUNTS
3.3.2 LANGUAGE & INPUTS
3.3.3 SETTING DEFAULT KEYBOARD
3.3.4 TO DISABLE/ENABLE TEXT CORRECTION (Recommended)
3.4 System
3.4.1 SERIAL NUMBER
3.4.2 ABOUT THE DEVICE
3.4.3 AUTOMATIC DATE & TIME
3.4.4 SET DATE & TIME
3.4.5 SET TIME ZONE
3.4.6 ENABLE / DISABLE PRINT SERVICES
3.4.7 MANUALLY ADDING A PRINTER
3.5 Exiting
4. UPDATE
ICON LEGEND
4.1 Account
4.1.1 SUBSCRIPTION RENEWALS
4.2 Vehicle
4.2.1 UPDATE DETAILS
4.2.2 PERFORMING UPDATES
4.2.3 DELETING VEHICLE SOFTWARE
4.3 System
4.4 APP
4.4.1 INSTALLING & UPDATING APPS
4.4.2 DELETING APP SOFTWARE
4.5 Exiting
5. TECHNICAL HOTLINE (THL)
5.1 Remote Control
5.2 Guides
5.3 Software Spec
5.4 Exiting
6. J2534
6.1 Connection Guide
6.2 AUJ2534 Utility (Windows PC)
6.3 Identifying Vehicle
6.4 Exiting
7. Support On Demand (SOD)
7.1 Connecting to Service Provider
7.2 Exiting
8. DIAGNOSIS
8.0.1 CONNECTING TO A VEHICLE
8.1 Toolbar
8.2 Setup
8.2.1 ABOUT
8.2.2 ACCOUNT INFORMATION
8.2.3 MENU ITEM STYLE
8.2.4 TRANSLATION
8.2.5 UNIT FORMAT
8.3 CRM
8.3.1 DELETE ALL SCREENSHOTS
8.3.2 EDIT COMPANY INFORMATION
8.4 Emailing
8.5 Printing
8.5.1 SAVE AS PDF
8.6 Bug Report
8.7 Sample Diagnosis
8.7.1 GRAPHING
8.7.2 FILTER
8.7.3 SCREEN CAPTURE
8.7.4 LEGEND
8.8 Exiting
9. HOW TO STAR DIAGNOSTIC ON-LINE
i
i
i
i
i
1
2
3
4
5
5
5
8
8
8
9
9
9
9
10
10
10
10
11
11
11
11
12
12
13
13
13
13
13
14
14
15
16

-i- Copyright © 2018 AUTOLAND SCIENTECH CO, LTD. All Rights Reserved.
TABLE of CONTENTS
ACKNOWLEDGEMENT
COPYRIGHT
DISCLAIMER AND LIABILITY
CONTACT
TECHNICAL ASSISTANCE
SCANNER FUNCTIONS & FEATURES
FEATURES
ACCESSORIES
TECH SUPPORT & FEEDBACK
1. CONNECTION WITH CAR
1.1 POWER ON/OFF
1.2 RESET SCANNER
2. NAVIGATING THE SCANNER
2.1 MAIN MENU
2.2 SYSTEM
2.3 SLIDING PANEL
3. SET UP
3.1 WiFi
3.1.1 ENABLE / DISABLE
3.1.2 CONNECTING TO A NETWORK
3.1.3 MANUALLY CONNECTING TO NETWORK
3.1.4 ADVANCED OPTIONS
3.2 Device
3.2.1 DISPLAY SIZE
3.2.2 SOUND & NOTIFICATION
3.2.3 TEMPERATURE
3.3 Personal
3.3.1 ACCOUNTS
3.3.2 LANGUAGE & INPUTS
3.3.3 SETTING DEFAULT KEYBOARD
3.3.4 TO DISABLE/ENABLE TEXT CORRECTION (Recommended)
3.4 System
3.4.1 SERIAL NUMBER
3.4.2 ABOUT THE DEVICE
3.4.3 AUTOMATIC DATE & TIME
3.4.4 SET DATE & TIME
3.4.5 SET TIME ZONE
3.4.6 ENABLE / DISABLE PRINT SERVICES
3.4.7 MANUALLY ADDING A PRINTER
3.5 Exiting
4. UPDATE
ICON LEGEND
4.1 Account
4.1.1 SUBSCRIPTION RENEWALS
4.2 Vehicle
4.2.1 UPDATE DETAILS
4.2.2 PERFORMING UPDATES
4.2.3 DELETING VEHICLE SOFTWARE
4.3 System
4.4 APP
4.4.1 INSTALLING & UPDATING APPS
4.4.2 DELETING APP SOFTWARE
4.5 Exiting
5. TECHNICAL HOTLINE (THL)
5.1 Remote Control
5.2 Guides
5.3 Software Spec
5.4 Exiting
6. J2534
6.1 Connection Guide
6.2 AUJ2534 Utility (Windows PC)
6.3 Identifying Vehicle
6.4 Exiting
7. Support On Demand (SOD)
7.1 Connecting to Service Provider
7.2 Exiting
8. DIAGNOSIS
8.0.1 CONNECTING TO A VEHICLE
8.1 Toolbar
8.2 Setup
8.2.1 ABOUT
8.2.2 ACCOUNT INFORMATION
8.2.3 MENU ITEM STYLE
8.2.4 TRANSLATION
8.2.5 UNIT FORMAT
8.3 CRM
8.3.1 DELETE ALL SCREENSHOTS
8.3.2 EDIT COMPANY INFORMATION
8.4 Emailing
8.5 Printing
8.5.1 SAVE AS PDF
8.6 Bug Report
8.7 Sample Diagnosis
8.7.1 GRAPHING
8.7.2 FILTER
8.7.3 SCREEN CAPTURE
8.7.4 LEGEND
8.8 Exiting
9. HOW TO STAR DIAGNOSTIC ON-LINE
16
17
17
18
18
18
18
19
19
19
19
20
20
21
21
21
22
22
24
24
25
26
26
27
27
28
28
28
29
29
29
30
30
30
31
31
32
32
36
36
37
37
37
38

-1- Copyright © 2018 AUTOLAND SCIENTECH CO, LTD. All Rights Reserved.
SCANNER FUNCTIONS & FEATURES
CR2032 PCB Battery
For Perpetual Calendar
Speaker
10.1" IPS LCD Touch Screen

-2- Copyright © 2018 AUTOLAND SCIENTECH CO, LTD. All Rights Reserved.
SCANNER FUNCTIONS & FEATURES
USB Port x 2 (Master)
System File Storage
12 ~24V DC Input
15-PIN Diagnostic Adaptor Reset Button
RJ45 Ethernet Cable (F)
Features
10.1 inches IPS LCD Touch Screen : Touch screen.
CR2032 PCB Battery : For perpetual calendar use.
System File Storage : Please DO NOT open the cap otherwise the system may crash.
Speaker : For system and diagnostic sound notification.
DC 12~ 24V Input : To power on the scanner when the vehicle does not provide OBD-II power.
15P-PIN Diagnostic Adaptor :
a. Connecting AC-EC4 Cable and vehicle diagnostic adaptor for vehicle connection and diagnostic.
b. User can also connect with AC-DC12V power adaptor to power on the scanner.
USB Port (Master) : 2 USB master ports for reading database.
USB Port (Slave) : For J2534 connection.
RJ45 Ethernet Cable (F) : a. For internet connection.
b. For J2534 connection.
Reset Button : Press the button to reset VeDiS3 Plus and reboot.

-3- Copyright © 2018 AUTOLAND SCIENTECH CO, LTD. All Rights Reserved.
ACCESSORIES
AC-EC4
PS-C1
OBDII-AC3-16P
DC 12V
DC-A
BU-EC-1
MB-AC-38P
BM-AC2-20P
PSCH-AC-19P
TYT-AC-17P
TYT-AC-23P
NSN-AC1-14P
HND-AC-3P
MIT-AC-12P
MAZ-AC-17P
GM-AC-12P
KIA-AC-20P

-4- Copyright © 2018 AUTOLAND SCIENTECH CO, LTD. All Rights Reserved.
From Technical Support
To provide prompt and proper technical support, when contacting Autoland licensed distributor and technical support personnel,
please carefully read the following instruction.
1. If available provide video or step by step images to illustrate the issue and circumstances in detail.
Screenshot function is available to record specific pages (see Section 8.7.3 for more details).
2. Please make sure VeDiS3 Plus Vehicle and App software is UP-TO-DATE (see Sections 4.2 and 4.4 for more details).
If not up-to date, please report software version.
3. Detail the issue using the Bug Report (see Section 8.6 for more details).
The more in-depth information the more helpful.
a) System: Specify the system the user encounters the issue.
*For example, ABS, Air Suspension, EGS are different.
b) Testing procedure. For example, Select “Power Train”, Select “Engine”, Select “Gasoline”, Select “4-cylinder”.
Then shows “Connection Fail”. Key-OFF and Key-ON again, the same situation.
c) How many different models have been tried. For example, tried “W164, engine, failed”. Tried “W163, engine, failed”.
Try “W140, engine, OK but data stream is wrong”.
d) Describe vehicle or system condition:
i. Report if the car was sent repaired after collision or just sent for maintenance.
ii. e.g. The engine light is ON. The ABS light is ON but can’t read the fault code.
iii. e.g. The connection is OK but can’t activate component.
**** Bidirectional controls can’t perform activations on tested working components.
4. Report relative circumstances: Key-ON? Engine Running? Car moving? Charging?
5. Be specific. Avoid reporting “All System Failed” when only single system was tested.
6. Fill in all needed info under Bug Report function, such as Make / Model / Year / Contact Info, etc.

-5- Copyright © 2018 AUTOLAND SCIENTECH CO, LTD. All Rights Reserved.
1 CONNECTION WITH CAR
1.1 POWER ON/OFF
1. From the Diagnostic Port connection
a. For most of the cars, VeDiS3 Plus is powered on via the diagnostic port.
Once the scanner is connected properly with the vehicle through AC-EC4 (Adapter Extension Cable)
and the vehicle compatible adapter, it will automatically turn on.
2. From the cigarette lighter connection
a. In some cases, older model vehicles do not have electricity outlet via diagnostic port.
The scanner will need to connect to the cigarette lighter by BU-EC-1 Cigarette-Lighter Power Cable.
3. From the vehicle battery connection
1.2 RESET SCANNER
The reset button is located opposite the handlebar.
Pressing the button will reset the scanner to the welcome page before automatically entering the menu page.
Functions:
1. Diagnosis
2. Diagnostic On-Line
3. J2534
4. Support On Demand (SOD)
5. Technical Hotline (THL)
6. Update
7. Set Up
Diagnosis
Vehicle Software Package including diagnostic and setting functions.
2.1 MAIN MENU
2 NAVIGATING THE SCANNER
Available Function May Vary By Product Software Package Purchased.

-6- Copyright © 2018 AUTOLAND SCIENTECH CO, LTD. All Rights Reserved.
Diagnostic On-Line
Connect VeDiS3 Plus to WiFi, using Diganostic On-Line to perform
vehicle diagnostic, and basic vehicle settings. Software is always
up-to-date. Connect to the vehicle and start diagnosing immediately.
J2534
Supports J2534 Interface standards for use with OEM software
on vehicle OBDII systems.
Support On Demand (SOD)
SOD offers capability for distributors or tech-support team to remotely
utilizing licensed OEM software to perform diagnostic, programming,
coding or repair guide.

Technical Hotline (THL)
TeamViewer remote control software for remotely operating VeDiS3 Plus.
Update
Manage scanner software.
-7- Copyright © 2018 AUTOLAND SCIENTECH CO, LTD. All Rights Reserved.
Set up
For basic settings and VeDiS3 Plus system information.

-8- Copyright © 2018 AUTOLAND SCIENTECH CO, LTD. All Rights Reserved.
1. Adjust Brightness:
a. Slide the icon (left – right) to adjust screen brightness.
2. Wi-Fi:
a. Press the Wi-Fi icon to enable/disable.
b. Select the dropdown arrow for More Settings.
3. Bluetooth:
a. Press the Bluetooth icon to enable/disable.
b. Select the dropdown arrow for More Settings.
4. Rotate:
a. Press the [Rotate] icon to rotate 180 degrees.
* This preference will remain active until disabled.
5. System Notifications.
2.2 SYSTEM
System [Back] button return to the previous screen or Exit.
System [All Apps] lists the open applications.
System [Home] returns to Home screen.
Indicates the function is disabled, slide right to enable.
Indicates the function is enabled, slide left to disable.
2.3 SLIDING PANEL
If user gently touches the top of the screen and swipes down, a short cut menu appears.
It contains the following items:
For basic system settings and VeDiS3 Plus system
information.
3 Set Up

-9- Copyright © 2018 AUTOLAND SCIENTECH CO, LTD. All Rights Reserved.
3. Enter Network name using the exact spacing and casing.*
4. Select the appropriate security type. *
5. Enter the Wireless Security Key. *
* As provided by your network administrator.
6. Press Save.
7. Select your network from the list of available networks.
8. Press Connect.
3.1 WiFi
3.1.1 ENABLE / DISABLE
- Swipe switch left to disable, right to enable.
3.1.3 MANUALLY CONNECTING TO NETWORK
3.1.2 CONNECTING TO A NETWORK
- When WiFi is ON, device will scan for wireless networks in range.
1. Select preferred network from list of available networks.
2. On the prompt, enter the wireless security key.
* Note: Contact the network administrator for wireless security details.
3. Select ‘Connect’.
1. Press the More Settings button on the top right corner.
2. Select ‘Add Network’.

-10- Copyright © 2018 AUTOLAND SCIENTECH CO, LTD. All Rights Reserved.
-10- Copyright © 2017 AUTOLAND SCIENTECH CO, LTD. All Rights Reserved.
For Proxy and IP settings.
1. Press the drop-down arrow to the right of
‘Advanced Options’.
2. Specify the network proxy settings. *
3. Specify the network IP settings. *
* As provided by your network administrator.
To adjust the text and icon size within apps
select preferred size from list.
To adjust the sound and notification settings.
3.2 Device
3.1.4 ADVANCED OPTIONS
3.2.1 DISPLAY SIZE
3.2.2 SOUND & NOTIFICATION

-11- Copyright © 2018 AUTOLAND SCIENTECH CO, LTD. All Rights Reserved.
Displays the system regulated temperature.
This setting is not supported by this device.
This setting specifies the system and notification
display language.
3.3 Personal
3.2.3 TEMPERATURE
3.3.1 ACCOUNTS
3.3.2 LANGUAGE & INPUTS

Alternate language keyboards are available for install
from the Update App (see section 4.4.1 for more info).
1. Select ‘Current Keyboard’ from the Keyboard & Input
section.
2. On the popup prompt, select ‘Choose Keyboard’ to
view a list of installed keyboards.
*If multiple keyboards are enabled you will have the option
to switch between keyboards when it is displayed.
3.3.3 SETTING DEFAULT KEYBOARD
3. Enable your preferred keyboard.
4. Disable all other keyboard options to set your preferred
keyboard as default.
* Image shows the GBoard assigned as default keyboard.
-12- Copyright © 2018 AUTOLAND SCIENTECH CO, LTD. All Rights Reserved.
Software function that automatically makes spelling or
grammar corrections.
1. Select ‘Gboard’ or the default keyboard listed from
the Keyboard & Input section.
3.3.4 TO DISABLE/ENABLE TEXT CORRECTION (Recommended)
2. From the list of settings select Text Correction.
3. Enable or Disable Text Corrections settings by
selecting the button to the right.

-13- Copyright © 2018 AUTOLAND SCIENTECH CO, LTD. All Rights Reserved.
3.4 System
To Enable [Use network provided time] slide switch right. *
* You must be connected to an active internet connection.
1. Disable Automatic date & time by swiping left on the
switch.
2. Press ‘Set date’ to select the date from the calendar.
3. Press ‘Set time’ to select the time from the clock.
3.4.1 SERIAL NUMBER
S/N is the scanner ID, needed for reporting issues and requesting technical support.
3.4.2 ABOUT THE DEVICE
This section provides associated information about the Android platform.
For additional information refer to Android documentation.
3.4.3 AUTOMATIC DATE & TIME
3.4.4 SET DATE & TIME

-14- Copyright © 2018 AUTOLAND SCIENTECH CO, LTD. All Rights Reserved.
1. Select ‘Set time zone’ to view a list of time zones.
2. Scroll the list to locate the most appropriate time
zone based on your geographical location.
2. Slide switch left to Disable or right to Enable.
3.4.5 SET TIME ZONE
Select Print to view a list of installed Print Services.
1. Select the appropriate Print Service App from the list.
3.4.6 ENABLE / DISABLE PRINT SERVICES

-15- Copyright © 2018 AUTOLAND SCIENTECH CO, LTD. All Rights Reserved.
You will need the Printer IP Address to continue
(this information is typically available from the
printer display – settings menu). App specifications
and functionality are manufacturer specific.
Not all Print Service Apps allow the user to manually
add a printer. For printer specific information please
contact your network administrator or printer manufacturer
for details.
1. From the Print Menu, select the appropriate Printer
Service App.
2. Press the [More Options] symbol on the top right.
4. Specify the connection type.
3. Select [Add Printer].
3.4.7 MANUALLY ADDING A PRINTER
5. Enter the Printer IP Address and Printer Name.

-16- Copyright © 2018 AUTOLAND SCIENTECH CO, LTD. All Rights Reserved.
Software and Account Management.
3.5 Exiting
4. UPDATE
ICON LEGEND
To maximize scanner performance close out of all
unused apps.
1. Swipe up from the bottom of the screen to display
the system menu.
2. Press the [Back] button and select [Exit] at the prompt.
3. Press the [All Apps] button and remove the application
from the list of background applications.
App Info button displays App version and Account details.
Display changes provided by selected Update.
Download and Install the selected Vehicle software or App.
Perform Update to all available Vehicle Software.
Indicates no additional updates are available for download.
Changes
Update
Update All
Update All
Table of contents
Other AUTOLAND Scientech Diagnostic Equipment manuals
Popular Diagnostic Equipment manuals by other brands
Autel
Autel MAXISYS MS906 Quick reference guide

NEXIQ Technologies
NEXIQ Technologies Brake-Link Wabash National Operator's manual
Snap-On
Snap-On Zeus Getting started pack

Subaru
Subaru 697-95-070 Operation manual

Autel
Autel AutoLink AL619EU manual
GlideScope
GlideScope LoPro S1 Operation & maintenance manual
