Page 2 For technical questions, please call 1-888-866-5797. Item 58149
2Before First Use
Pre-Cleaning
RISK OF EXPLOSION -
DO NOT SPRAY FLAMMABLE LIQUIDS.
WARNING! TO PREVENT SERIOUS INJURY: Do not spray or clean with liquids having a flash point less than 38°C (100°F).
Only use water or mineral spirits for cleaning. Only use water-based or oil-based paint for spraying.
NOTICE: Do not immerse Spray Gun Body in solvent. Do not allow solvent to enter the air inlet.
1. Designate a container for waste.
2. Remove Cup and fill with mineral spirits
(sold separately) until a quarter full.
3. Replace Cup.
4. Turn Air Control Knob clockwise until
it stops. It will be fully open.
5. Turn Fluid Control Knob clockwise until
two threads are showing.
6. Plug Sprayer into grounded 120VAC
outlet, then turn Sprayer on.
7. Point Spray Gun at interior side of waste container.
Depress Trigger and slightly shake Spray Gun
while spraying solvent into the container.
8. Turn off and unplug Sprayer, point Spray Gun
into waste container and depress Trigger again
to make sure no air pressure remains.
9. Remove Cup and Lid, wipe with clean cloth, and allow to dry.
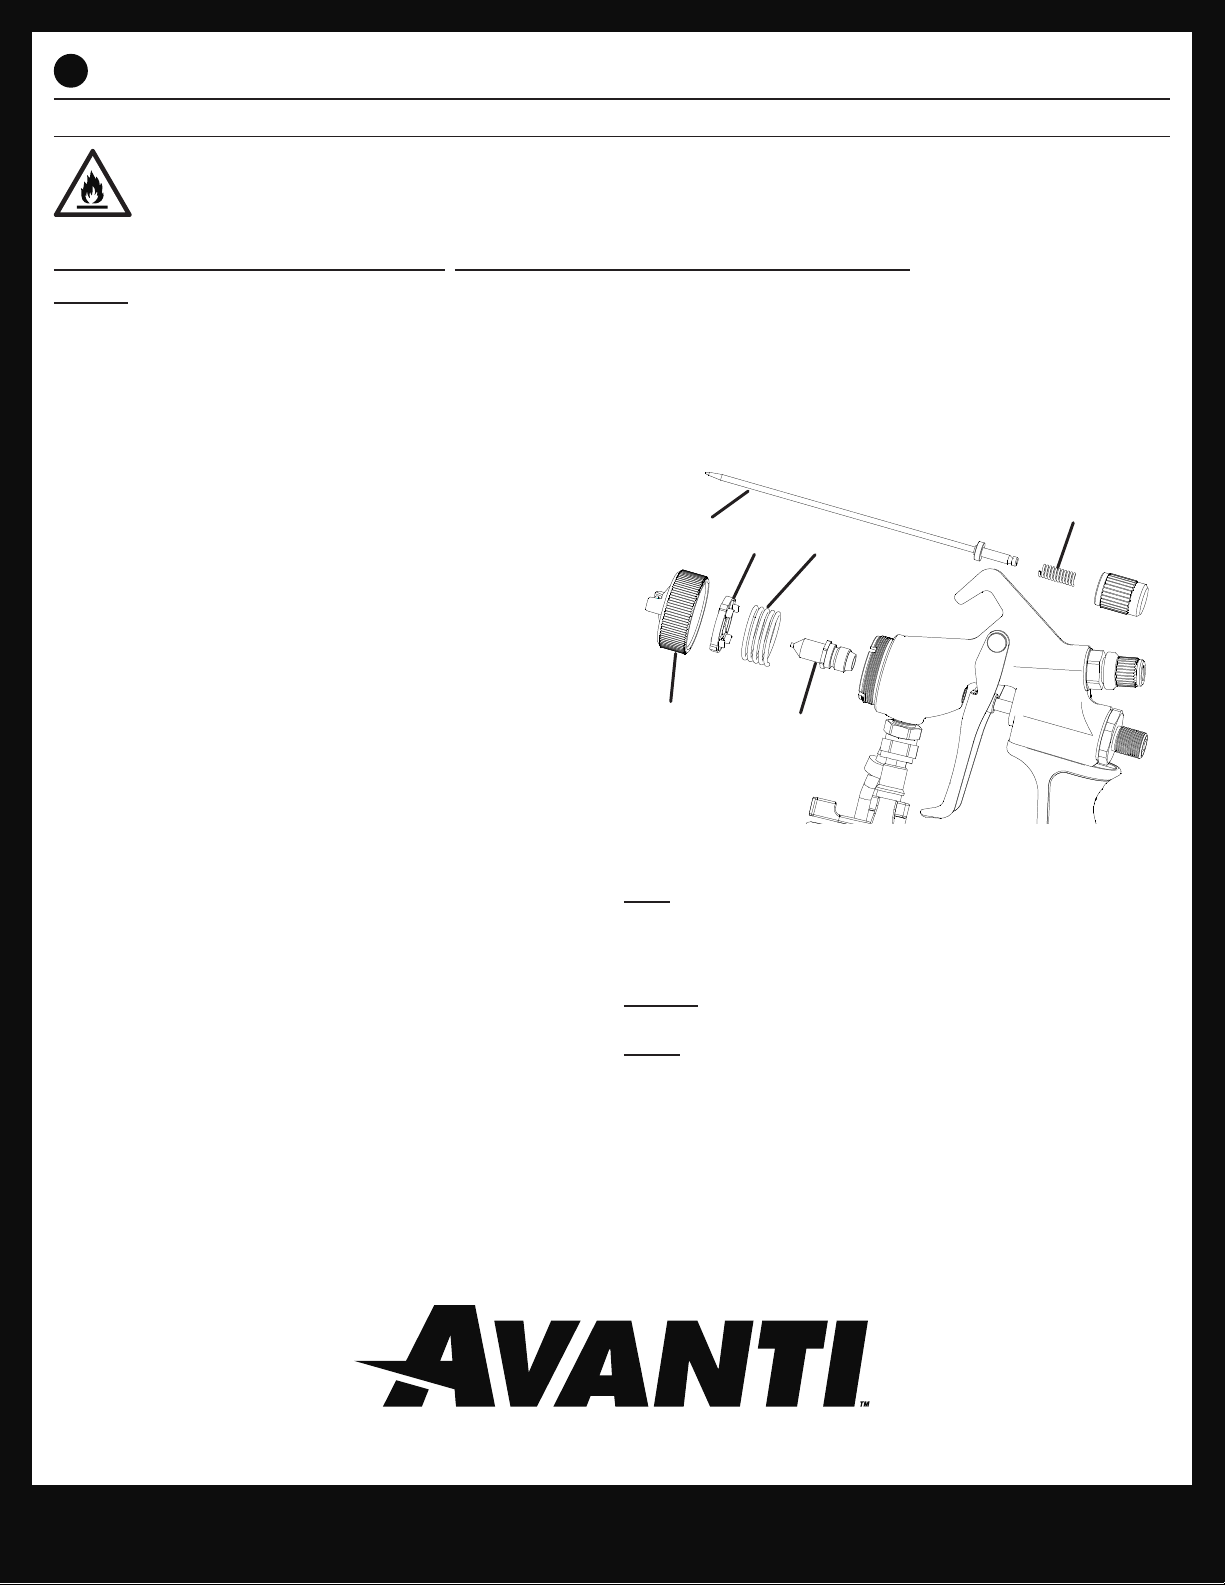
10. Turn Lock Ring counterclockwise by hand to remove, then
remove Air Cap and Air Valve, and and allow them to dry.
11. Reassemble Spray Gun.
NOTICE: Do not use any kind of lubricant. The
lubricant will mix with paint, causing poor results.
NOTE: Dispose of waste according to
local hazardous waste standards.
3Spray Gun Setup and Adjustment
Paint Preparation and Filling
RISK OF EXPLOSION -
DO NOT SPRAY FLAMMABLE LIQUIDS.
WARNING! TO PREVENT SERIOUS INJURY: Do not spray or clean with liquids having a flash point less than 38°C (100°F).
Only use water or mineral spirits for cleaning. Only use water-based or oil-based paint for spraying.
Note: Proper paint mixture is essential. Follow paint
manufacturer’s directions for thinning.
Most paints will spray easily if they are thinned properly.
1. Thin paint according to manufacturer’s
directions and mix thoroughly.
2. Remove Cup.
3. Carefully strain the paint into the Cup through a paint strainer
or a piece of cheesecloth. Fill the Cup 3/4 full.
4. Replace Cup.
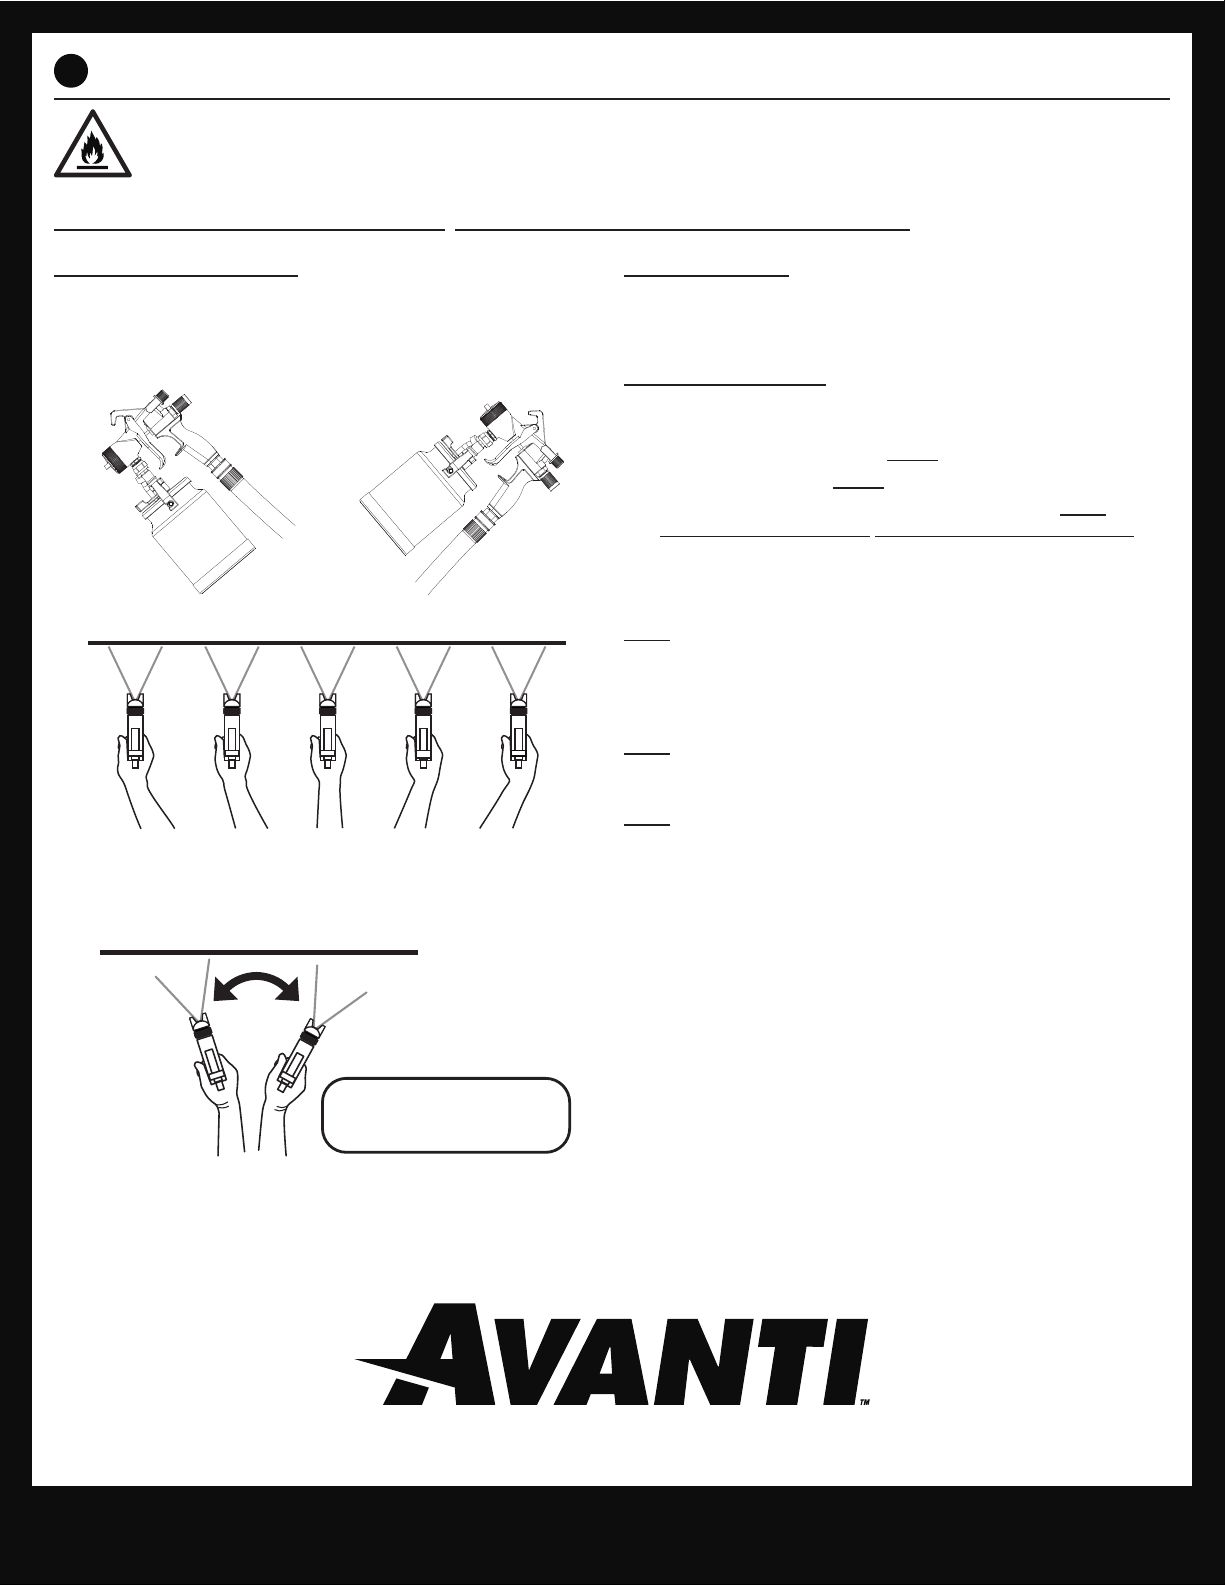
Fan Pattern
To change fan pattern: Lock Ring will be loose. Keep Fluid Nozzle flush with Air Cap unless
adjusting Pattern. Turn Air Cap clockwise until desired fan pattern is selected.
Fluid/Air Adjustment
1. Turn Air Control Knob clockwise until
it stops. It will be fully open.
2. Turn Fluid Control Knob counterclockwise
until two threads are showing.
3. Plug Sprayer into grounded 120VAC
outlet, then turn Sprayer on.
4. Spray on piece of scrap material in short
bursts, then check consistency.
5. If necessary, slowly adjust Fluid Control Knob
and/or Air Control Knob, then spray on scrap
material until desired consistency is achieved.
6. If paint is too thick, thin paint according to manufacturer’s
instructions and repeat instructions above.