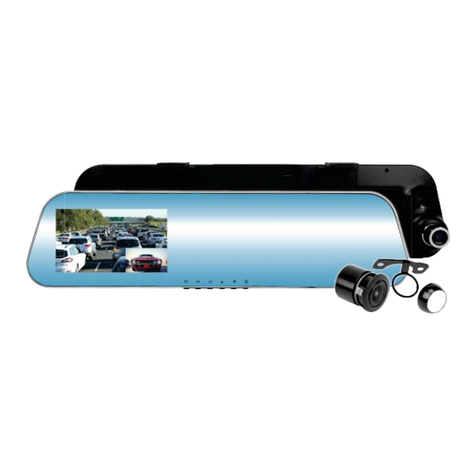
Axis DVR1909M User manual

INSTRUCTION MANUAL
DVR1909M
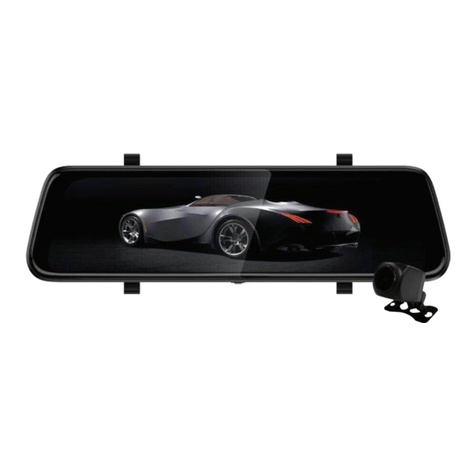
9.3” TOUCHSCREEN REARVIEW MIRROR MONITOR with DVR
GENERAL
- Vertical Viewing Angle Adjustable via Touchscreen
- Wide Dynamic Range
- Built-In Microphone / Speaker
- Operating Temperature: 0°C to +40°C
- Built-In Battery: 500mAh
- Working Voltage: DC +5V
- Working Current: 2A Max
- Power: 10W Max
MONITOR
- 9.3” Touchscreen LCD Screen
- Highly Reflective Mirror Finish
- Anti-Glare Glass
- Front or Rear View (with Optional Rear Camera)
- Adjustable Rubber Straps
- 12/24V via Cig Lead
- Dimensions: 72mm (H) x 25.5mm (D) x 257mm (W)
FRONT CAMERA
- Full HD: 1920 x 1080P 30FPS
- Swivel Adjustable
- 6 Layer Full Glass Lens
- 130° Diagonal View Angle
DVR
- G-Sensor
- Parking Monitor / Loop Recording
- Front 1080p Recording
- Rear 720p Recording via Optional Rear Camera
- Supports up to 128GB SD Card Class 10 (not included)
OPTIONAL REAR CAMERA INPUT
- Optional Camera: FHD639
- Runs off Mirror Power
- 12V Reverse Trigger
INCLUDES
- 12/24V Cig Lead Car USB Charger
- Hard Wiring Kit
- 8m Rear Camera to Mirror Extension Lead
- 4-Pin Adaptor
SPECIFICATIONS
2YEAR WARRANTY

Product Structure
Product Structure
2

Product Structure
1. Mini USB Data Interface
- Used to connect to a PC to transfer data;
- Connects to 5V output of cigarette charger or hardwire kit.
2. AV IN- Rear Camera Input
Connection for optional rear-view camera.
3. Micro SD Card Slot
Memory card slot. Use speed class 10 or higher.
Capacity should be between 4GB and 128GB.
MLC cards are highly recommended.
4. Back clip-on hook.
Used to mount onto existing rear-view mirror.
5. RESET
Press the reset button when the unit is frozen/not operating correctly.
6. Speaker
Playback audio from recorded videos.
7. Mic
Supports audio recording in DVR mode.
8. Front Camera lens
Front view DVR recording. Position is adjustable.
9. LCD screen
Image display.
10. Power button/Screen saver button
Short press: Screen saver.
Long press: On / O.
Buttons / Functions
3

Main Menu Functions
4
Main Menu Functions
Resolution:
Select Video recording resolution: 1296P*, 1080p or 720p.
A higher resolution results in clearer and sharper videos with larger le sizes.
* 1296P is only available when the rear camera is disconnected.
Loop Recording:
Can be set to record les in: 1 min, 3 min, 5 min size or set to close for no le
size. In the event of an accident, the recorded le will be saved.
Exposure:
Is used to adjust the brightness of the light in dark environments.
7 settings from -3 to +3 selectable. Option 0 is recommended.
Note: When the exposure is set too high, it will be dicult to read license plates.
Screen Saver:
LCD display time-out can be adjusted to:
Close (O), 10sec, 15sec, 1min, 3min, 5min.
G-Sensor:
The G-shock sensitivity can be set to; Close (O), Low, Medium or High.
When the unit senses impact due to a collusion, the recorded les will
be locked and not be deleted by loop recording. The camera will turn on
automatically and start recording when it feels a bump or crash.
It will stop after 18-20 seconds of recording.
Note: 1. If the G-sensor sensitivity set too high, the storage card will more
easily be lled and will not have available space to record.
2. The Parking Monitor function requires the G-sensor to operate, so do
not set to Close if using Parking Monitoring function.
Format:
Format the memory card (not included) before recording.
It is recommended to format the card once or twice per month depending on
the amount of use.
Note: Formatting the card will erase all recorded data/information.
Date & Time:
Setting time and date: Year, Month, Day, Hour, Minute.
Note: Once the battery runs out, the time and date set will revert to factory default,
requiring the date & time to be set again.
Default:
Use to restore the unit to factory settings.
4

5
Special Functions / Features
Parking FPS:
In Parking Monitoring Mode the FPS (Frames per Second) can be set to:
Close (O), 2 FPS, 5 FPS
Key Sound:
Sound selection: Close (O) / ON
Language Selection:
Setting the required language
Parking Monitor:
Will automatically power on and record when the car is bumped.
Note: G-Sensor setting must be on. Requires sucient power from internal battery or
from the vehicle’s battery if using the hard wiring harness.
Version:
Factory rmware version details.
Reversing Aid:
Guide-lines: Close (O) / ON.
Automatic ON/OFF
The camera can automatically starts recording when connected to the vehicle
power and stops recording with auto save after the car is stalled.
In the event of an accident, the recorded le will be saved.
Note: In low power state, the unit will be automatically shut down after it displays low
battery voltage warning.
WDR:
The WDR (Wide Dynamic Range) automatically adjust exposure and
enhances the brightness of the image in the low light or in dark environment
which optimizes night vision.
Photo Mode
Click the “Camera” on the main interface. A photo is taken after the click
sound.
File Management
Click the “le management” on the main interface to view the videos
recorded and the photos taken. Video and photo les can be operated (locked,
deleted, etc.).
5

USB Mode (Not included connect cable)
Connect the USB cable to the computer, the car camera recorder will
automatically pop up the USB menu. There are three dierent modes to
choose as below:
1. Memory Mode
In this mode, you can access video les and photo les.
2. Camera Mode
Selecting this mode to pop up a USB video equipment for real-time photo
or video.
3. Camera Recording Mode (USB cable as a power supply in this mode)
In this mode, you can record the video & switch to photo mode to take
pictures.
There are three ways to charge the battery:
1. Charging via the cig. power adapter
2. Charging via PC-USB
3. Charging via the car power supply using the hard wiring kit
The charging indicator will light up in the battery symbol on the screens top
right corner when on.
Battery Charging instructions
6

Cannot take pictures or record video:
Check the Micro SD card. It may have come to the end of its life cycle, may be
full or all recorded les may be locked. Format the MicroSD Card.
A “le error” notice appears when playing back your pictures and
videos:
Please “Format” the Micro SD card. Refer to the Main Menu of this unit.
Video quality is not clear:
Please check the resolution settings in the Main Menu.
Check if the clear lm from the factory has been removed from the lens.
Check if the lens has any dirt or nger print and use a lens cloth to wipe clean.
The image is very dark or too bright:
Adjust the exposure setting in the Main Menu.
Will not respond:
Press the Reset button and the unit will reboot.
IMPORTANT NOTE:
Use only high endurance type Micro SD Cards made for Dash Cam or Video
Surveillance only! Not all Micro SD cards are made for continuous recording or
for in vehicle conditions.
Troubleshooting Tips and Techniques
7

8
Product Specifications:
Product Name Car Camera Recorder
Product Features HD Camera, HD Video Recording
Colour Customized
Display Screen HD Display
Lens 130º Diagonal A+ Level high resolution ultra-wide angle lens
Language English, Japanese, French, Italian, German, Spanish, Russian,
Chinese (Simplified), Chinese (Traditional), Korean
File Format MOV
Video Resolution Maximum 1080P (Front) 720P (Rear)
Video Format H.264
Loop Recording Seamless loop recording, no leakage seconds
AUTO ON/OFF Support
Time/Date Support
Camera Mode 5 MP
Photo Format JPEG
USB Function 1: USB-Disk 2: PC camera
Storage Card Micro SD (maximum support 128GB)
Parking Monitoring Support
Microphone Support
Built-in Sound Support
Video Format PAL / NTSC
Current Frequency 50Hz / 60Hz
Battery 500mA Built-in battery
Power Interface 5V/2A
Product Specications

9
Wiring Diagram

Notes
______________________________________________________________
______________________________________________________________
______________________________________________________________
______________________________________________________________
______________________________________________________________
______________________________________________________________
______________________________________________________________
______________________________________________________________
______________________________________________________________
______________________________________________________________
______________________________________________________________
______________________________________________________________
______________________________________________________________
______________________________________________________________
______________________________________________________________
______________________________________________________________
______________________________________________________________
______________________________________________________________
______________________________________________________________
______________________________________________________________
______________________________________________________________
10

Notes
______________________________________________________________
______________________________________________________________
______________________________________________________________
______________________________________________________________
______________________________________________________________
______________________________________________________________
______________________________________________________________
______________________________________________________________
______________________________________________________________
______________________________________________________________
______________________________________________________________
______________________________________________________________
______________________________________________________________
______________________________________________________________
______________________________________________________________
______________________________________________________________
______________________________________________________________
______________________________________________________________
______________________________________________________________
______________________________________________________________
______________________________________________________________
11

RRANTY
NORMAL USE TWENTY FOUR MONTHS
WITHIN 30 DAYS OF PURCHASE DATE:
must
AFTER30 DAYS OF PURCHASE DATE:
SIX MONTH
National Service Centre:
DVR1909M
Table of contents
Other Axis Automobile Accessories manuals